


 564Likes
Thread: 55/58 Chevy truck build


Results 76 to 90 of 434
 LinkBack URL
 About LinkBacks
Hybrid View
-
03-20-2015 05:09 PM #1
 CHR Member

- Join Date
- Apr 2011
- Location
- Prairie City
- Car Year, Make, Model: 40 Ford Deluxe, 68 Corvette, 72&76 K30
- Posts
- 7,300
- Blog Entries
- 1
Nice work on that! I almost got one of their universal ones for my 40.Ryan
1940 Ford Deluxe Tudor 354 Hemi 46RH Electric Blue w/multi-color flames, Ford 9" Residing in multiple pieces
1968 Corvette Coupe 5.9 Cummins Drag Car 11.43@130mph No stall leaving the line with 1250 rpm's and poor 2.2 60'
1972 Chevy K30 Longhorn P-pumped 24v Compound Turbos 47RH Just another money pit
1971 Camaro RS 5.3 BTR Stage 3 cam, SuperT10
Tire Sizes
-
03-21-2015 12:24 AM #2
CHR Member
- Join Date
- Sep 2007
- Location
- New Bedford
- Car Year, Make, Model: 34 Ford 3W Coupe Replica
- Posts
- 14,754
I've been wondering where you've got off to!?!?! And BAM there you are! LOL..
Nice work on the crossmembers.
-
03-21-2015 09:54 AM #3
CHR Member
- Join Date
- Oct 2005
- Location
- germantown
- Car Year, Make, Model: 57 chevy p/u
- Posts
- 329
I'm not sure how I never saw this either. Awesome work, can't wait to see it finished.Superman wears Chuck Norris pajamas
-
03-28-2015 09:54 PM #4
CHR Member
- Join Date
- Mar 2014
- Location
- Inglewood
- Car Year, Make, Model: 55 Chevy 210 and 58 Chevy Truck
- Posts
- 267
Thanks guys.
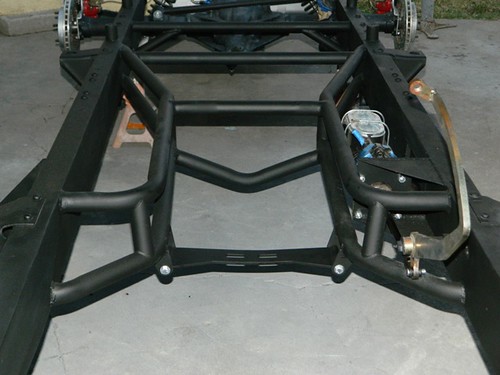
The set back of installing the x member means I can no longer use the factory brake assembly. So here is my brake bracket I fabricated. As you can see I also had to notch the frame to have clearance for the Hydroboost unit.
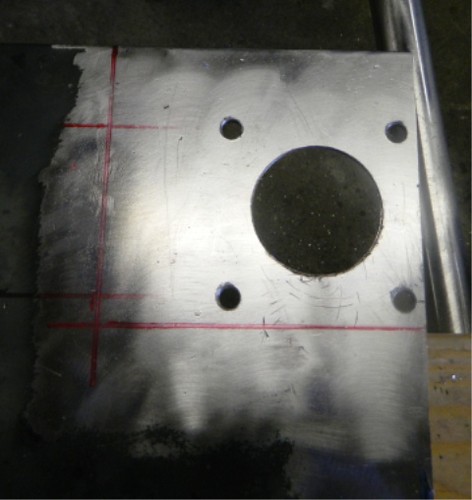
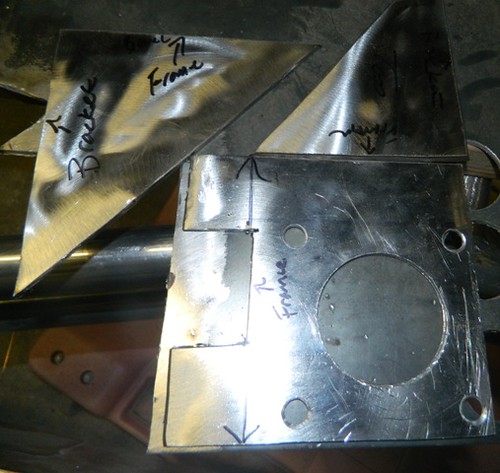
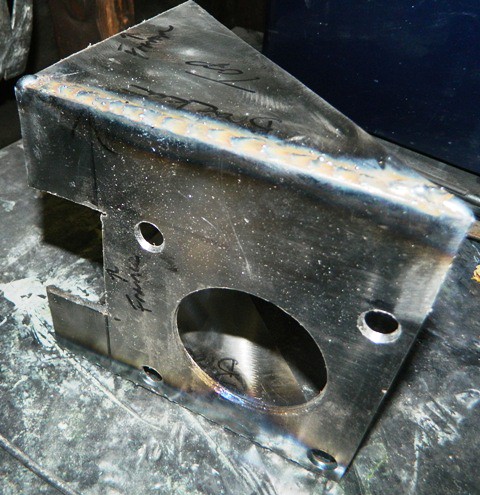
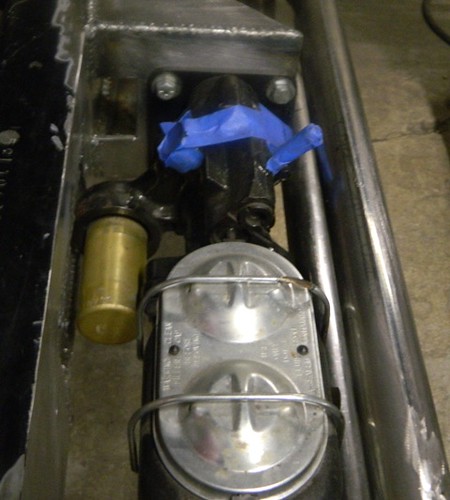
I already modified the panel assembly, all that is required is a push rod extension but I think I better wait until the cab is back on to mock it up so that I know the brake is in the right spot.My Chevy Truck Project
-
03-28-2015 10:40 PM #5
CHR Member
- Join Date
- Feb 2007
- Location
- Santa Monica
- Car Year, Make, Model: 37 Ford tudor humpback
- Posts
- 1,988
Looks Great, Bam!!! You're gonna have it ready for the Culver City show in May, right??
"It is not much good thinking of a thing unless you think it out." - H.G. Wells
-
03-29-2015 05:32 AM #6
CHR Member/Contributor
- Join Date
- Sep 2007
- Location
- Gardner, KS
- Car Year, Make, Model: '33 HiBoy Coupe, '32 HiBoy Roadster
- Posts
- 11,232
Good to see you back, and that you're making progress on the truck, BAM.
Oh, and don't pay too much attention to 34_40's commentWith all of the snow up in Massachusetts his wife's had him watching too many of Emeril's cooking shows on TV Originally Posted by 34_40

Roger
Enjoy the little things in life, and you may look back one day and realize that they were really the BIG things.
-
03-29-2015 05:43 AM #7
CHR Member
- Join Date
- Sep 2007
- Location
- New Bedford
- Car Year, Make, Model: 34 Ford 3W Coupe Replica
- Posts
- 14,754
Originally Posted by rspears


-
03-29-2015 05:47 AM #8
CHR Member
- Join Date
- Nov 2003
- Location
- bluff dale texas
- Car Year, Make, Model: 47 inderweed
- Posts
- 2,145
looking good bam . you'll be driving it before long . still banging away at mine. it looks like a bucktooth hillbilly without the fenders on it.
-
03-29-2015 02:47 PM #9
CHR Member
- Join Date
- Mar 2014
- Location
- Inglewood
- Car Year, Make, Model: 55 Chevy 210 and 58 Chevy Truck
- Posts
- 267
Thanks guys.
Shine, I'm not really worried about driving it soon, because the plan is to make it the first thing I've built that is exactly like I intended so its no rush. I have the car to enjoy until its done. I just don't want that if I would have I could have thing that I do after every build. So I will take my time and do it my way. Yeah its taking long and the wife is more in a rush than I am.lol But what she doesn't know is after the truck I will take the car apart and do the same thing.lol I don't plan to ever sale either so hopefully I live long enough to see both redone to my liking.My Chevy Truck Project
-
03-29-2015 10:52 PM #10
CHR Member
- Join Date
- Mar 2014
- Location
- Inglewood
- Car Year, Make, Model: 55 Chevy 210 and 58 Chevy Truck
- Posts
- 267
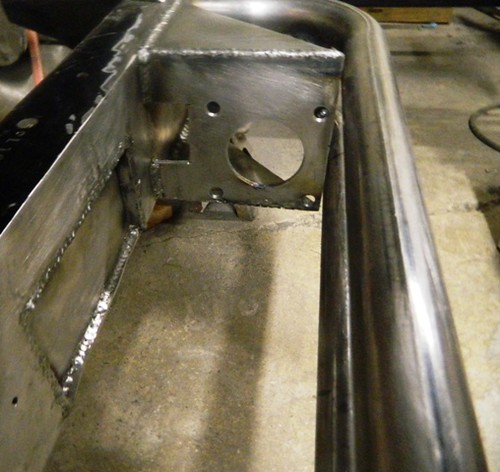
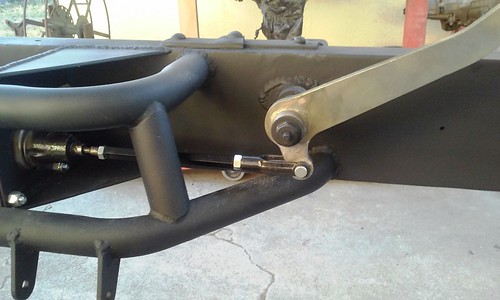
Here is the piece I fabricated for the pedal assembly.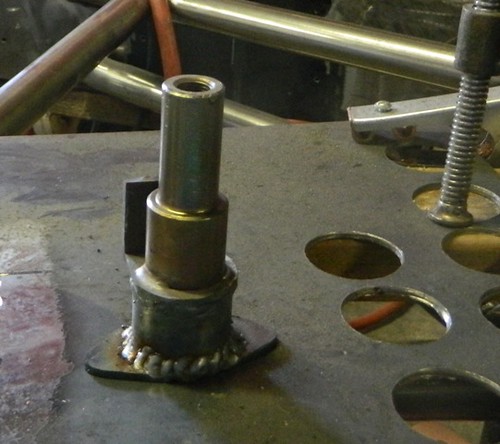
After a lot of measuring here it is tacked in place. I'm going to leave it tacked until the cab is back on the frame, because I may have to move it a little bit.
Here is the pedal installed. Yes the push rod connection clears the bottom tube by about 1/2 inch. As you can see I need to make or purchase a longer push rod extension.
My Chevy Truck Project
-
03-30-2015 04:09 PM #11
CHR Member
- Join Date
- Apr 2011
- Location
- Prairie City
- Car Year, Make, Model: 40 Ford Deluxe, 68 Corvette, 72&76 K30
- Posts
- 7,300
- Blog Entries
- 1
Great work on the hydraboost install. The x member looks great too.Ryan
1940 Ford Deluxe Tudor 354 Hemi 46RH Electric Blue w/multi-color flames, Ford 9" Residing in multiple pieces
1968 Corvette Coupe 5.9 Cummins Drag Car 11.43@130mph No stall leaving the line with 1250 rpm's and poor 2.2 60'
1972 Chevy K30 Longhorn P-pumped 24v Compound Turbos 47RH Just another money pit
1971 Camaro RS 5.3 BTR Stage 3 cam, SuperT10
Tire Sizes
-
04-28-2015 10:42 AM #12
CHR Member
- Join Date
- Mar 2014
- Location
- Inglewood
- Car Year, Make, Model: 55 Chevy 210 and 58 Chevy Truck
- Posts
- 267
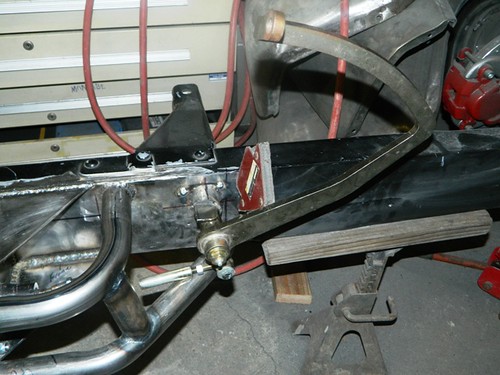
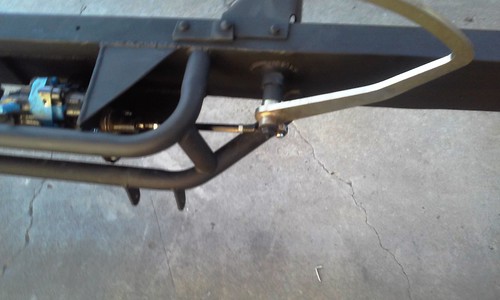
I got the frame repainted.
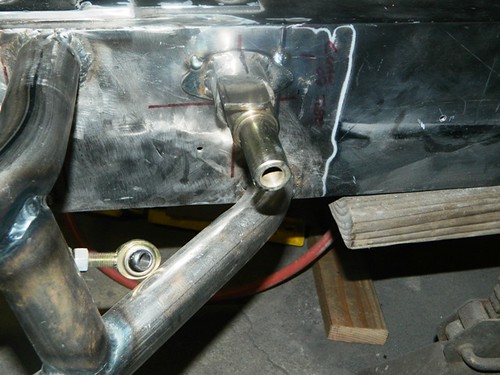
Here is the push rod connection to the brake pedal I had to fab up the mount for the brake pedal.
Last edited by BAM55; 04-29-2015 at 07:44 PM.
My Chevy Truck Project
-
04-28-2015 06:45 PM #13
CHR Member
- Join Date
- Mar 2013
- Location
- Seguin
- Car Year, Make, Model: 1940 Ford p/u 1937 Caddy Coupe
- Posts
- 780
Hey Bam55 Thats Looking Goooood ! Glad to see some new post, I was wondering where you went ? Love the new work on the frame.Last edited by Navy7797; 04-28-2015 at 06:49 PM.
-
11-28-2016 09:32 AM #14
CHR Member
- Join Date
- Mar 2014
- Location
- Inglewood
- Car Year, Make, Model: 55 Chevy 210 and 58 Chevy Truck
- Posts
- 267
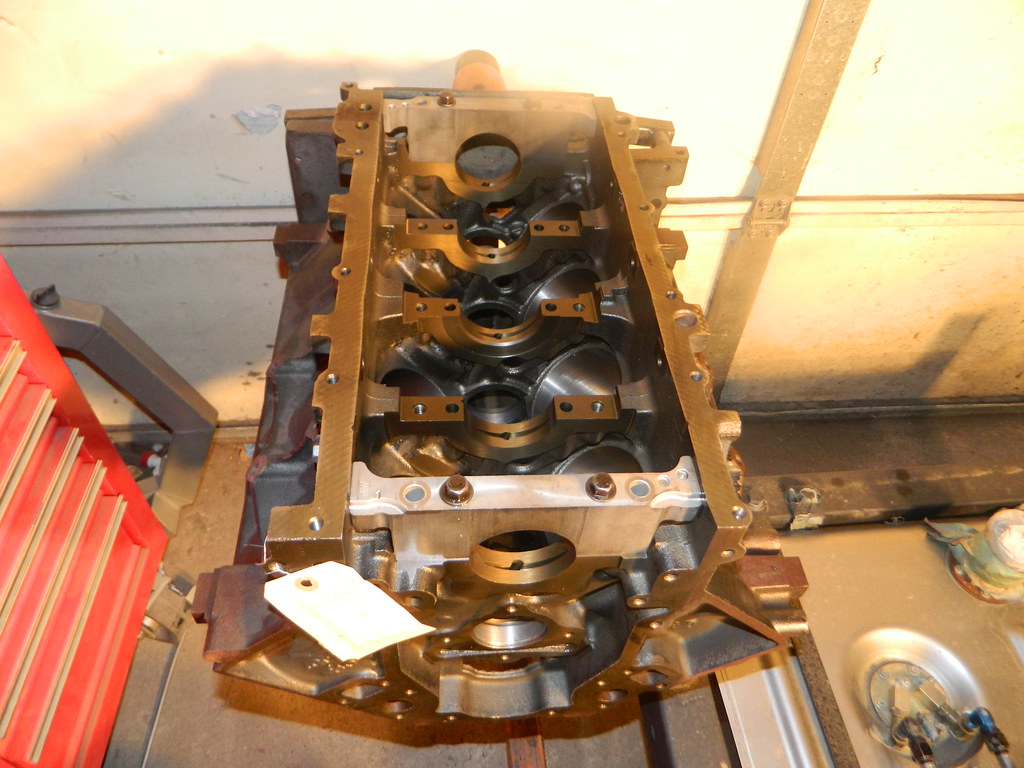
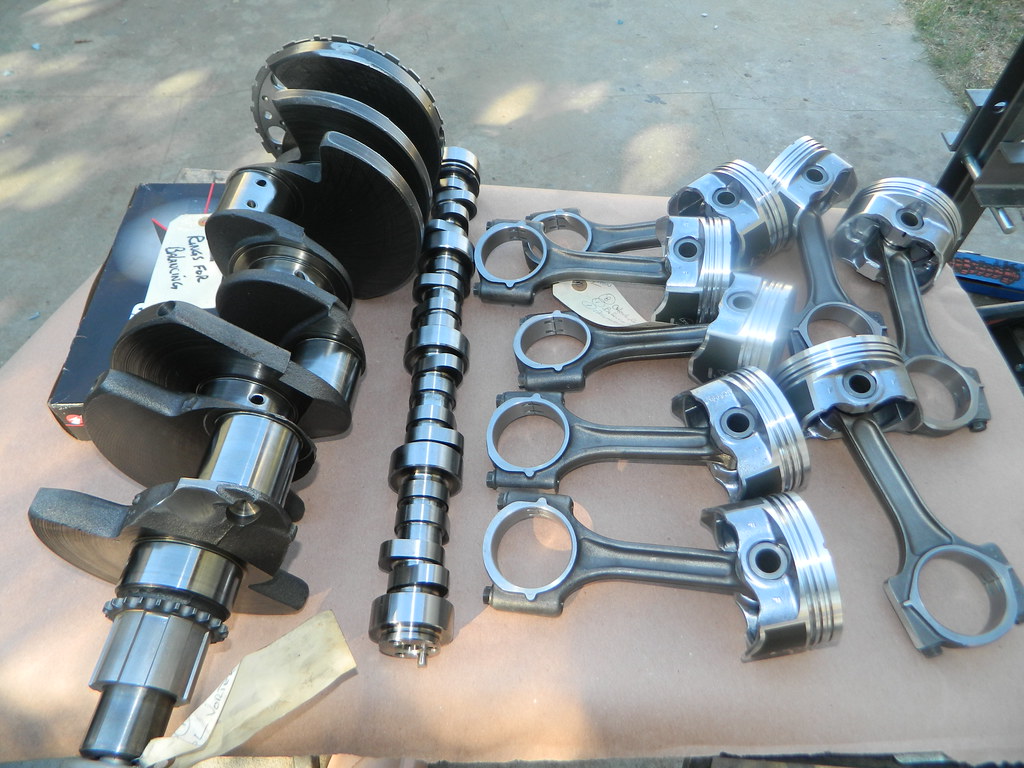
I after doing the shed I was tired of sanding due to installing all the drywall and stuff. So I decided to focus my attention on the LS engine. It was sitting so long that I just want to rebuild it. I bored it to a 5.7 and added 5.7 flattop pistons, and TSP 228r cam, and ARP rod bolts, other than that the rotating assembly is stocked.
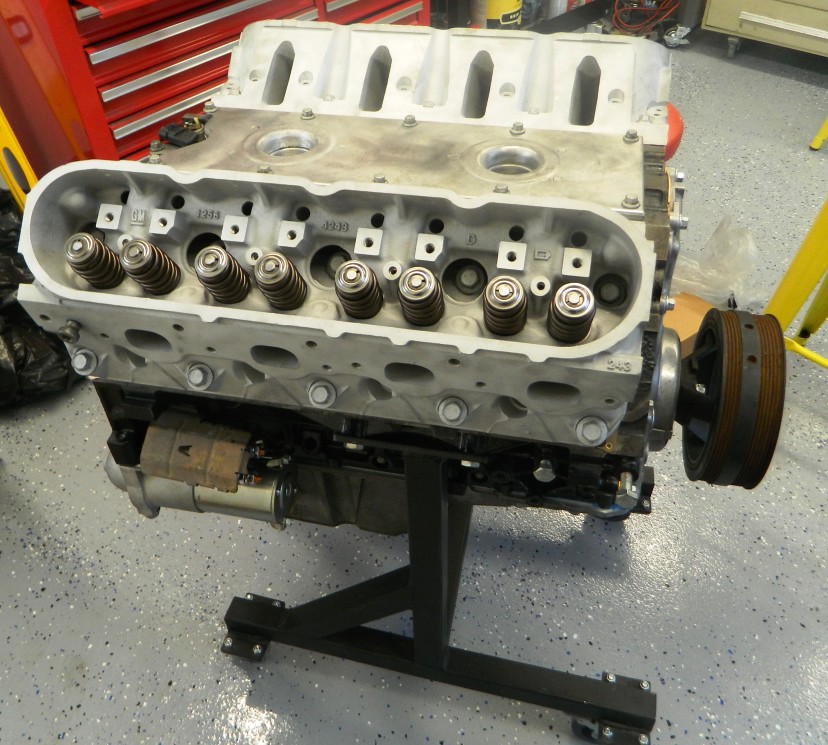
Bare block when it came back from the machine shop
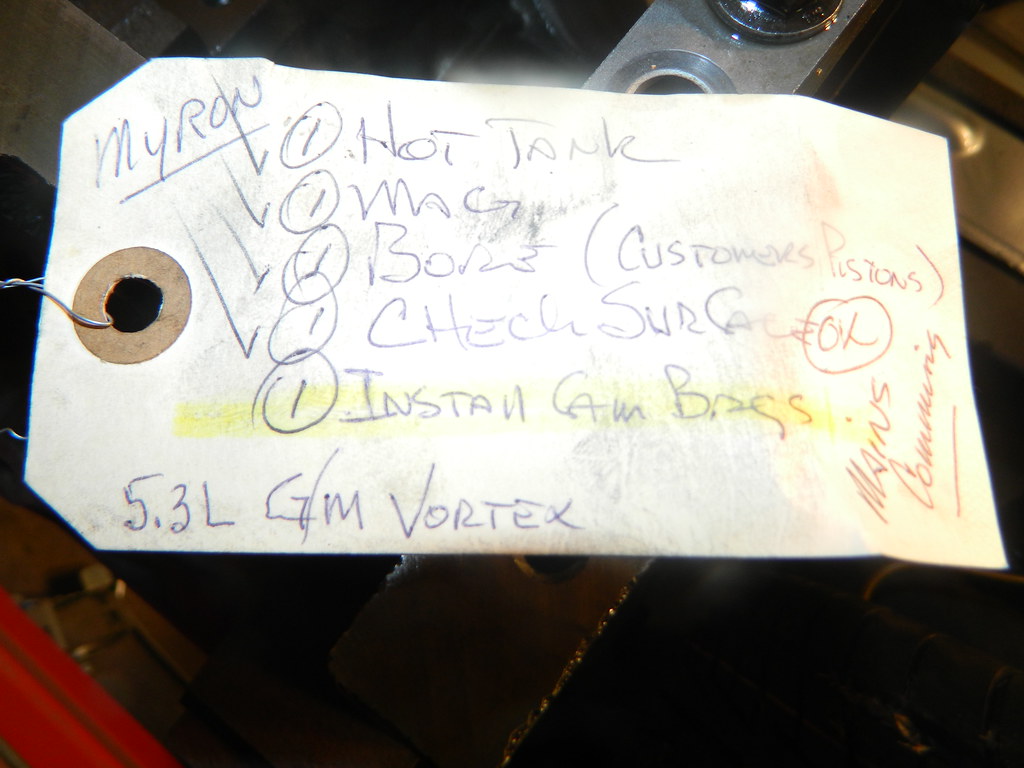
Machine shop check list.
Rotating Assembly right before I installed it.
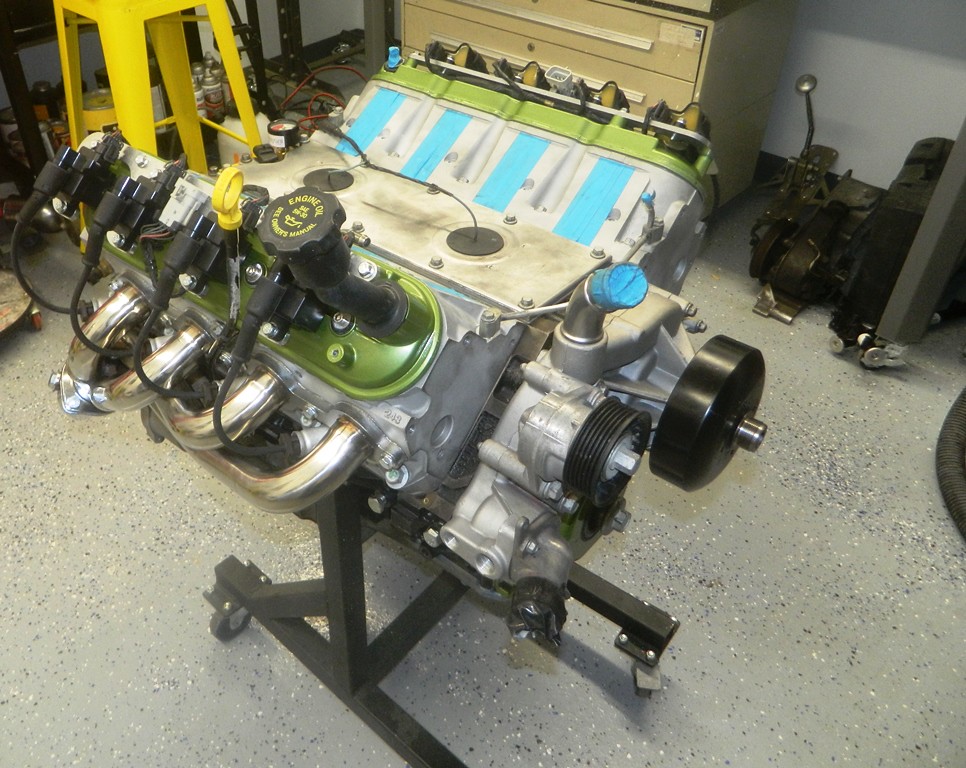
Engine back together. Oh I also brought some used 243 heads of ebay and had them rebuilt also.
Other things I did was paint the valve the same color as the trucks and found some aftermarket coil brackets that I like way better than the OEM ones and headers.
Ready to fire it up for the first time. I only let it run a little while due to no radiator. My setup is a engine dolly I made, along with a front that is removable. It just slides into the legs of the dolly. For gas I used Lawn Mower gas tank that I modified for a return line, PSI wiring harness and basic tune (still have to have it tuned for the cam), external fuel pump, corvette filter regulator, and drive by wire.

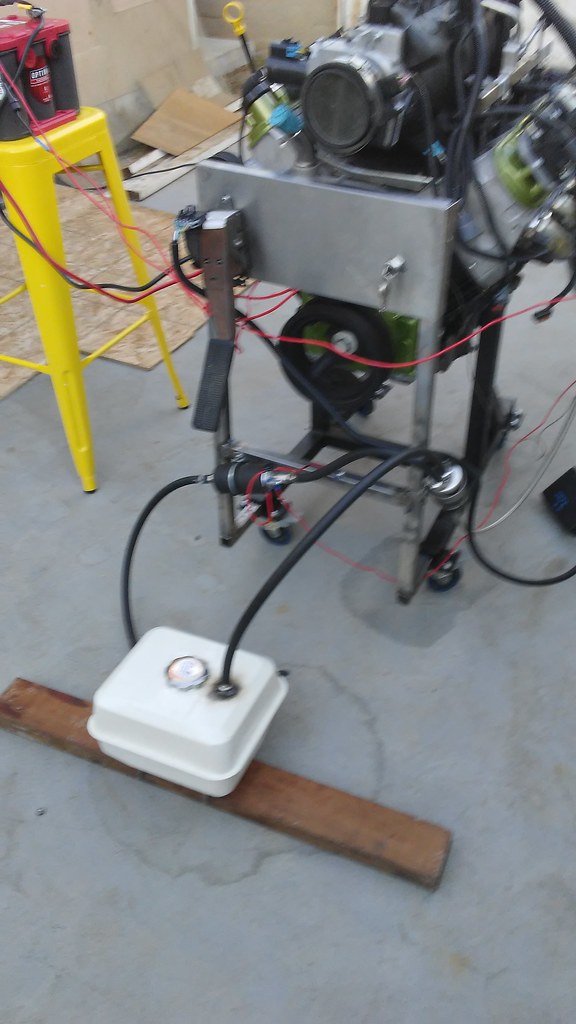
Here is a link to a short video of it running. I only let it run for a short time due to no radiator. It sounds pretty good. https://www.flickr.com/photos/bam55/...7670272808501/My Chevy Truck Project
-
11-28-2016 09:34 AM #15
CHR Member
- Join Date
- Mar 2014
- Location
- Inglewood
- Car Year, Make, Model: 55 Chevy 210 and 58 Chevy Truck
- Posts
- 267
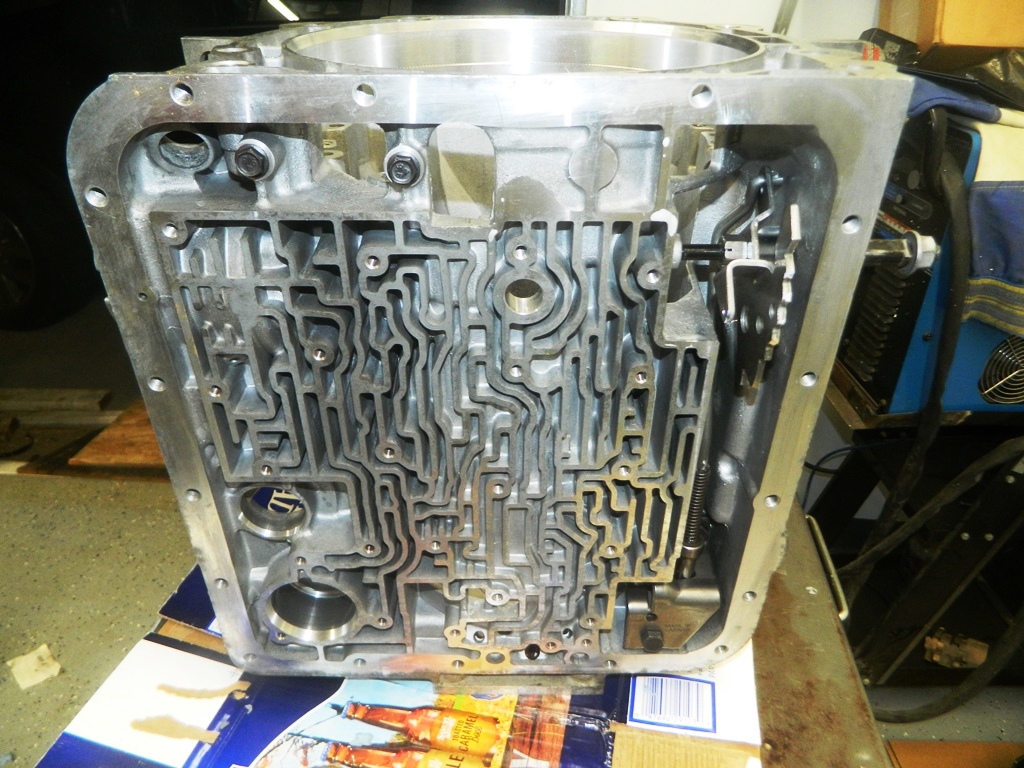
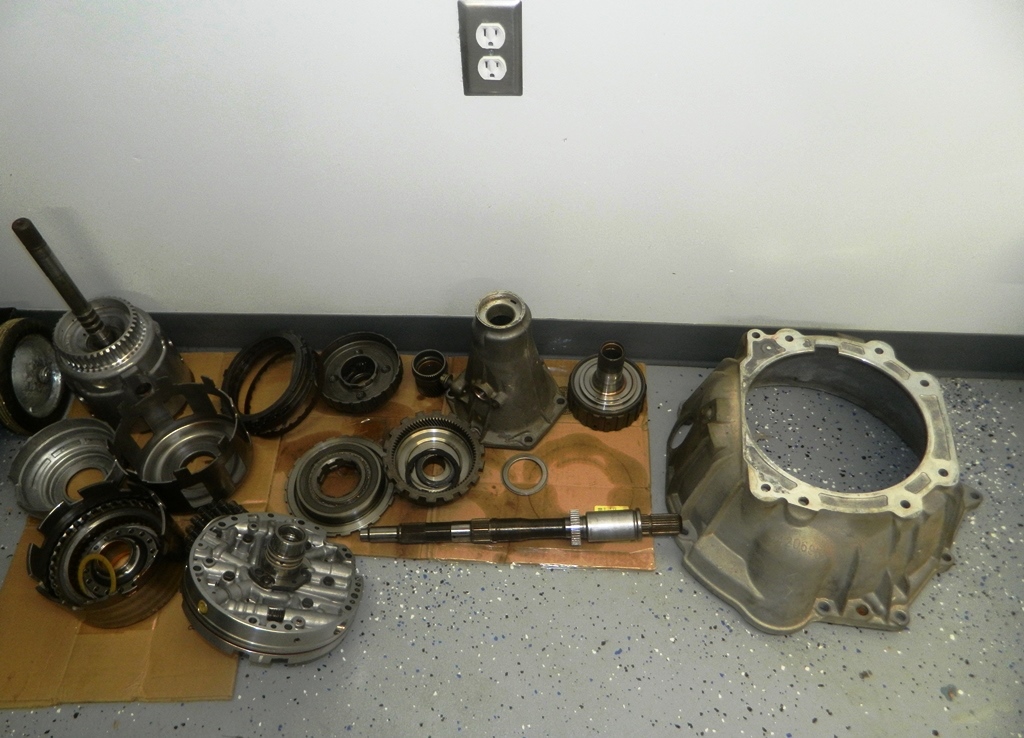
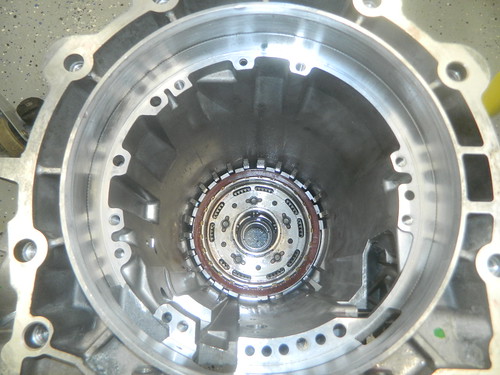
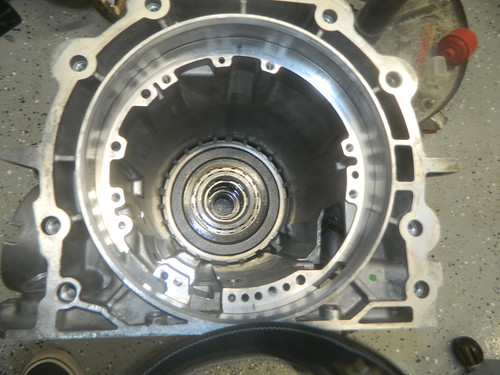
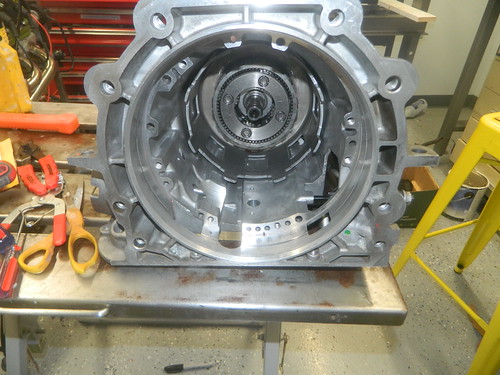
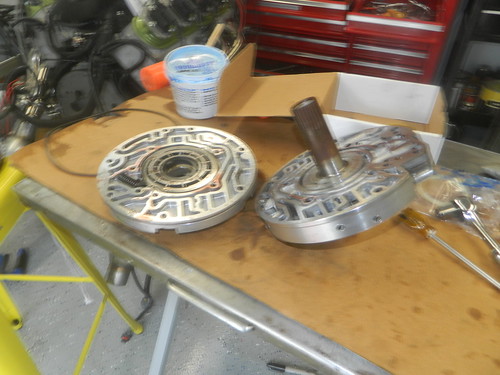
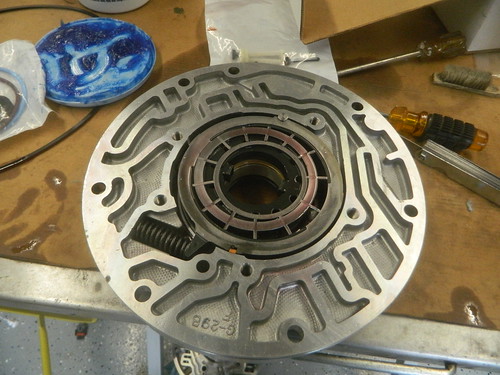
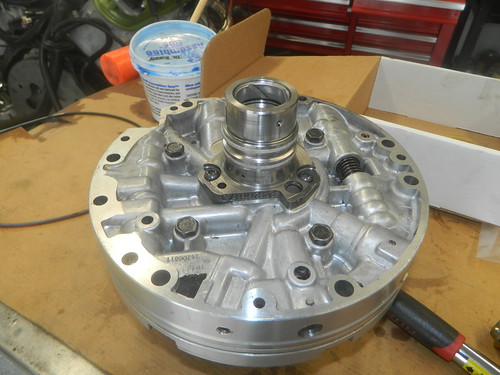
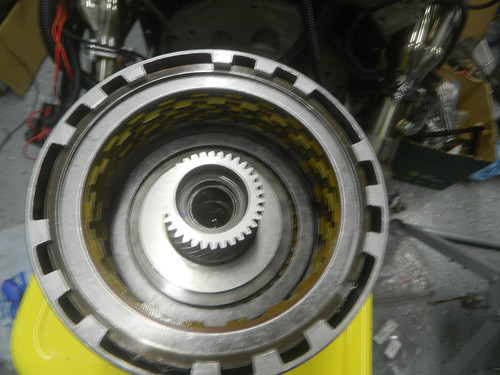
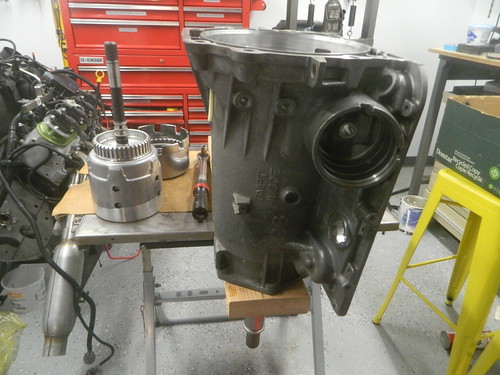
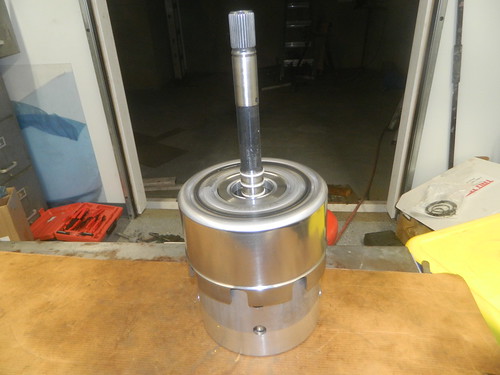
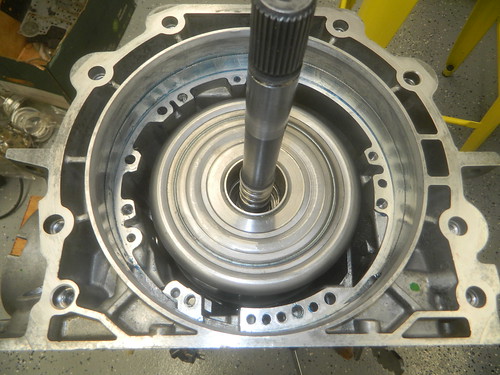
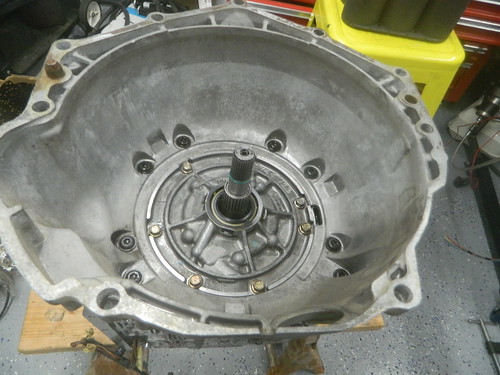
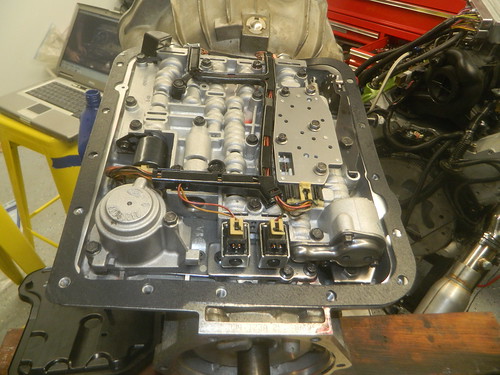
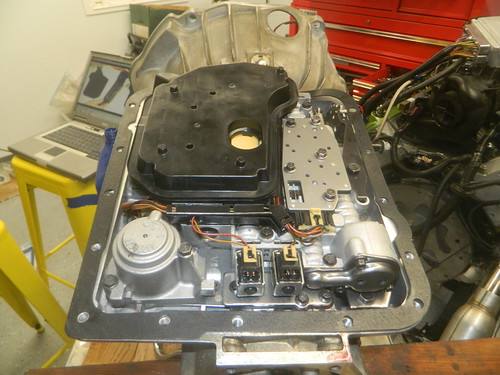
Here are some pics of the trans tear down and cleaned up.
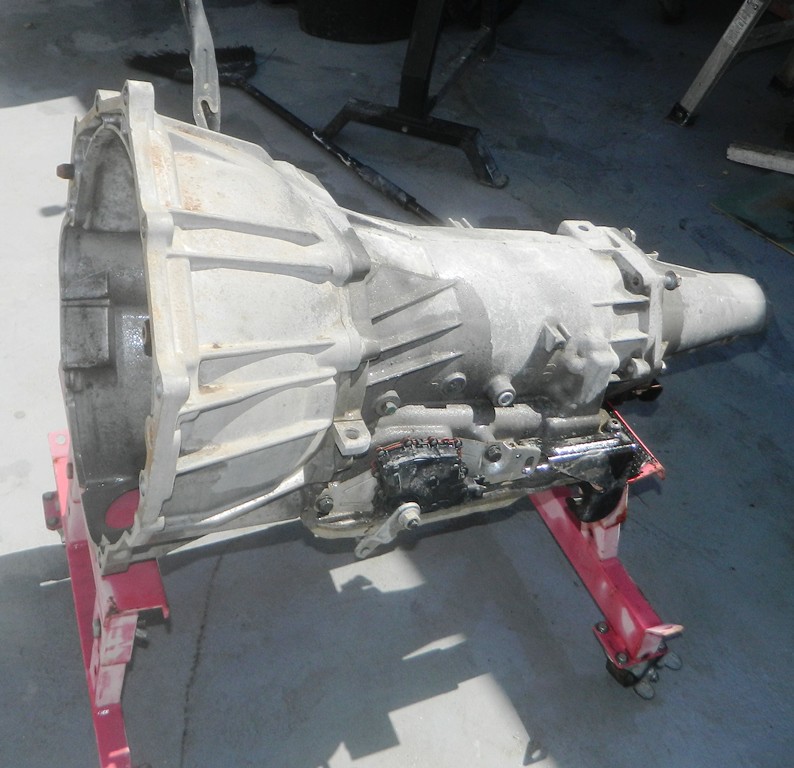
I finished the 4L60E rebuild with upgrades such as corvette servo and added more clutches than stock. Here are the pics.
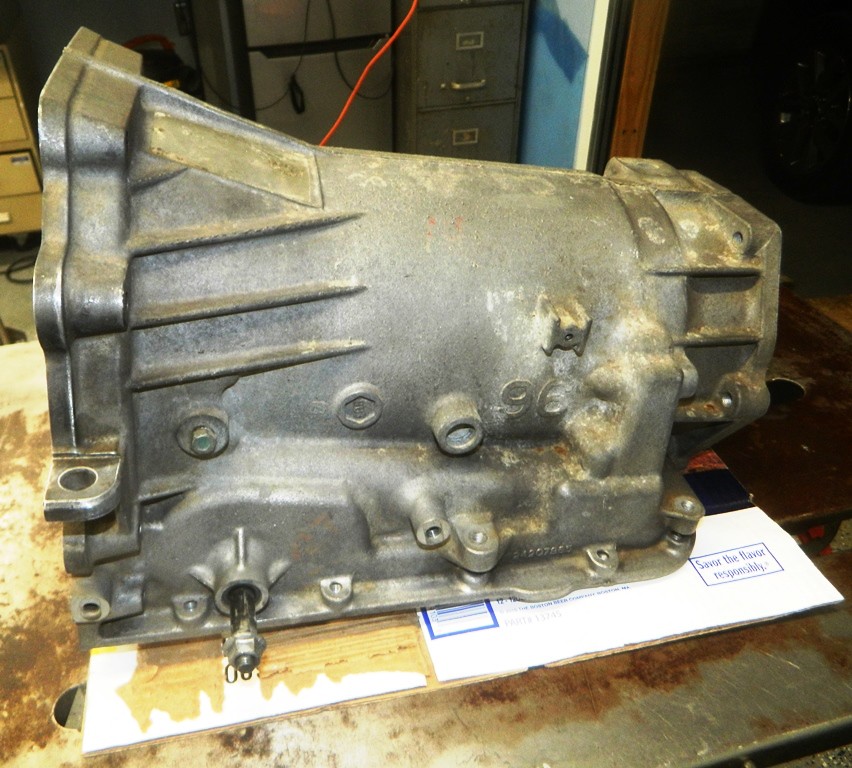
Installing the components for the case.
Rebuilt the pump
Assembling the drum with new steel and frictions
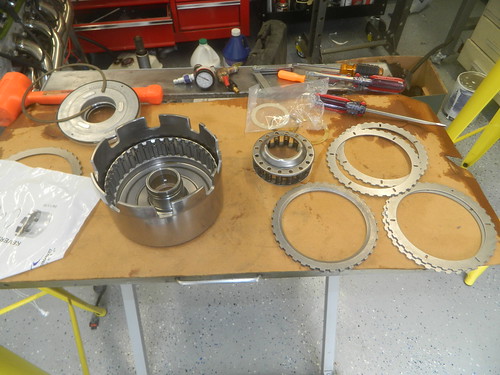
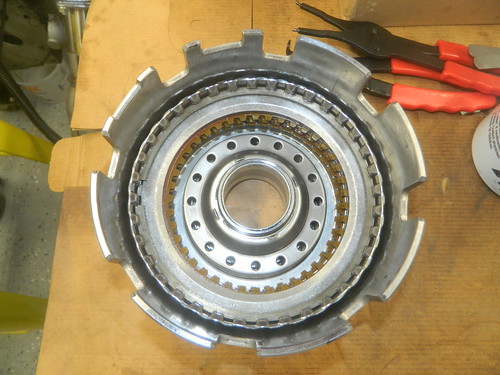
Assembly of the input drum with new steel and frictions
Components ready to go in the case
Drum and input drum installed.
Pump installed.
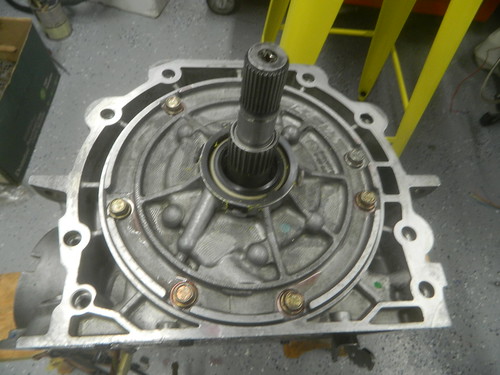
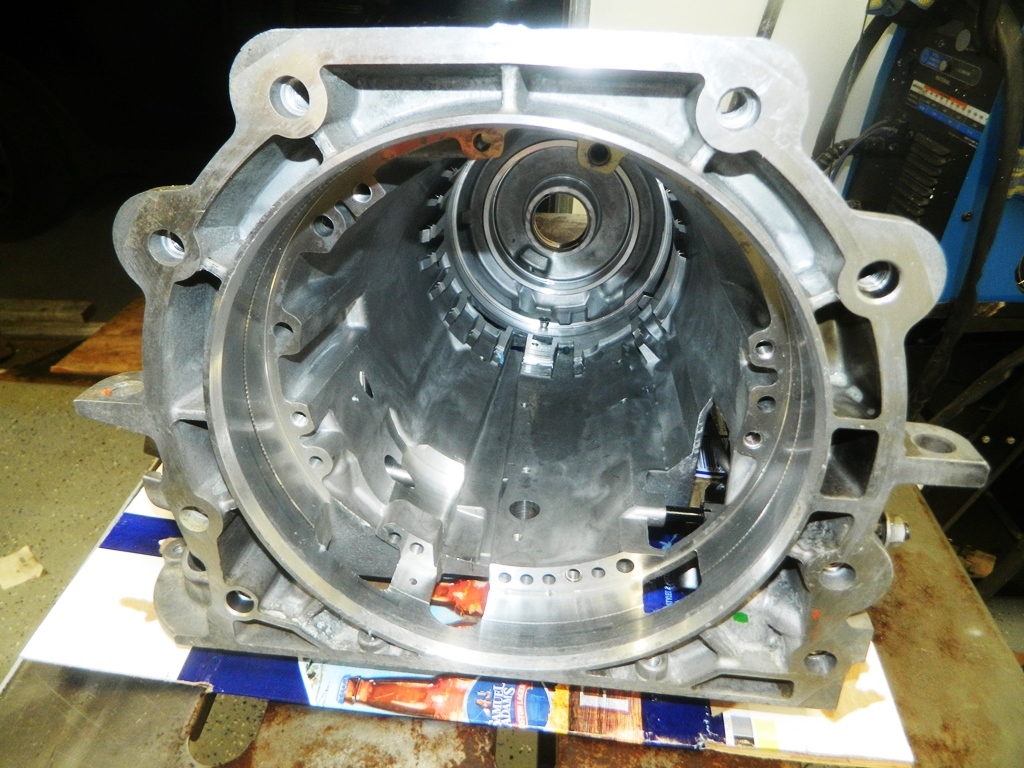
Bell Housing installed
Valve body and all electronics installed
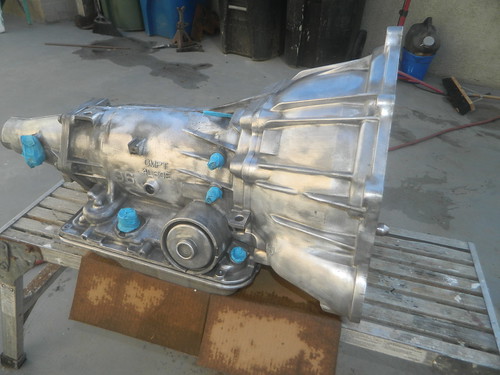
Prep for primer and paint
Painted and done
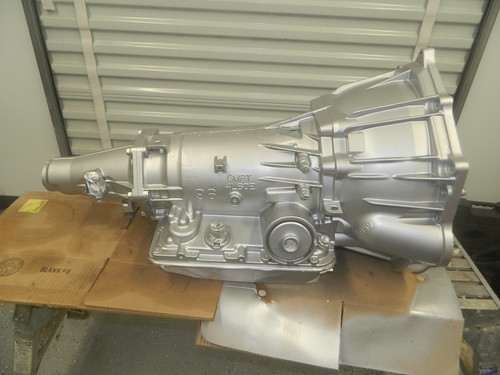
I air tested everything along the way. Next step install the Torque Converter and bolt her up to the engine.My Chevy Truck Project
 Reply With Quote

Posting Permissions
- You may not post new threads
- You may not post replies
- You may not post attachments
- You may not edit your posts

And then a newer model....
Montana Mail Runner