Thread: Build thread 37 Dodge PU
-
04-17-2017 10:45 AM #271
What are you using for wiring connectors? The last time I had the tach and speedo out of the Vette I made some quick disconnects using Molex plugs. They're faiIMG_4968.jpgIMG_4964.jpgIMG_4965.jpgIMG_4968.jpgIMG_4964.jpgIMG_4965.jpgrly cheap and as long as they're not exposed to the elements they work fine.Ken Thomas
NoT FaDe AwaY and the music didn't die
The simplest road is usually the last one sought
Wild Willie & AA/FA's The greatest show in drag racing
-
Advertising

- Google Adsense
- REGISTERED USERS DO NOT SEE THIS AD
-
04-17-2017 12:27 PM #272
Nice work on the dash Ken....it sure makes it easier doesn't it
For my dash I used a recycled a 6 pin plug from a random wiring harness and a flat three plug (Ford used these in some of their harnesses).
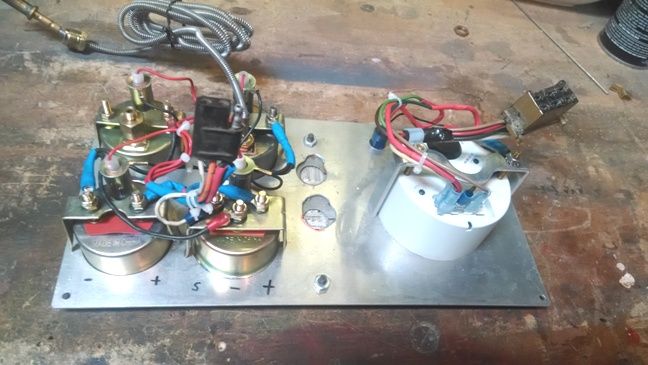
The rest of the harnesses were mostly a combination of trailer wiring plugs which should hold up well to any inclement weather the truck may see; a few Square 6s, flat fours some 2 pin plugs. The individual circuits are generally on bullet or spade connectors. This is the harness for the grill shell. I can remove the whole grill shell and just have to unplug the one harness. The individual components (headlights, turn signals and horn) unplug individually to make it easier when I pull everything apart.
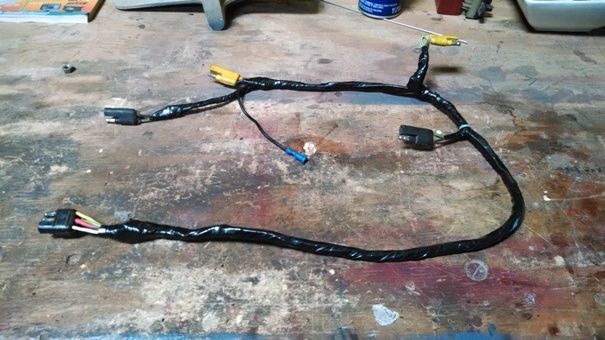
There are separate harnesses for the engine, dash, wiring going to the back of the truck (lights, fuel sender and pumps etc) and transmission controller is also on it's own harness.
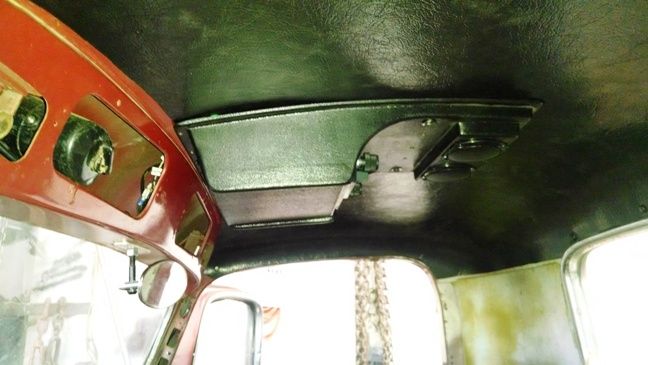
All the electrical for the overhead console also is on plugs (which sure made it a lot easier installing it).
And yes I drew out a wiring diagram as I went (about 5 pages so far )
)
.I've NEVER seen a car come from the factory that couldn't be improved..... 
-
04-17-2017 12:42 PM #273
- Join Date
- Apr 2011
- Location
- Prairie City
- Car Year, Make, Model: 40 Ford Deluxe, 68 Corvette, 72&76 K30
- Posts
- 7,301
- Blog Entries
- 1
Nice progress, it looks nice. You're getting really close to being bale to drive it for sure. I started making a schematic when I wired my 72. But stopped because I got caught up with just finishing it. Now sometime, I need to go back and finish it for if there issues down the road.
Last edited by 40FordDeluxe; 04-17-2017 at 12:44 PM.
Ryan
1940 Ford Deluxe Tudor 354 Hemi 46RH Electric Blue w/multi-color flames, Ford 9" Residing in multiple pieces
1968 Corvette Coupe 5.9 Cummins Drag Car 11.43@130mph No stall leaving the line with 1250 rpm's and poor 2.2 60'
1972 Chevy K30 Longhorn P-pumped 24v Compound Turbos 47RH Just another money pit
1971 Camaro RS 5.3 BTR Stage 3 cam, SuperT10
Tire Sizes
-
04-17-2017 04:48 PM #274
Ain't nobody gonna be lookin' at that little itty bitty brake valve. All eyes are gonna be glued to those valve covers! roflmao...
looks really good there Mike.
-
04-28-2017 10:17 AM #275
The bed strips that were supposed to be here a week ago finally arrived yesterday so I've made a bit more progress
The 37 originally had a metal floor in the bed (big selling point for some back in the day). Somewhere along the way the floor was cut out and by the time I bought it there was only a badly rotted piece of plywood kind of covering the bed. Several years ago I pulled the old plywood out. Fortunately when they cut the bed out they did weld in bracing to support a new floor.
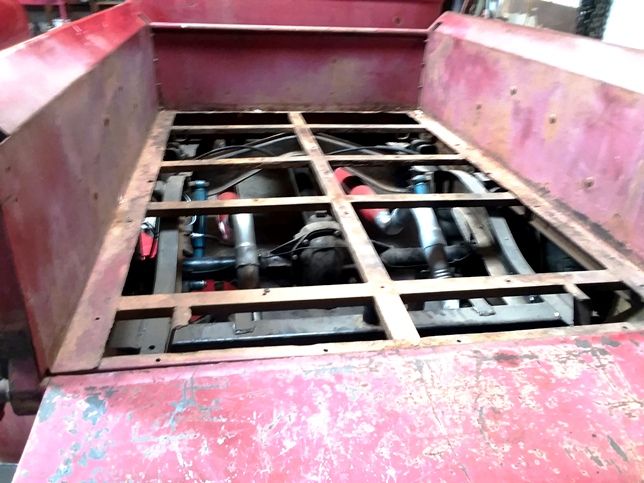
At the time I pulled the old wood out I just trimmed a sheet of 1/2" plywood to lay down so I could put stuff in the bed while I worked on it. (leave it to me to get the bed that was 47 1/2" wide so 1/2" had to be trimmed off the side)
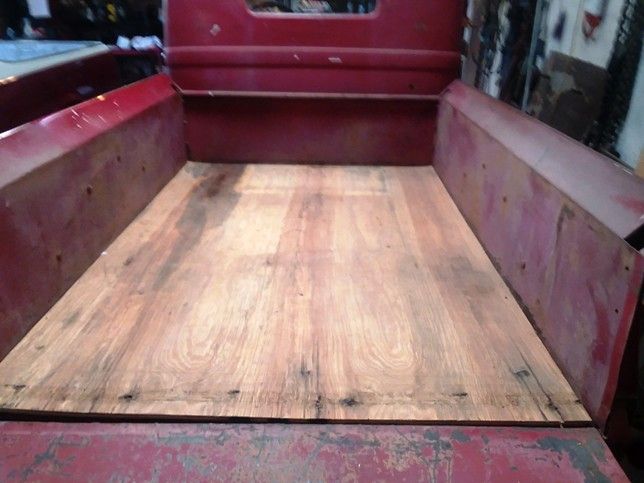
Over the years I've given some thought about what I was going to do with the bed. I kicked around putting a sheet of steel in, using aluminum diamond plate or doing a wood floor......It's still up in the air about what it will end up with when the truck is painted and pretty but for now I needed something.
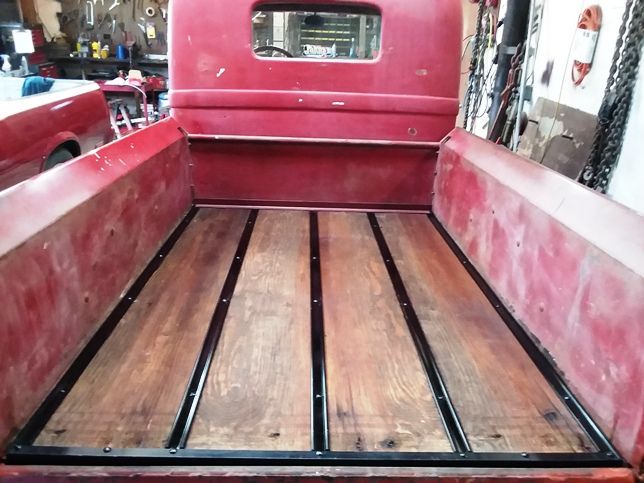
At this point a really nice looking bed would look out of place in the truck, so I wanted something that looked a little aged. The more I looked at the piece of plywood that was already in the bed the better it looked with the "character" marks and couple of stains it had picked up over the years. I figured what the heck and put a light coat of stain followed by some Thompson's Water Seal on in and called it good. I got all the holes marked and drilled and then got everything bolted down this morning. For being quick and cheap I don't think it came out to bad it and looks appropriate for the truck. The plywood will be a good template for drilling the holes when I get around to doing whatever will be the final bed in the future.
.Last edited by Mike P; 04-28-2017 at 10:21 AM.
I've NEVER seen a car come from the factory that couldn't be improved..... 
-
04-28-2017 04:58 PM #276
- Join Date
- Apr 2011
- Location
- Prairie City
- Car Year, Make, Model: 40 Ford Deluxe, 68 Corvette, 72&76 K30
- Posts
- 7,301
- Blog Entries
- 1
That looks really nice and fits the truck nicely. Nice work.Ryan
1940 Ford Deluxe Tudor 354 Hemi 46RH Electric Blue w/multi-color flames, Ford 9" Residing in multiple pieces
1968 Corvette Coupe 5.9 Cummins Drag Car 11.43@130mph No stall leaving the line with 1250 rpm's and poor 2.2 60'
1972 Chevy K30 Longhorn P-pumped 24v Compound Turbos 47RH Just another money pit
1971 Camaro RS 5.3 BTR Stage 3 cam, SuperT10
Tire Sizes
-
04-28-2017 06:38 PM #277
Thanks Ryan. I spent the afternoon bolting the gas tank down, finishing the fuel lines and getting the sending unit hooked up (I mounted the fuel pumps and filter earlier this week). So the fuel system is now done from tank to carburetors.
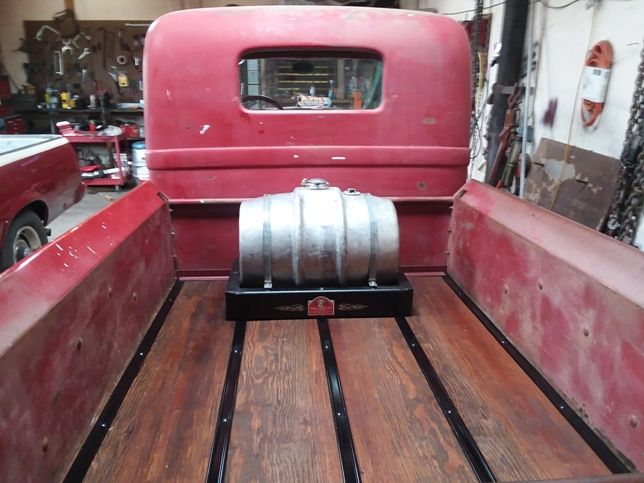
That just leaves getting the battery box done and a battery cable run to the solenoid and I should finally be able to move it under its own power.
.I've NEVER seen a car come from the factory that couldn't be improved..... 
-
04-29-2017 12:26 PM #278
Did something very similar with mine too. Easy to maintain and looks great!"  "No matter where you go, there you are!" Steve.
-
04-29-2017 05:36 PM #279
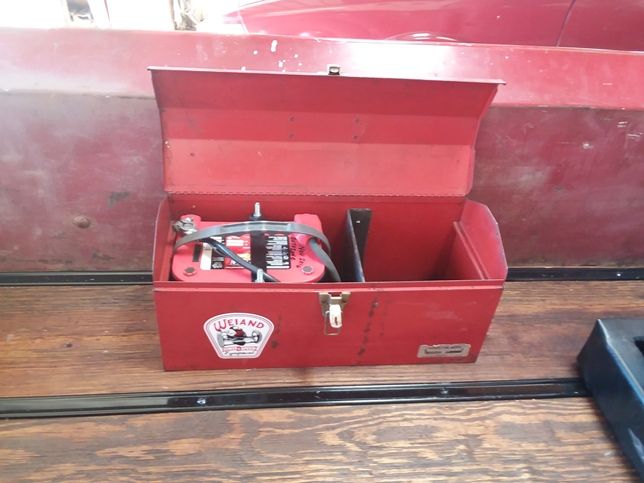
The battery was originally located under the passenger side floor in the cab. I figured that I would either keep it there or maybe move it under the floor of the bed. The dual exhaust pretty much eliminated both of those areas. That just left mounting the battery in the bed of the truck. Until I get the paint and body work done I kind of figured a shiny new aluminum or stainless battery box would look out of place .......and I knew I'd hate the look of a plastic one. I had resigned myself to fabricating a battery box out of some old painted metal I had to make it look a bit aged. Then I ended up with this idea of using an old tool box if I could find one big enough.
I didn't have anything on hand and hadn't had any luck finding one at the swap meets, so it was E Bay. A search under "crappy old $10 tool box" didn't come up with any results, so I typed in "vintage" instead (you know..... the add 50% to the asking price term). Anyway I ended up with this one which fit the bill nicely. Yeah. with shipping I paid 2 or 3 times what it sold for new, but it was pretty much exactly what I was hunting for and the slightly tattered "Western Auto" sticker is a nice touch.
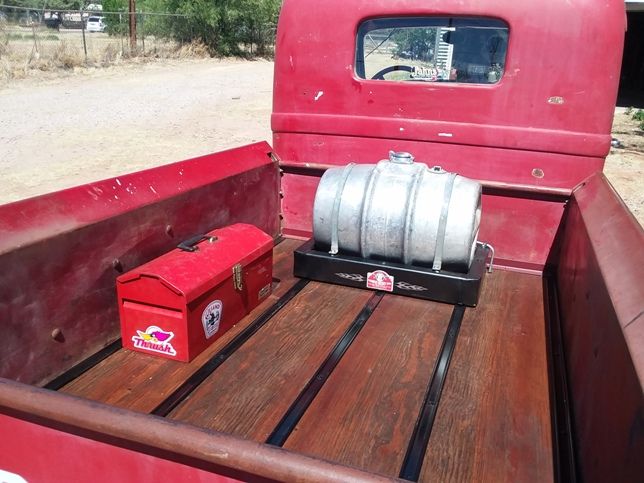
It's even big enough that I can throw a hand full of tools.
With the tank and battery done, the truck was finally able to move under it's own power for the first time. I was just going to back it out of the shop so I could clean the bay out (really )
)
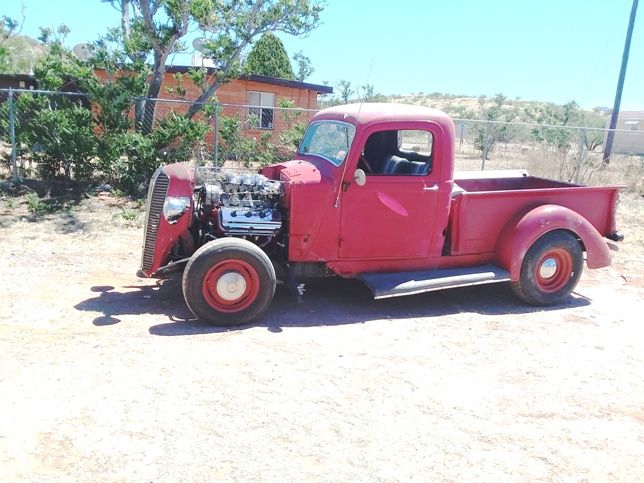
Of course that turned into taking a couple of laps around the arena . I still have a ton of stuff to do but at least it moves under its own power now.
.I've NEVER seen a car come from the factory that couldn't be improved..... 
-
04-29-2017 08:33 PM #280
I love the battery box. Apparently, the battery tool box is old hat for the rat rodders, but its new to me.
It looks clean, and even holds tools. Awesome..
Education is expensive. Keep that in mind, and you'll never be terribly upset when a project goes awry.
EG
-
04-30-2017 05:45 AM #281
Finally...........Your Uncle Bob, Senior Geezer Curmudgeon
It's much easier to promise someone a "free" ride on the wagon than to urge them to pull it.
Luck occurs when preparation and opportunity converge.
-
04-30-2017 06:54 AM #282
Great battery box idea.
Nice to finally drive it, eh?
..Pugsy
-
04-30-2017 07:31 AM #283
Congrats! That first drive had to feel great.1 Corinthians 1:27
-
04-30-2017 10:54 AM #284
"......Finally......IT"S ALIVE IT"S ALIVE......."
Yup Bob pretty much my thoughts when I dropped it in gear. Been a long time coming.
Firebird & Pugsy. For currently not having any other place to put the battery I'm pretty happy the way it works out/looks.
Yeah even as short as it was the first time moving a new project is always great...... provided you don't end up walking home . When I blipped the throttle a couple of times I decided the 4.56 gears are going to be a lot of fun.
A couple of minor issues did turn up to add to the to do list. The gasket on the master cylinder cover leaks, and I've got to either get a torque strap on the motor or build a limiter for the drivers' side motor mount.
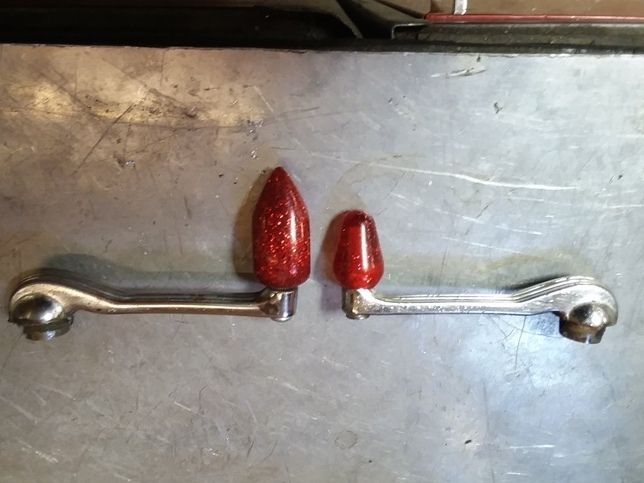
Then there was the self inflected wound (literally). I was pretty proud of my red metal flake window crank knobs. When I slammed the door on the truck for my test drive this old fat guy figured out that those long pointy window crank knobs were a really bad idea (my leg still hurts)

I took a little time this morning correcting that little problem......after all there are a lot more test drives coming up.
.I've NEVER seen a car come from the factory that couldn't be improved..... 
-
04-30-2017 11:19 AM #285
Congrats Mike"  "No matter where you go, there you are!" Steve.


 432Likes

 LinkBack URL
 About LinkBacks
 Reply With Quote

A belated Happy 78th Birthday Roger Spears
Belated Happy Birthday