


 3390Likes
Thread: 55 Wagon Progress


Results 1,546 to 1,560 of 1865
 LinkBack URL
 About LinkBacks
Hybrid View
-
10-08-2020 12:01 PM #1
 CHR Member

- Join Date
- Aug 2014
- Location
- Rochester
- Posts
- 27
Thanks for the link to the pulleys. It looks like I have another weekend project.
-
10-09-2020 05:25 AM #2
CHR Member
- Join Date
- Jun 2008
- Location
- Leonardtown
- Car Year, Make, Model: Walking
- Posts
- 1,228
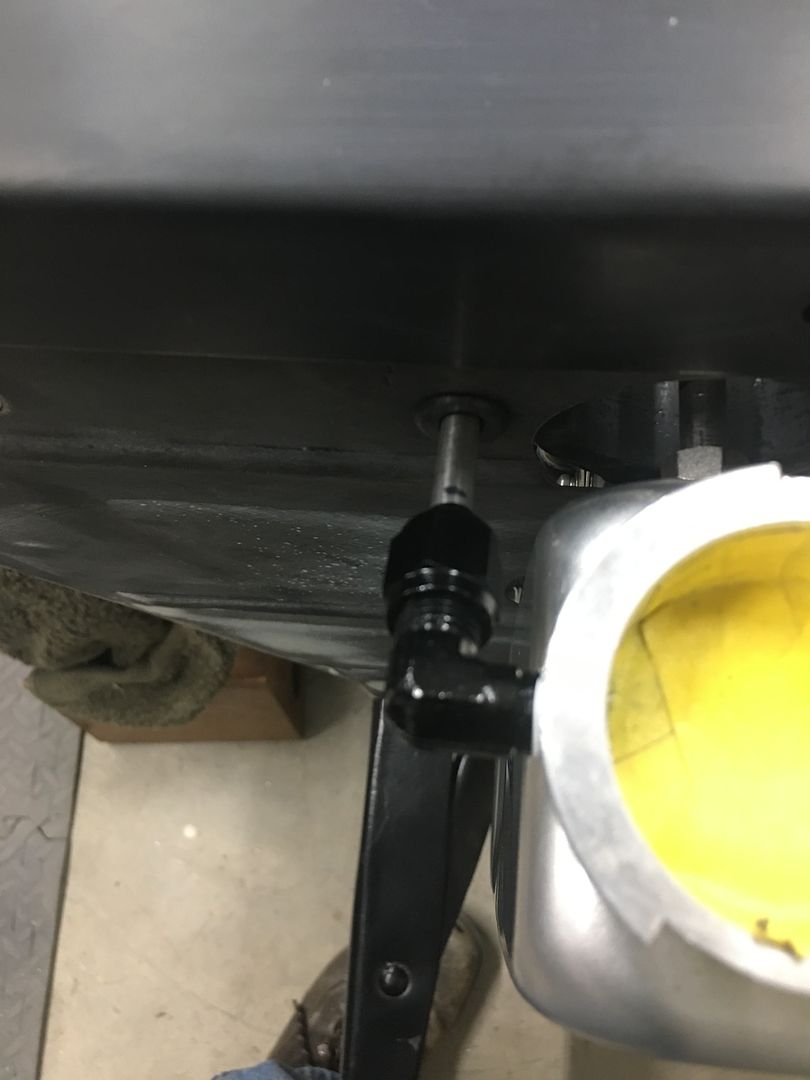
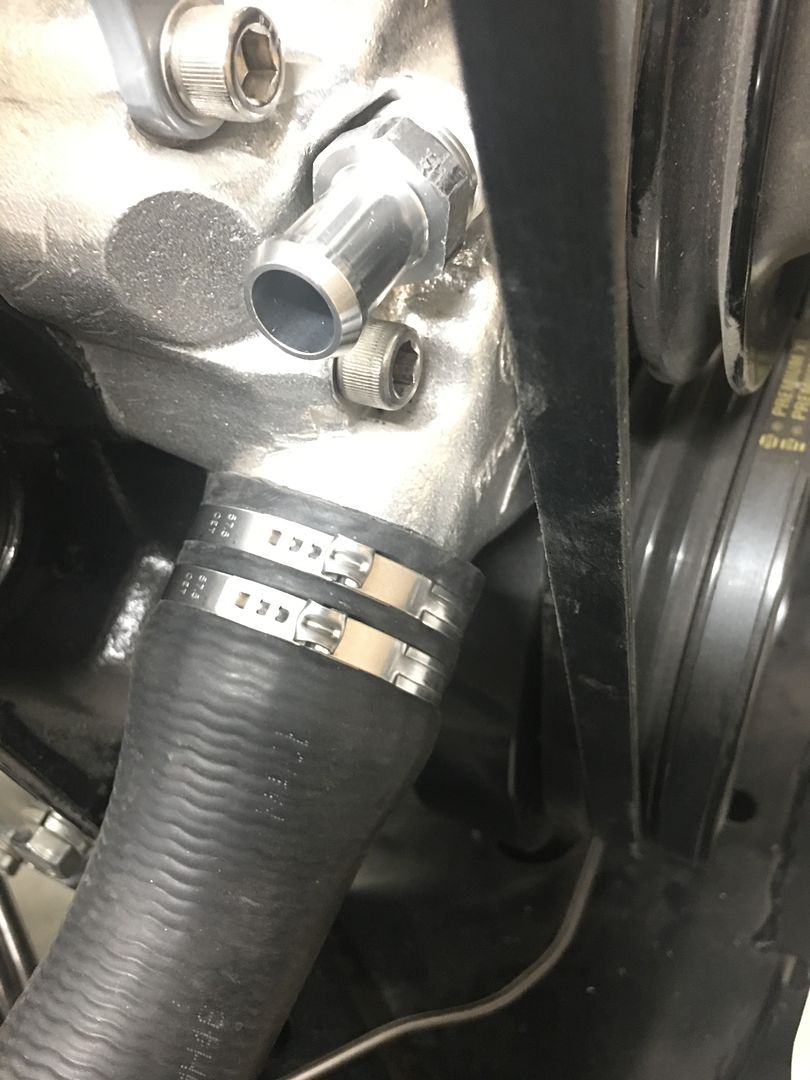
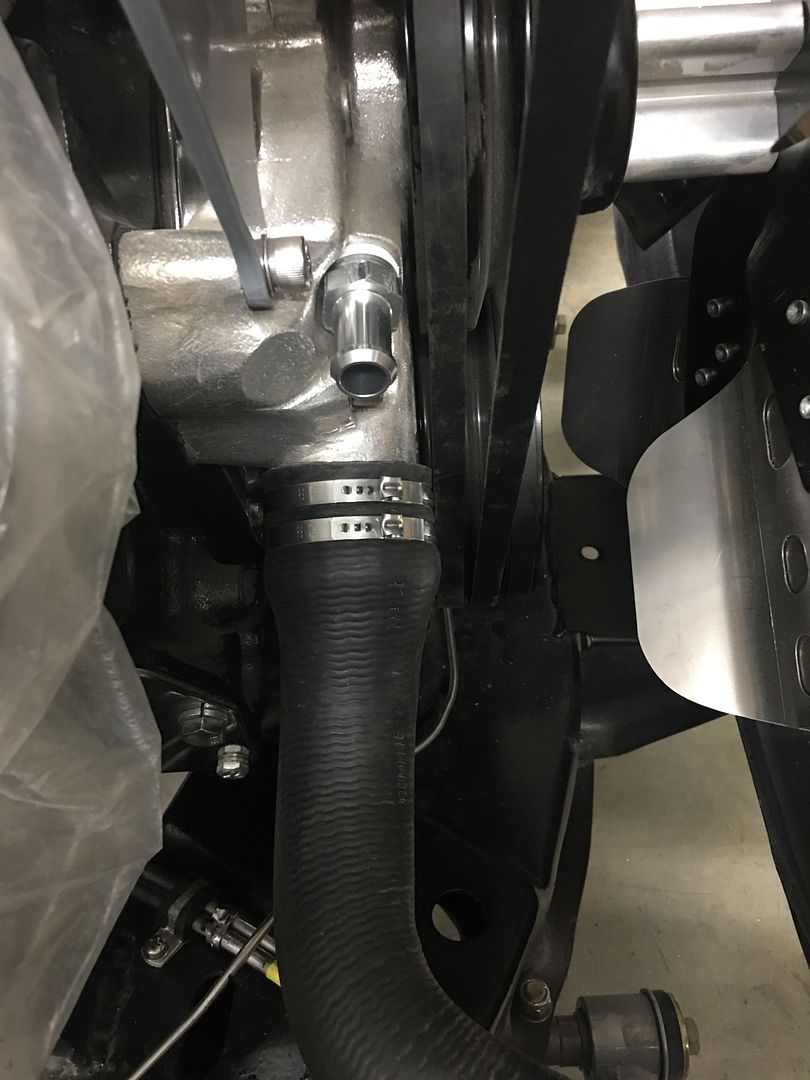
Last night we got some details crossed off the list, our radiator sits on the front side of the core support but the overflow can't stay on the front side as it would spew all over a painted splash pan. So we marked the core support baffle to align with our overflow AN fitting and as Jared was drilling the hole and installing the grommet, I got to bending some 1/4" stainless tubing. Now it will drain behind the frame rail...
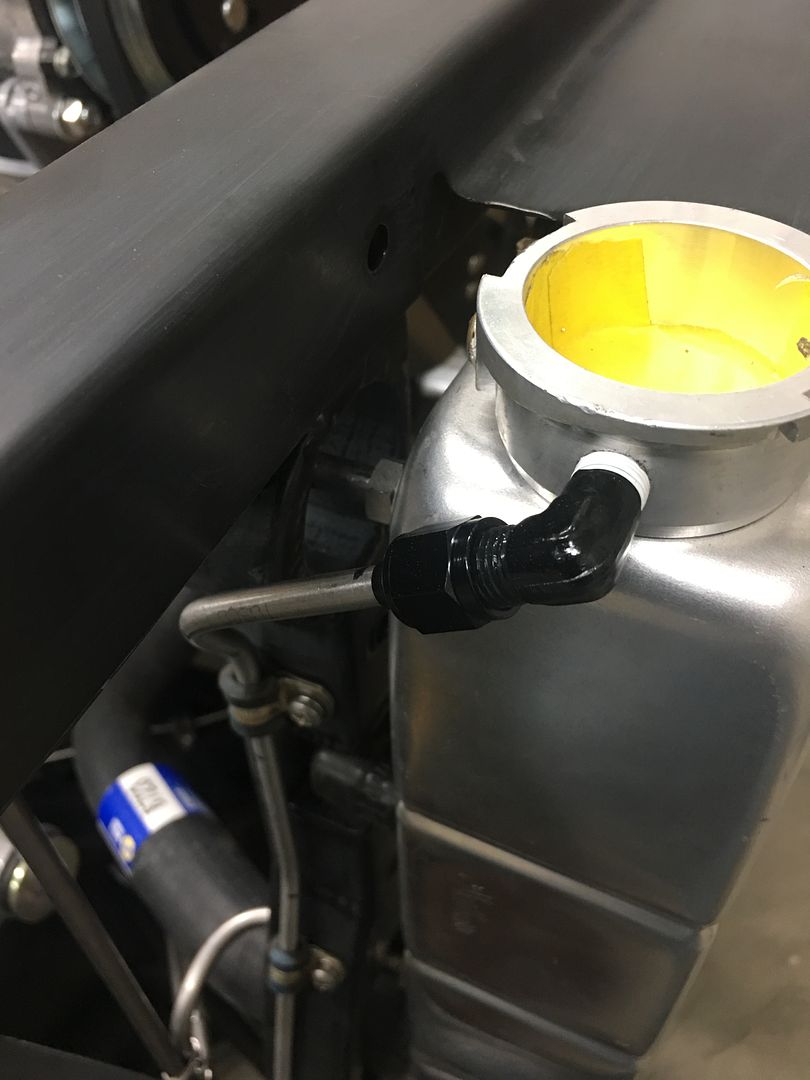
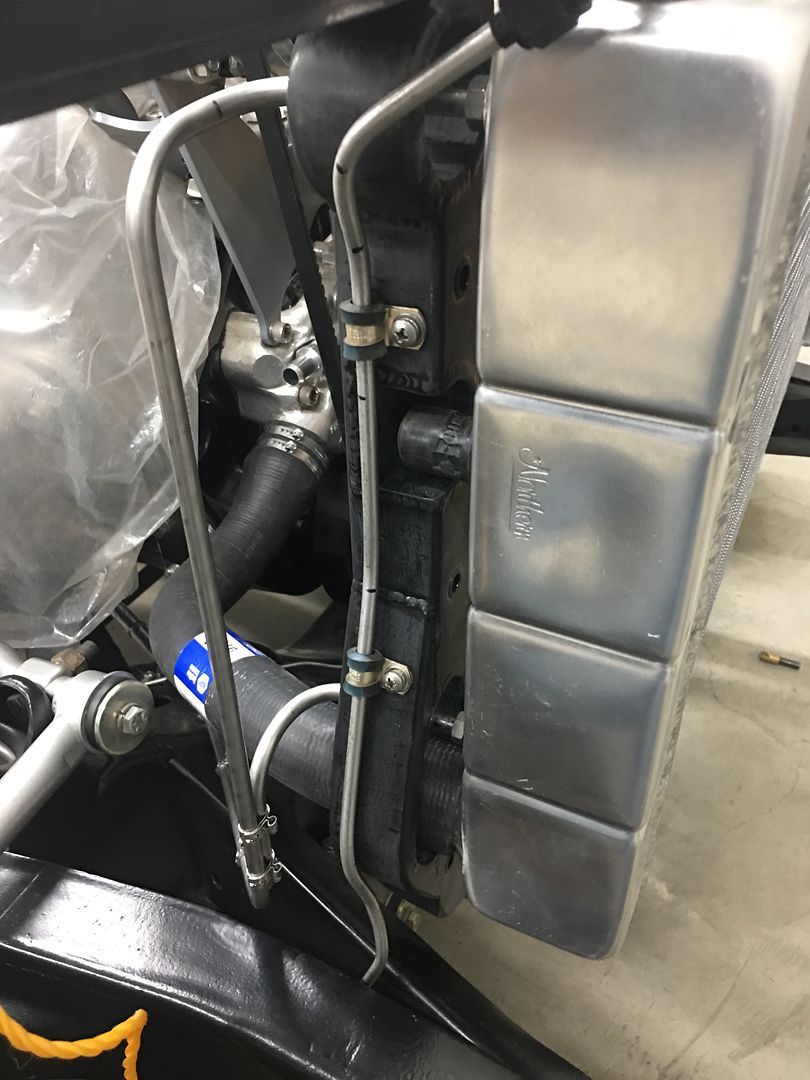
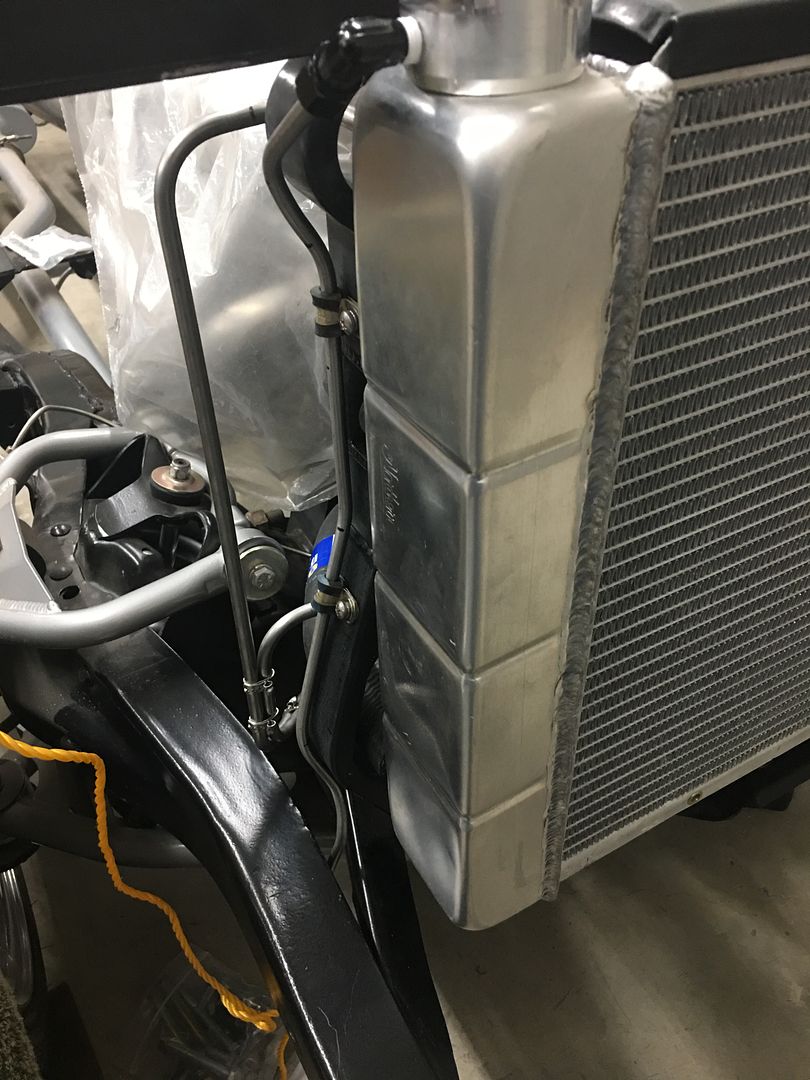

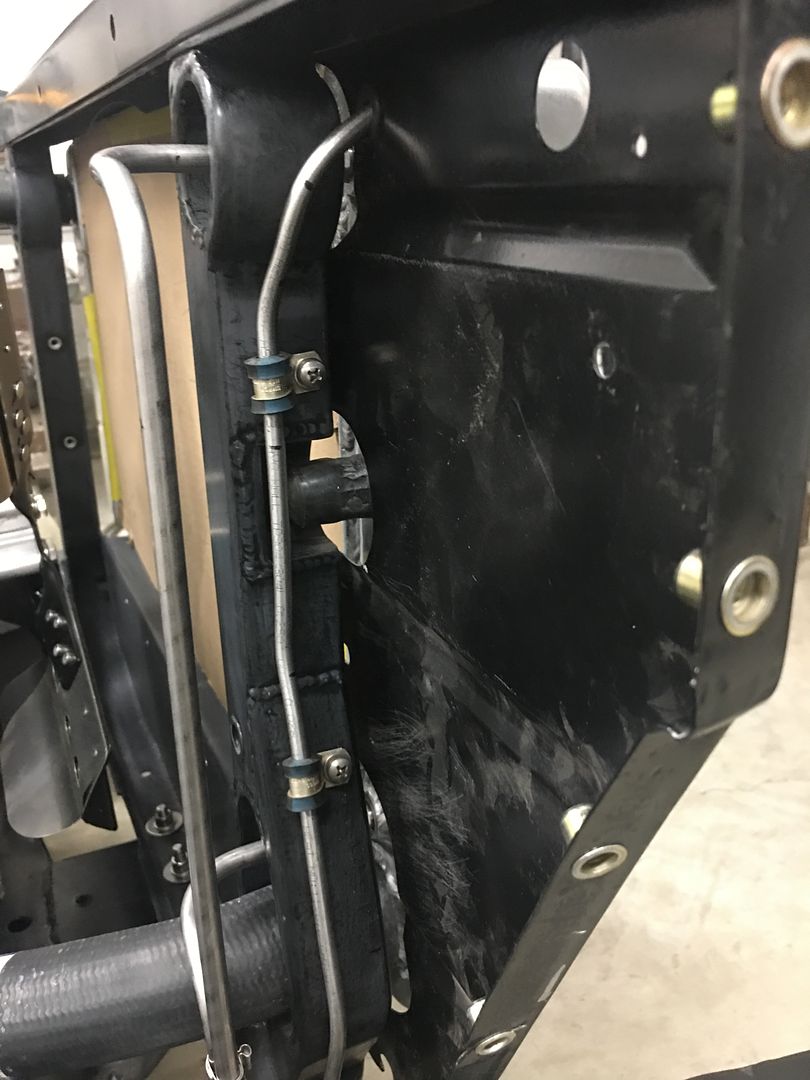
Since McMaster had made a delivery we got some of the Oetiker clamps installed. Yeah, I think I like this cleaner look...
My buddy Jeff Ford down in Aiken SC was working on installing a floor pan patch and had omitted the flange in the radius corner below the toe panel.
So in addition to busting his chops, we put together this video tutorial so he could do the next panel in one piece. Hope it helps someone else as well..
.Robert
-
10-10-2020 05:26 AM #3
CHR Member
- Join Date
- Apr 2001
- Location
- Salado
- Car Year, Make, Model: 32, 40 Fords,
- Posts
- 10,895
Always enjoy your tutorials Robert, thanks for taking the time to produce them.Your Uncle Bob, Senior Geezer Curmudgeon
It's much easier to promise someone a "free" ride on the wagon than to urge them to pull it.
Luck occurs when preparation and opportunity converge.
-
10-10-2020 08:42 PM #4
CHR Member
- Join Date
- Jun 2008
- Location
- Leonardtown
- Car Year, Make, Model: Walking
- Posts
- 1,228
Thanks Bob!
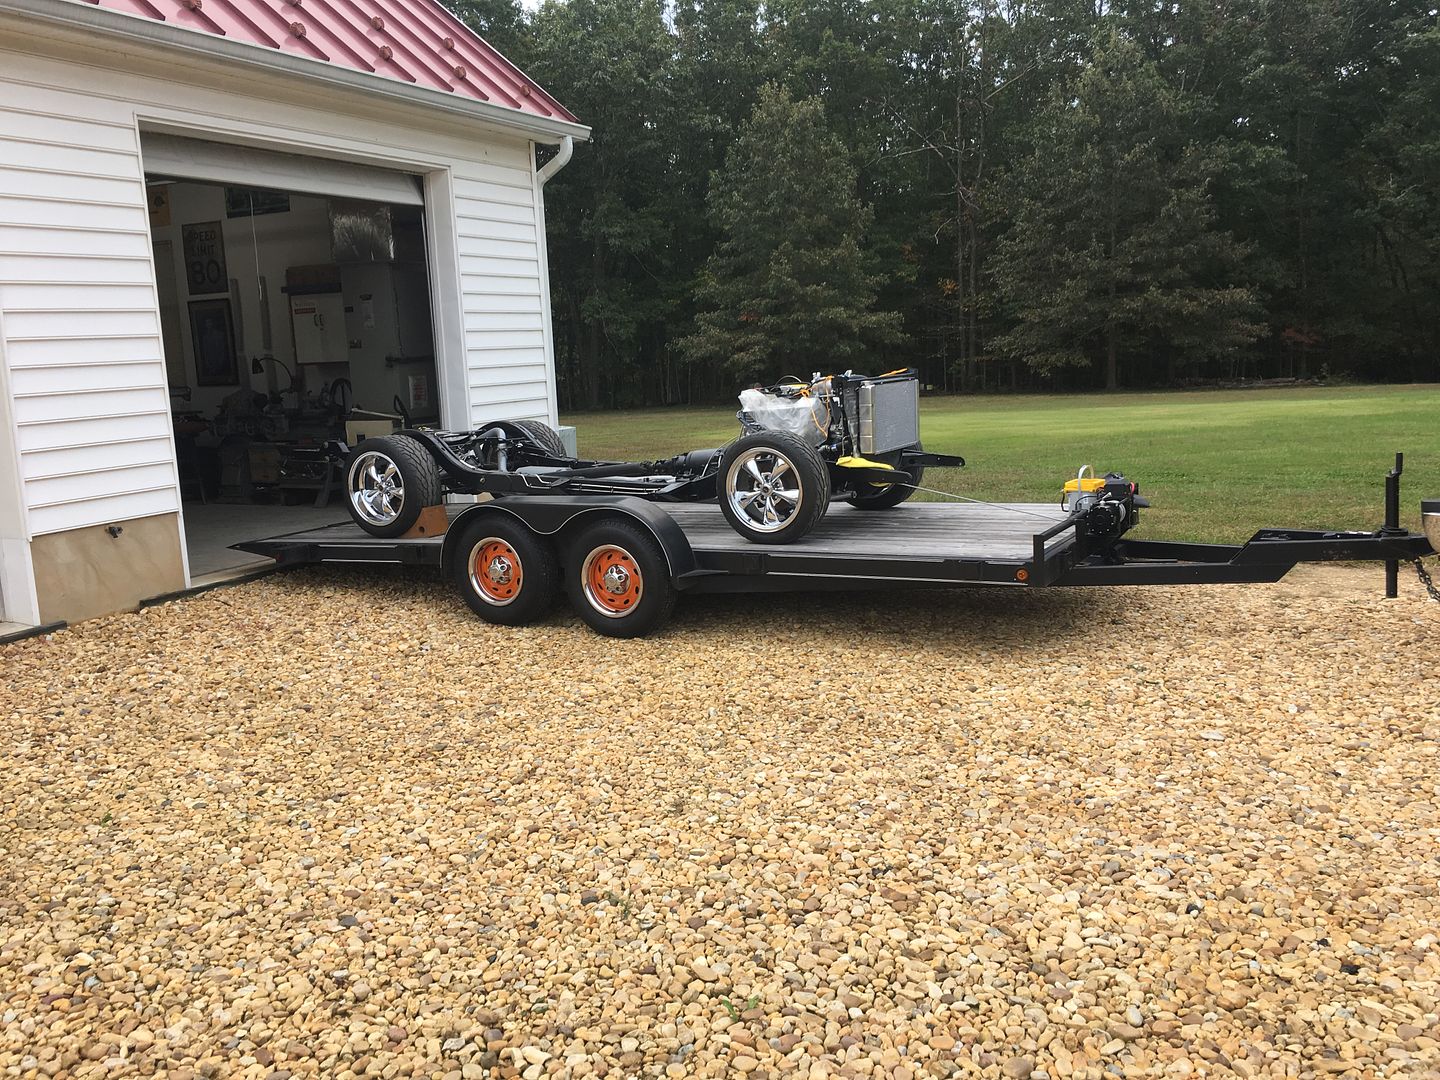
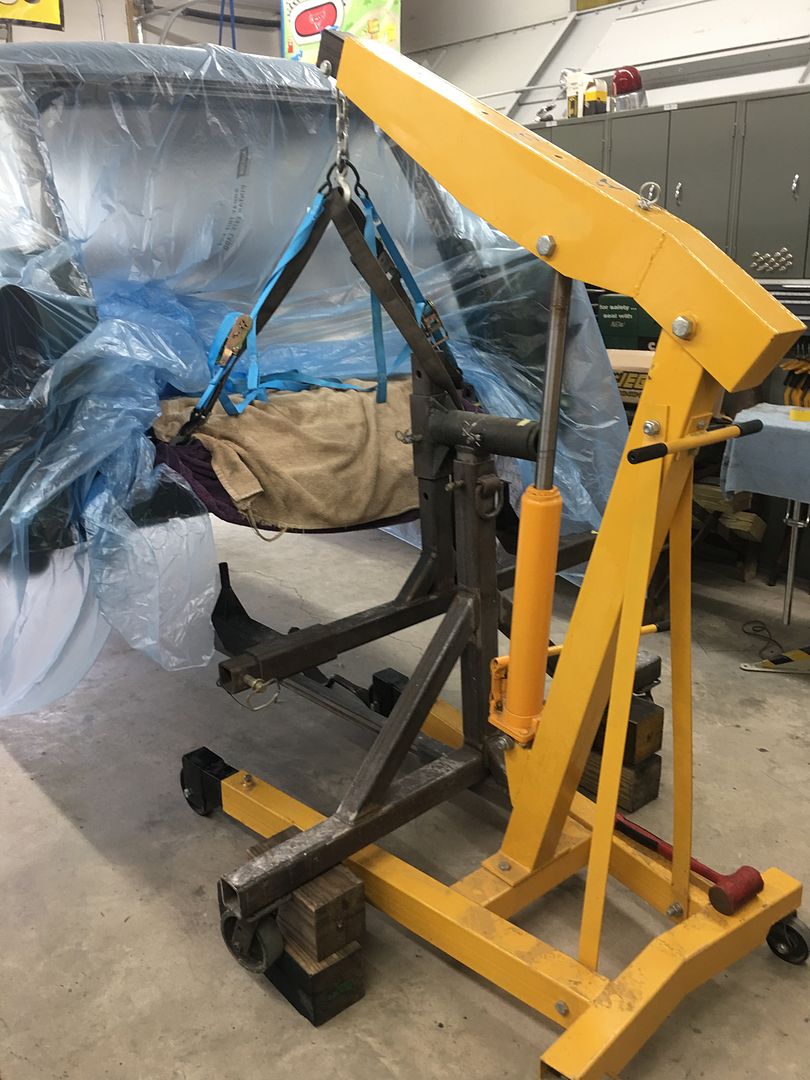
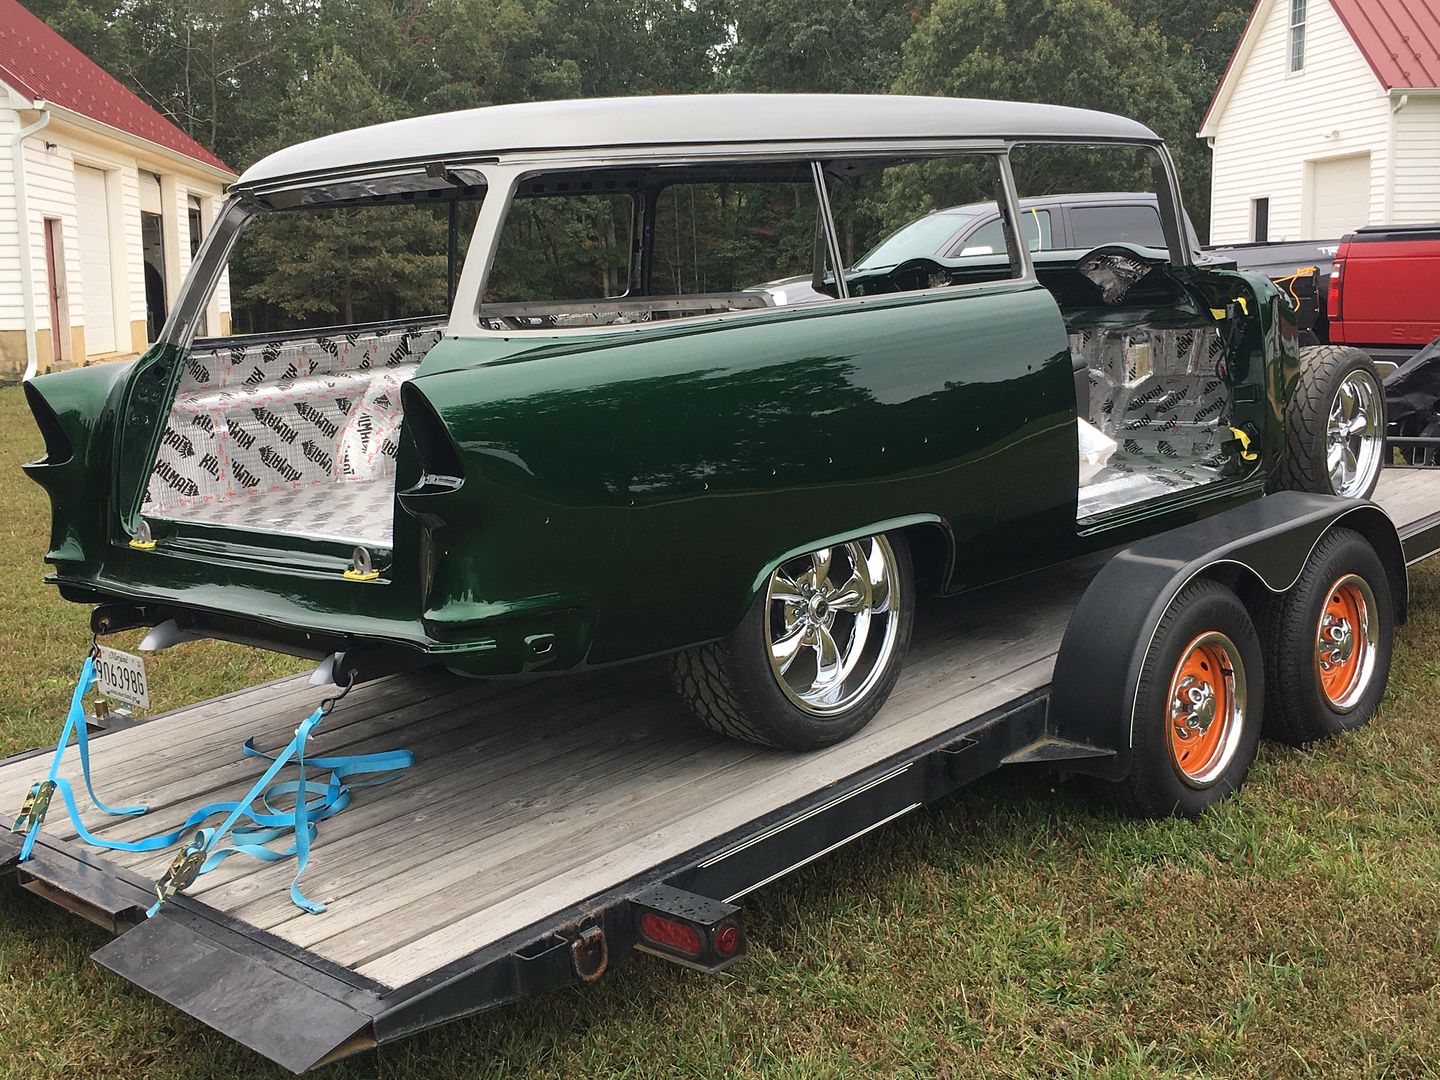
Well today was slated as lift-off day. So we got our lifting eyes installed on the body this morning and set up the lifting devices.
We loaded the frame onto the trailer, figured a winch would be easier than pushing..
Getting the body ready to separate from the rotisserie...

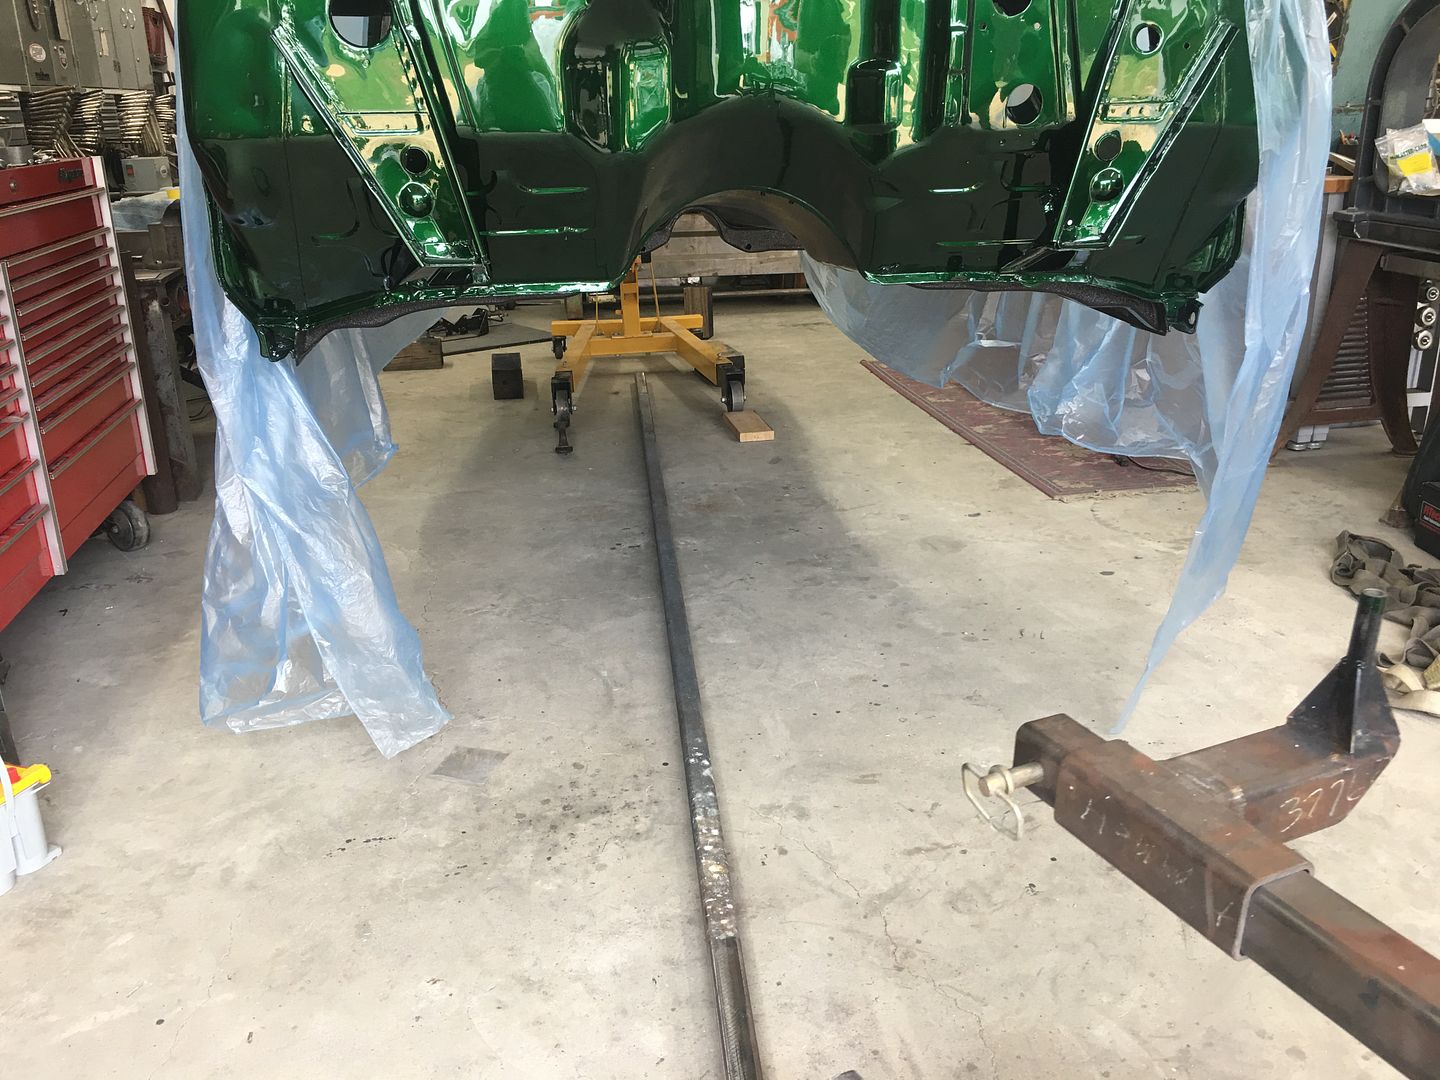

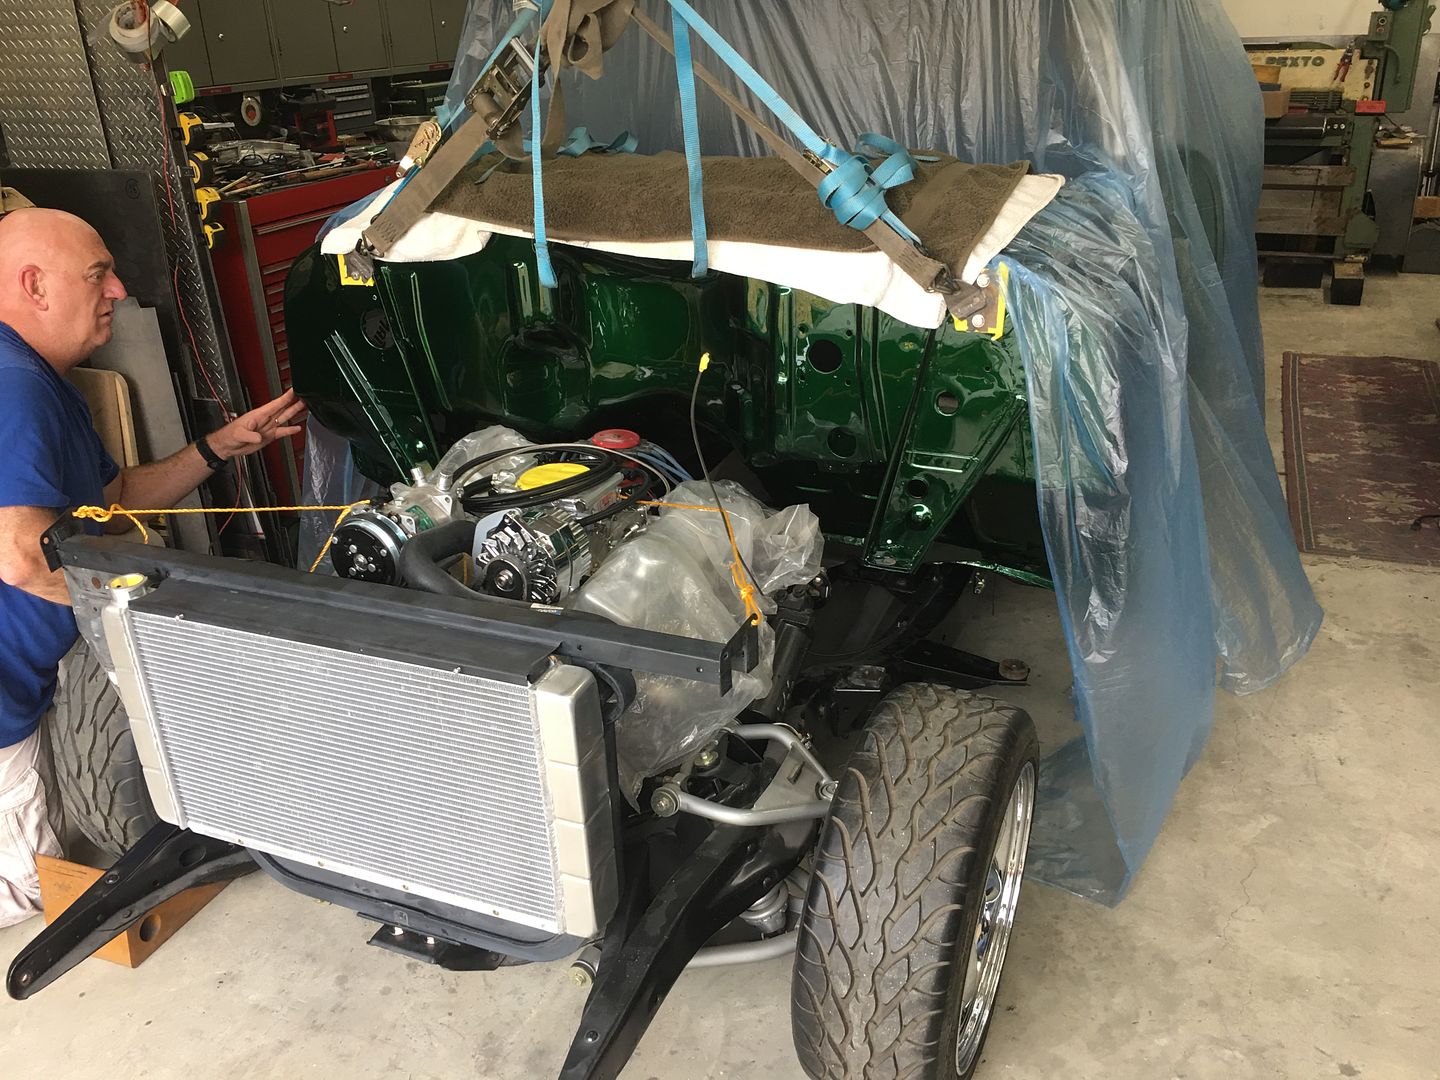
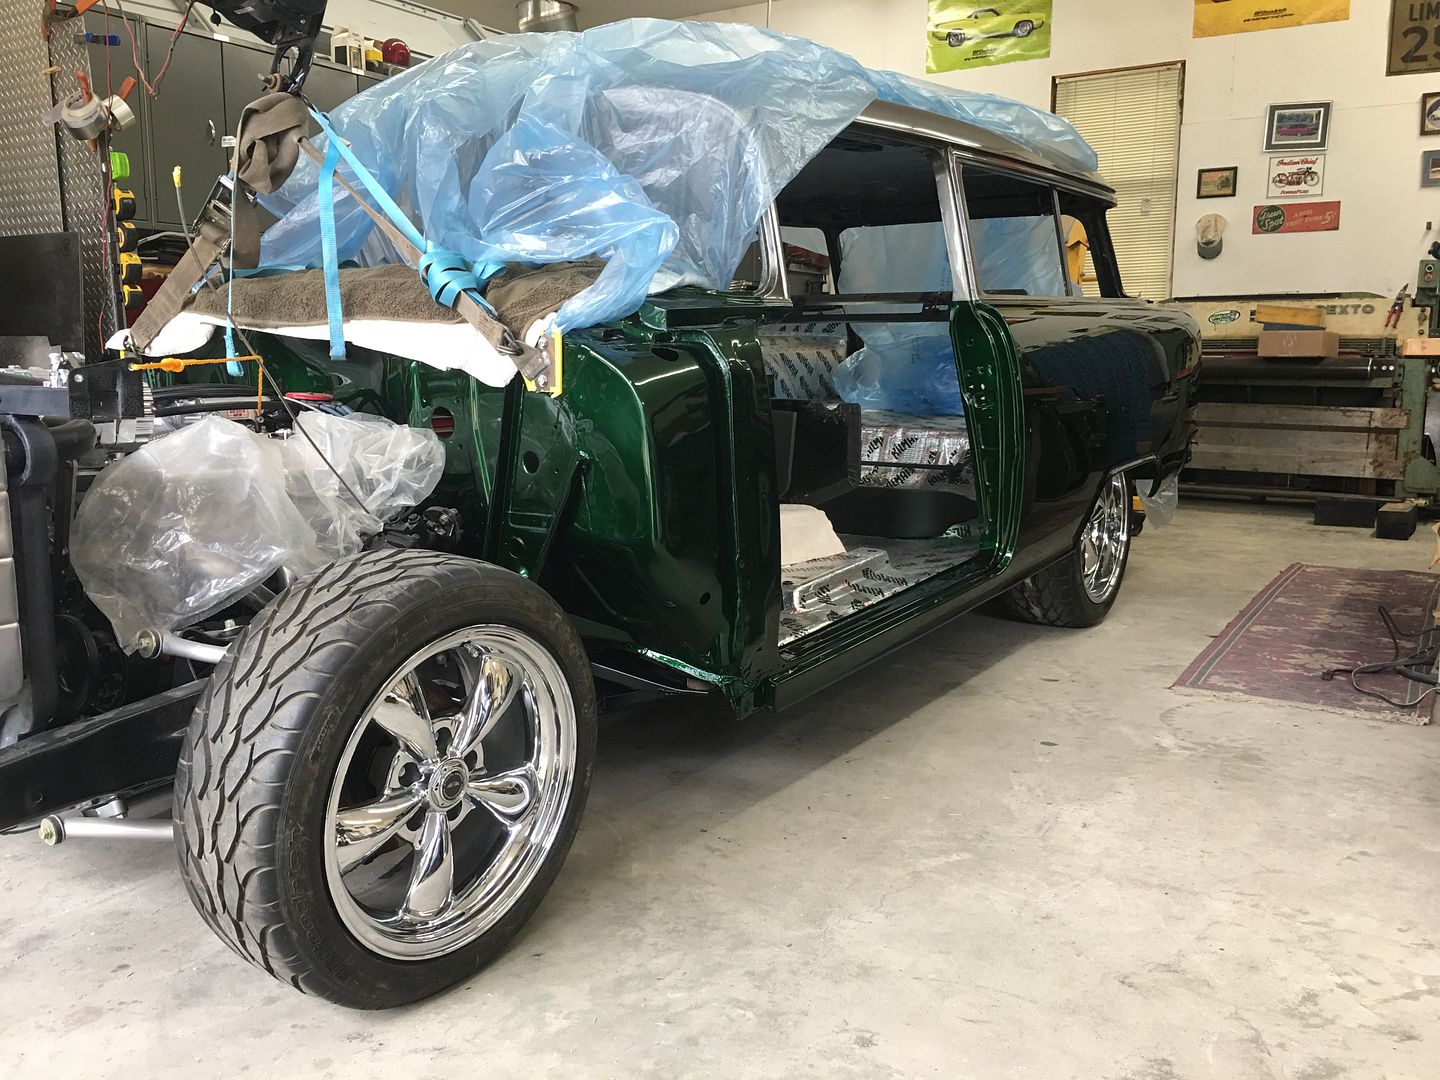
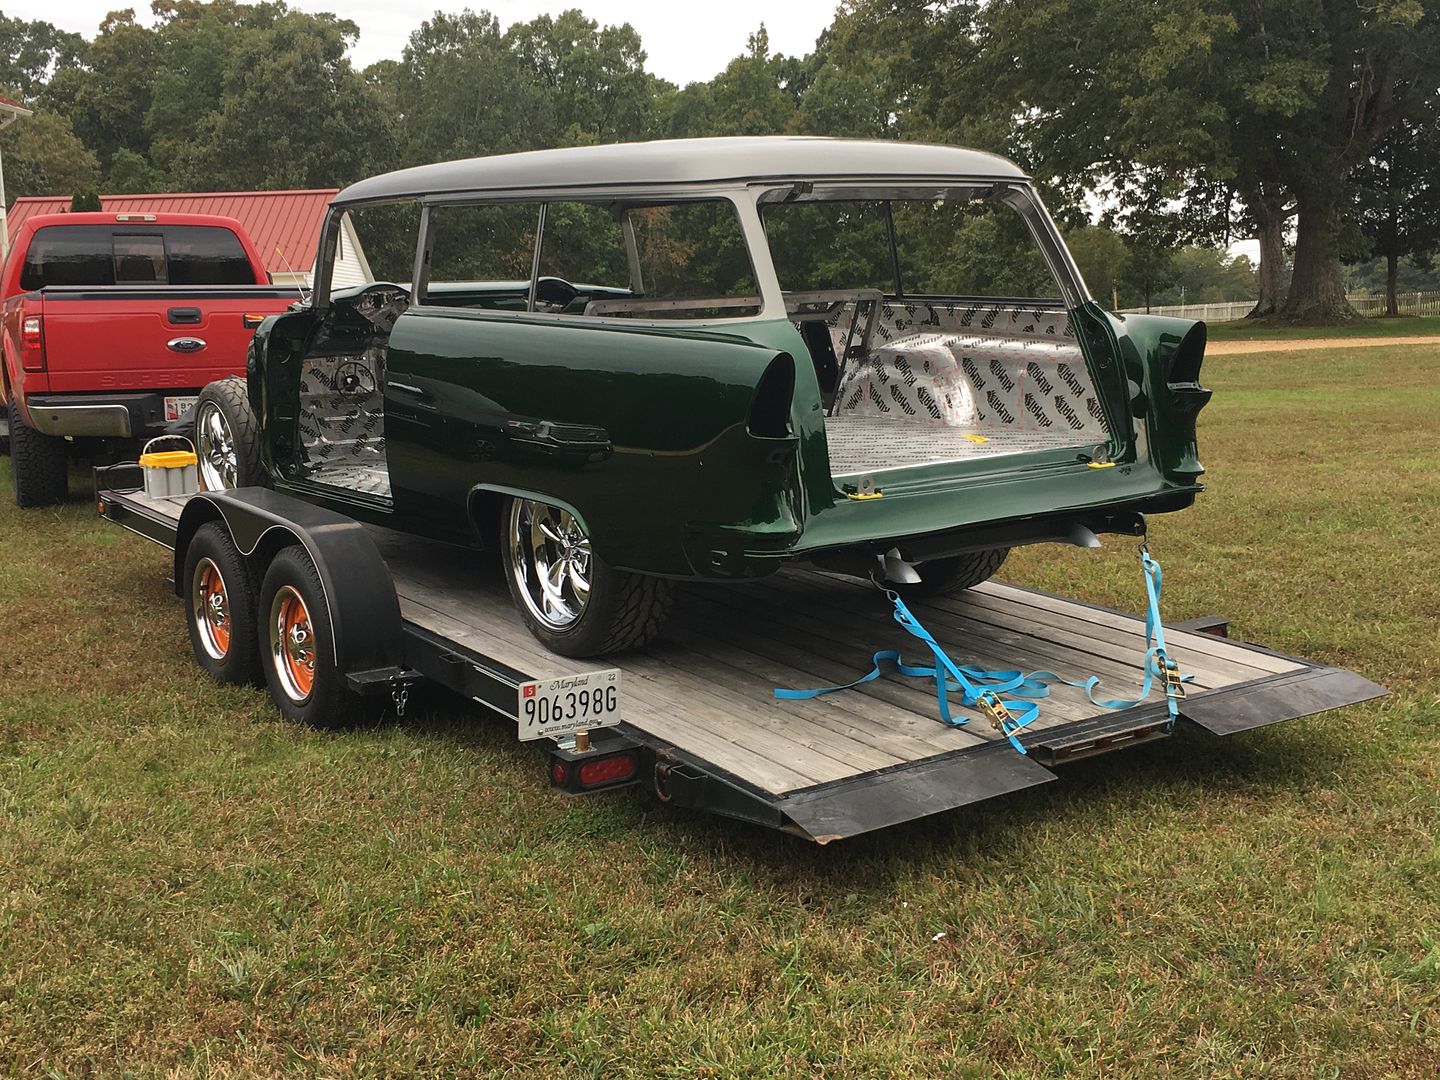
With the body bolted down, we moved it outside to take some pictures..
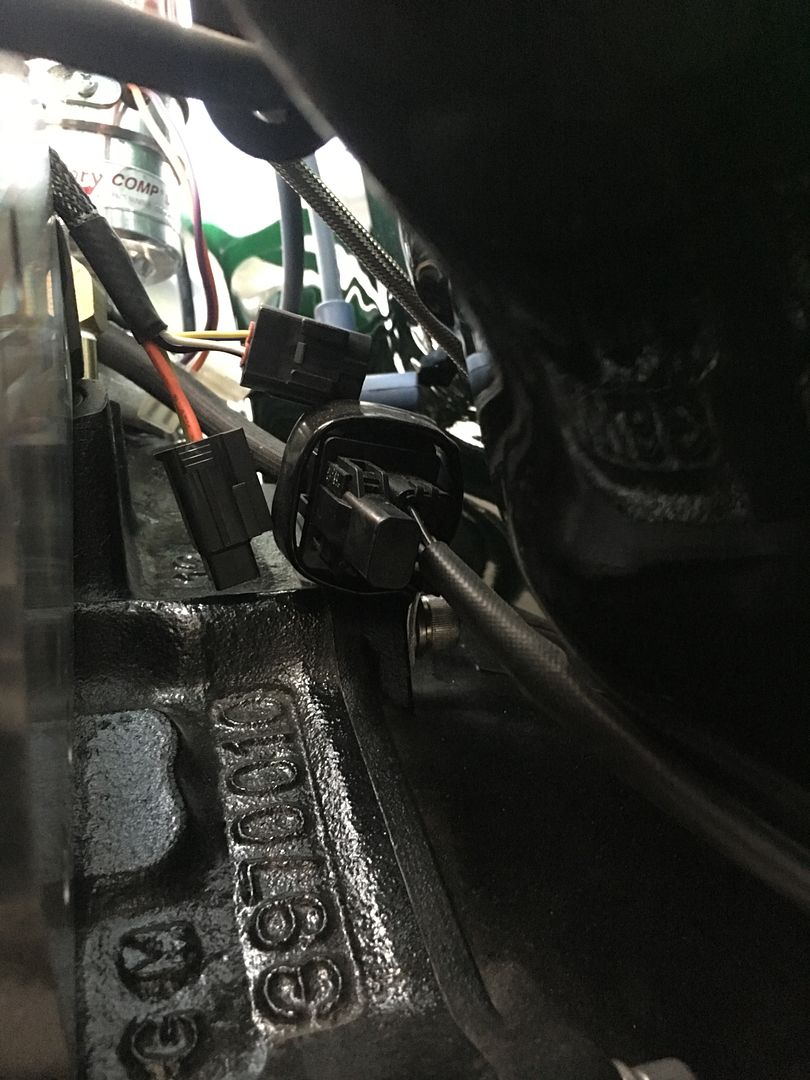
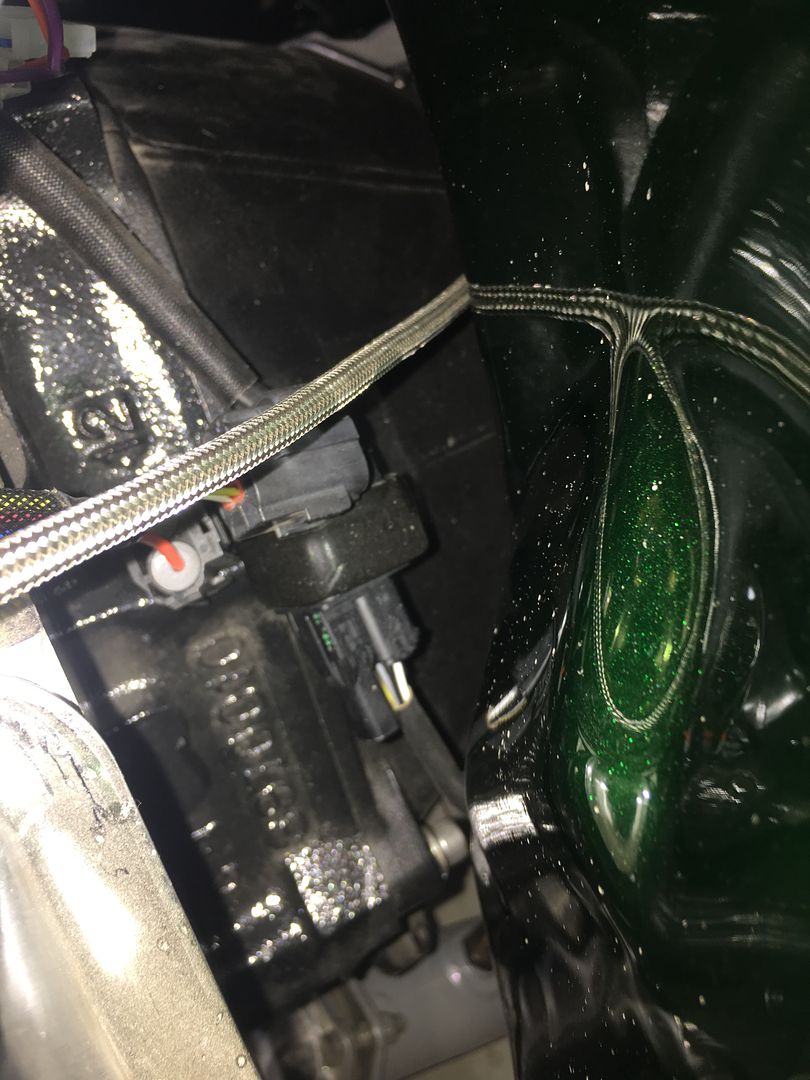
Here is the room we have behind the engine for access to the O2 sensor connector...
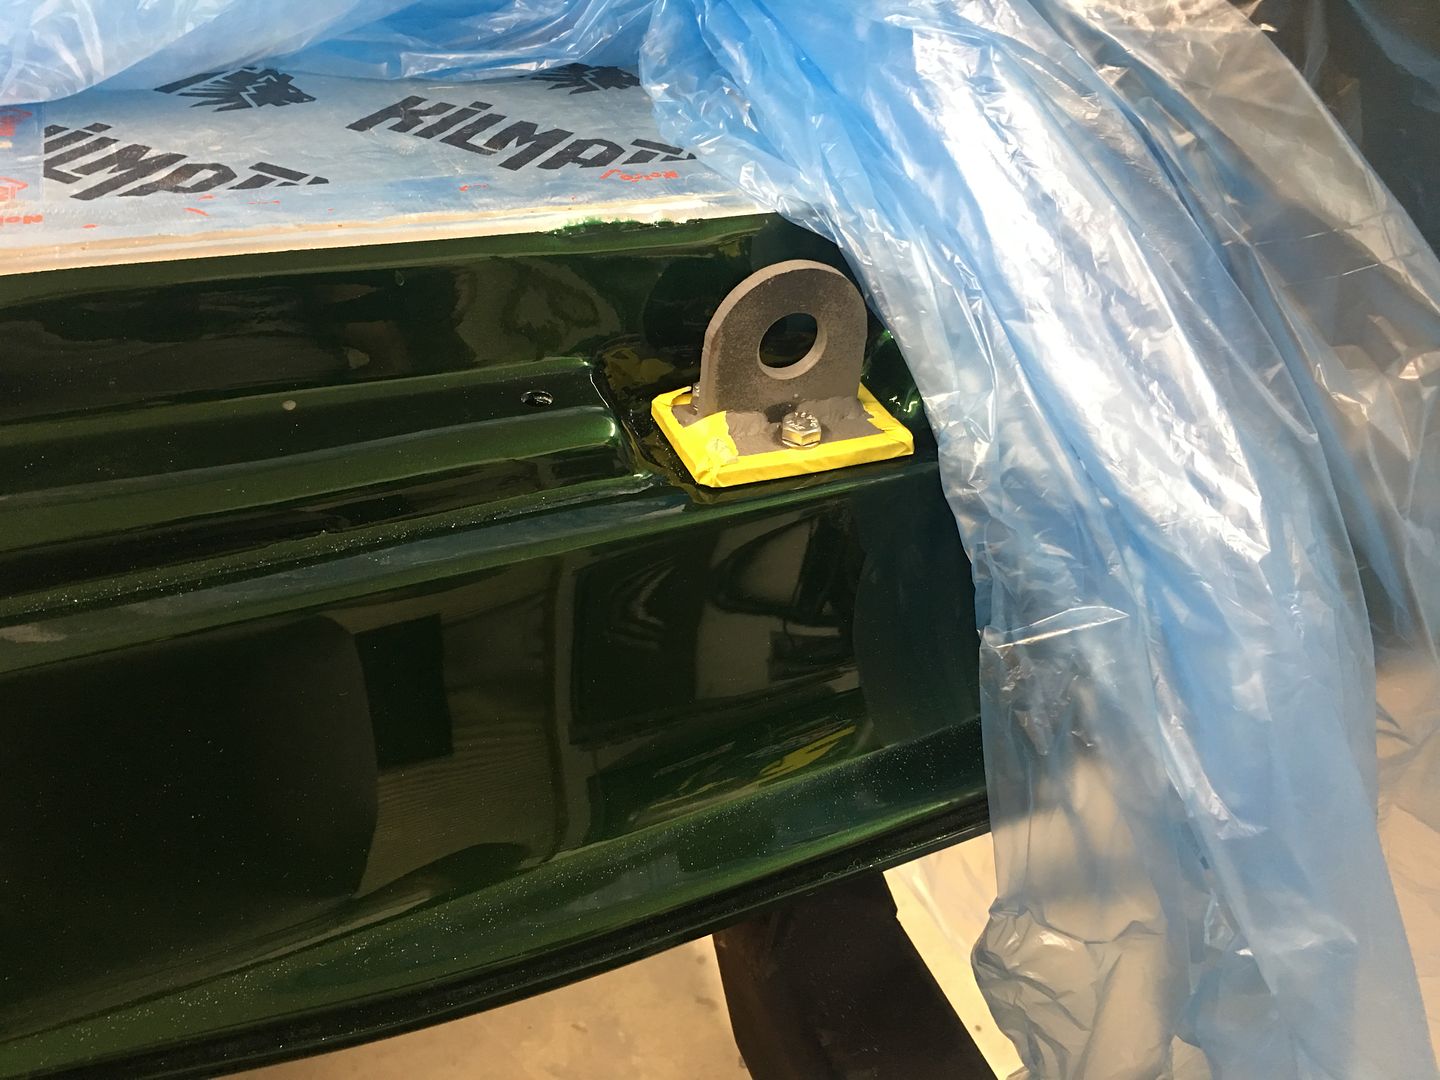
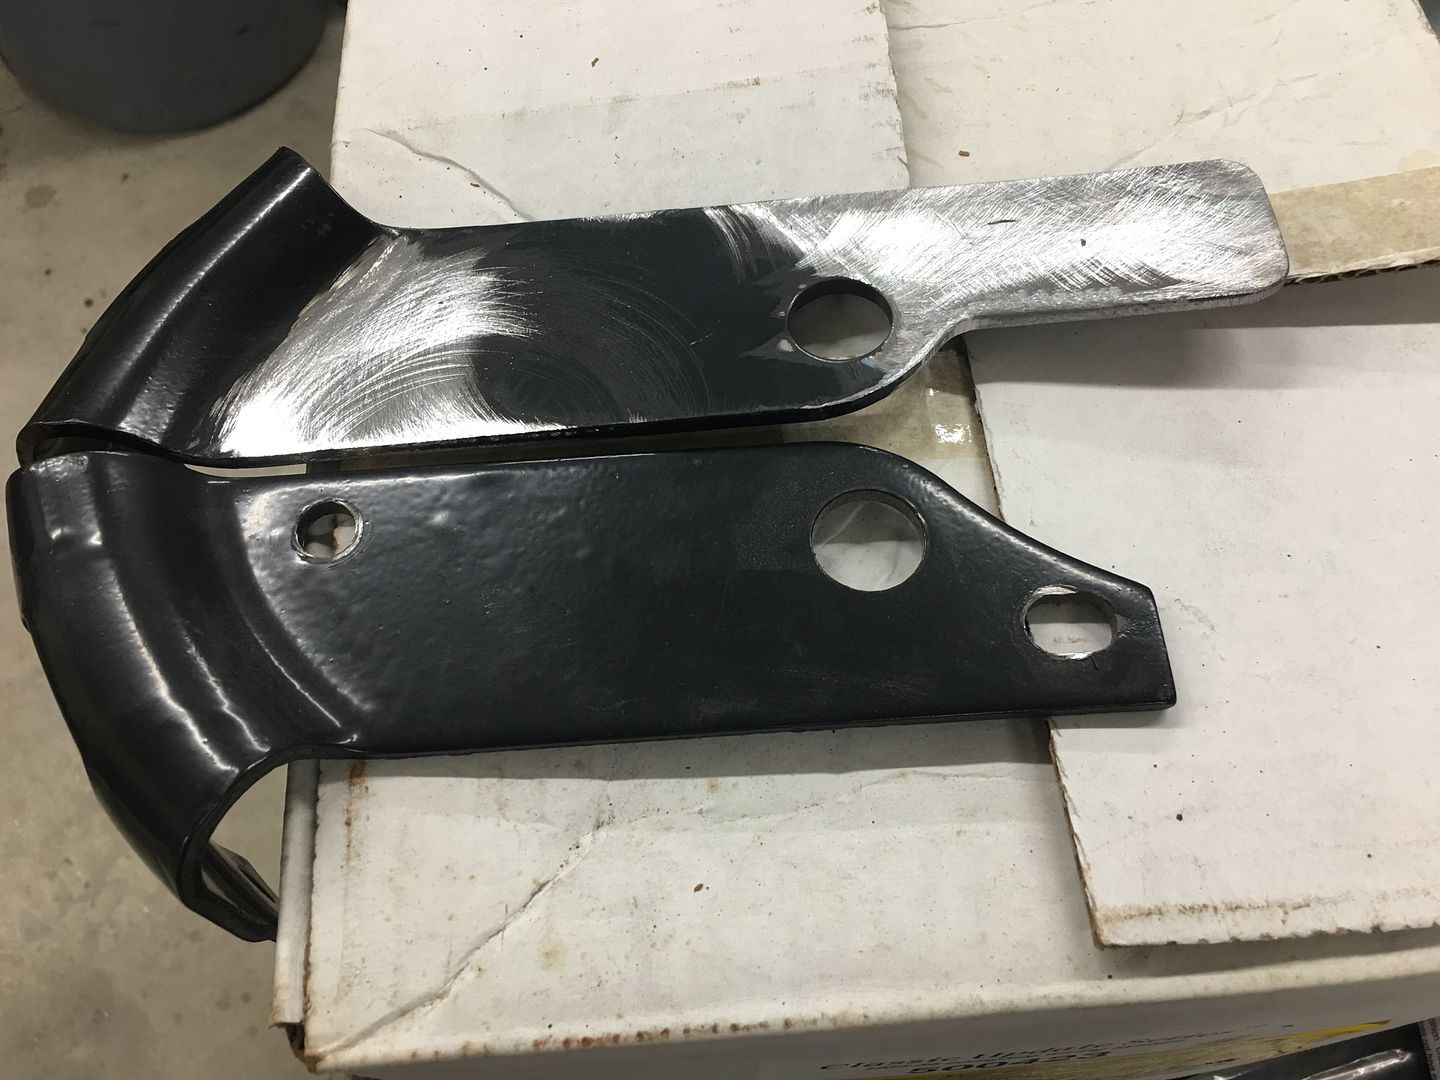
Our attempt to install the rear bumper so we could look at it with some chrome on the rear end did not fare well. The bumper brackets did not line up correctly, just my luck, so we added length and welded the original holes closed so they can be moved to the correct location...
Robert
-
10-11-2020 03:15 AM #5
CHR Member
- Join Date
- Sep 2007
- Location
- New Bedford
- Car Year, Make, Model: 34 Ford 3W Coupe Replica
- Posts
- 14,754
The last time? Not sure what I'll do once this one gets completed - hope you've got another one in the wings?!?!?!
Sure does look nice Robert.
-
10-11-2020 10:16 AM #6
CHR Member
- Join Date
- Jun 2008
- Location
- Leonardtown
- Car Year, Make, Model: Walking
- Posts
- 1,228
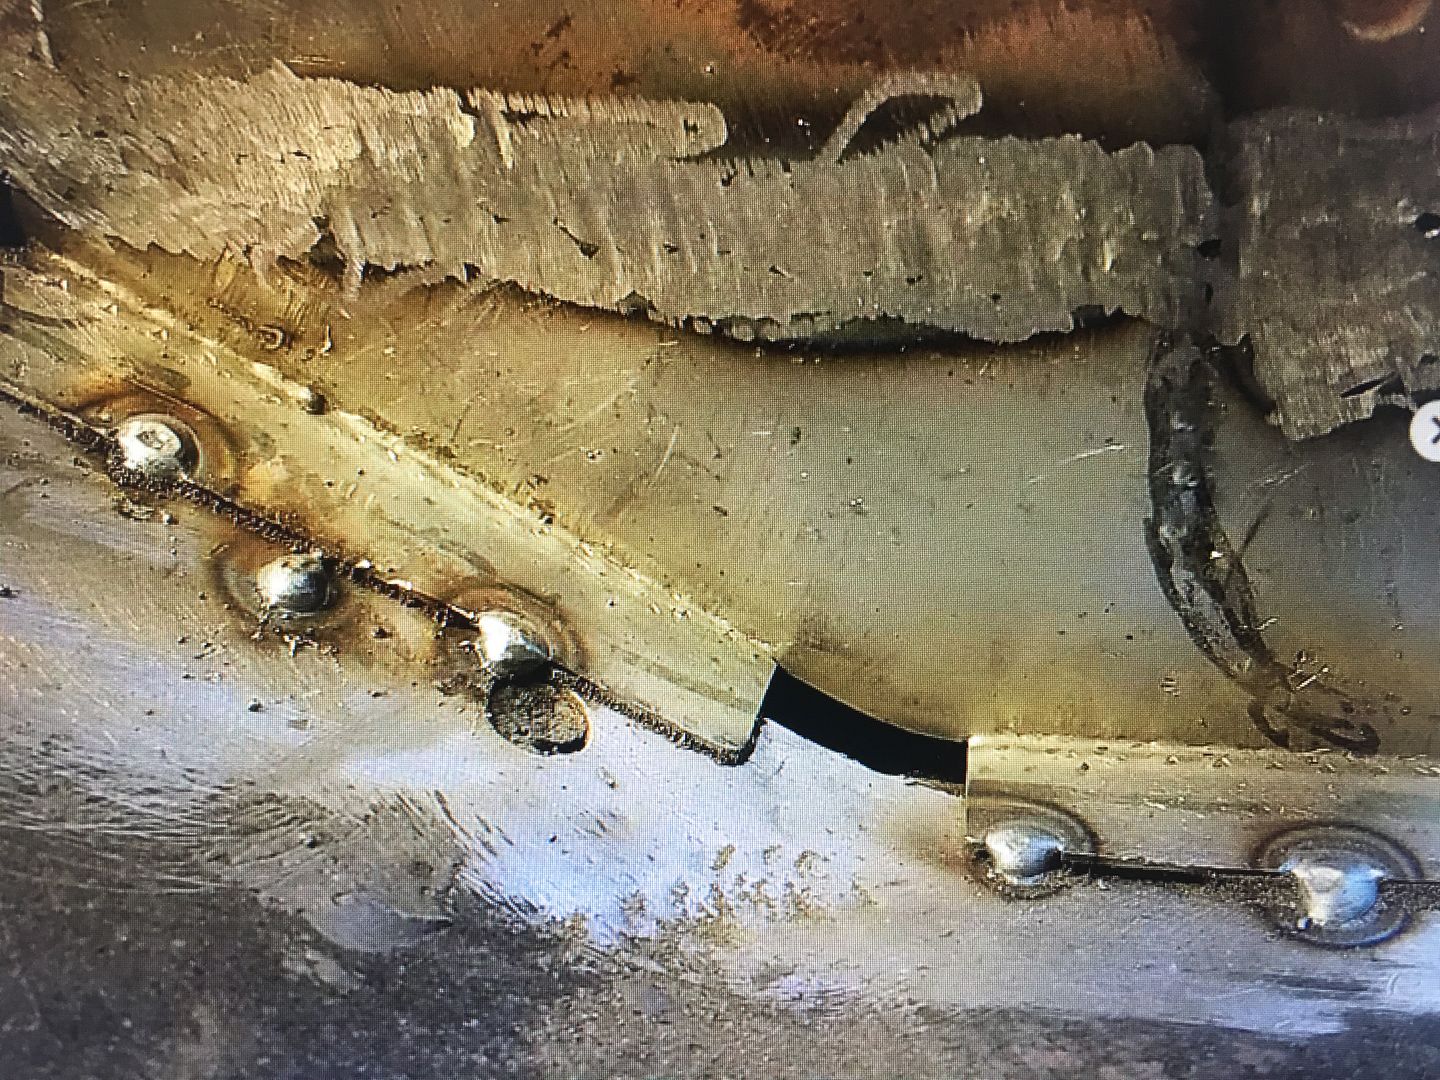
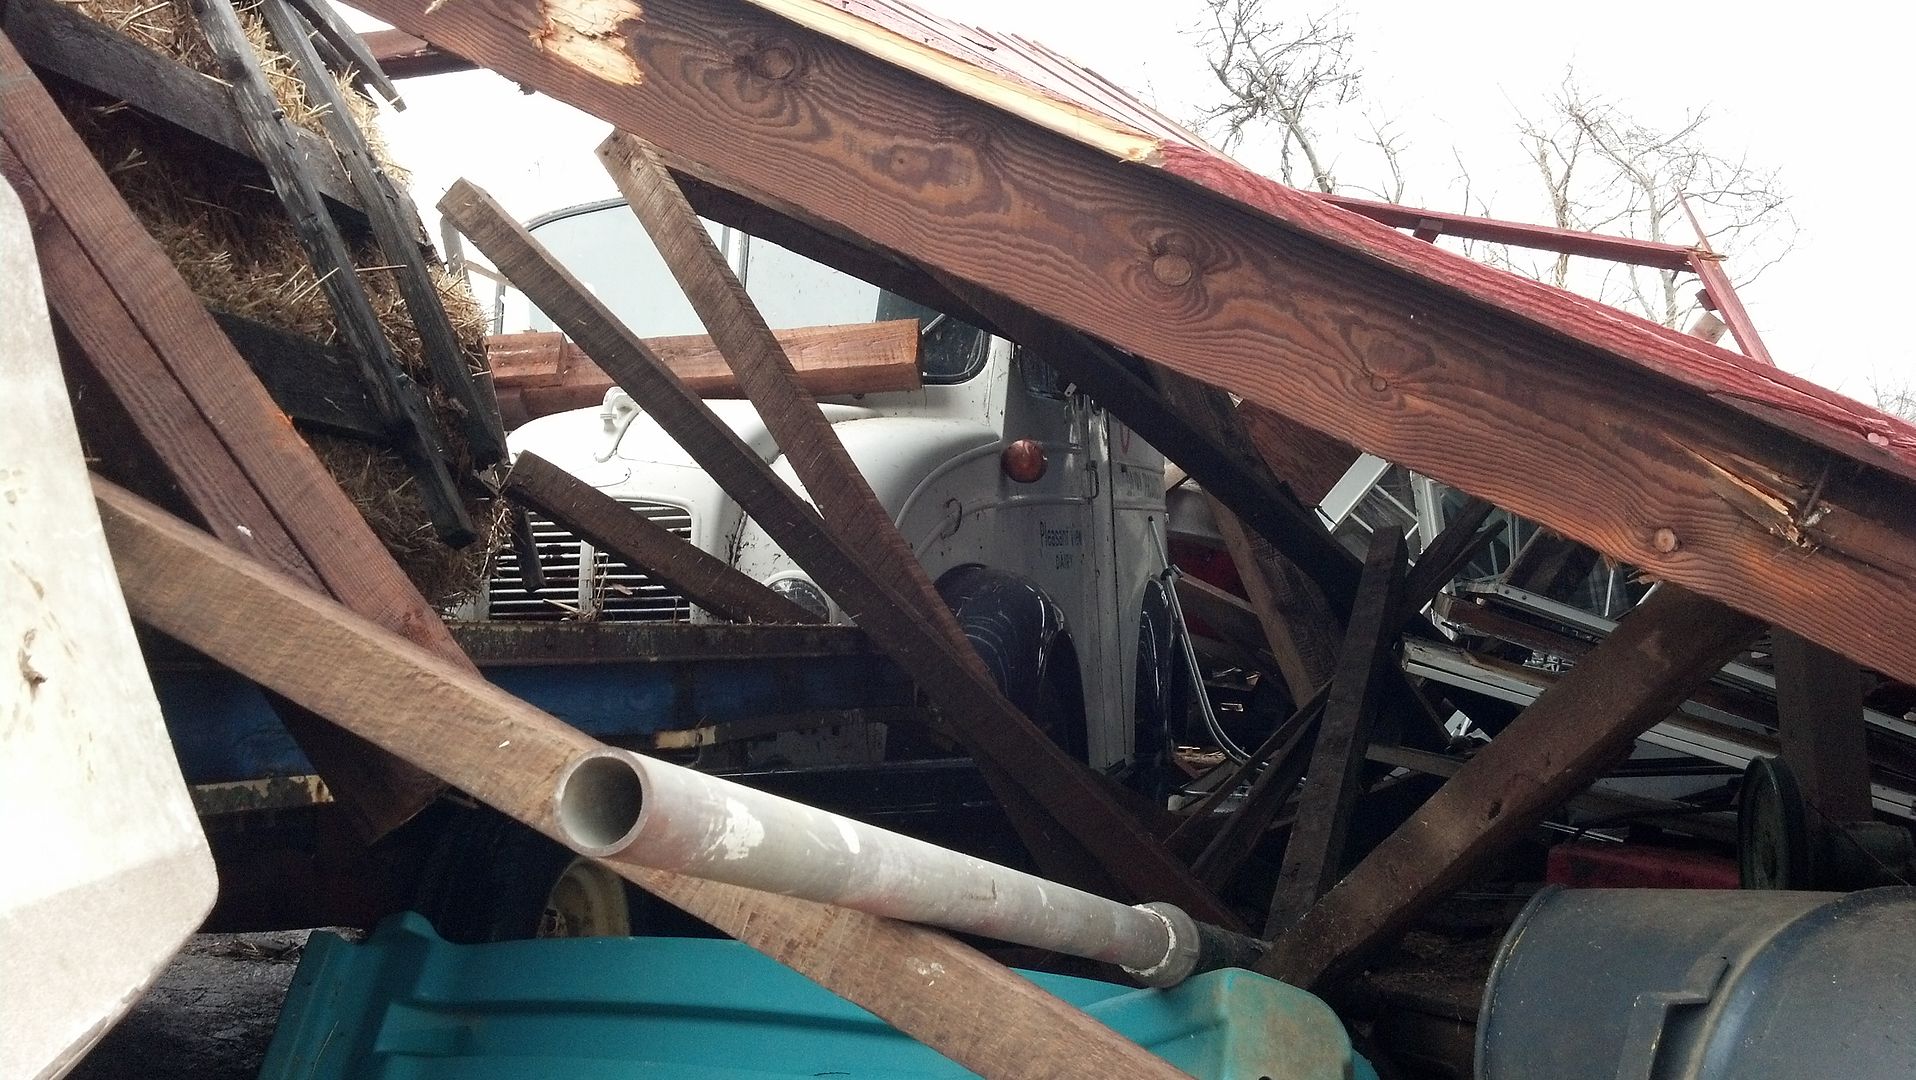
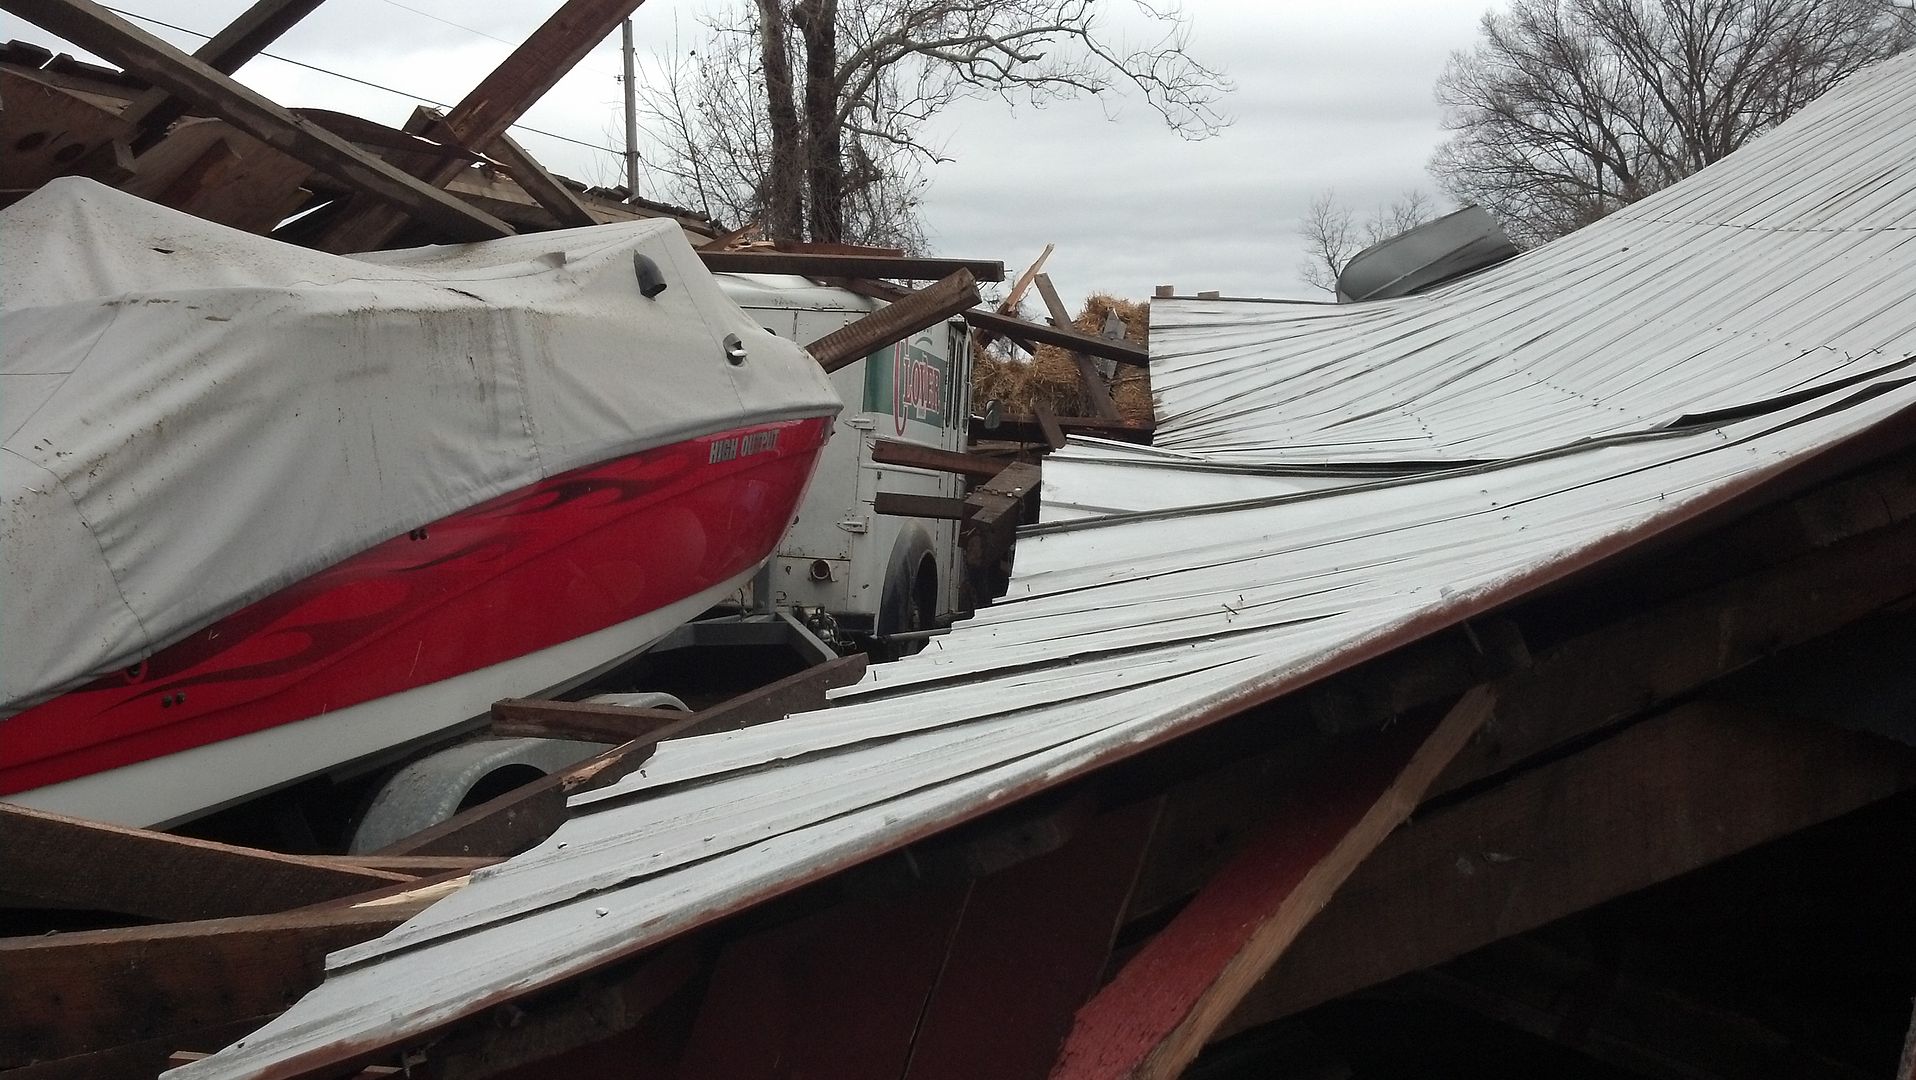
We have a 1954 Divco next, we have this carnage here to repair....

Robert
-
10-11-2020 01:07 PM #7
CHR Member
- Join Date
- Sep 2007
- Location
- New Bedford
- Car Year, Make, Model: 34 Ford 3W Coupe Replica
- Posts
- 14,754
OUCH! Do you know what brought the building down? It must be one special truck! LOL From memory... Detroit Industrial Vehicle Company = DIVCO.... yes/no?
-
10-11-2020 02:19 PM #8
CHR Member
- Join Date
- Jun 2008
- Location
- Leonardtown
- Car Year, Make, Model: Walking
- Posts
- 1,228
Yes, Detroit Industrial Vehicle... It was being stored in a barn and a tornado went through the area in close proximity, sheer force winds blew the barn straight over. I got pictures of everything on top of it to better see how the dents formed for when it comes time for dent removal.. It was about as rust free as you can get, two small spots about 1" and less in diameter. And WAS dent free.. WAS.
Robert
-
10-11-2020 03:26 PM #9
CHR Member
- Join Date
- Sep 2007
- Location
- New Bedford
- Car Year, Make, Model: 34 Ford 3W Coupe Replica
- Posts
- 14,754
I think I remember your trip to inspect this.. you shared pictures of this before didn't you? Originally Posted by MP&C

-
10-19-2020 06:13 AM #10
CHR Member
- Join Date
- Jun 2008
- Location
- Leonardtown
- Car Year, Make, Model: Walking
- Posts
- 1,228
Yes indeed..
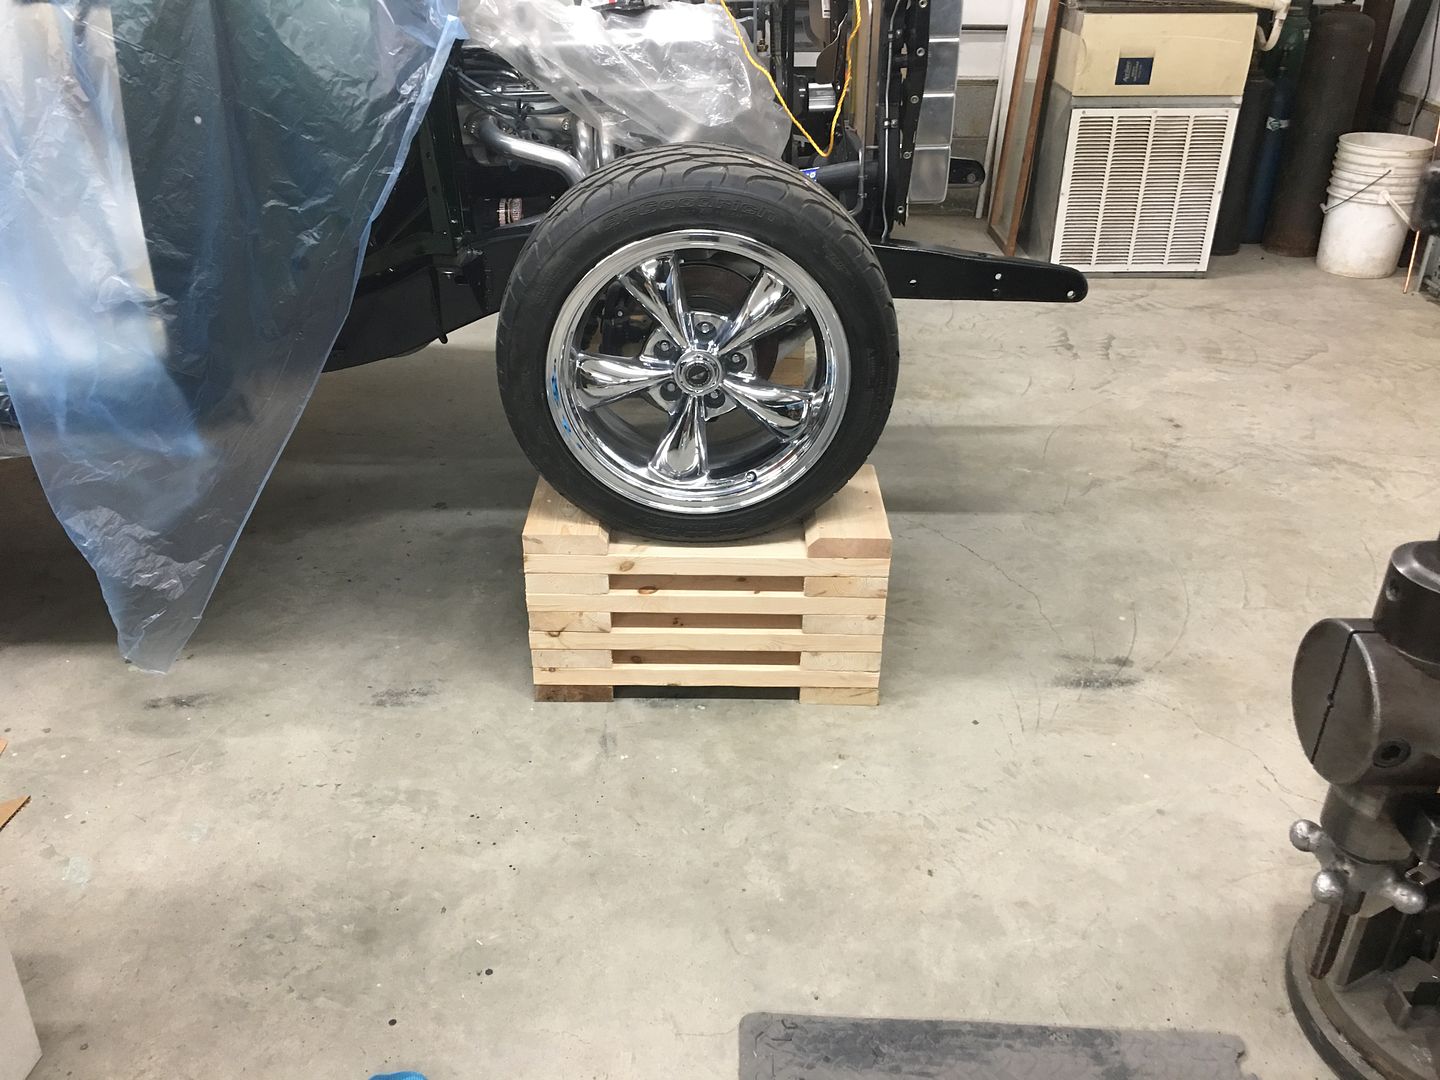
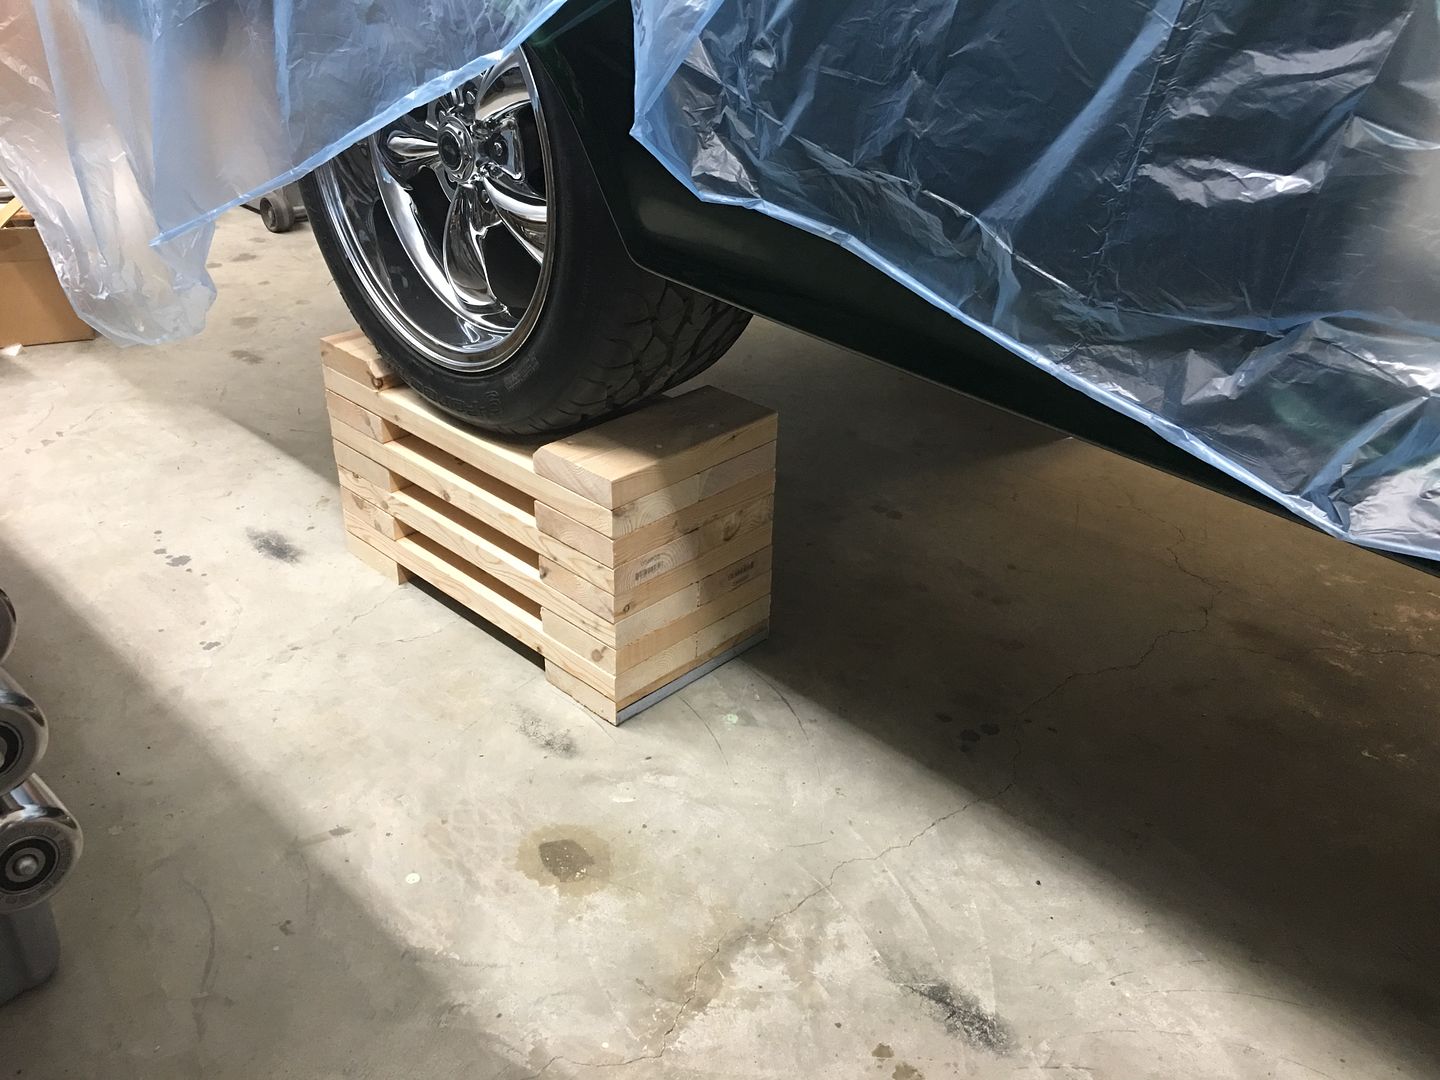
So this weekend we played with blocks. Made from 2x6's, and gave the wagon a lift kit. This should help in using a creeper for any underside work..
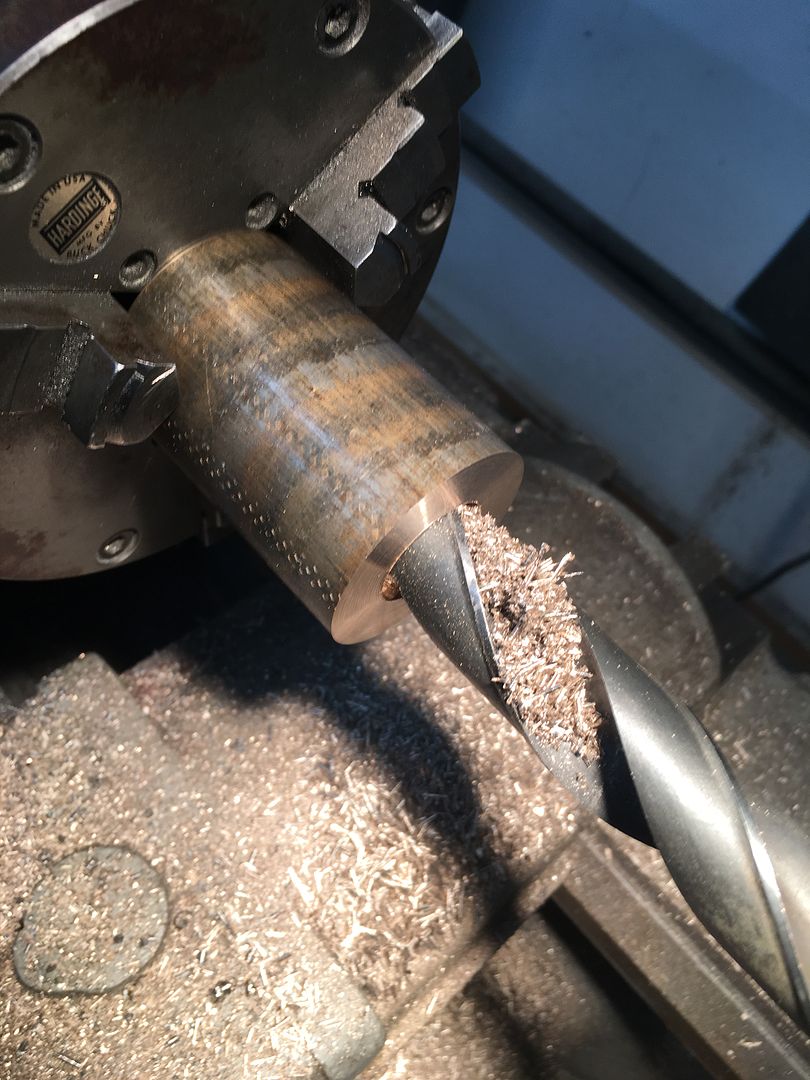
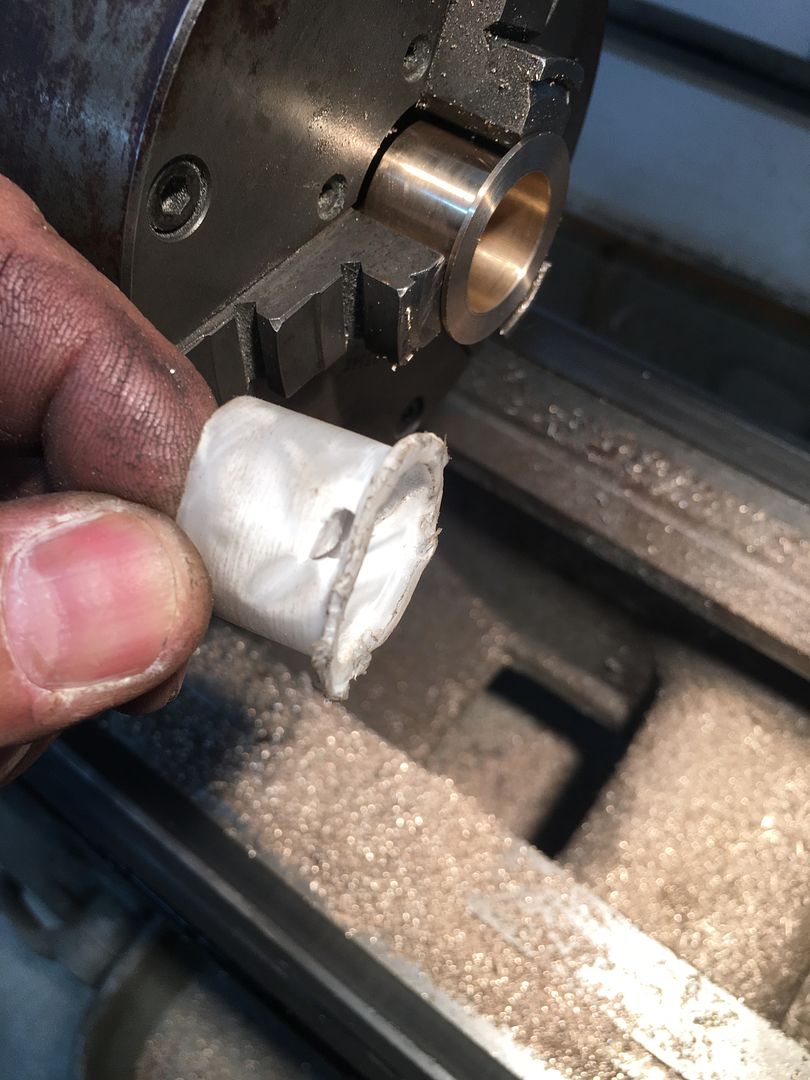
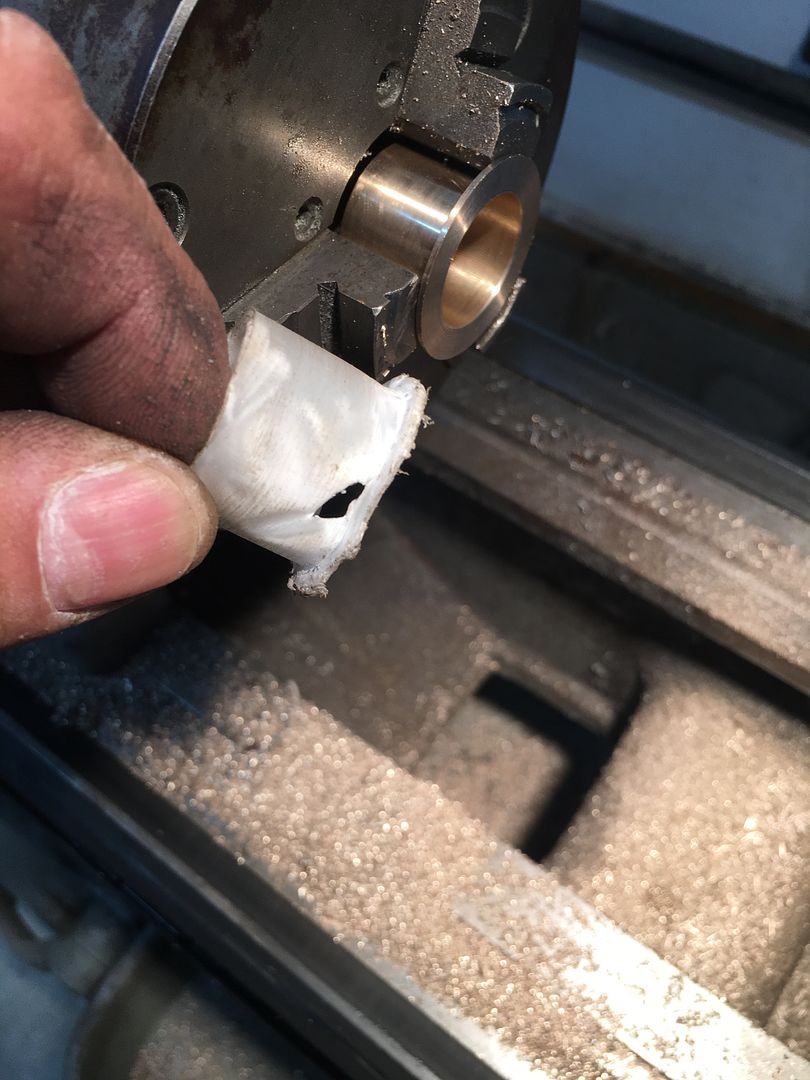
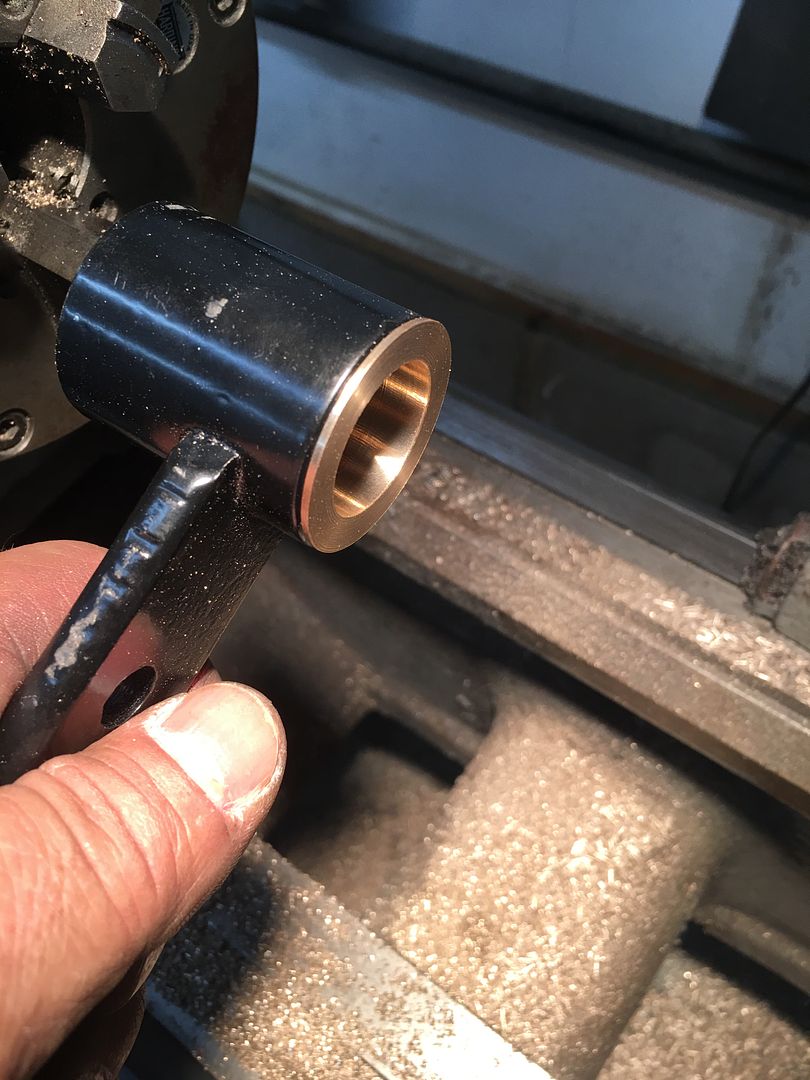
Mike wanted to get started on the wiring harness, but we thought it best to install the brake bracket assy first. As luck would have it, the plastic bushings did not fare well with the install. We took the opportunity to make bushings out of oilite bronze, something more fitting in a 55 Chevy over plastic.

https://www.youtube.com/watch?v=4Ibn...ature=youtu.be
.Robert
-
10-26-2020 04:28 AM #11
CHR Member
- Join Date
- Jun 2008
- Location
- Leonardtown
- Car Year, Make, Model: Walking
- Posts
- 1,228
With the brake pedal sporting new oilite bronze bushings, Mike got all the pedal assemblies installed, and hole drilled in the floor for the parking brake cable.. Then on to underneath stuff, installing the flex plate bolts and torqueing them down. We used the starter to bump the engine around, and found we also needed to shim the starter, so that was done.
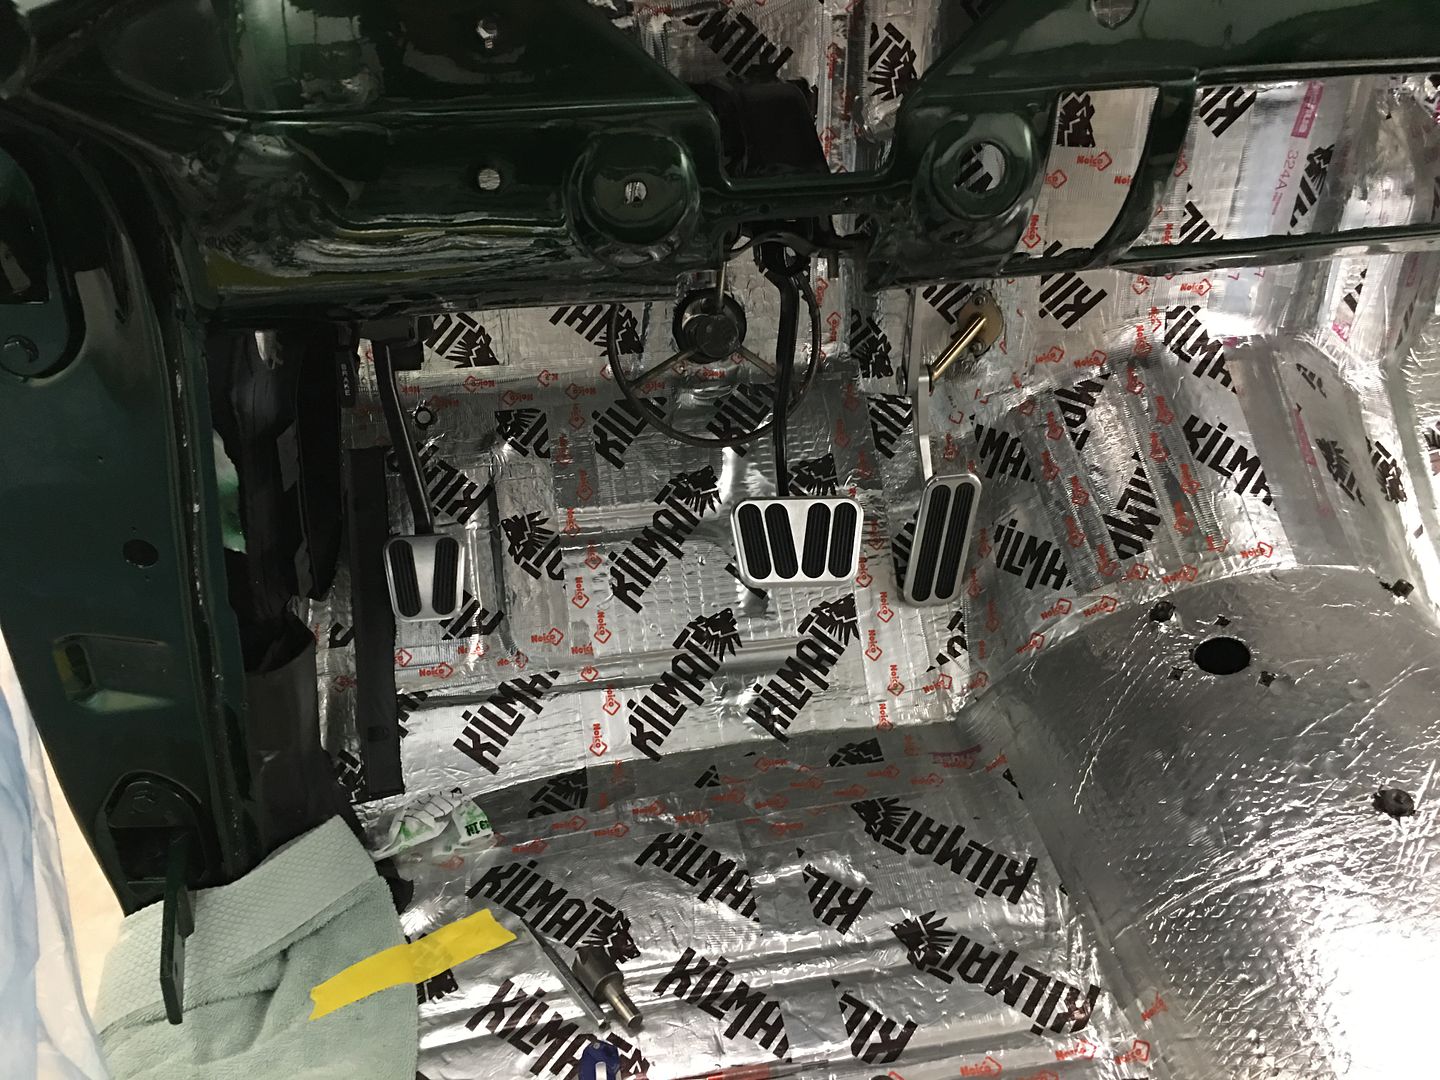
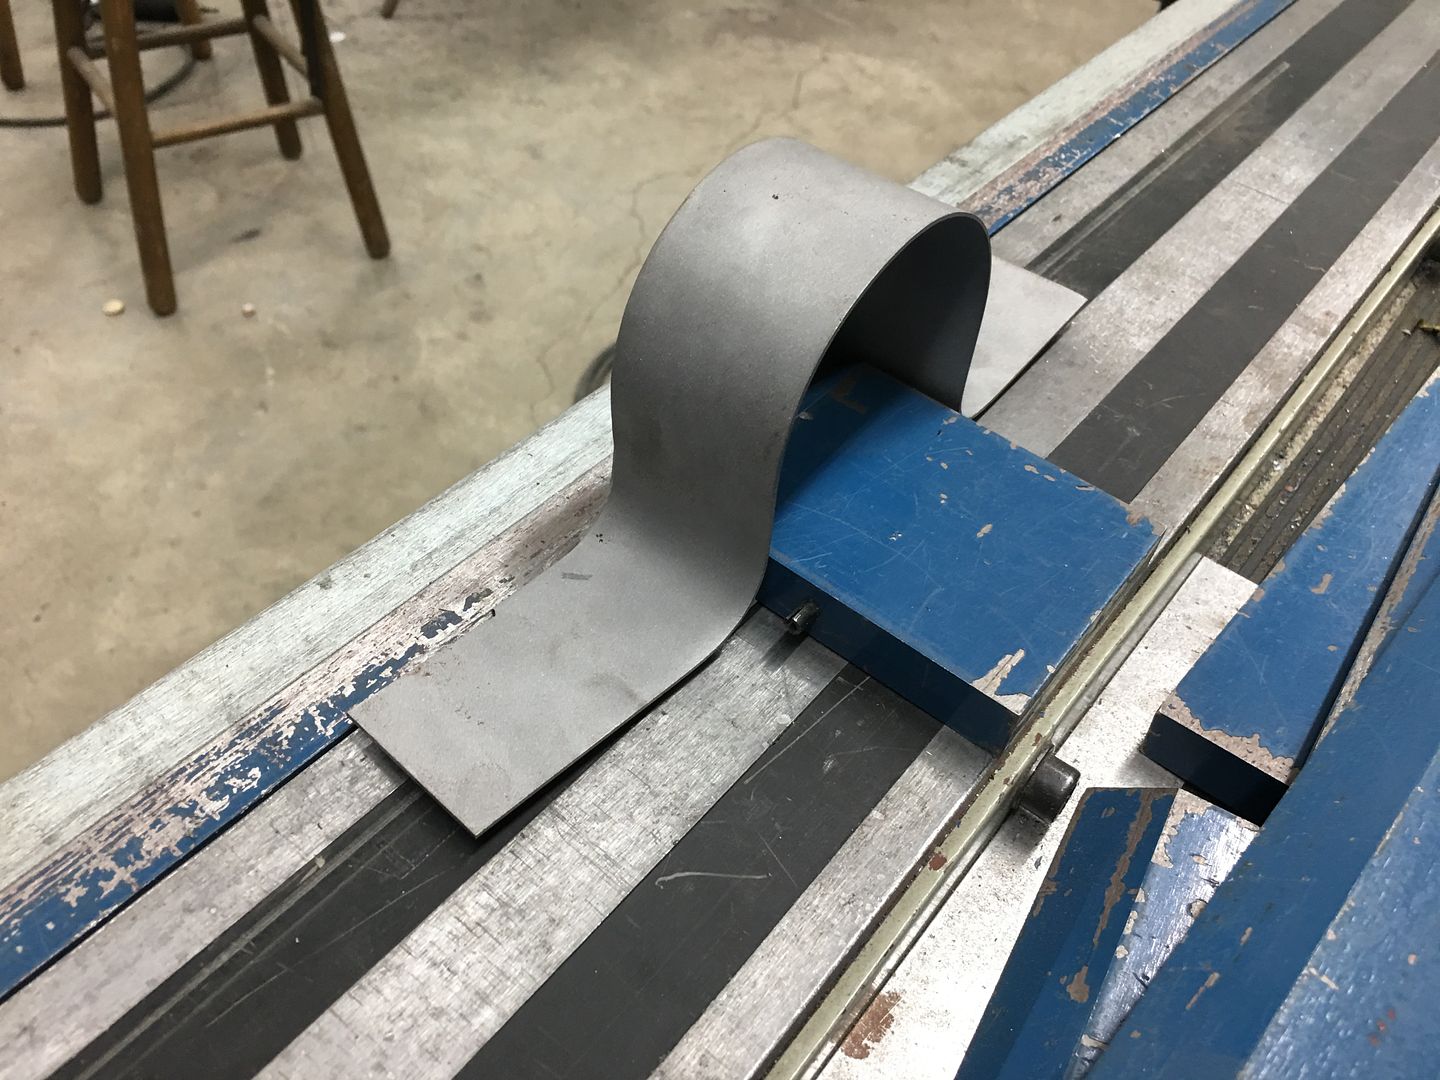
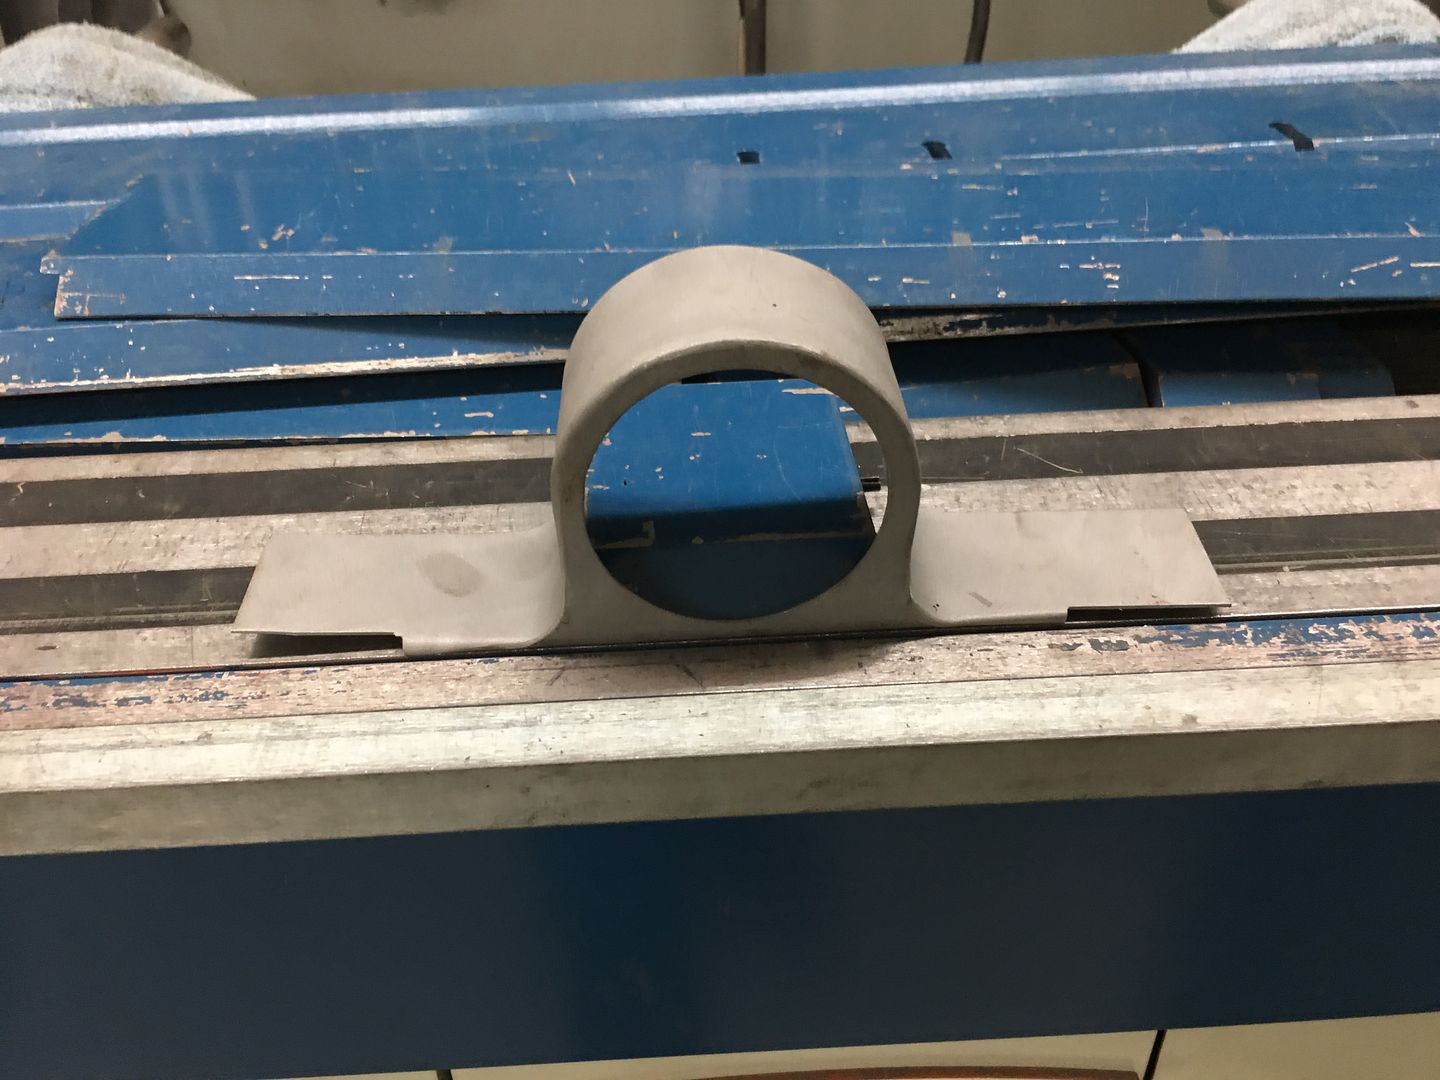
The AC vent brackets were folded using the magnetic brake....
Then trim the ends and one more media blast session to get it ready for epoxy primer.
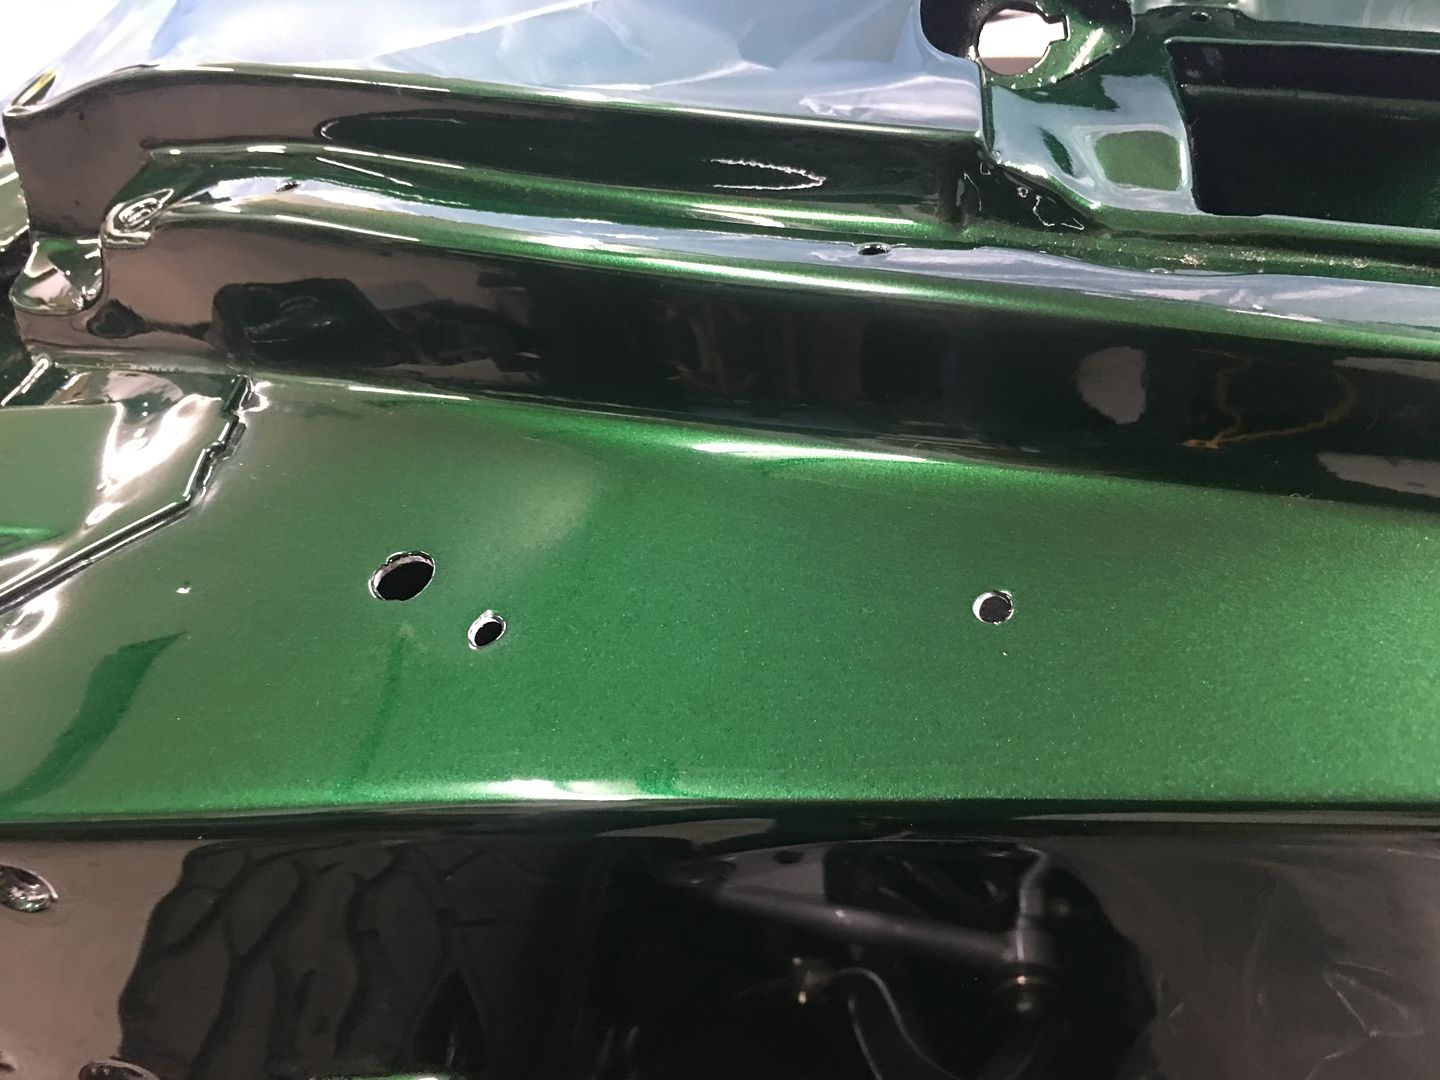
Jared and I worked on getting all the body mounts snugged down, and then turned attention to the rear bumper. In the stock configuration this is slightly wide, so we had opted for a slice and dice and making the three piece bumper into a one piece..
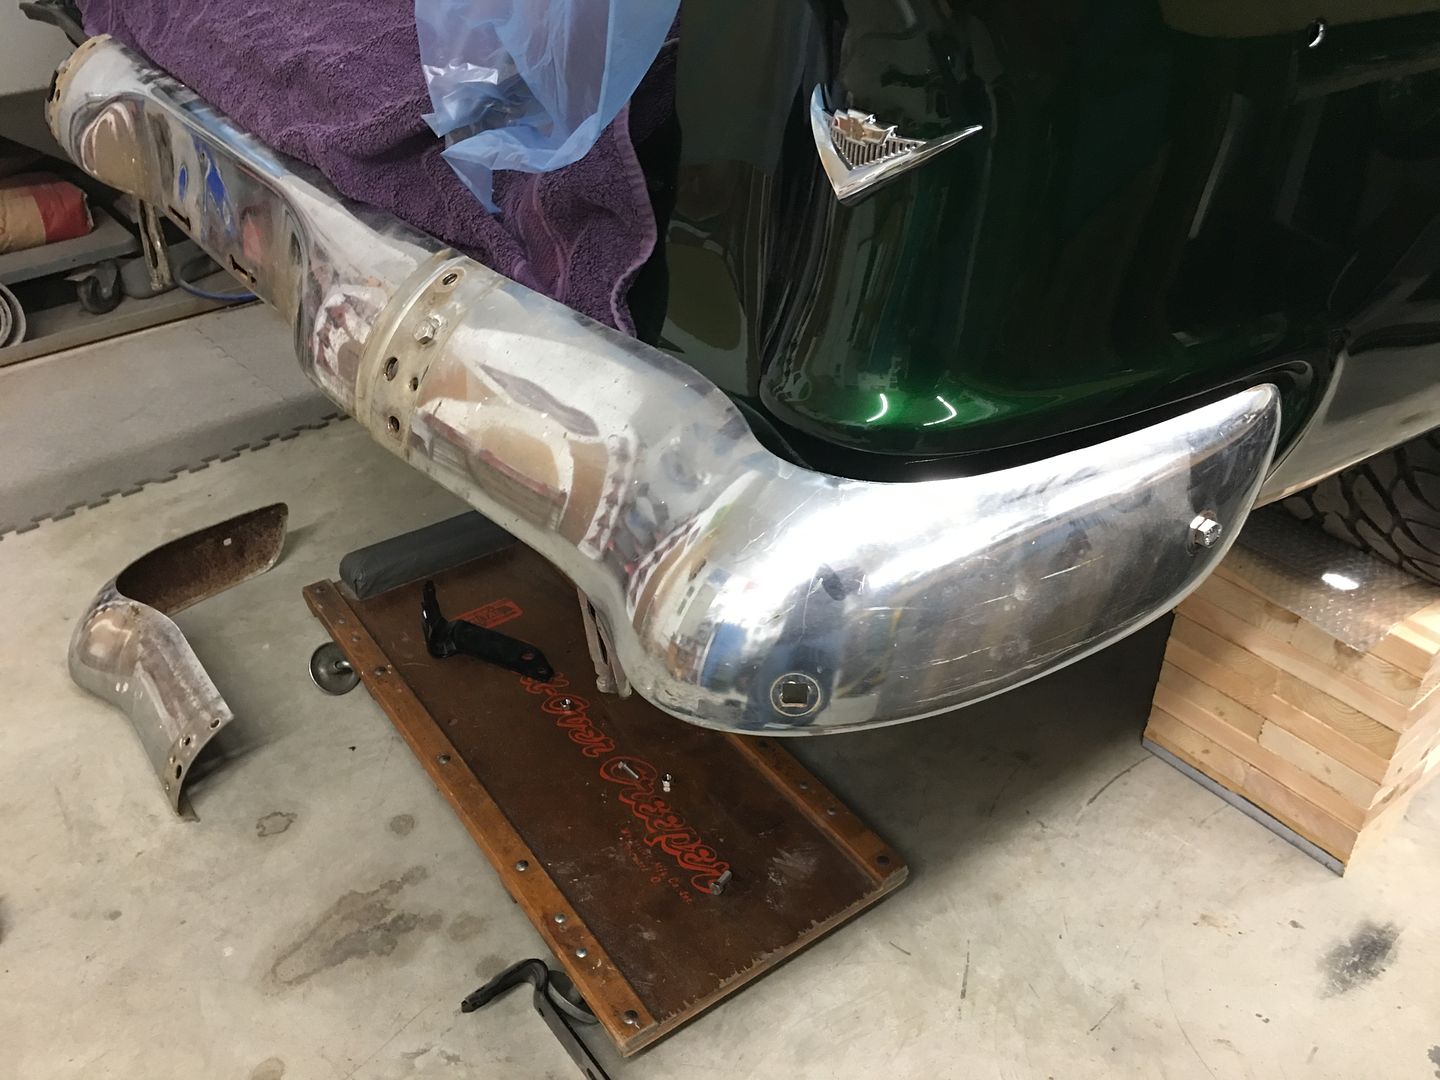
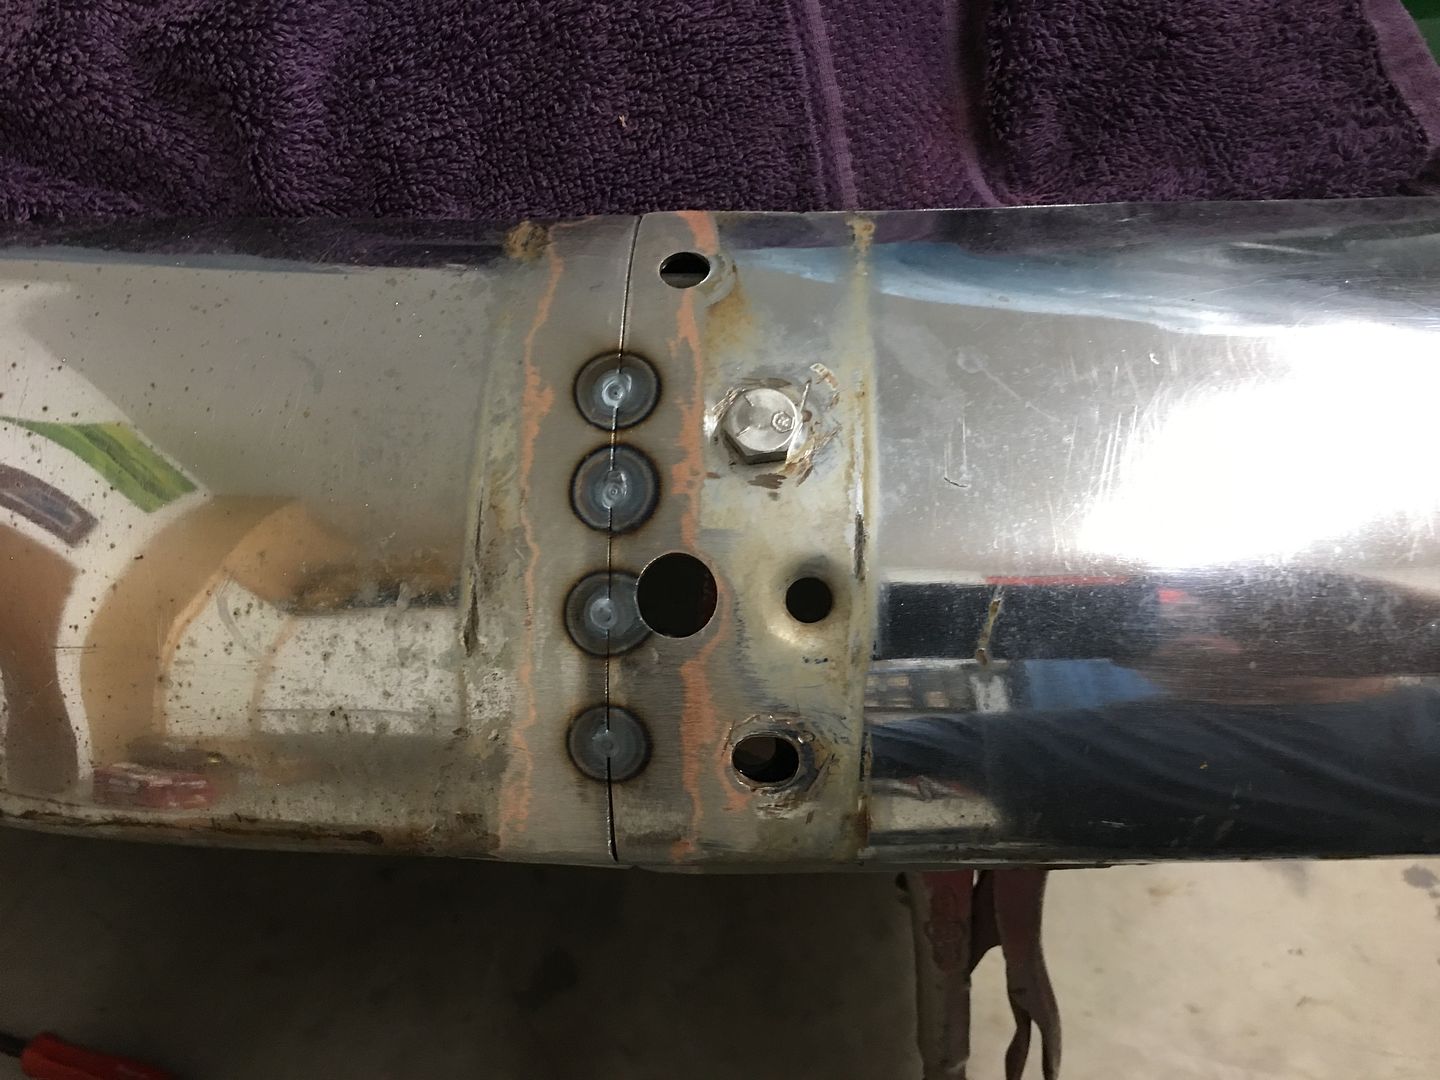
We had intended to get this done prior to paint, just one of those things that slipped through the cracks before it got sent out for paintwork. We did have some rags used between the bumper and body to prevent any damage, and removed them for pictures. The final fitment after tacking:
https://www.youtube.com/watch?v=CiSJfE7_i4E
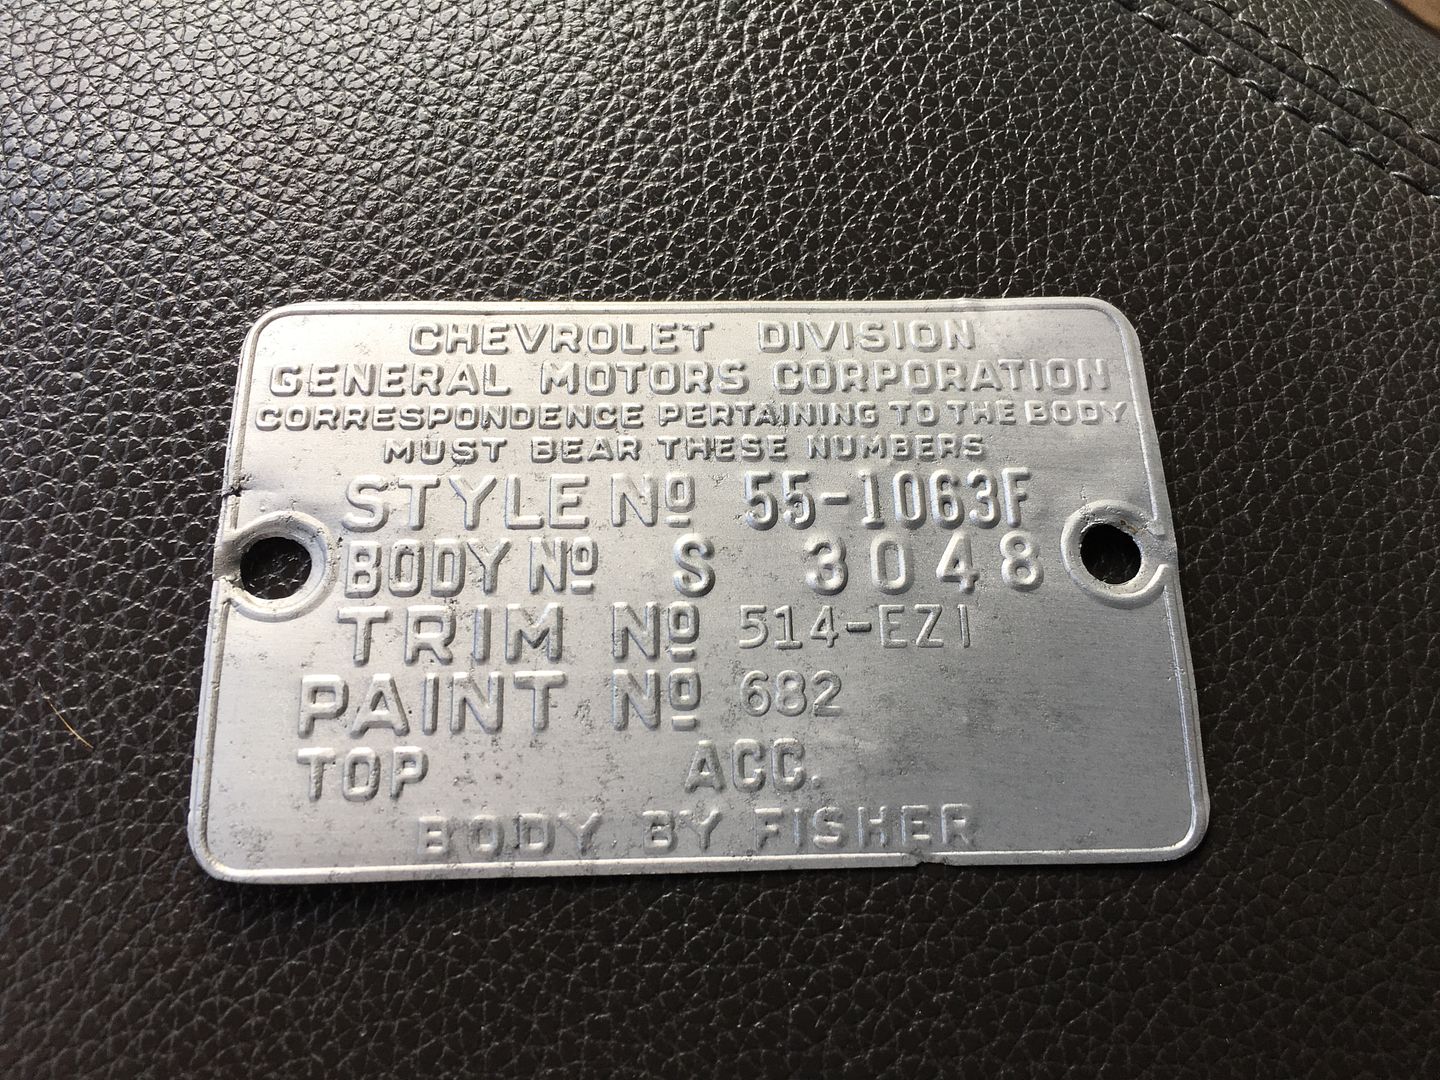
Our data plate for the firewall had been looking pretty sad....
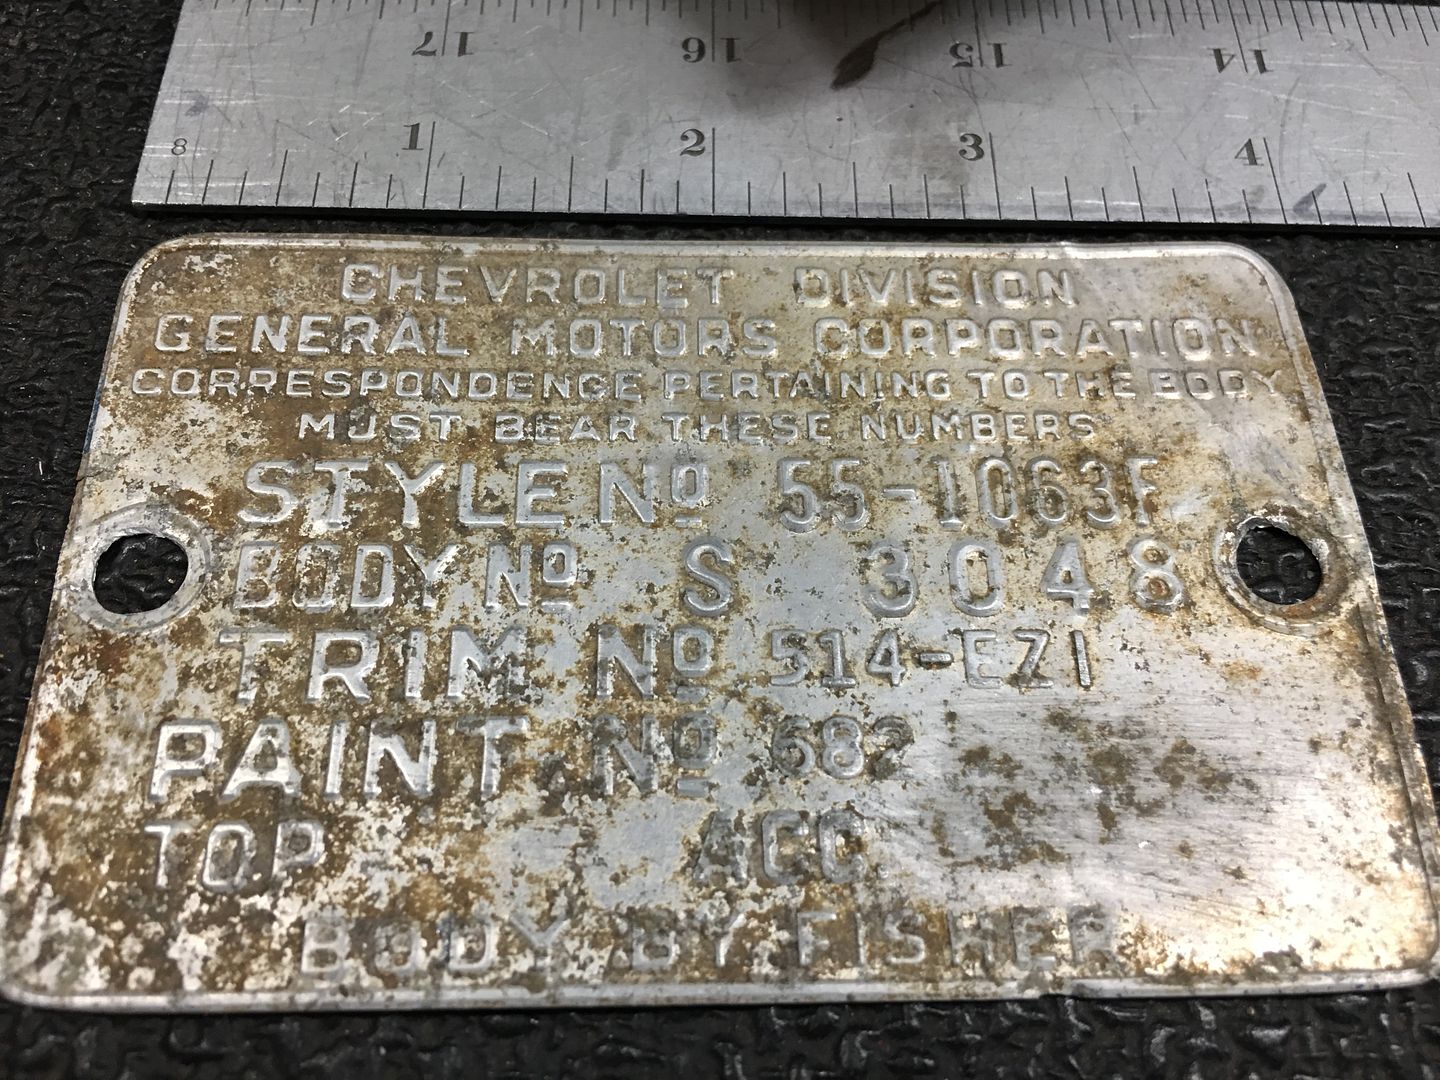
…...so much so that we had thought about leaving it off the nice shiny firewall..
But we had sent some pictures of the carnage to Bob at Alternative Chrome in Kutztown PA, and he said he could clean it right up and add a sealer for us.. Much better...
Robert
-
11-06-2020 05:52 AM #12
CHR Member
- Join Date
- Jun 2008
- Location
- Leonardtown
- Car Year, Make, Model: Walking
- Posts
- 1,228
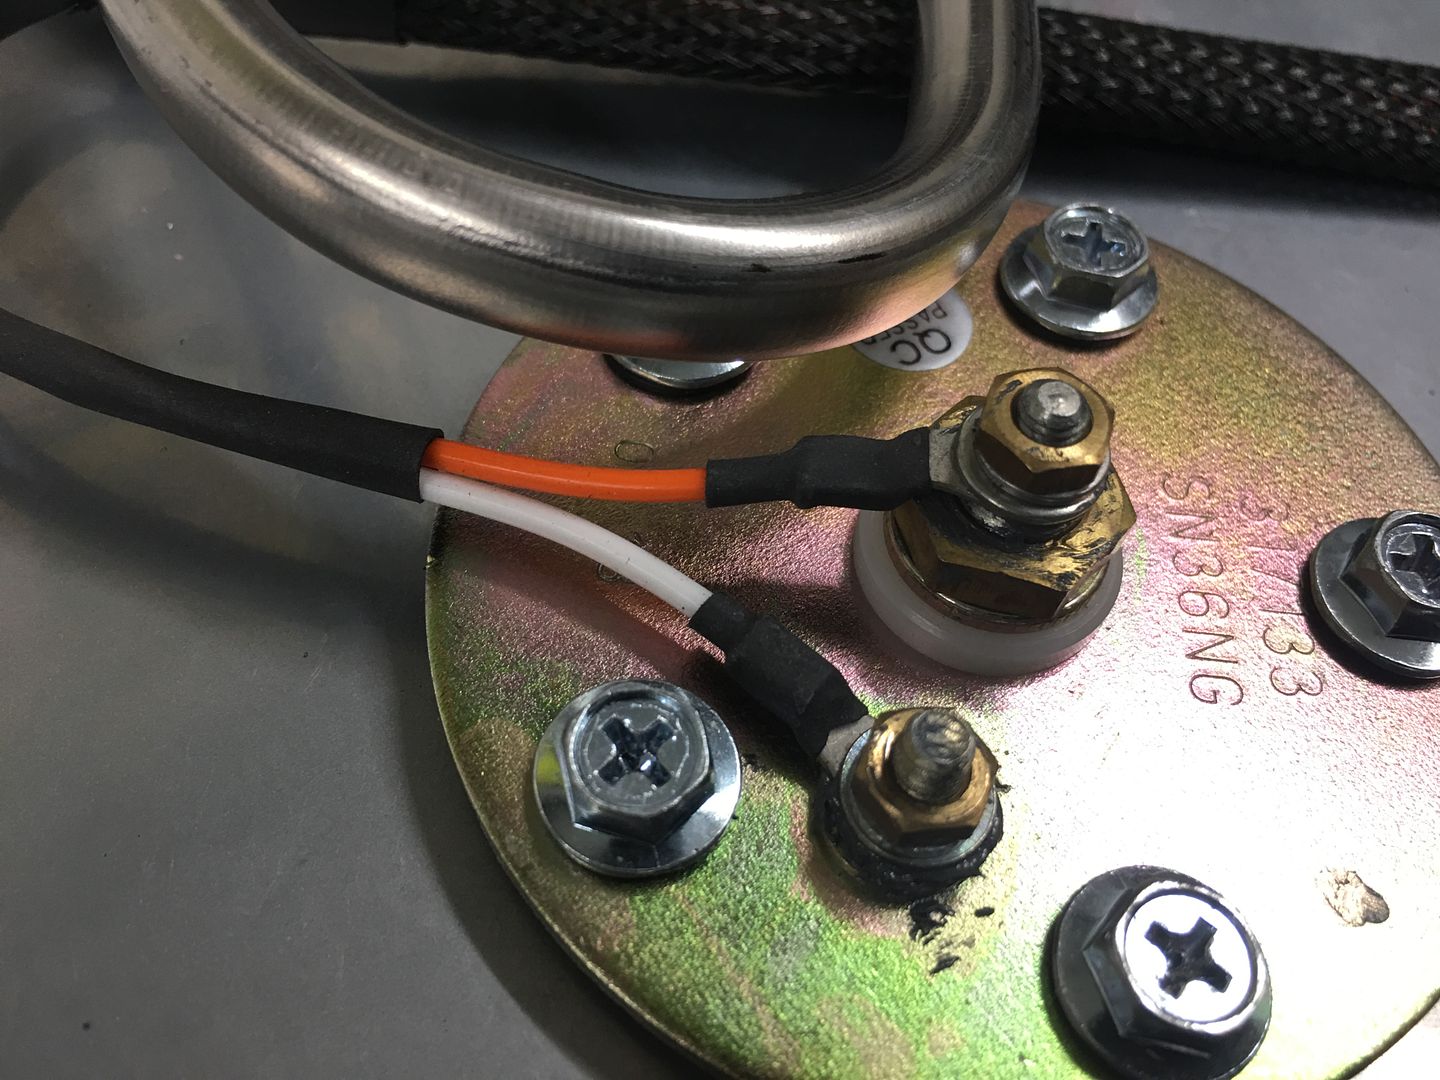
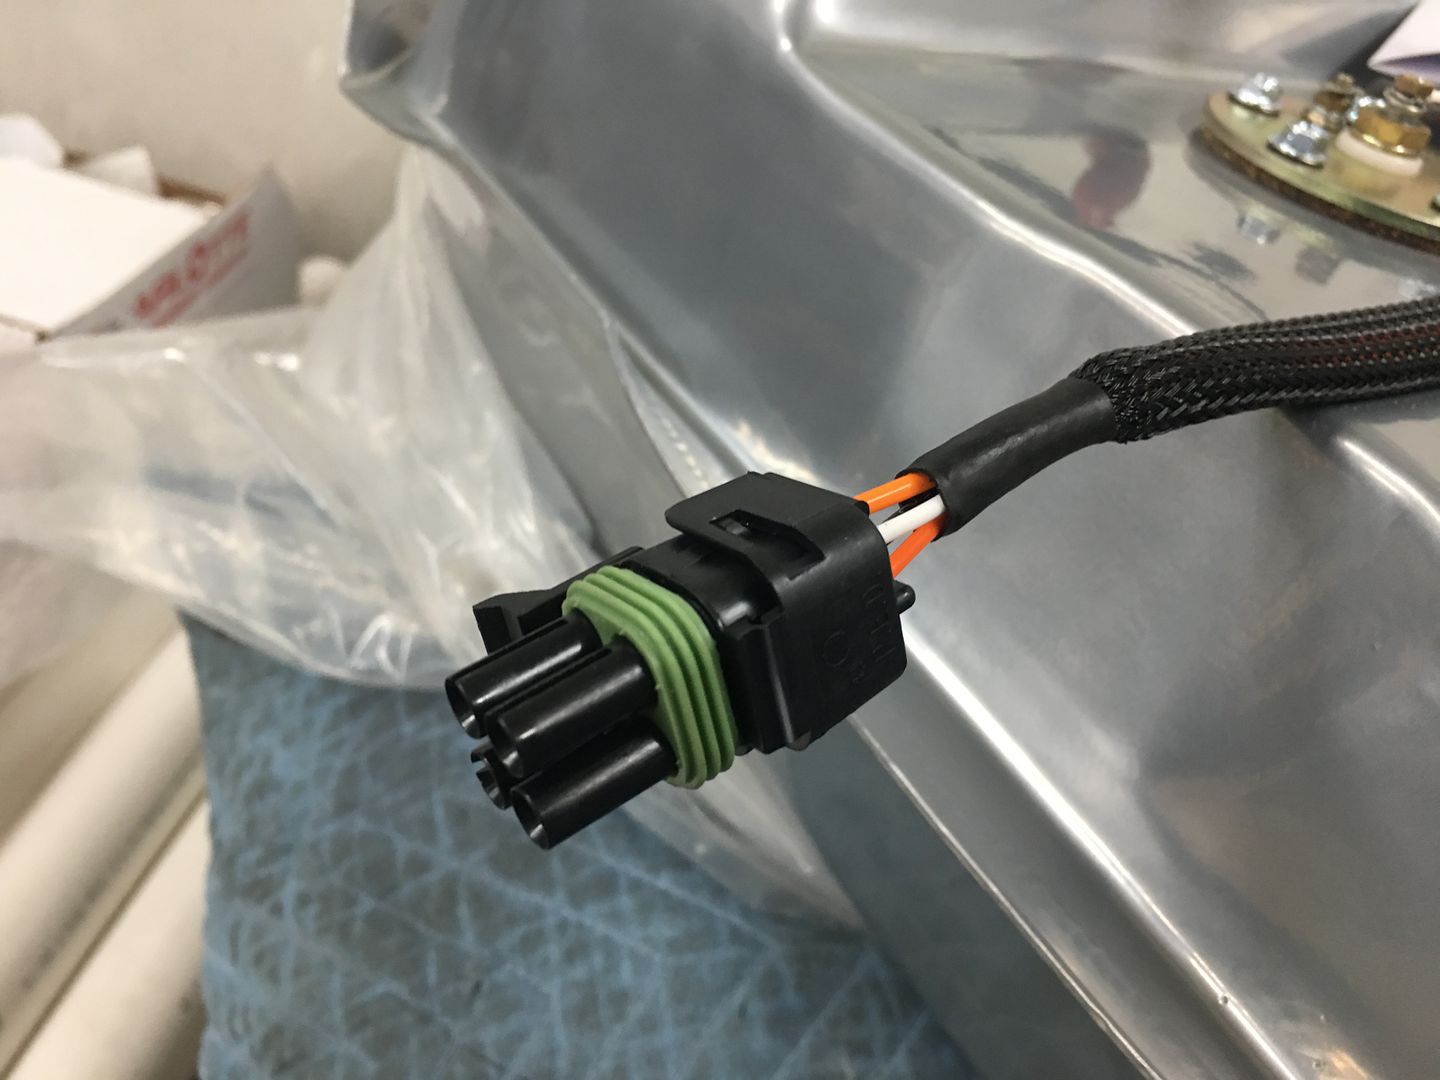
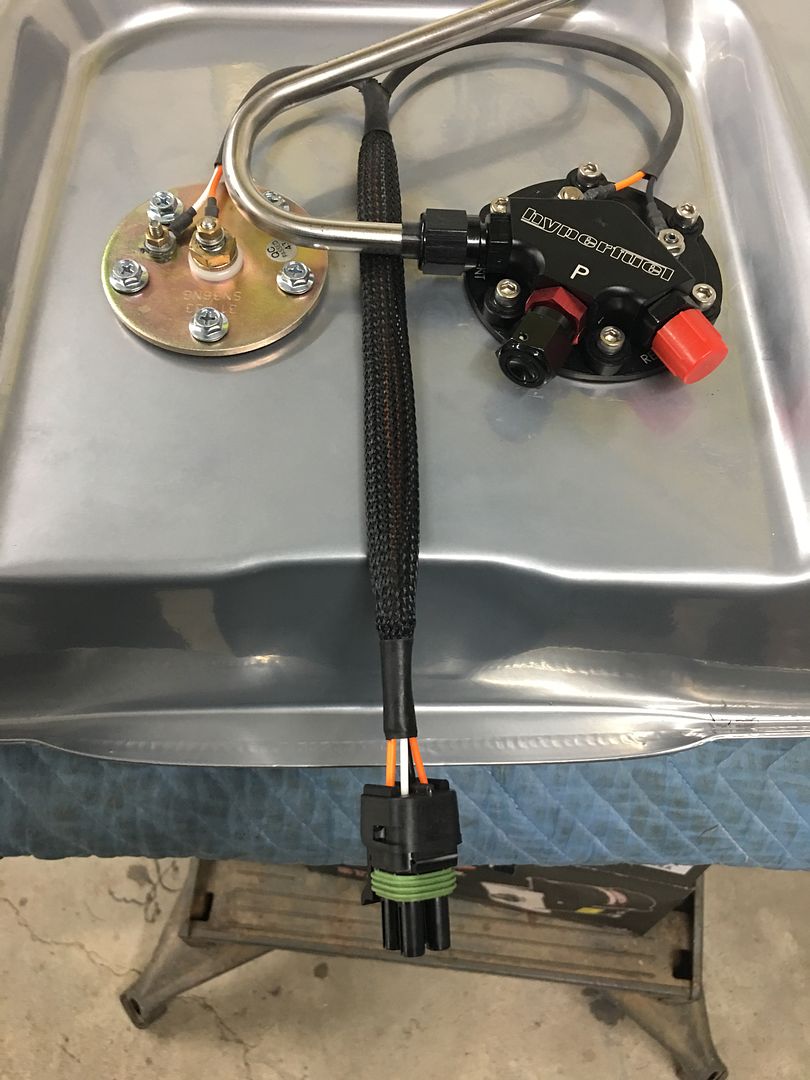
Starting some of our electrical work, since the fuel pump and float assembly both connected using ring terminals, we wanted to use some weather pack connectors so there would be a quick disconnect. We had purchased one of the weather pack "kits" from Jegs in order to have a selection to work from as we put the car back together..

On our standard terminal lugs, we pulled insulating sleeve off the back side so we could use a "W" crimp, and then covered with heat shrink.
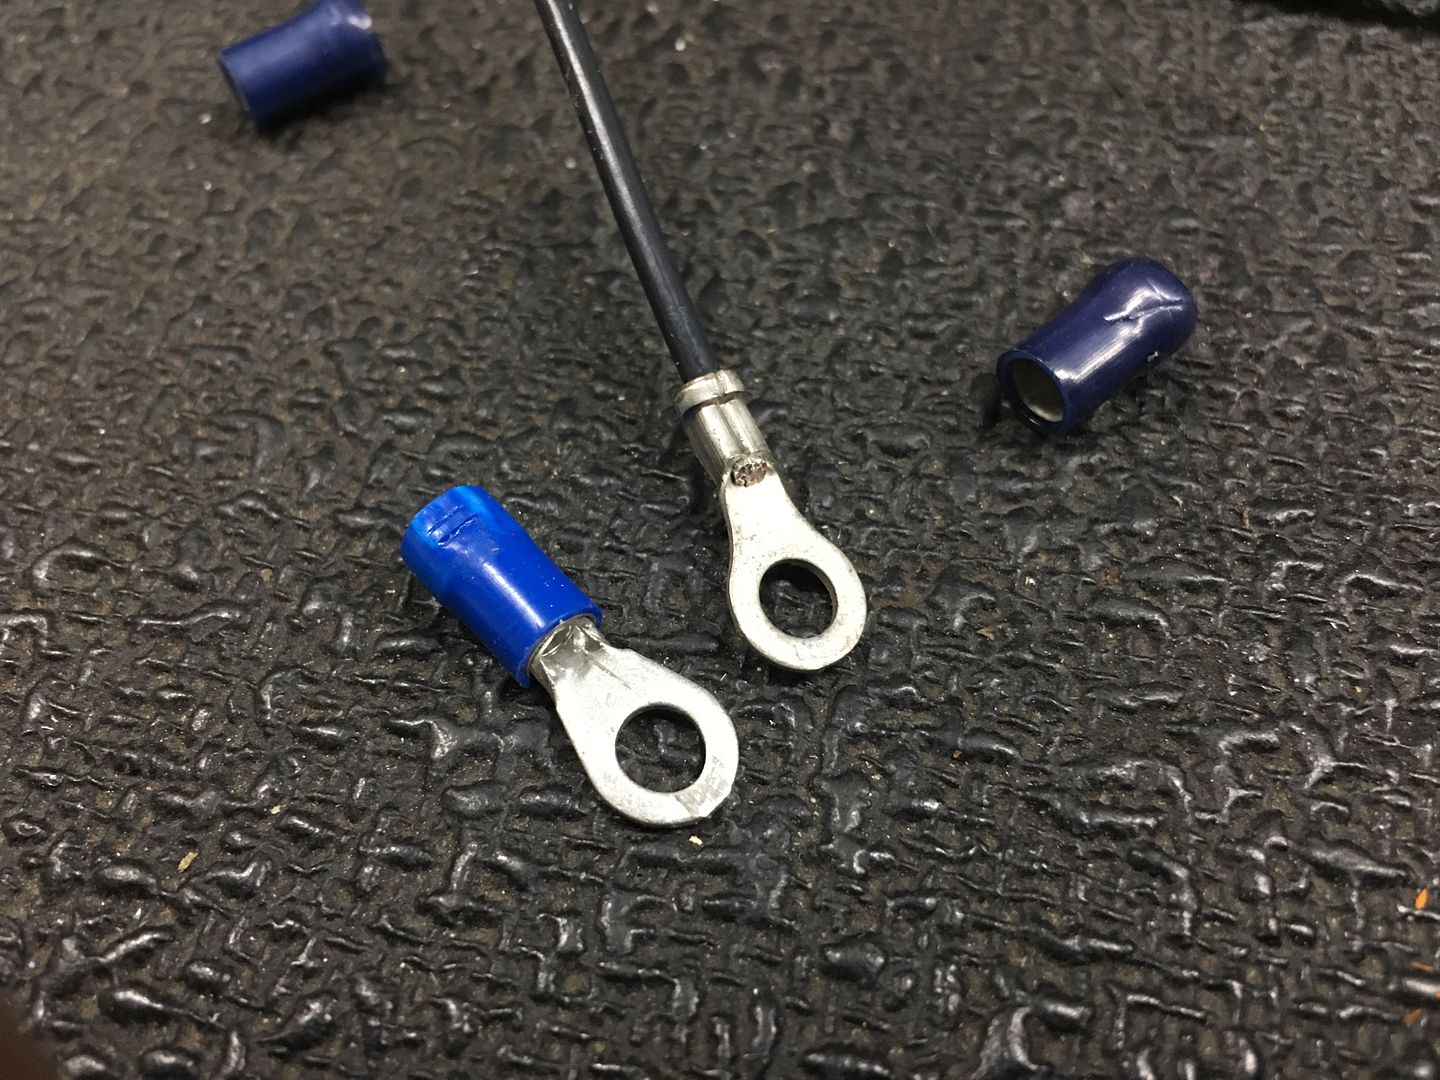
Some anti seize was applied to the connection to help keep corrosion controlled, and some braid loom and heat shrink was used to add some protection.
Weather pack connection, wires stripped just enough for the W crimp, strain relief crimp remains on top of the wire's jacket insulation.

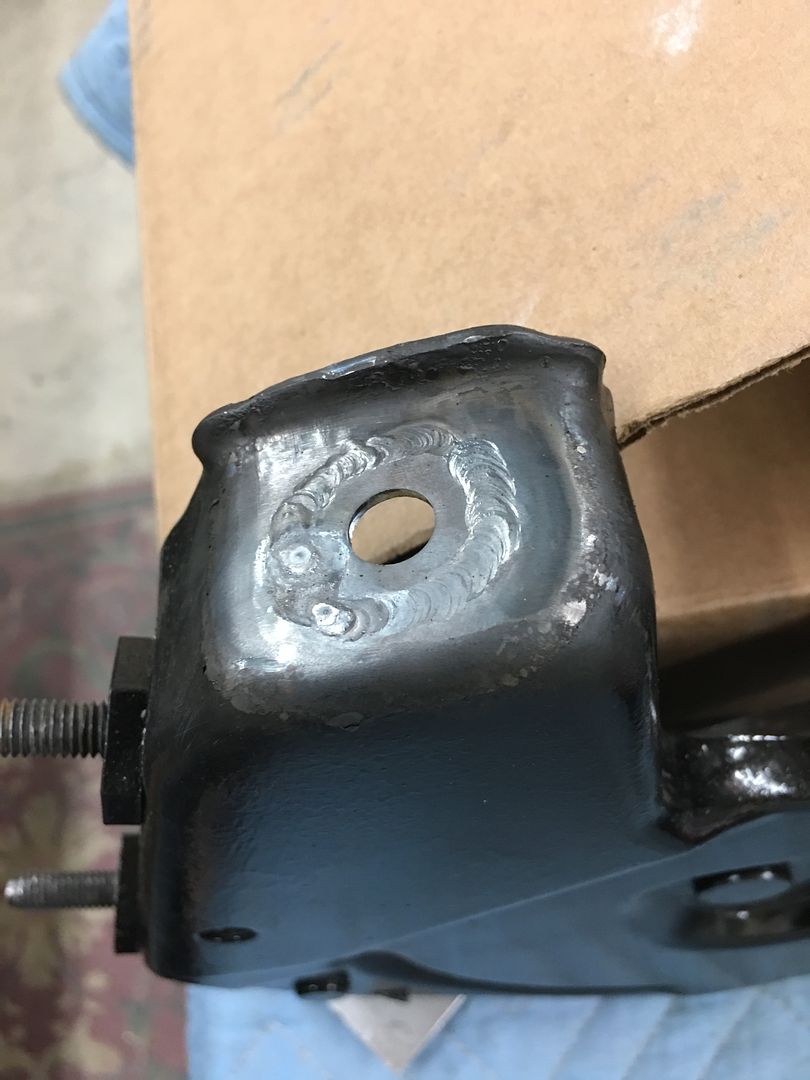
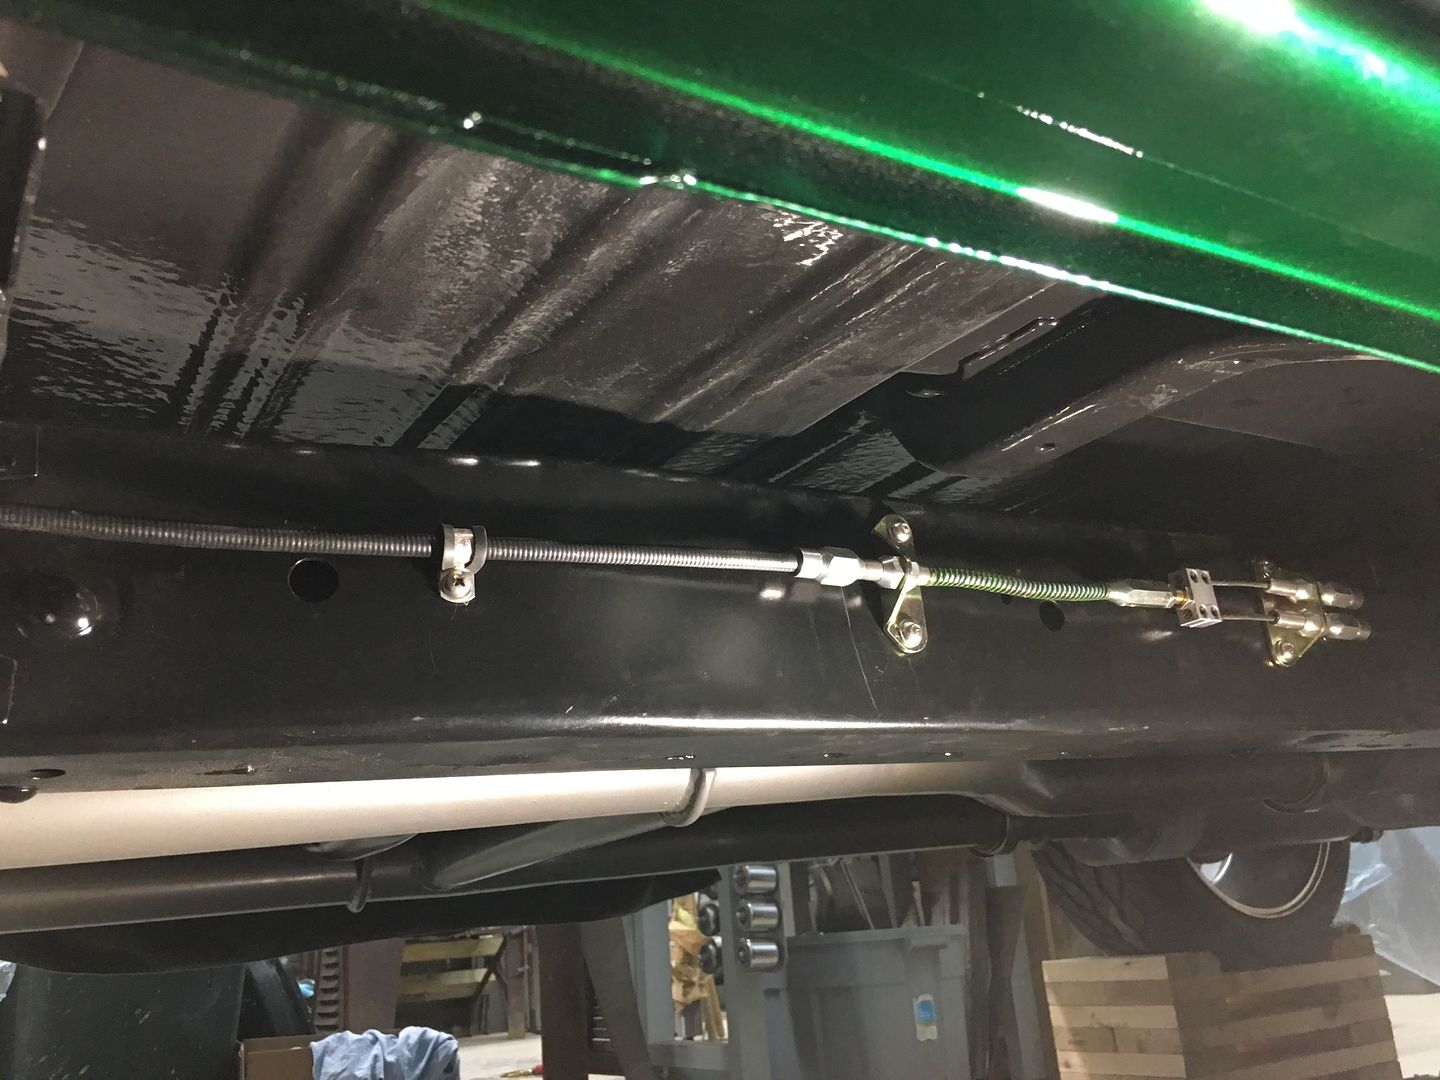
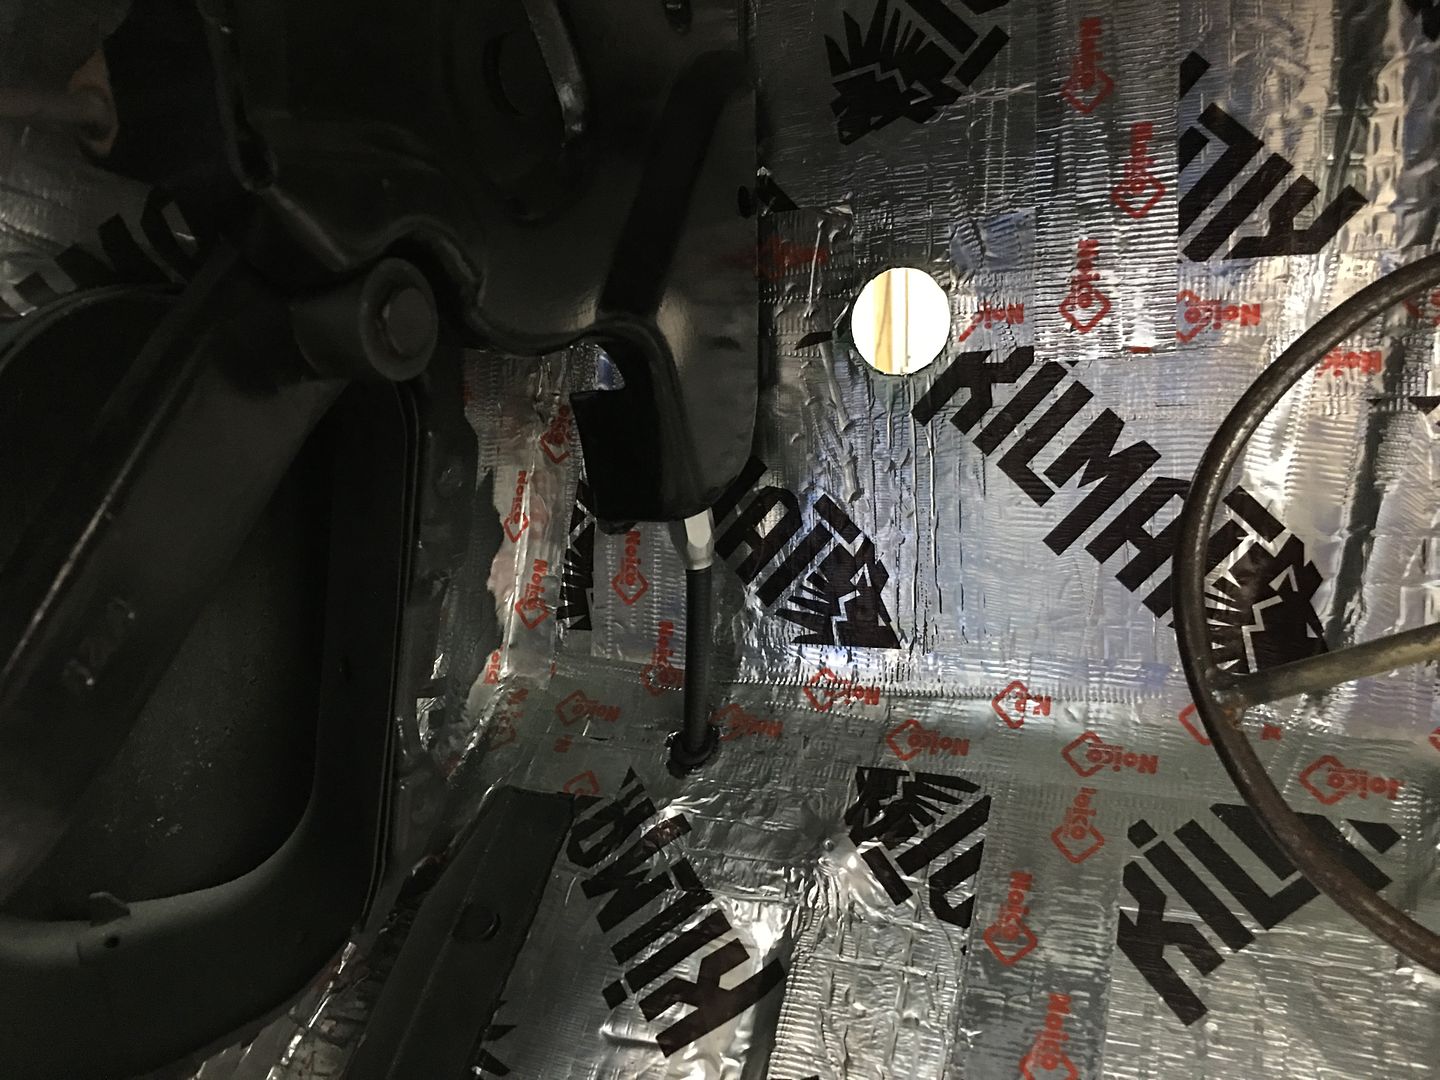
Next, to finalize our parking brake situation, we needed to drill a hole in the floor, which then had epoxy primer applied to the perimeter. Once cured, we installed a rubber grommet and fed through the floor. If you recall, the Lokar cable did not fit the opening in our donor brake pedal assembly, so a thick washer with the correct smaller hole was found, and the bracket hole was opened up to the outer diameter of the washer...
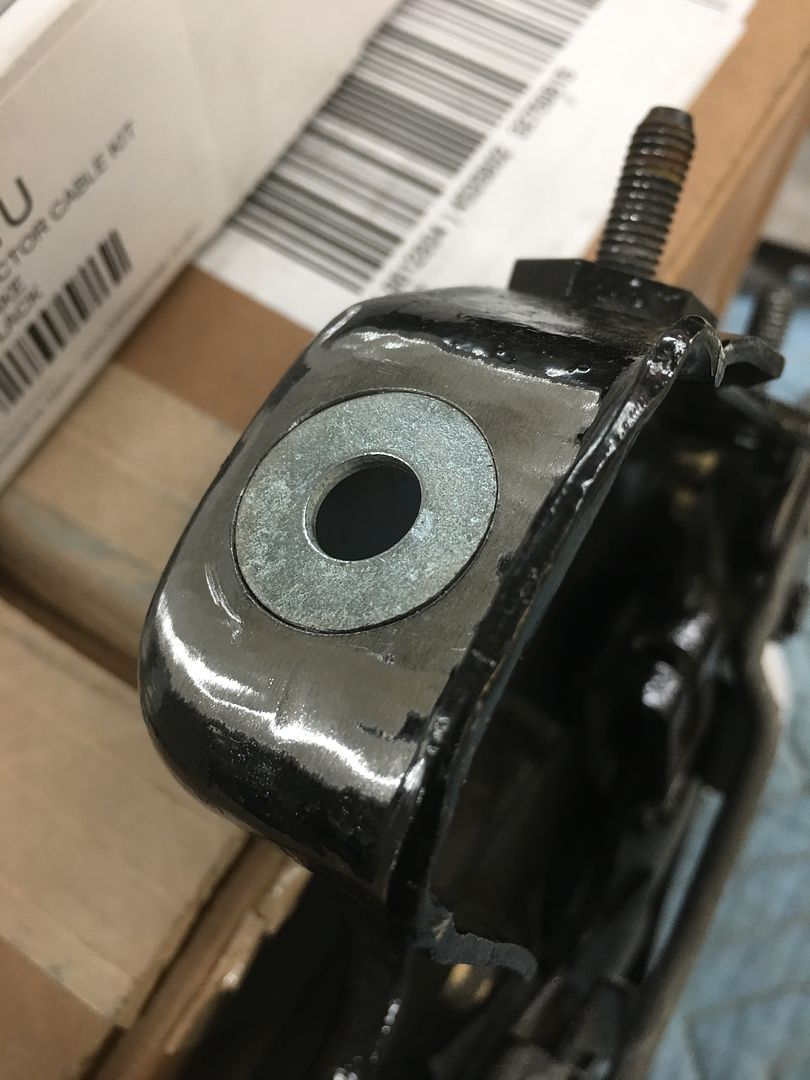
Then the washer was TIG welded in place..
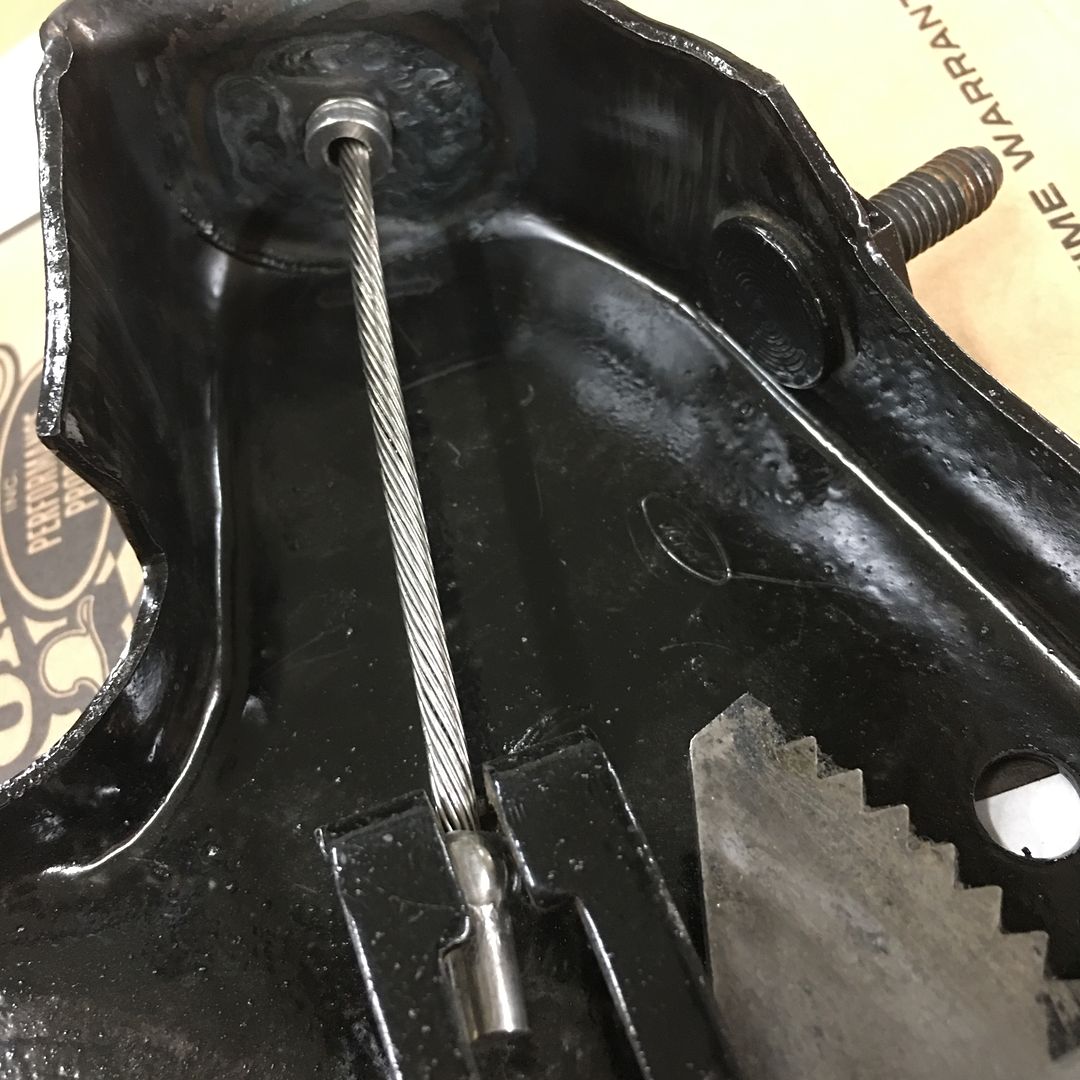
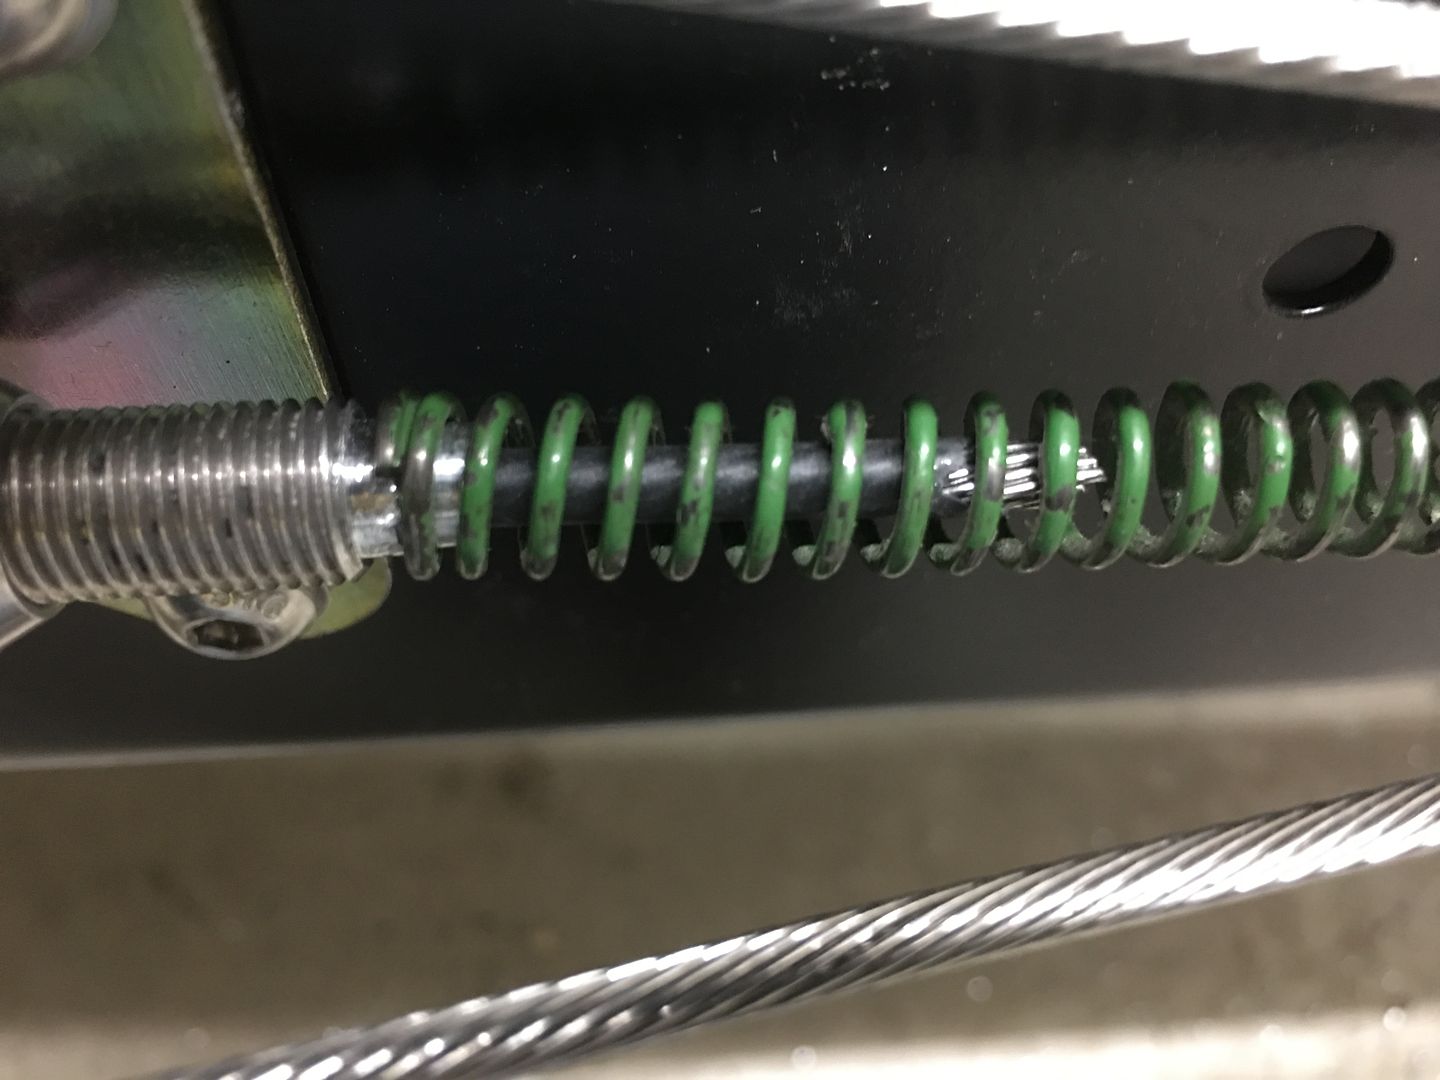
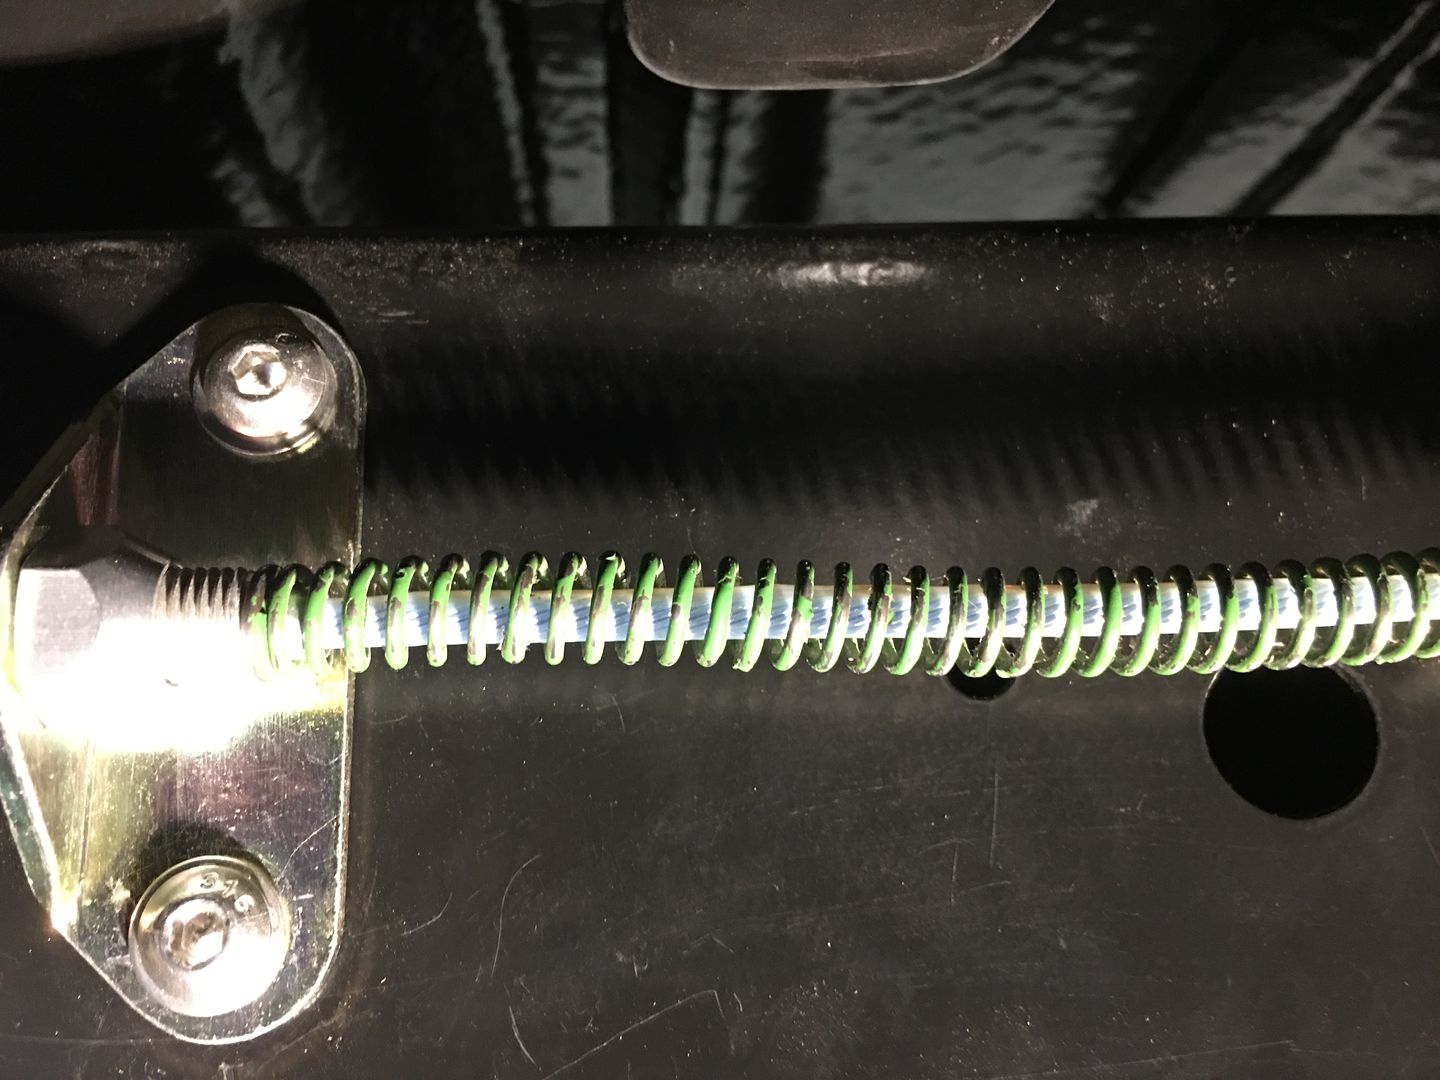
Next challenge, the brake assembly had an internal pedal return spring that would now rest on the cable and rub in the same place on the ends, so in order to minimize any wear through the cable strands, the spring was relocated to the side of the frame at the adjusters where a shoulder was machined into the adjustment fittings to support the spring ends and not rub into the cable.
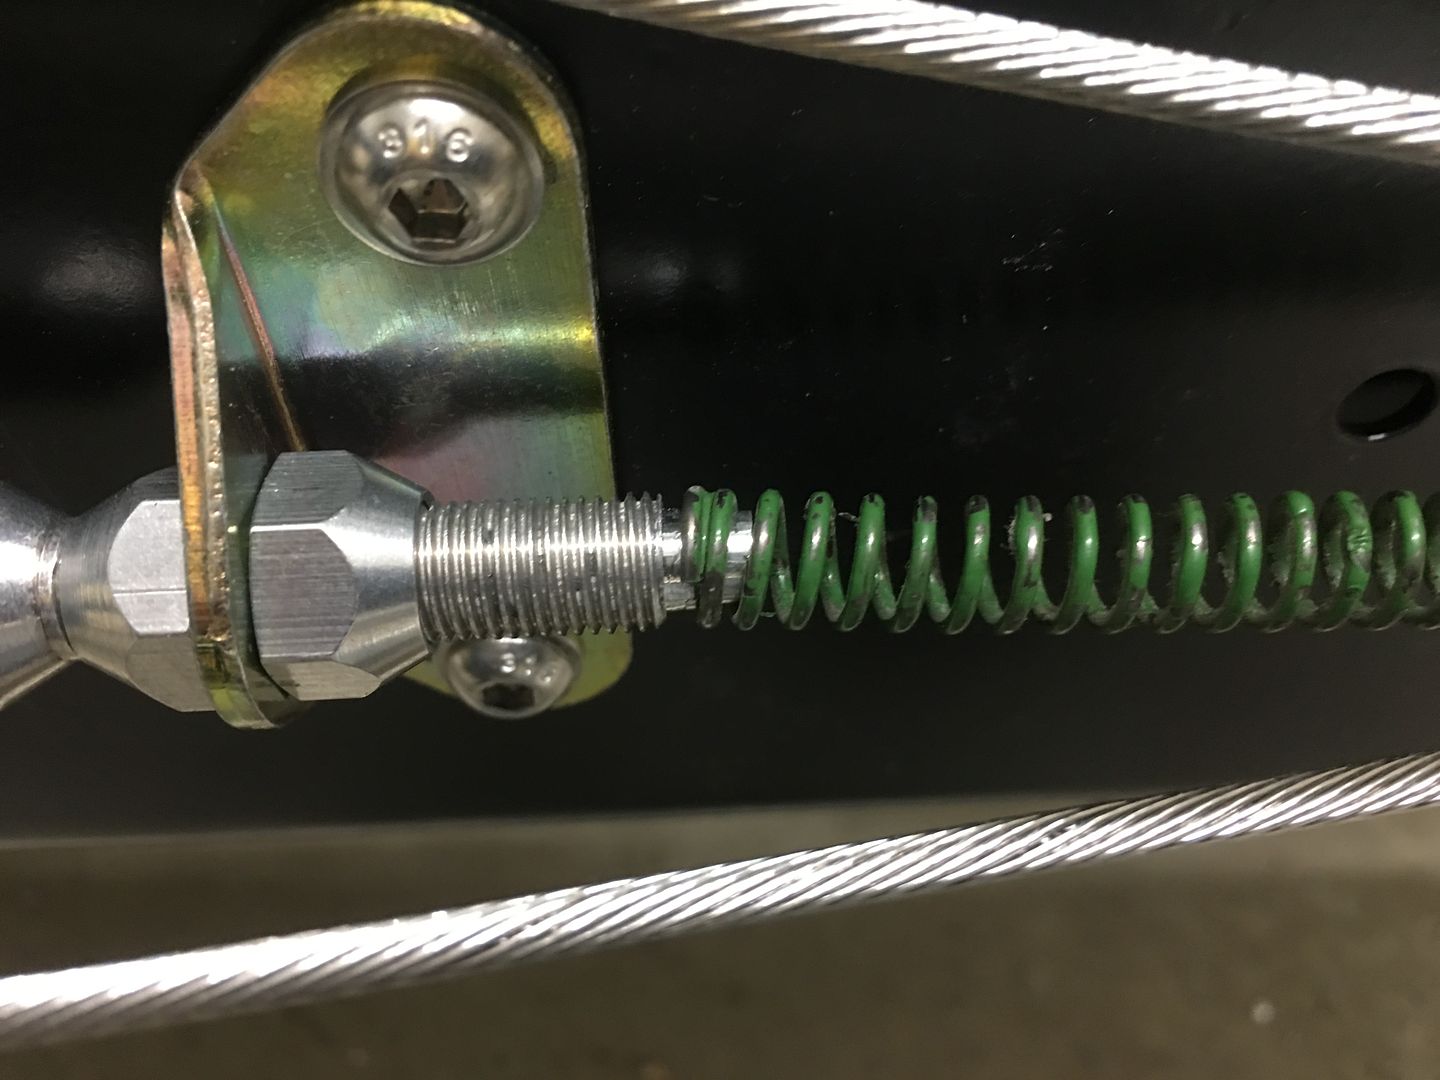
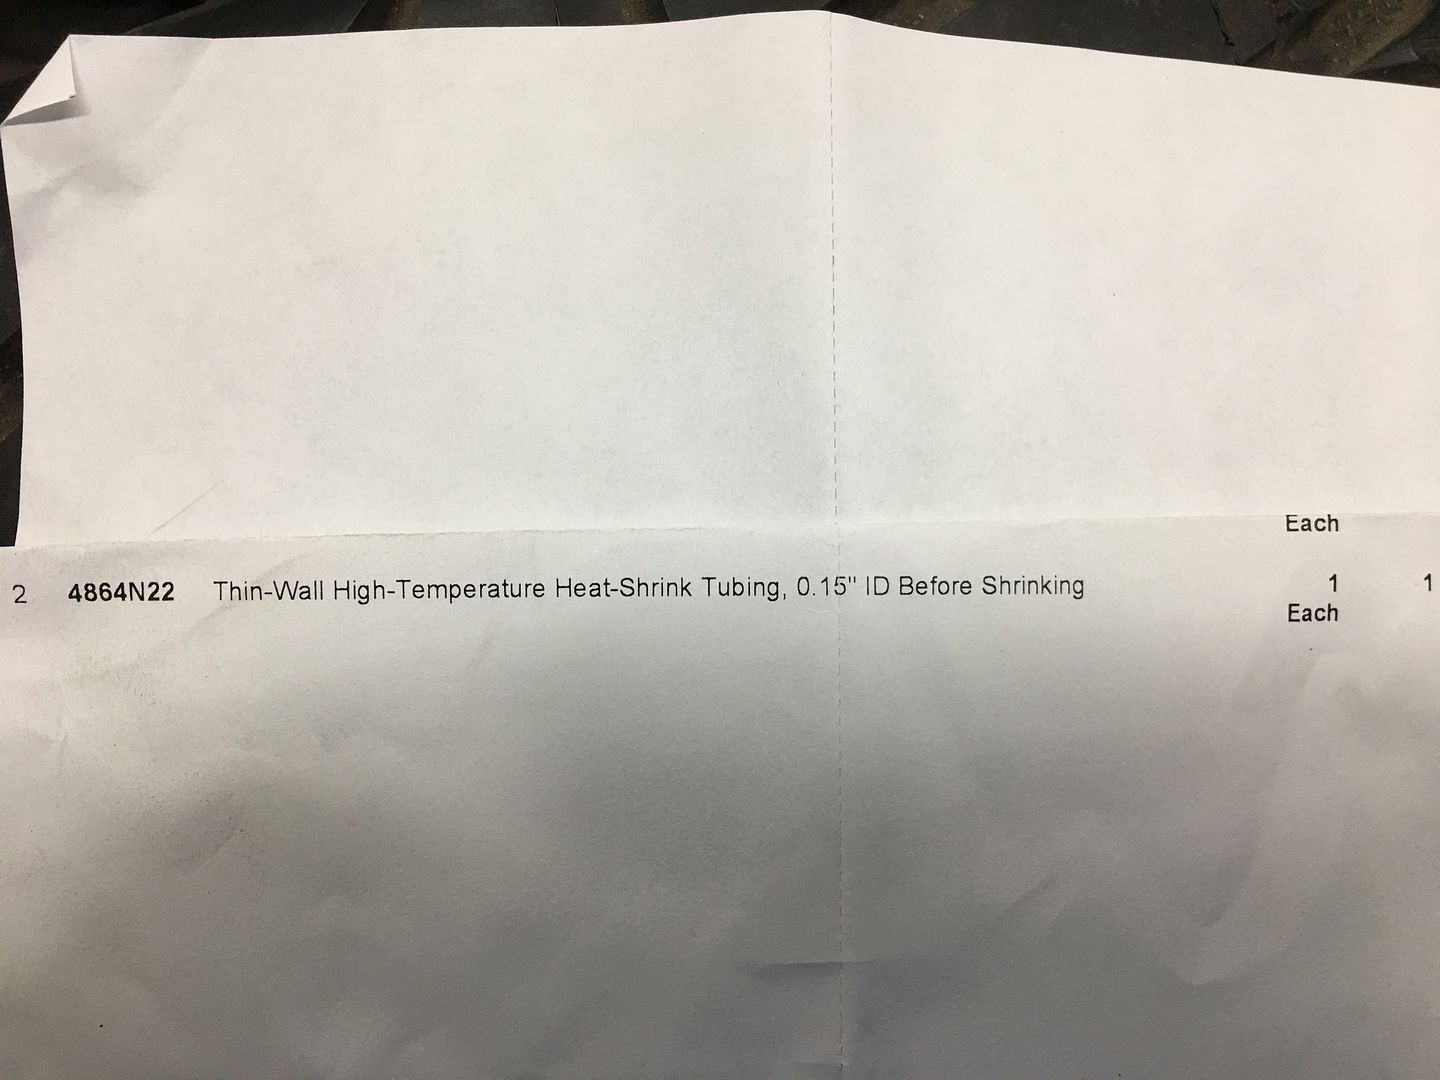
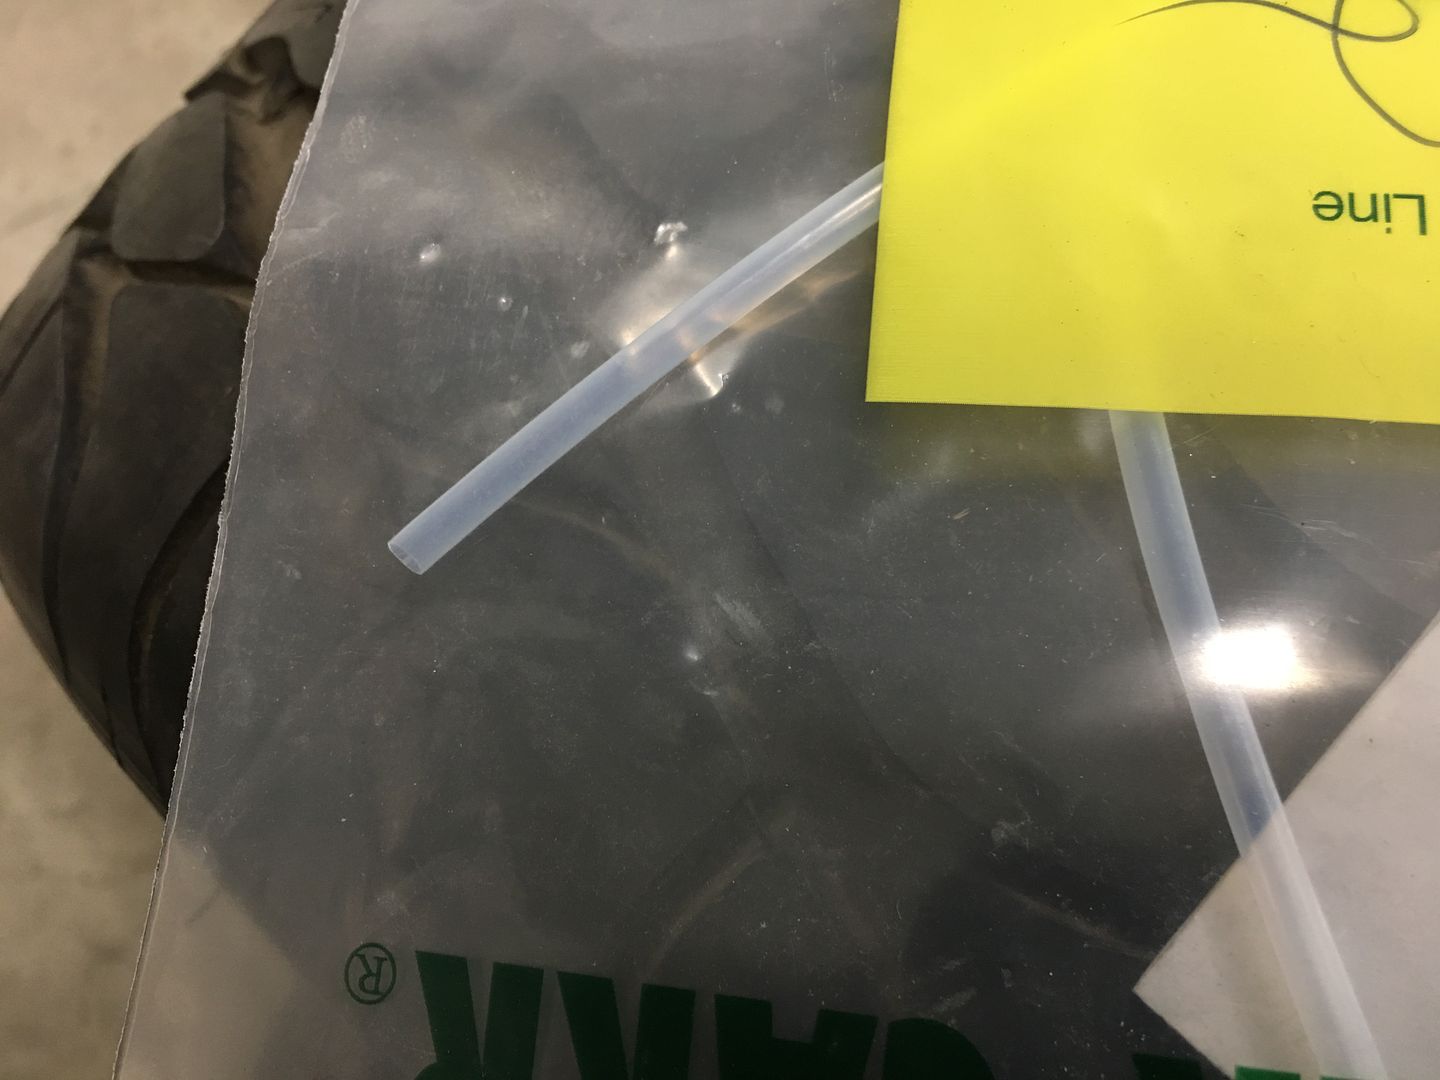
To further protect the cable from spring rub, as there surely would be deflection of the spring as the brake was applied, we test fit some heat shrink to act as a protective sleeve. The internal liner of the Lokar cable was roomy enough for the heat shrink to pass up inside, so concept test complete, we ordered some high heat Teflon shrink tubing from McMaster. This was installed over the cable, with plenty of extra slid up in the liner, and assembled all the parts..
That should hold us.....Robert
-
11-08-2020 07:56 AM #13
CHR Member
- Join Date
- Jun 2007
- Location
- New Market
- Posts
- 2,590
iv`e delt with antiseize before Originally Posted by MP&C
iv`e used up all my sick days at work .. can i call in dead ?
-
11-06-2020 06:00 AM #14
CHR Member
- Join Date
- Nov 2016
- Location
- rocklin
- Posts
- 645
Nicely done. Very clean install.
-
11-06-2020 10:28 AM #15
CHR Member
- Join Date
- Jun 2008
- Location
- Leonardtown
- Car Year, Make, Model: Walking
- Posts
- 1,228
Thanks!!
Oh yeah! Made a trip to Annapolis Wednesday, Brandon and Richard were done buffing parts... Hell of a way to transport fenders and doors....
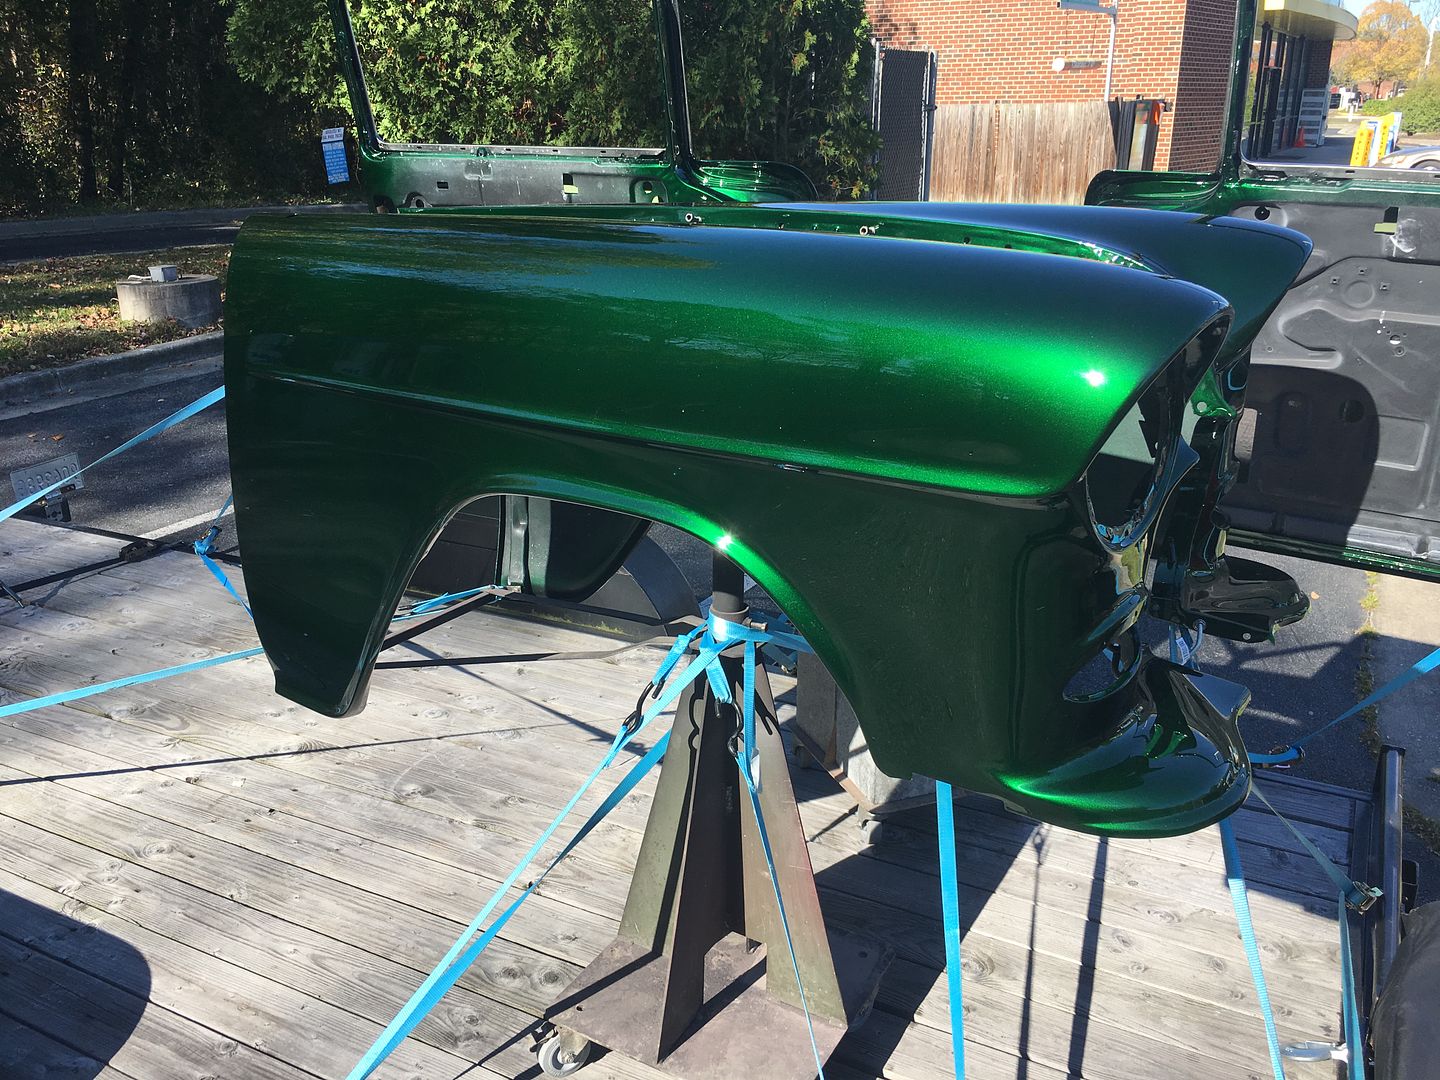
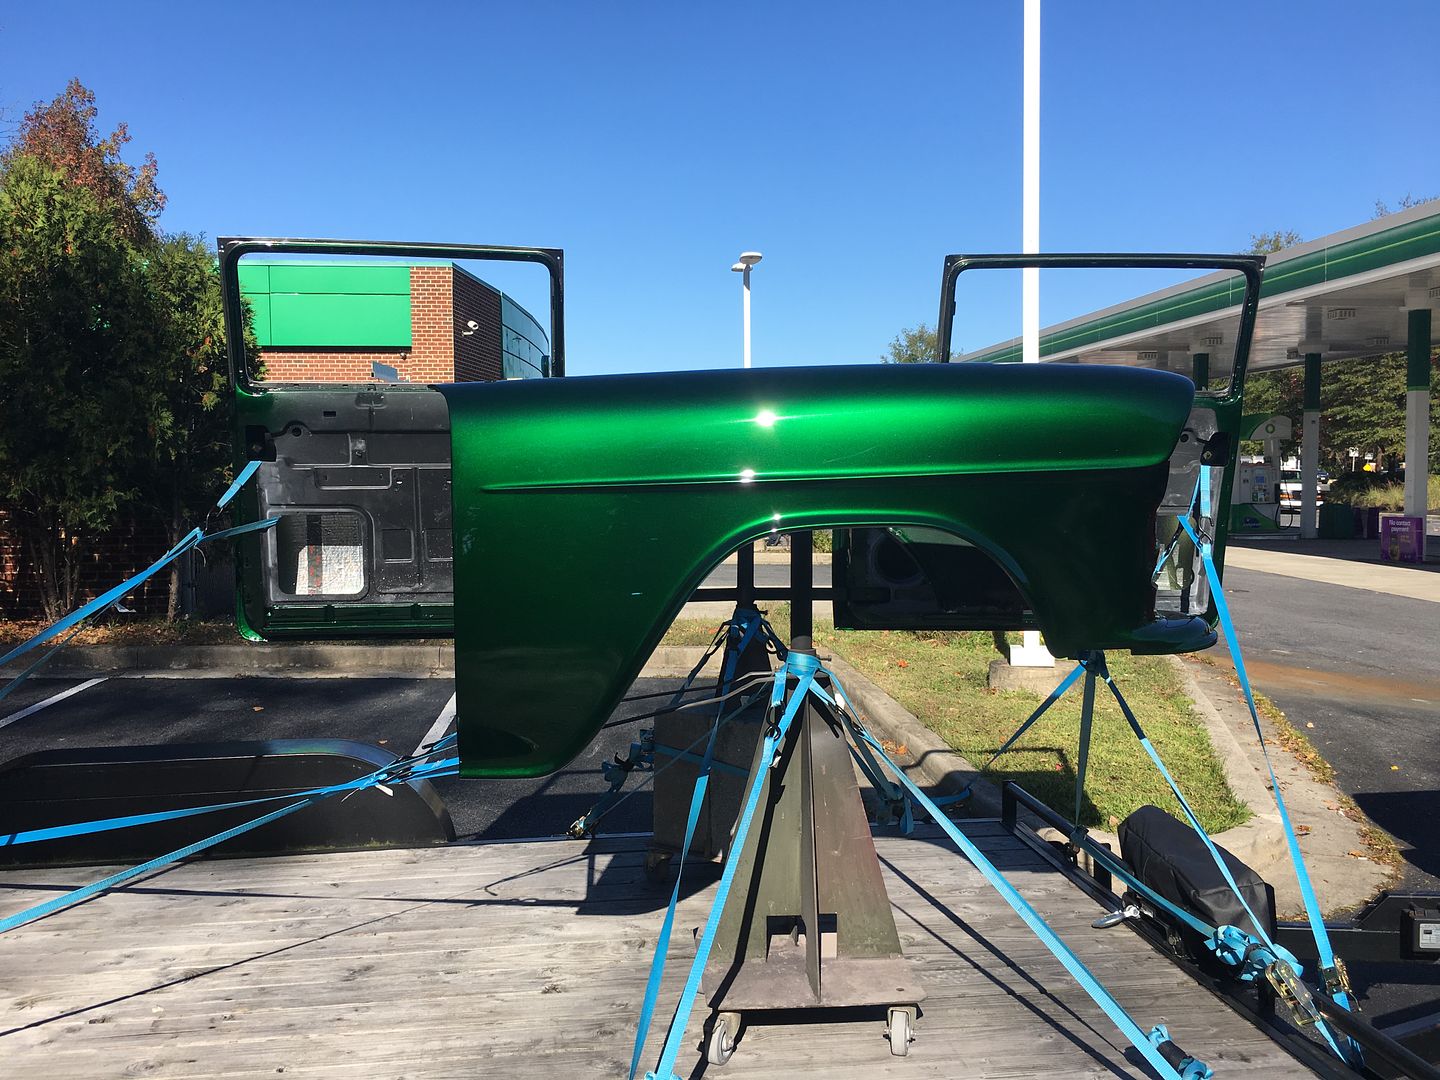
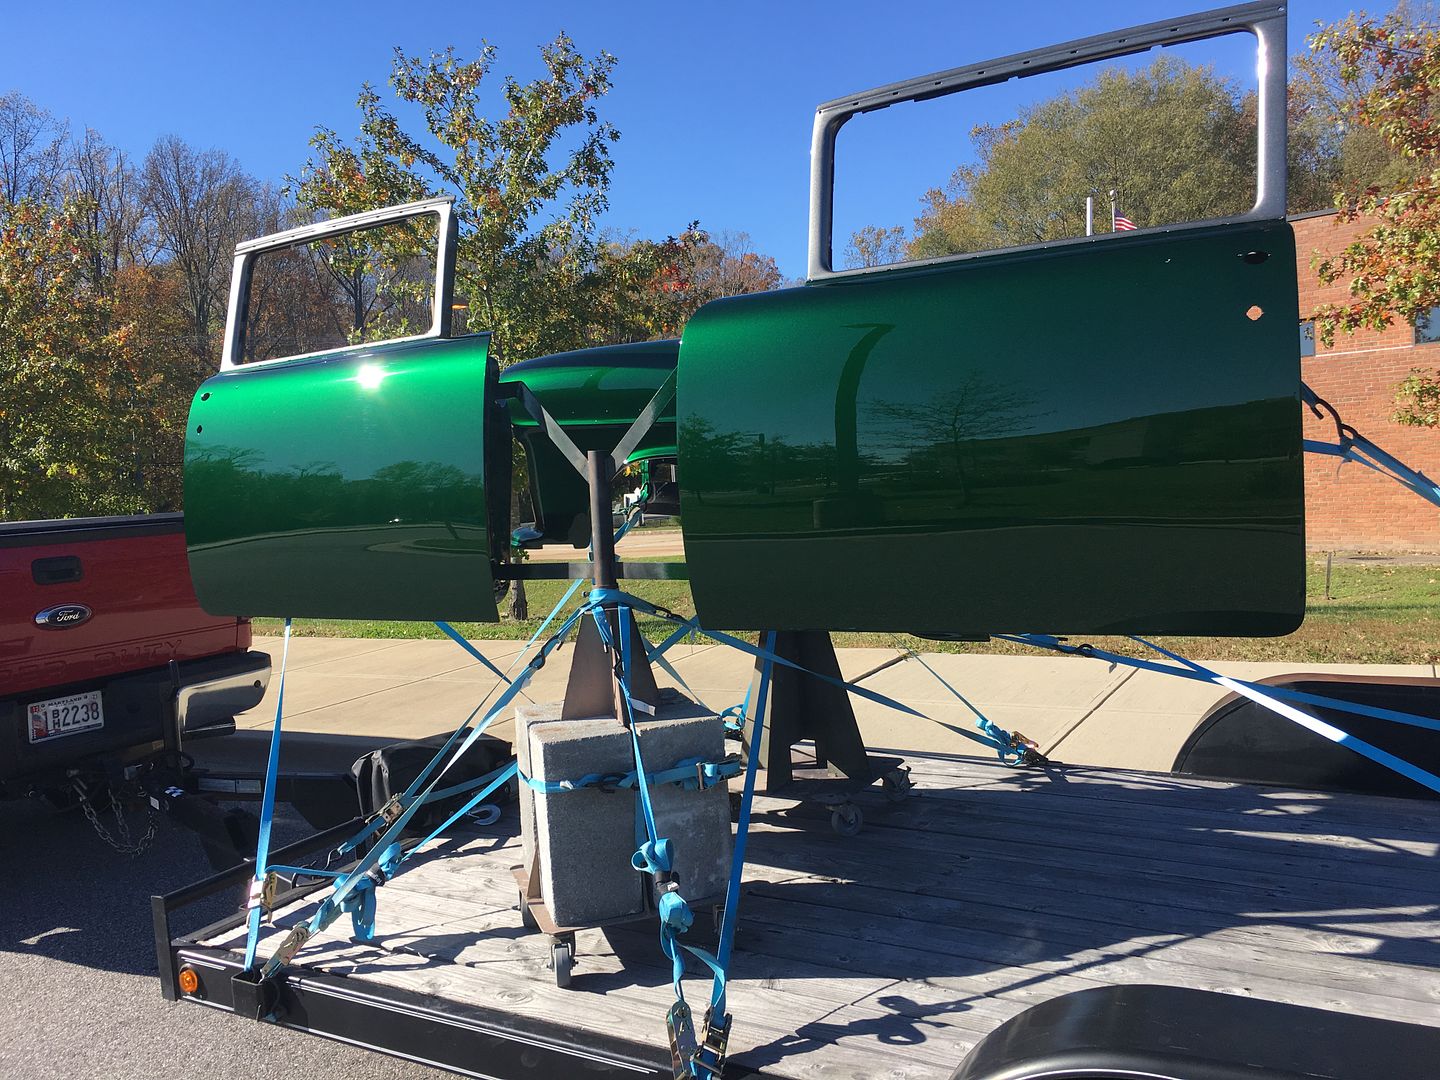
Robert
 Reply With Quote

Posting Permissions
- You may not post new threads
- You may not post replies
- You may not post attachments
- You may not edit your posts

A day late here, Seth, but caught you on FB! A belated Happy Birthday! Some of us are more than half your age older than you!! ARRRGH!
Happy Birthday 53Chevy5