


 3390Likes
Thread: 55 Wagon Progress


Results 286 to 300 of 1865
 LinkBack URL
 About LinkBacks
Hybrid View
-
09-02-2014 06:17 PM #1
 CHR Member

- Join Date
- Apr 2011
- Location
- Prairie City
- Car Year, Make, Model: 40 Ford Deluxe, 68 Corvette, 72&76 K30
- Posts
- 7,301
- Blog Entries
- 1
Very nice! The LH bottom rear corner of my door on my 40 sticks out farther than the quarter, but the upper half is flush. When I get to that point, I'm going to have to get your take on how I should fix it as I don't want to ruin the door.
Ryan
1940 Ford Deluxe Tudor 354 Hemi 46RH Electric Blue w/multi-color flames, Ford 9" Residing in multiple pieces
1968 Corvette Coupe 5.9 Cummins Drag Car 11.43@130mph No stall leaving the line with 1250 rpm's and poor 2.2 60'
1972 Chevy K30 Longhorn P-pumped 24v Compound Turbos 47RH Just another money pit
1971 Camaro RS 5.3 BTR Stage 3 cam, SuperT10
Tire Sizes
-
09-03-2014 08:38 PM #2
CHR Member
- Join Date
- Jun 2008
- Location
- Leonardtown
- Car Year, Make, Model: Walking
- Posts
- 1,228
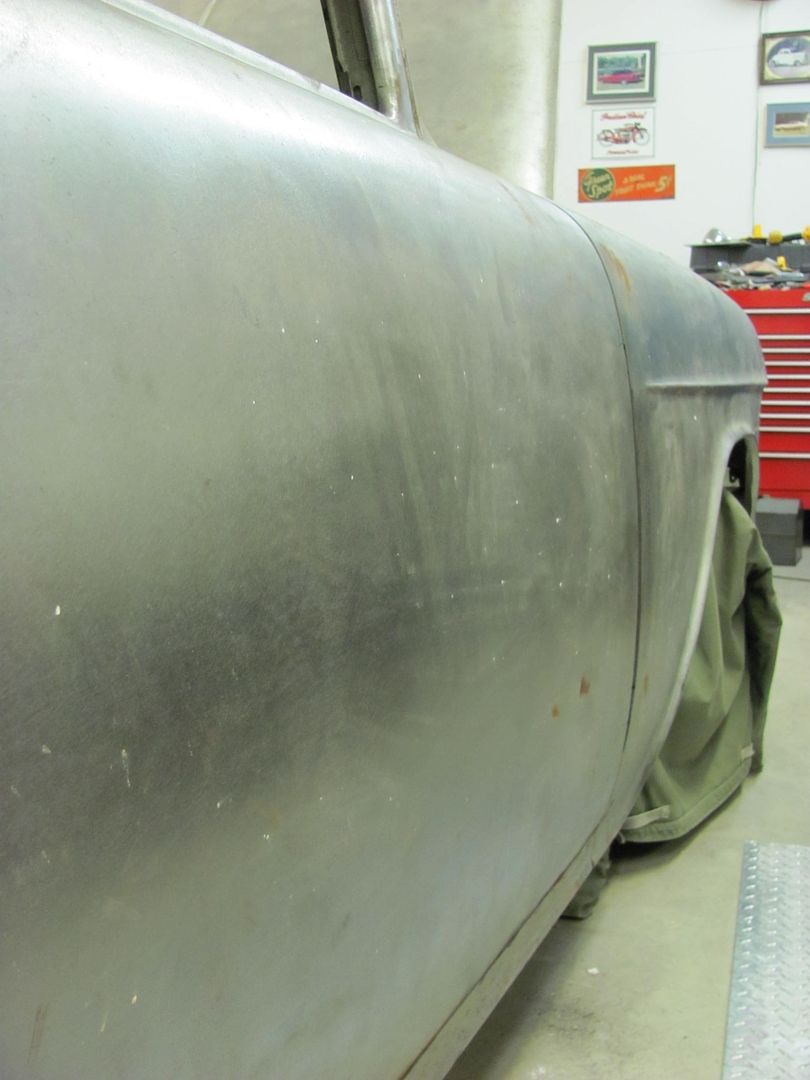
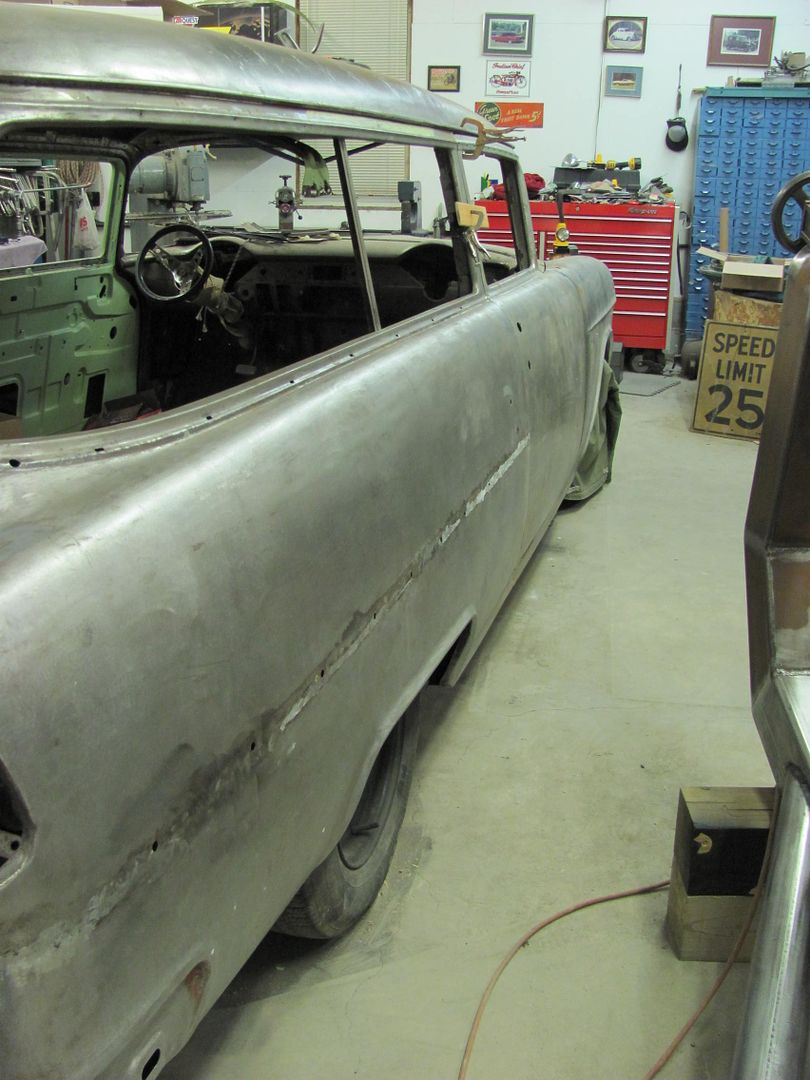
On a painted car, this involves rolling down the window, wrapping a 2x4 in a towel, and place the 2x4 between the door jamb and the center part of the door that fits. Then lean on the door above and below the 2x4 to "tweak" the fit. On a car without paint, save the wear and tear on the towel.
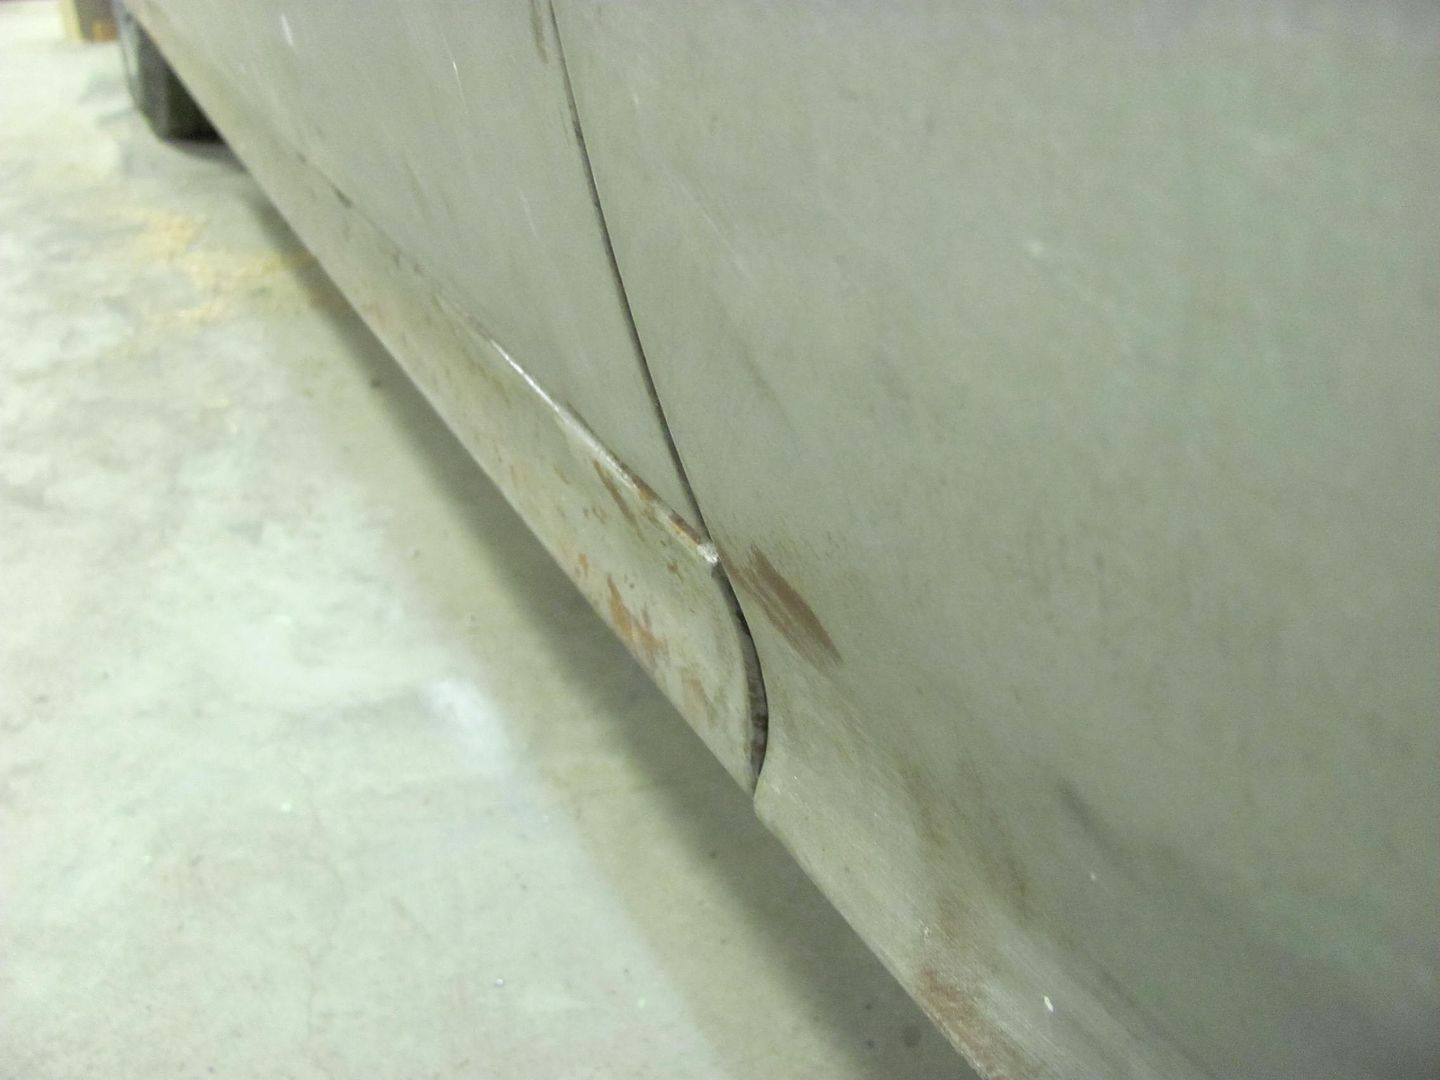
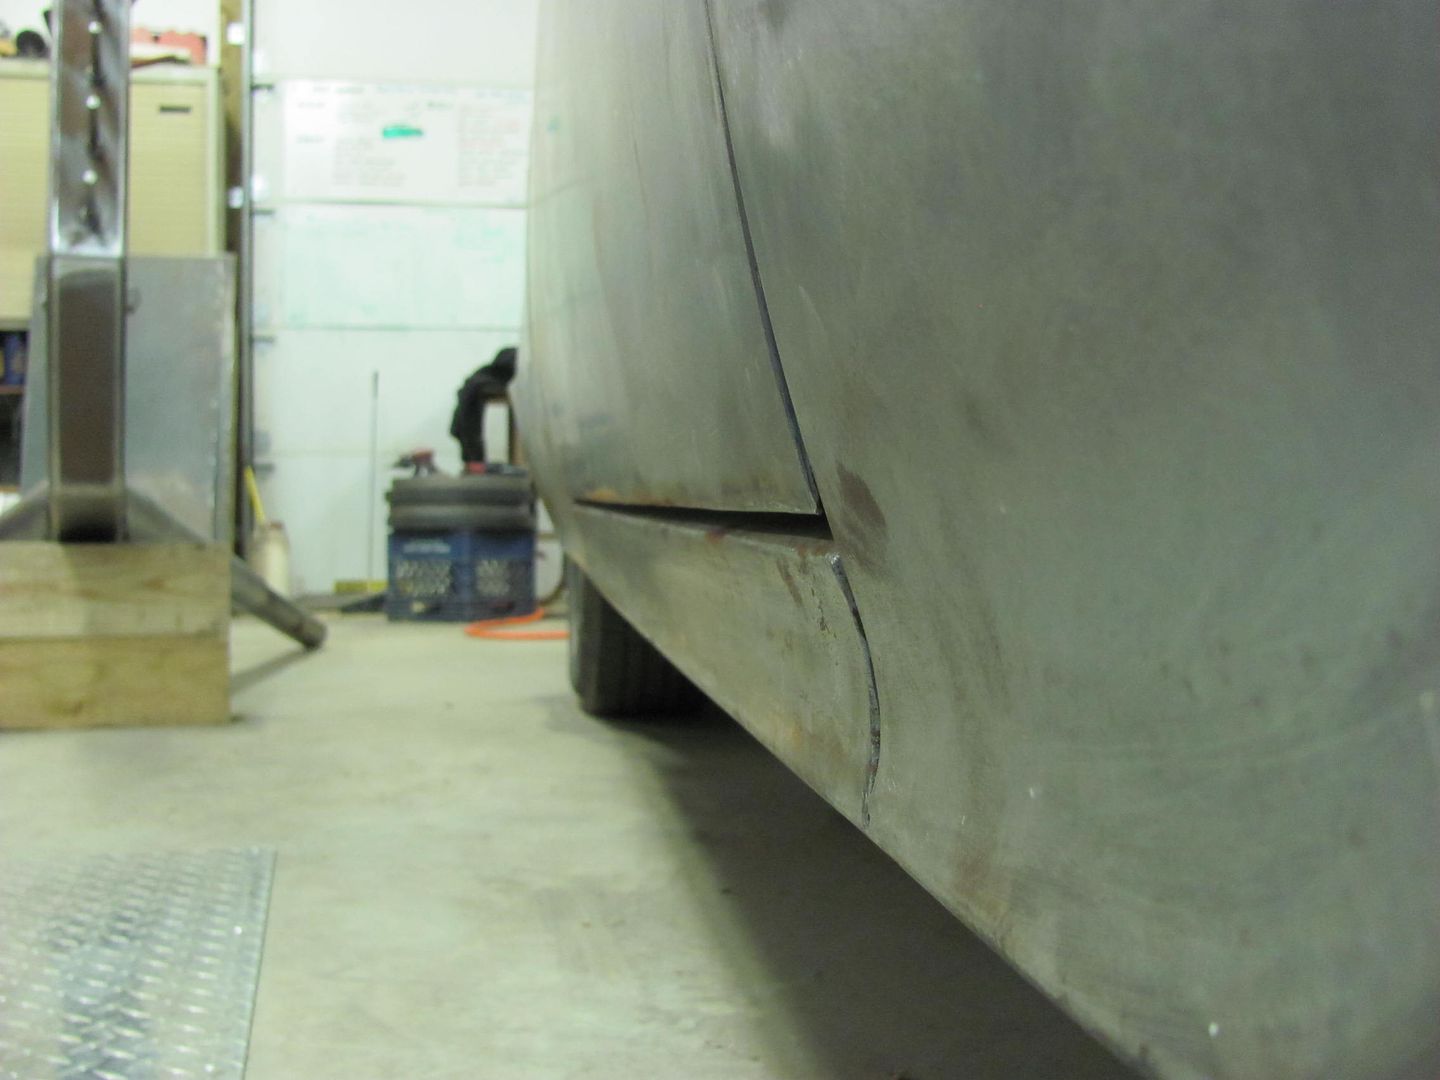
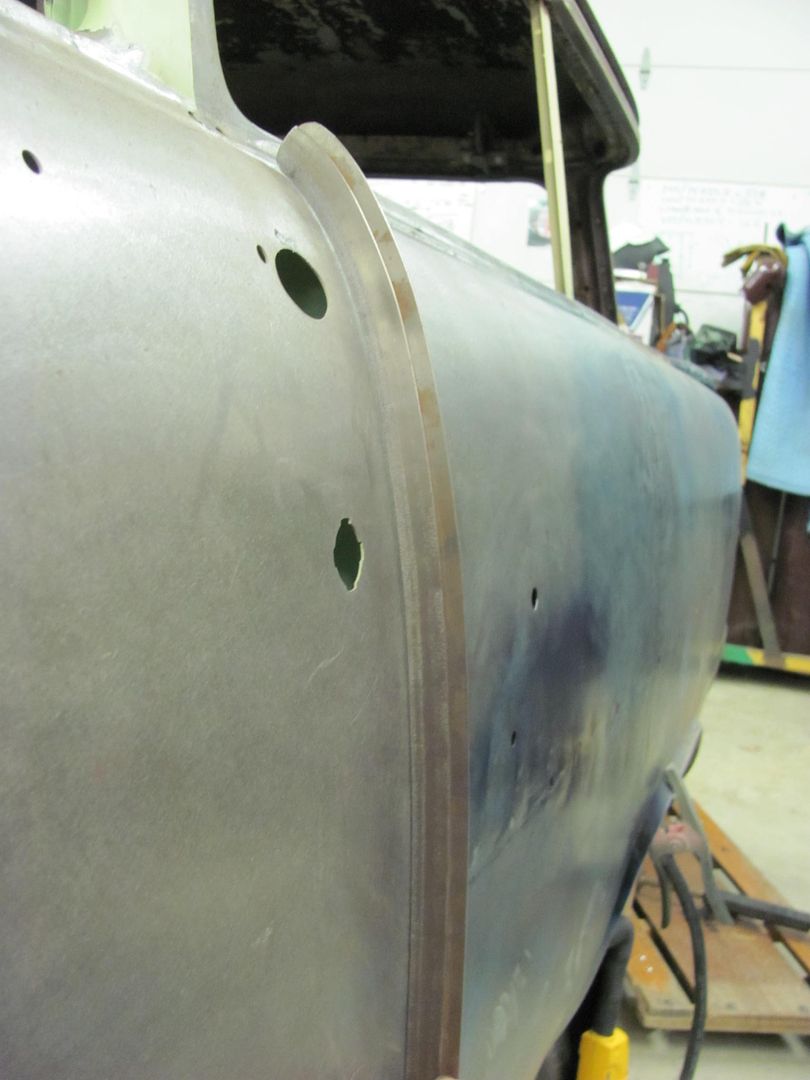
With the lower corner of the door fitting better, it becomes all the more obvious how poor of a reproduction these outer rocker panels are. The "concave" radius does not match the fender to the front or the quarter to the rear of the rocker. This would have been a good fix using the Wheeling machine with a Go Kart slick, had it been noticed before installation.
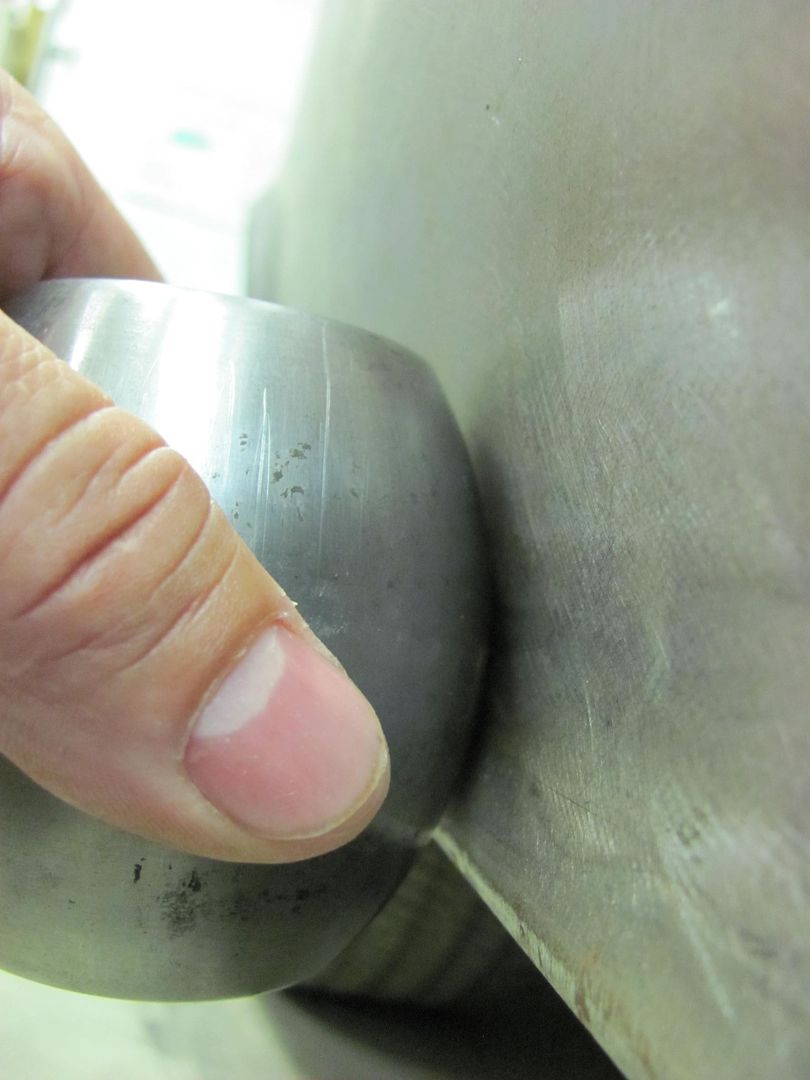
Matching the lower anvils of the Wheeling machine to the radius on the quarter, this one fits the best. Also notice how it doesn't fit as well in the rocker panel..
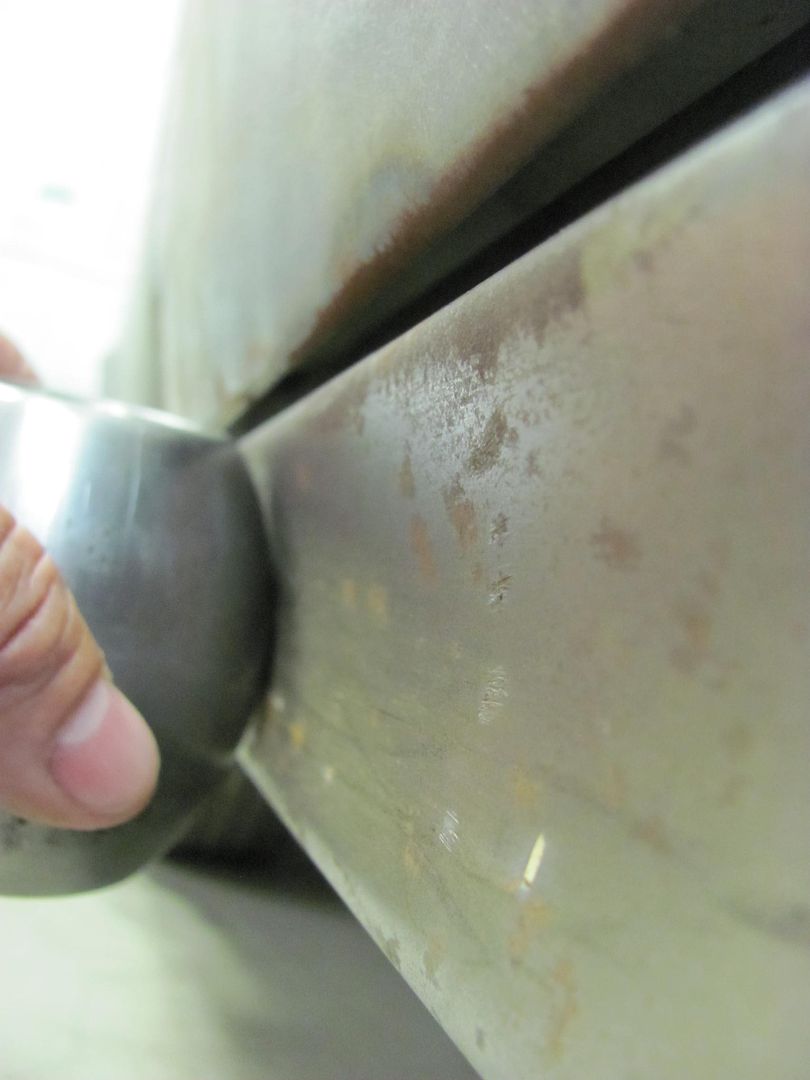
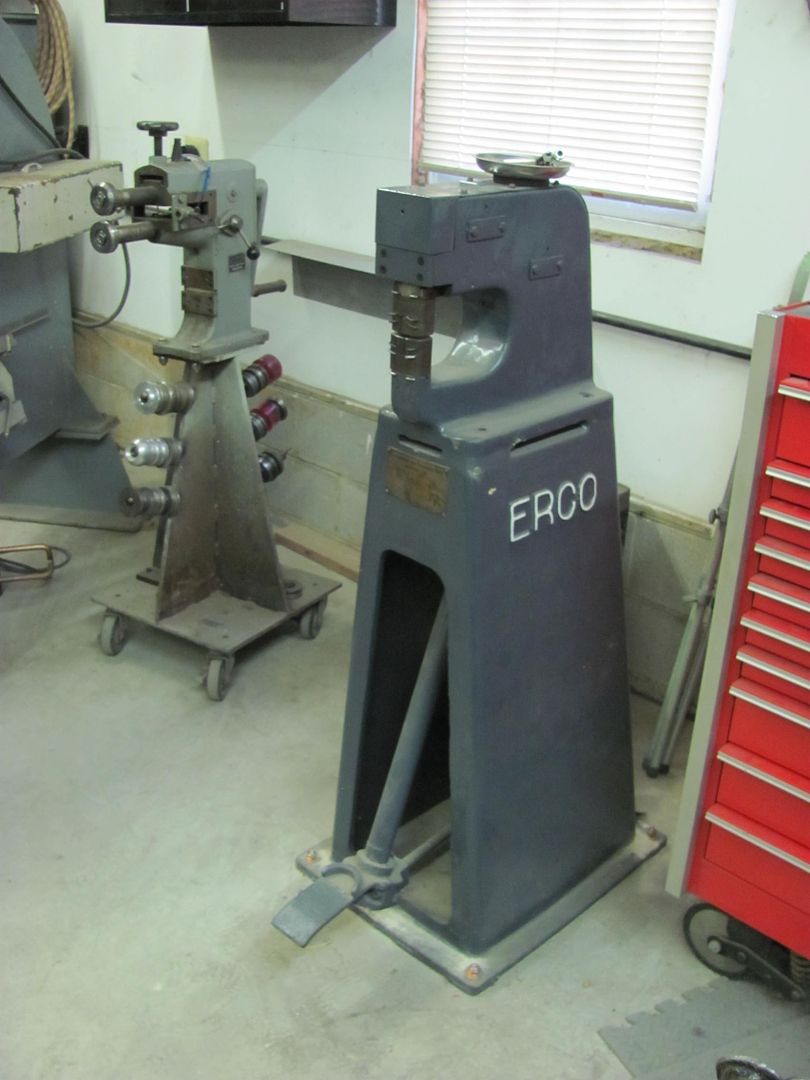
At this point I thought I'd try a "portable" version of the Wheeling machine to add a bit more radius to the rocker panel.

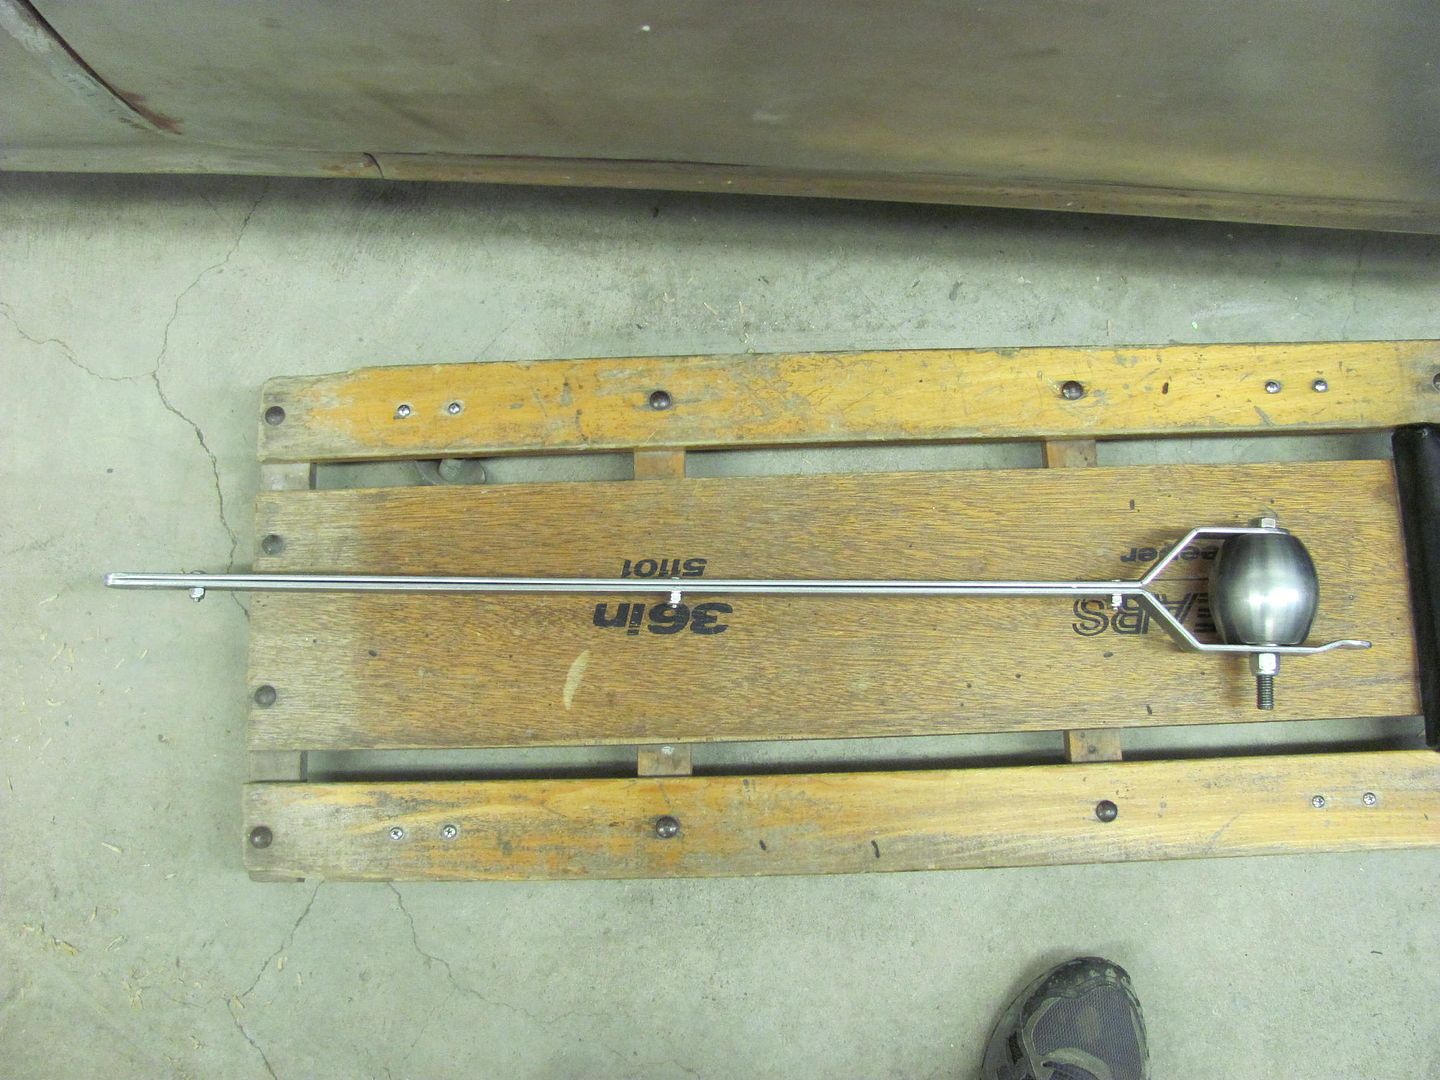
Built in guide......
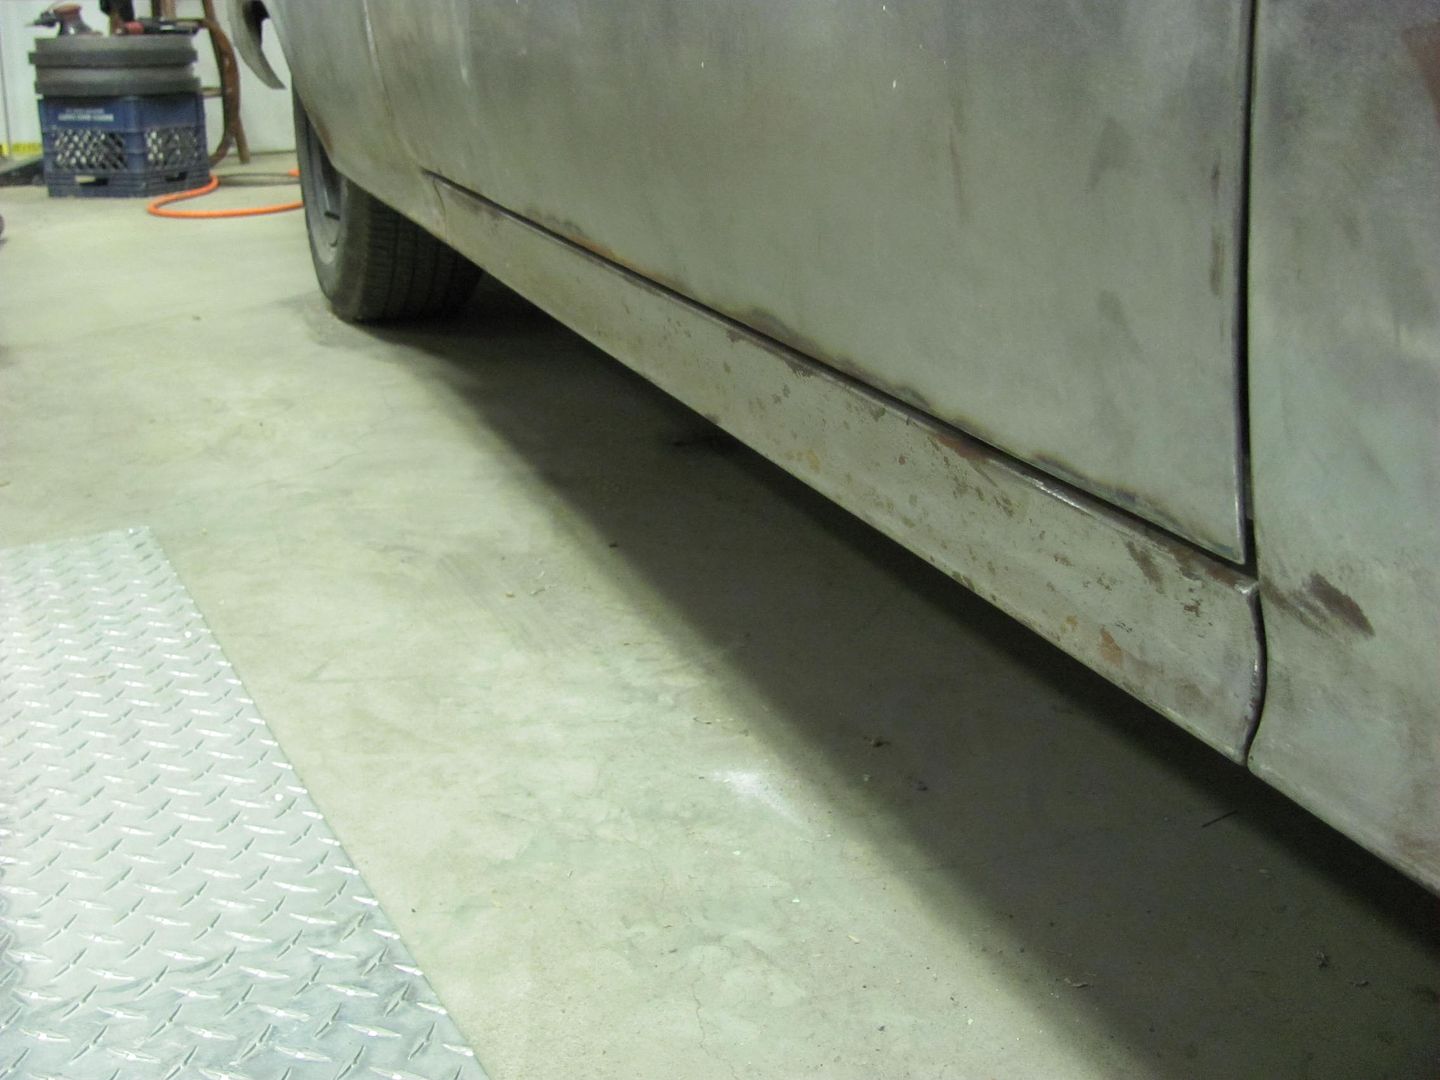
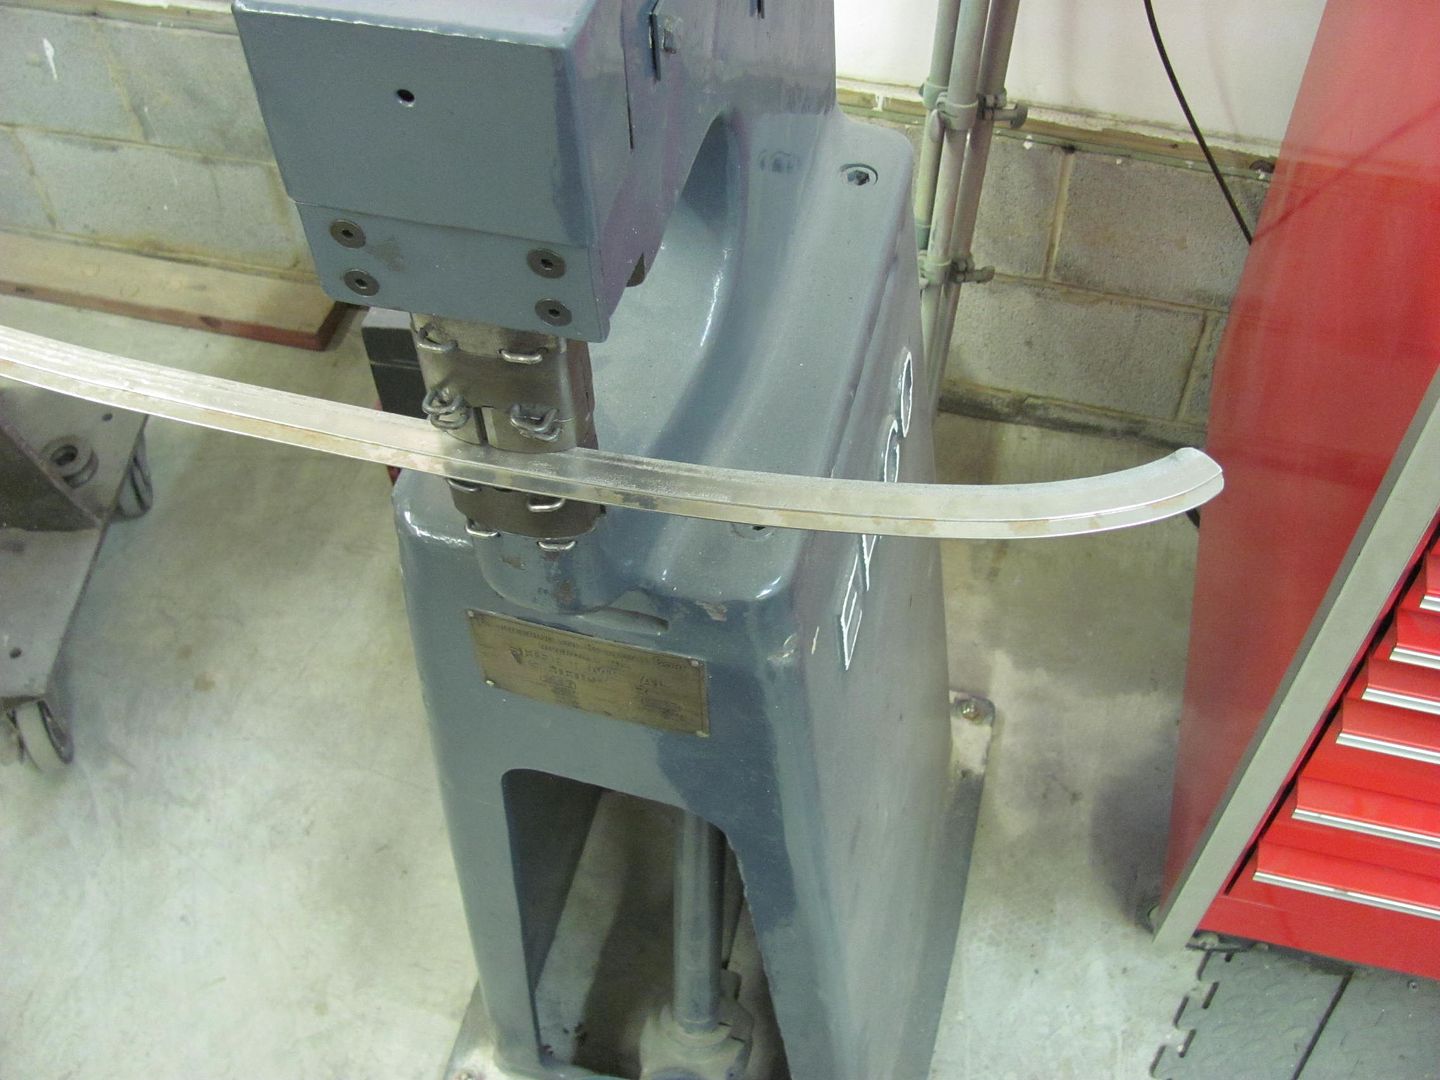
After some "wheeling", and some bumping of the leading edge with a door skin hammer:
Just to show the comparison, before
After:
Robert
-
09-03-2014 08:44 PM #3
CHR Member
- Join Date
- Feb 2007
- Location
- Santa Monica
- Car Year, Make, Model: 37 Ford tudor humpback
- Posts
- 1,988
I used that same method on my '37. Worked like a charm! Originally Posted by MP&C

"It is not much good thinking of a thing unless you think it out." - H.G. Wells
-
09-13-2014 02:27 AM #4
CHR Member
- Join Date
- Feb 2008
- Location
- Inglewood
- Car Year, Make, Model: 60 F100 truck
- Posts
- 6,339
An old telephone book works well,too.. Even better than a block of wood in some cases.. Originally Posted by randyr

Micah 6:8
If we aren't supposed to have midnight snacks,,,WHY is there a light in the refrigerator???
Robin.
-
09-22-2014 03:08 PM #5
CHR Member
- Join Date
- Oct 2003
- Location
- ST.LOUIS
- Car Year, Make, Model: 31 FORD 5 WINDOW,69 442, 305 sprint car,
- Posts
- 1,410
Matching the lower anvils of the Wheeling machine to the radius on the quarter, this one fits the best. Also notice how it doesn't fit as well in the rocker panel..
At this point I thought I'd try a "portable" version of the Wheeling machine to add a bit more radius to the rocker panel.
After some "wheeling", and some bumping of the leading edge with a door skin hammer:
Lost me.... You mean you was bumping your die ? Or the rocker just in front of your die ? Thanks.
-
09-22-2014 07:32 PM #6
CHR Member
- Join Date
- Jun 2008
- Location
- Leonardtown
- Car Year, Make, Model: Walking
- Posts
- 1,228
This was basically a glorified "rolling" operation, as there is no access to the back side like you would have with using an actual English wheel. So for applying pressure, I started on a creeper and found the casters counter-productive.
Once I put the piece of diamond plate on the floor I could get a bit more pressure applied. Rolled it back and forth a few times with pressure applied. Even though it has a guide, by adjusting height location of handle end, you could move anvil's path up and down on the rocker about 1/2 to 3/4 inch. So I worked it front to back and then moved position slightly and repeated. About ten minutes time overall, took longer to make the handles than to use them.
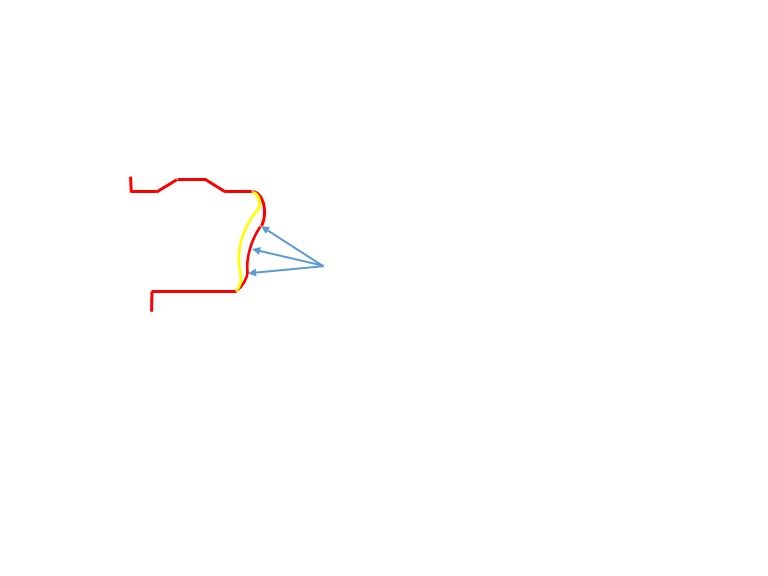
It didn't appear to pull the gap open any farther. In watching the movement as I was rolling, what appeared to happen is the reproduction panel has rather bulbous radius on outside corners where factory is sharper. So looking at this crude depiction, I think it is just relocating metal and forming sharper creases in the process.
Where the front end of the rocker has an end plate spot welded in, the roller didn't have as much effect there, so it needed more persuasion right on the end. Hence, the door skin hammer..Robert
-
09-04-2014 10:19 AM #7
CHR Member
- Join Date
- Oct 2007
- Location
- Petaluma
- Car Year, Make, Model: 48 Ford F1
- Posts
- 9,795
Very nice work. Cool solution to working with everything in place. Also nice tips on door adjustments!"  "No matter where you go, there you are!" Steve.
-
09-04-2014 01:35 PM #8
CHR Member
- Join Date
- Apr 2011
- Location
- Prairie City
- Car Year, Make, Model: 40 Ford Deluxe, 68 Corvette, 72&76 K30
- Posts
- 7,301
- Blog Entries
- 1
Wow, great work and thanks for the tips. Once the body is bolted to the frame I will try that!Ryan
1940 Ford Deluxe Tudor 354 Hemi 46RH Electric Blue w/multi-color flames, Ford 9" Residing in multiple pieces
1968 Corvette Coupe 5.9 Cummins Drag Car 11.43@130mph No stall leaving the line with 1250 rpm's and poor 2.2 60'
1972 Chevy K30 Longhorn P-pumped 24v Compound Turbos 47RH Just another money pit
1971 Camaro RS 5.3 BTR Stage 3 cam, SuperT10
Tire Sizes
-
09-06-2014 06:16 PM #9
CHR Member
- Join Date
- Jun 2008
- Location
- Leonardtown
- Car Year, Make, Model: Walking
- Posts
- 1,228
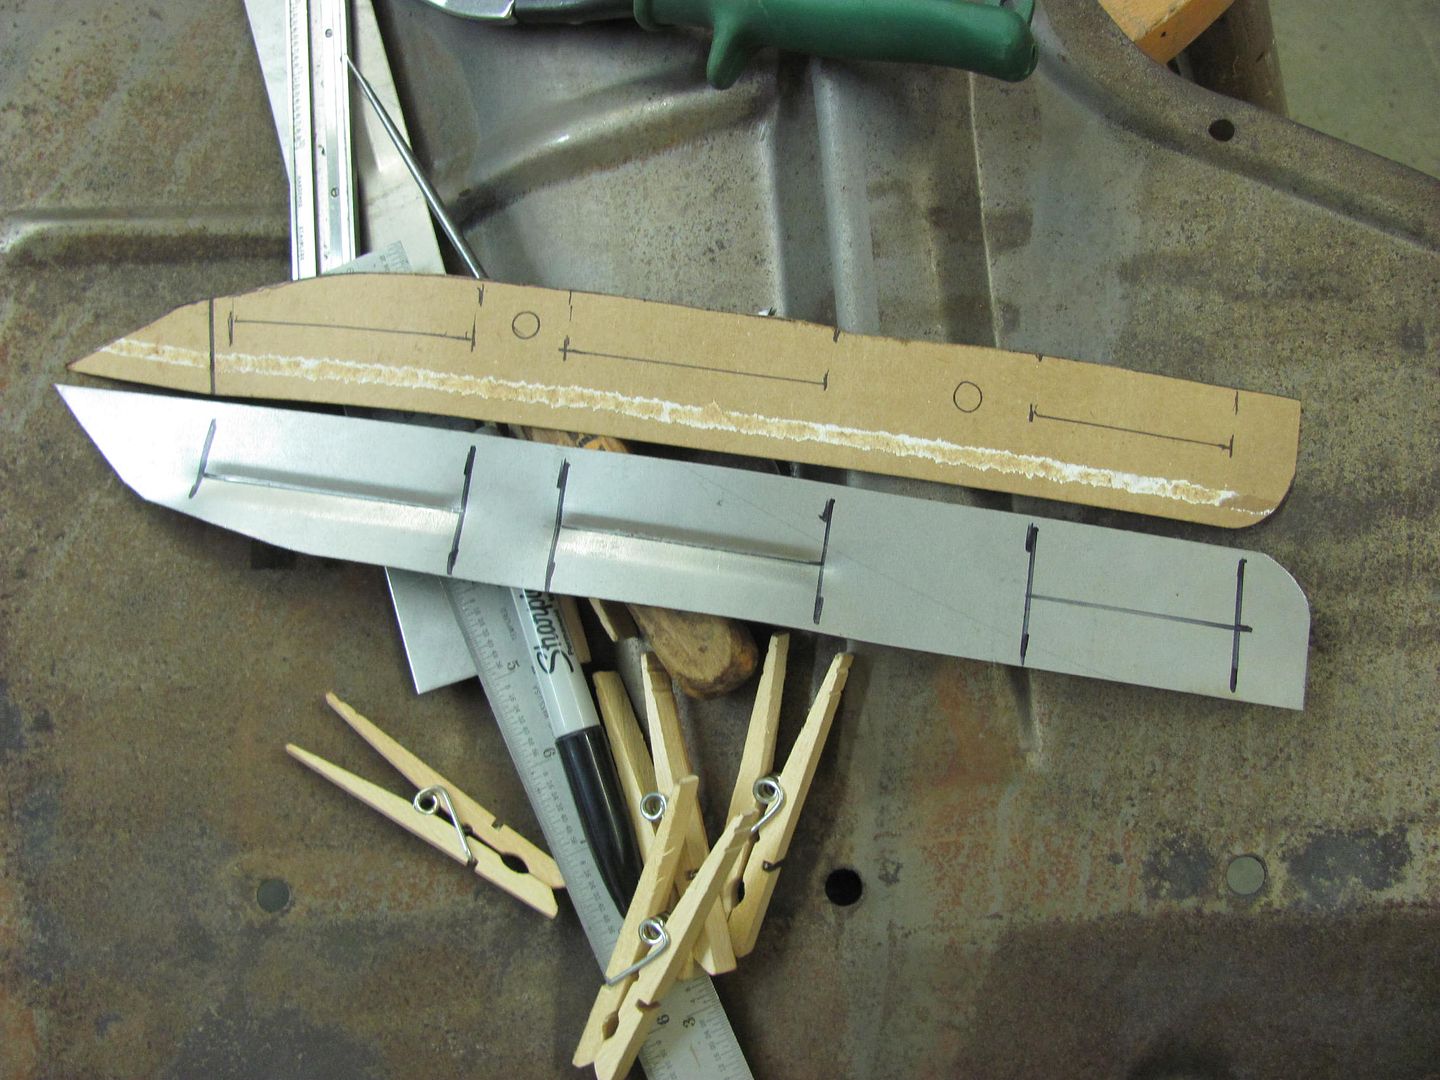
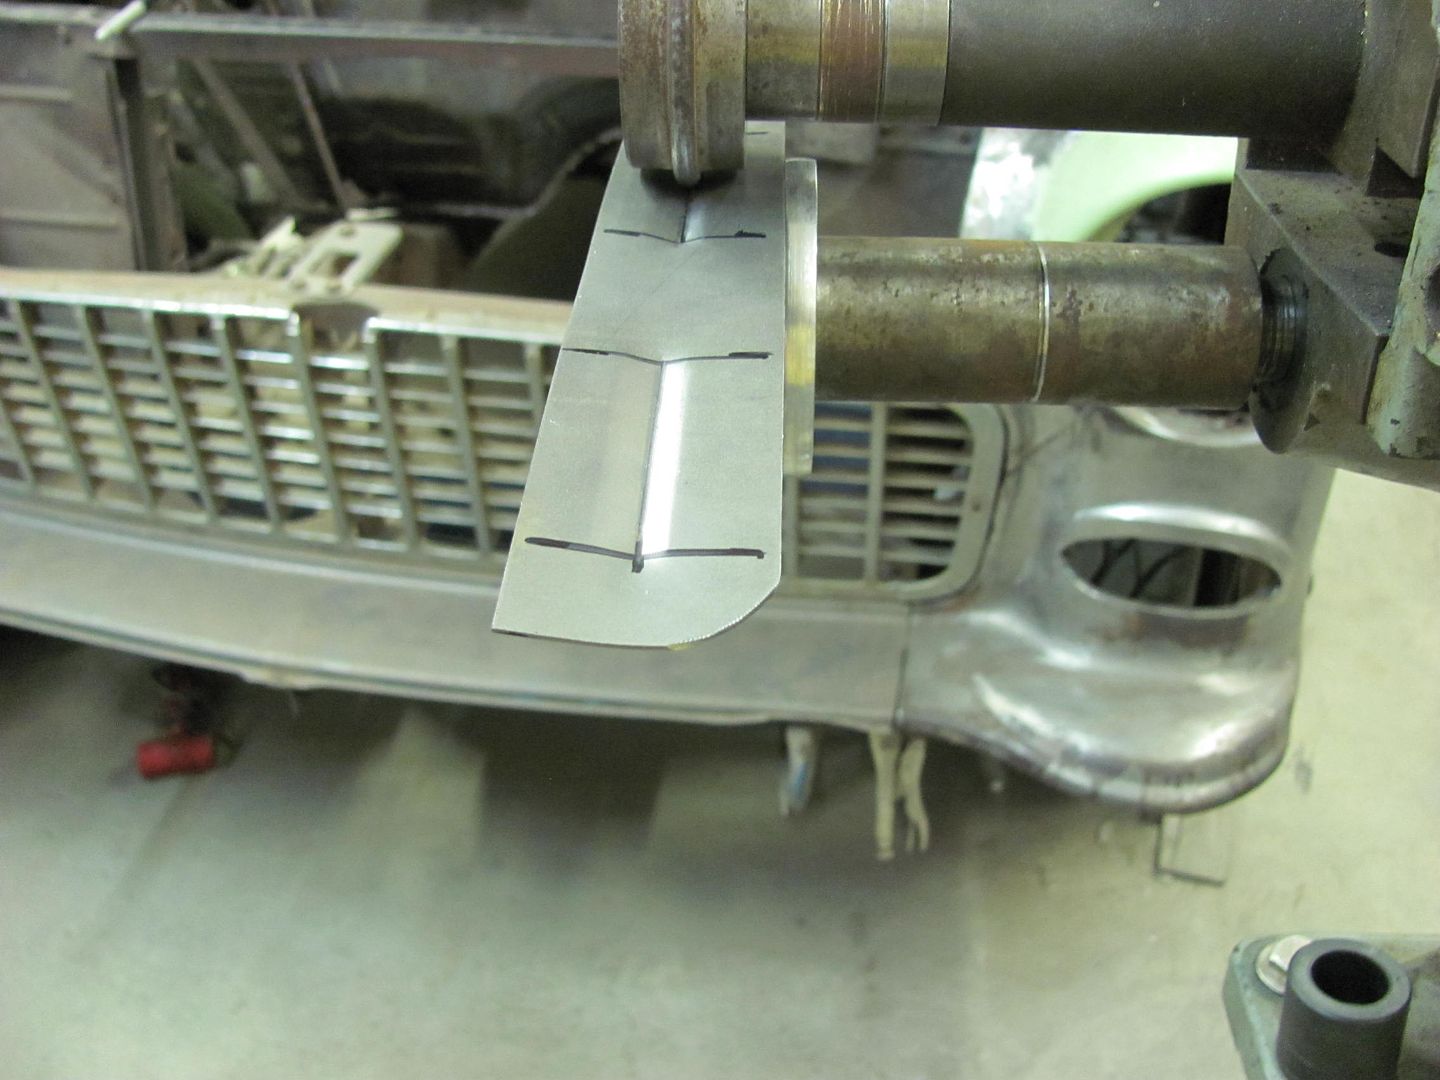
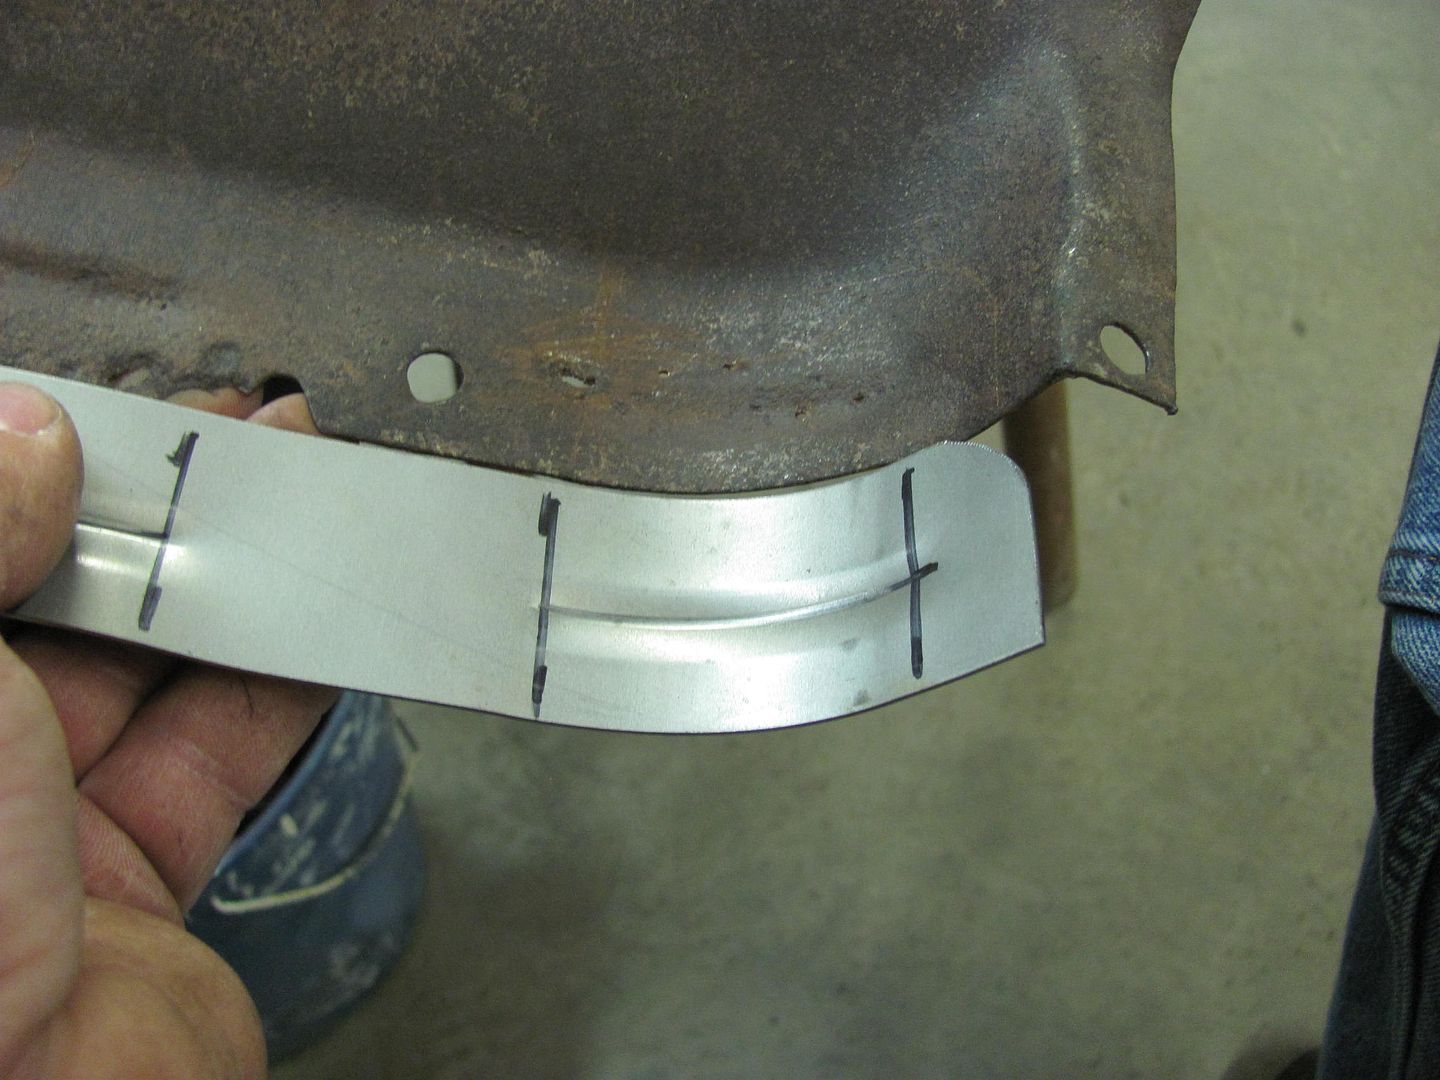
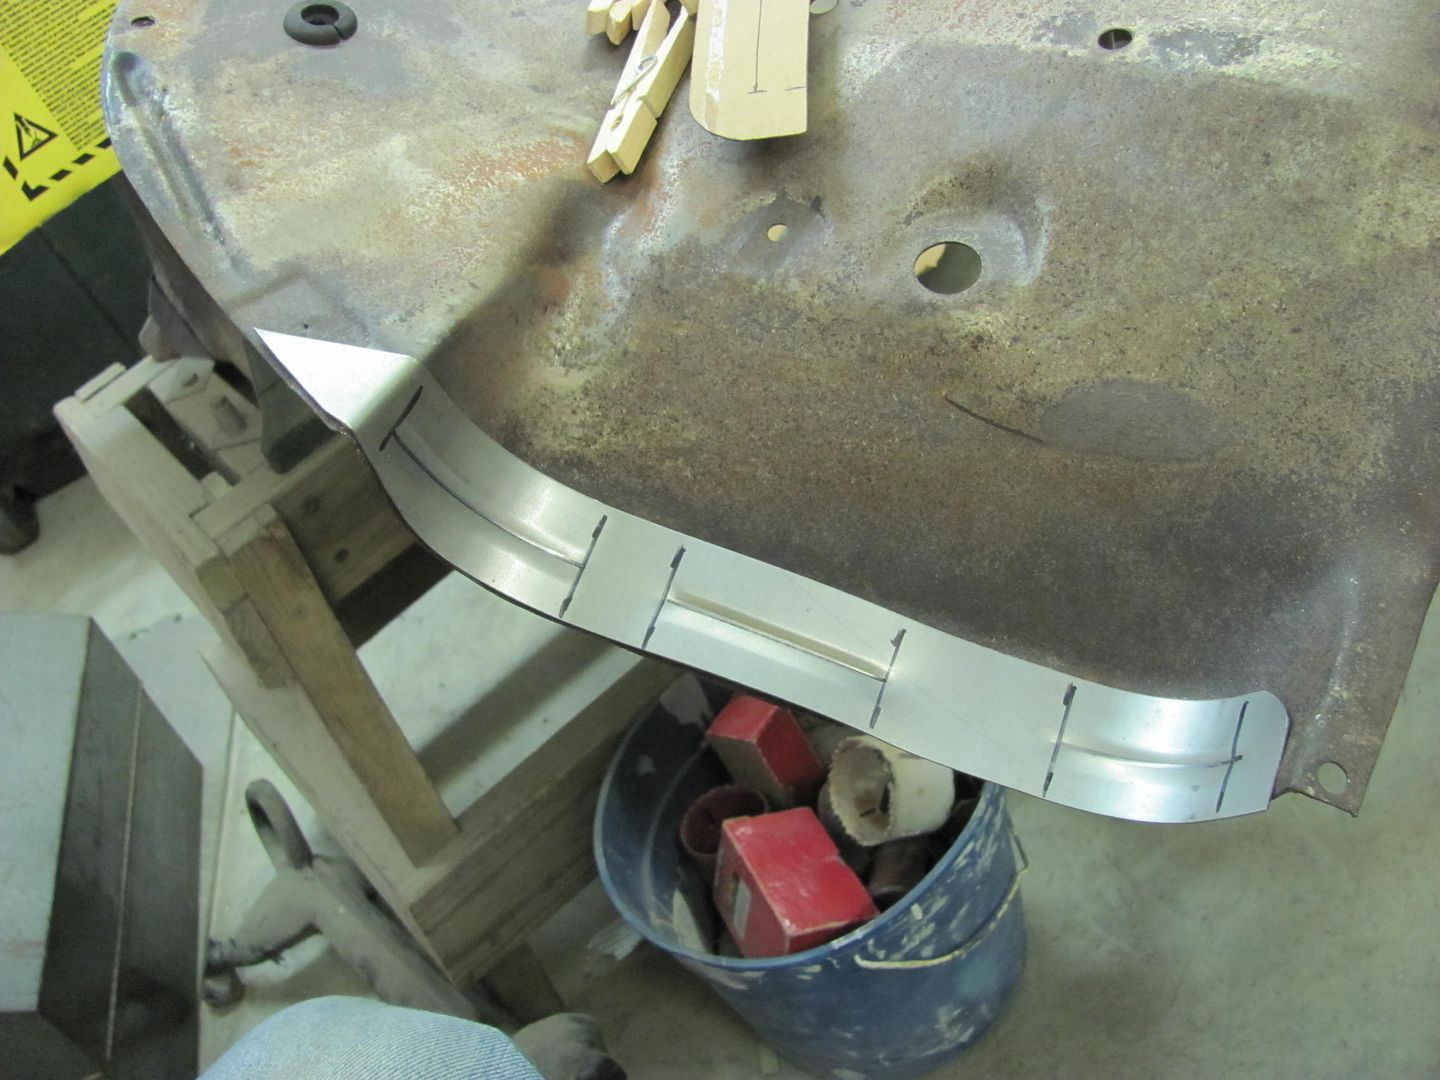
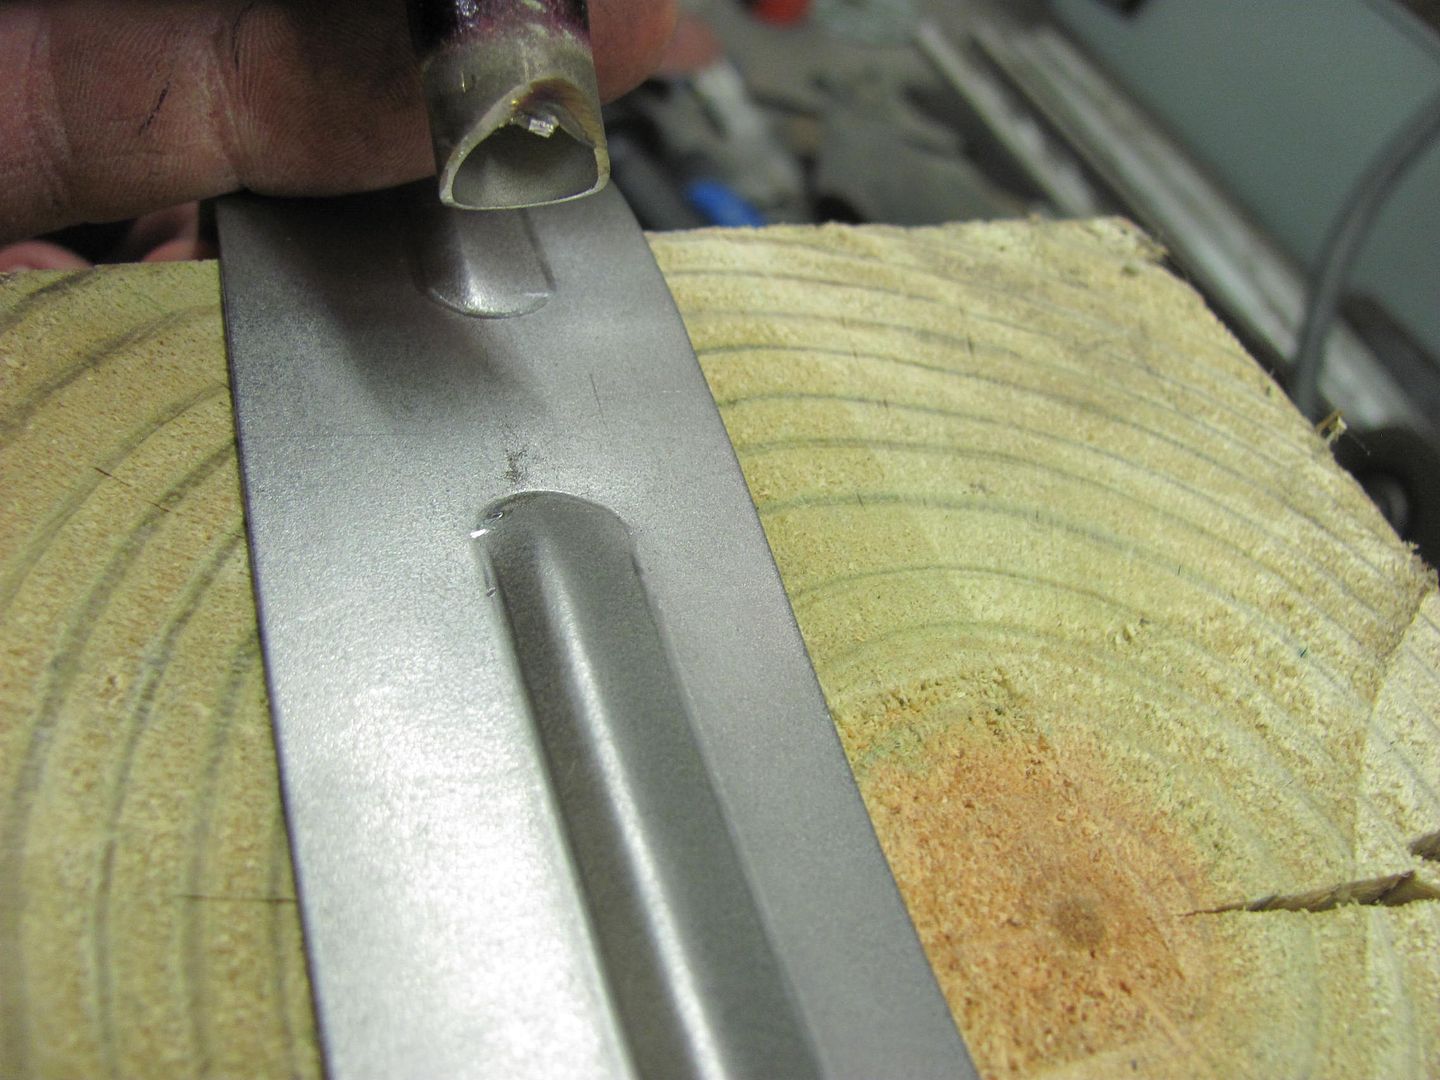
More progress today, working on some metal bumping on the drivers quarter, so a profile template was needed... Took a 1-1/2 x48 piece of 19 ga and used the mag brake to fold it, then the bead roller to flatten.

Then used the kick shrinker to get it to match the contour of the rear of the door, this will give us a close match to the front half of the quarter...
If you shrink too much, no need to change dies, just shrink the rear portion of the template (away from the body)
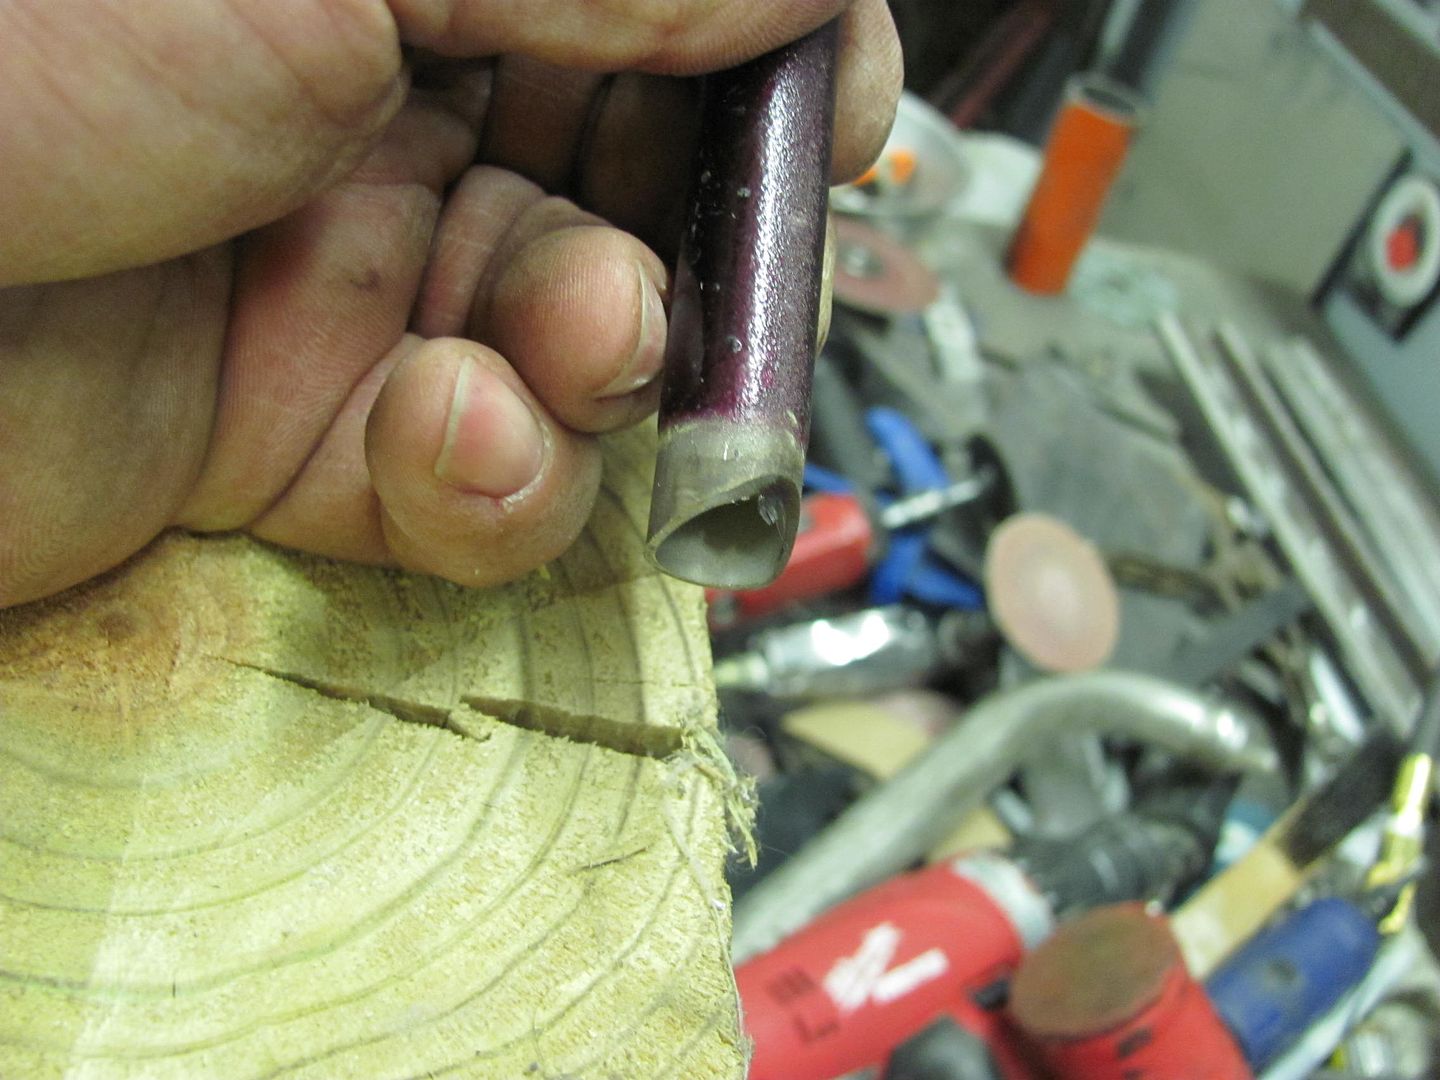
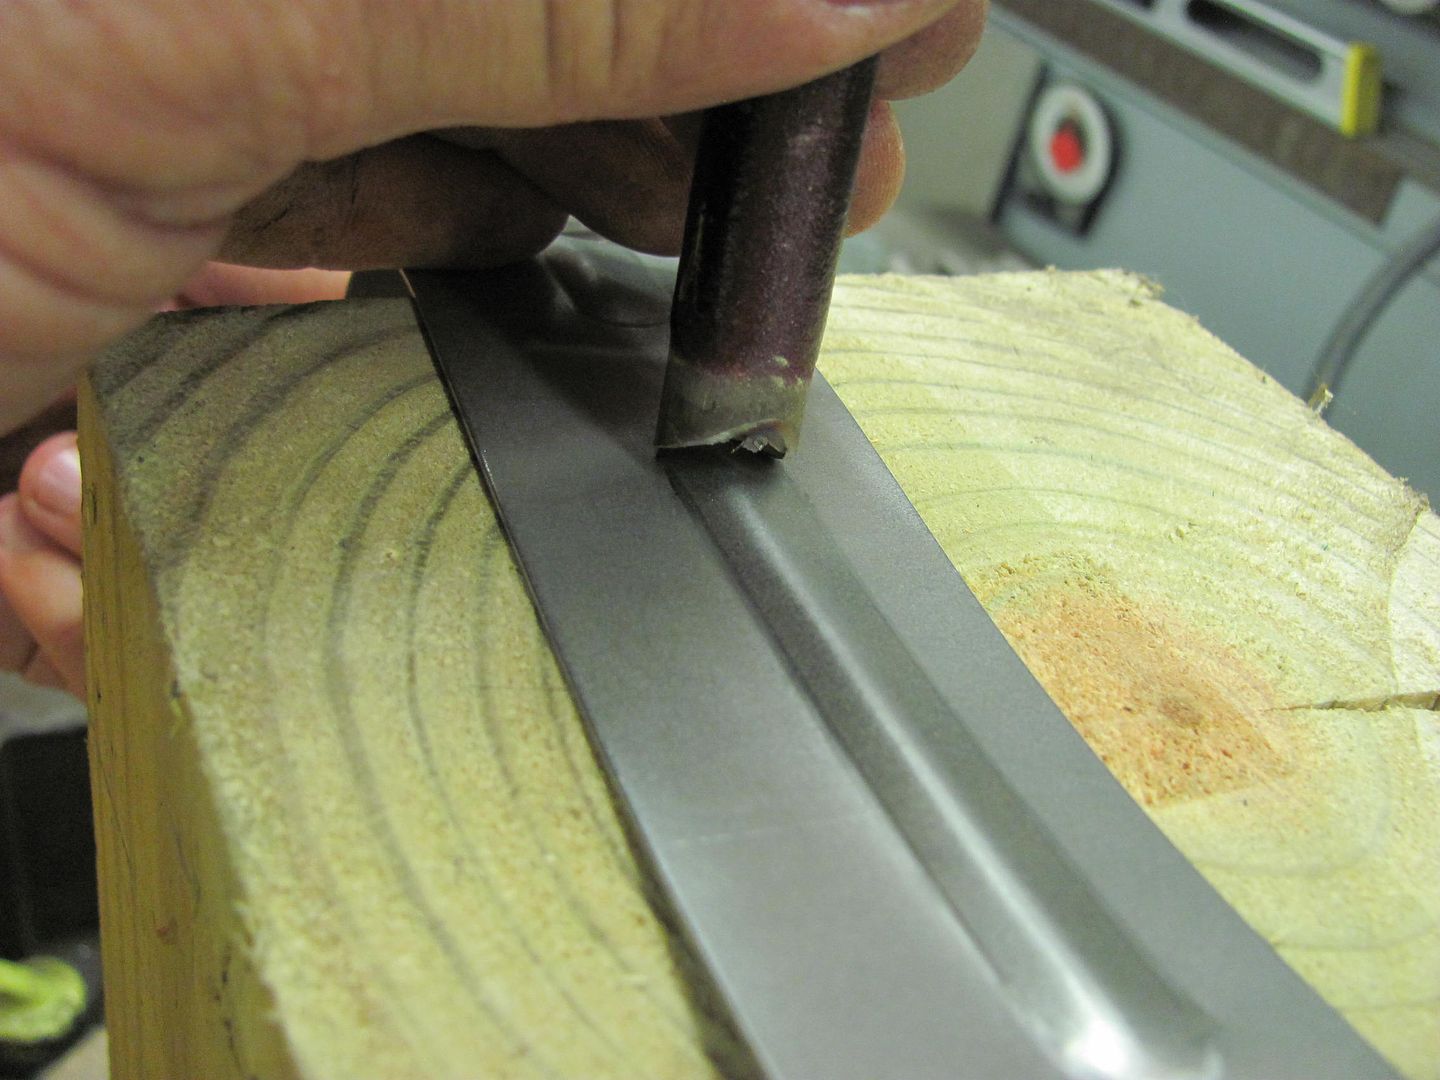
Ends are radiused...

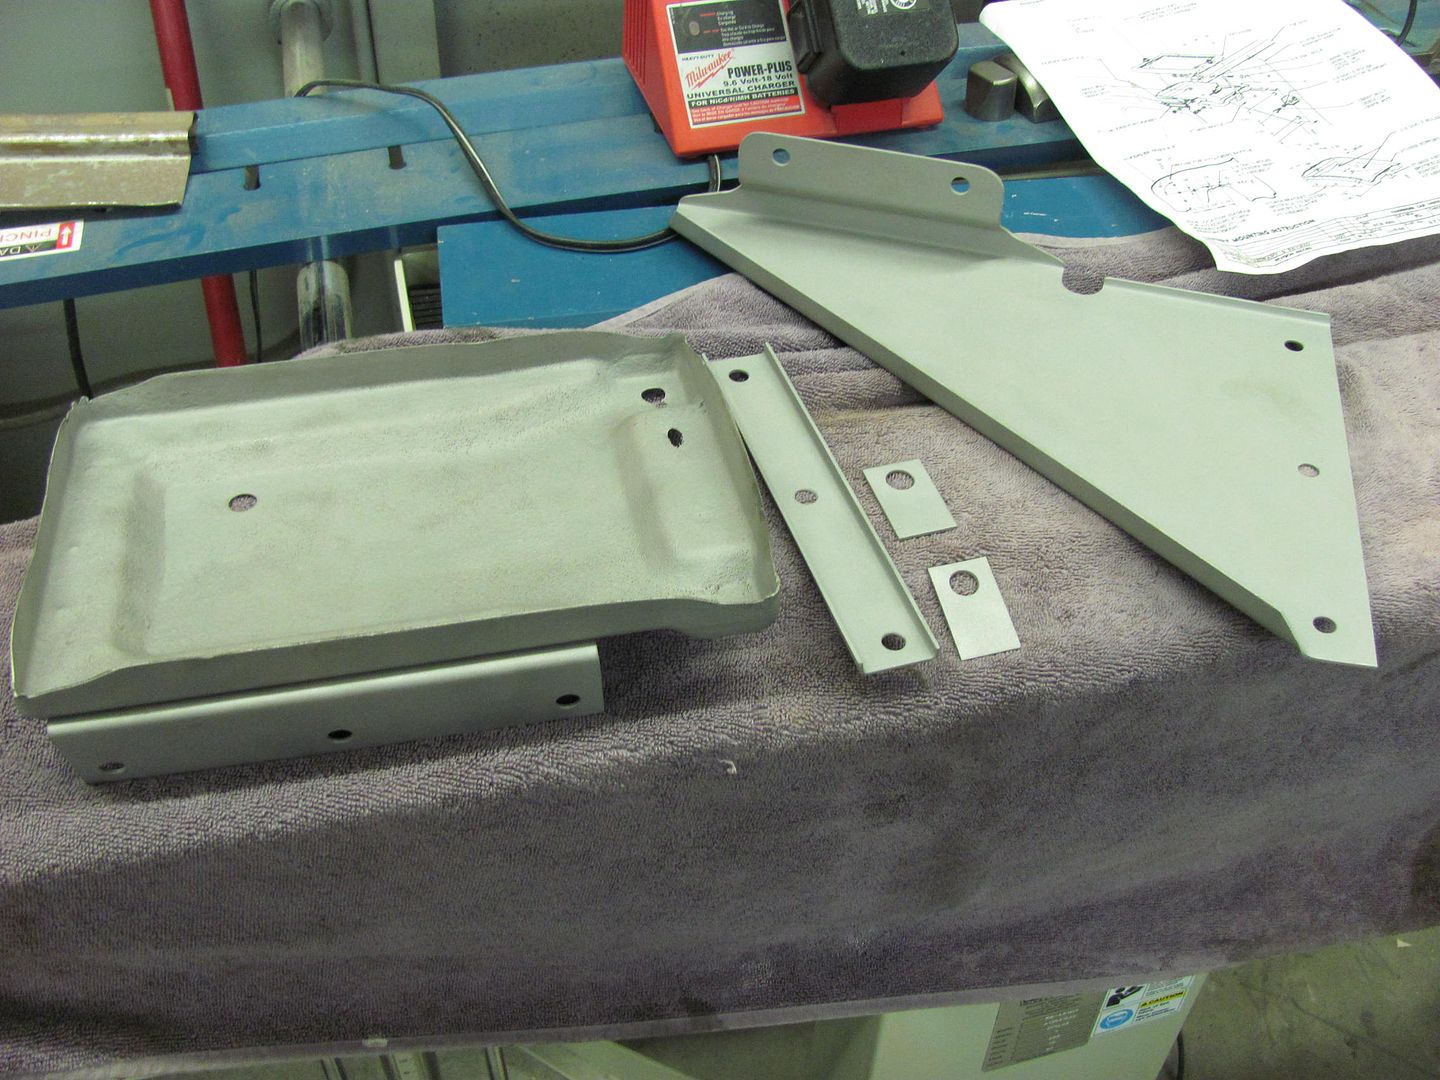
Then the factory battery tray (firewall mounted) was dissected to use with the "Factory AC car" parts, in order to mount the battery in the passenger front corner behind the core support.
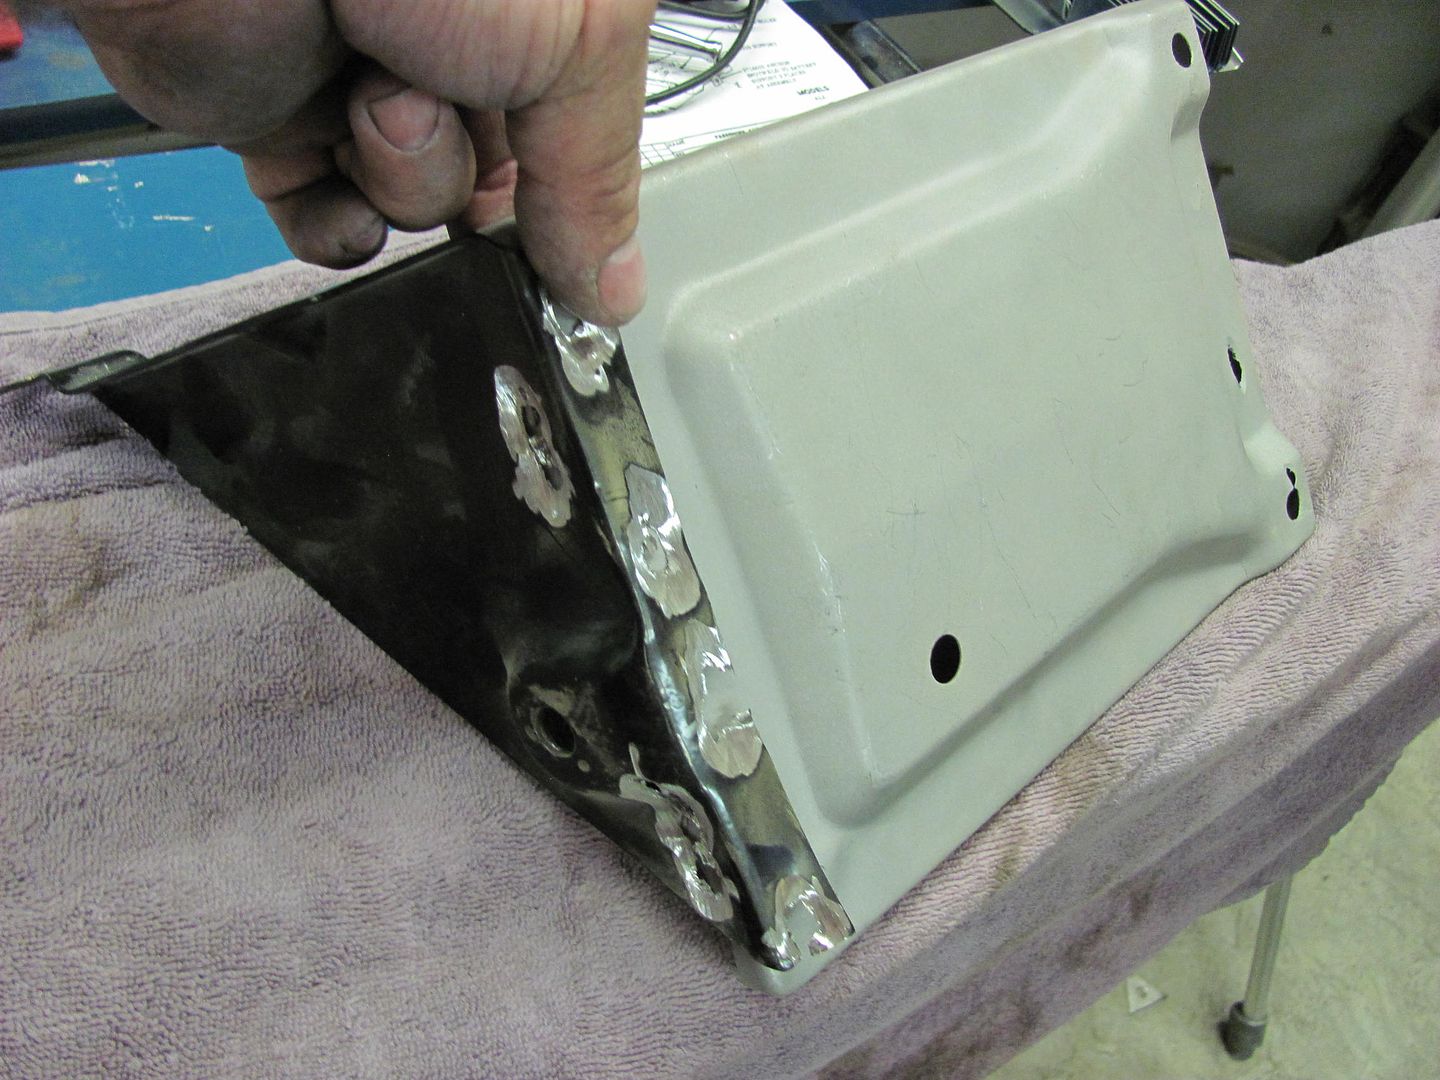
...and all the parts were media blasted. We have some sheet metal plugs to punch out tomorrow for use on a couple of repairs of thin spots, and then the works will get mocked up on the inner fender for placement, weld the parts together, and off for powder coating.
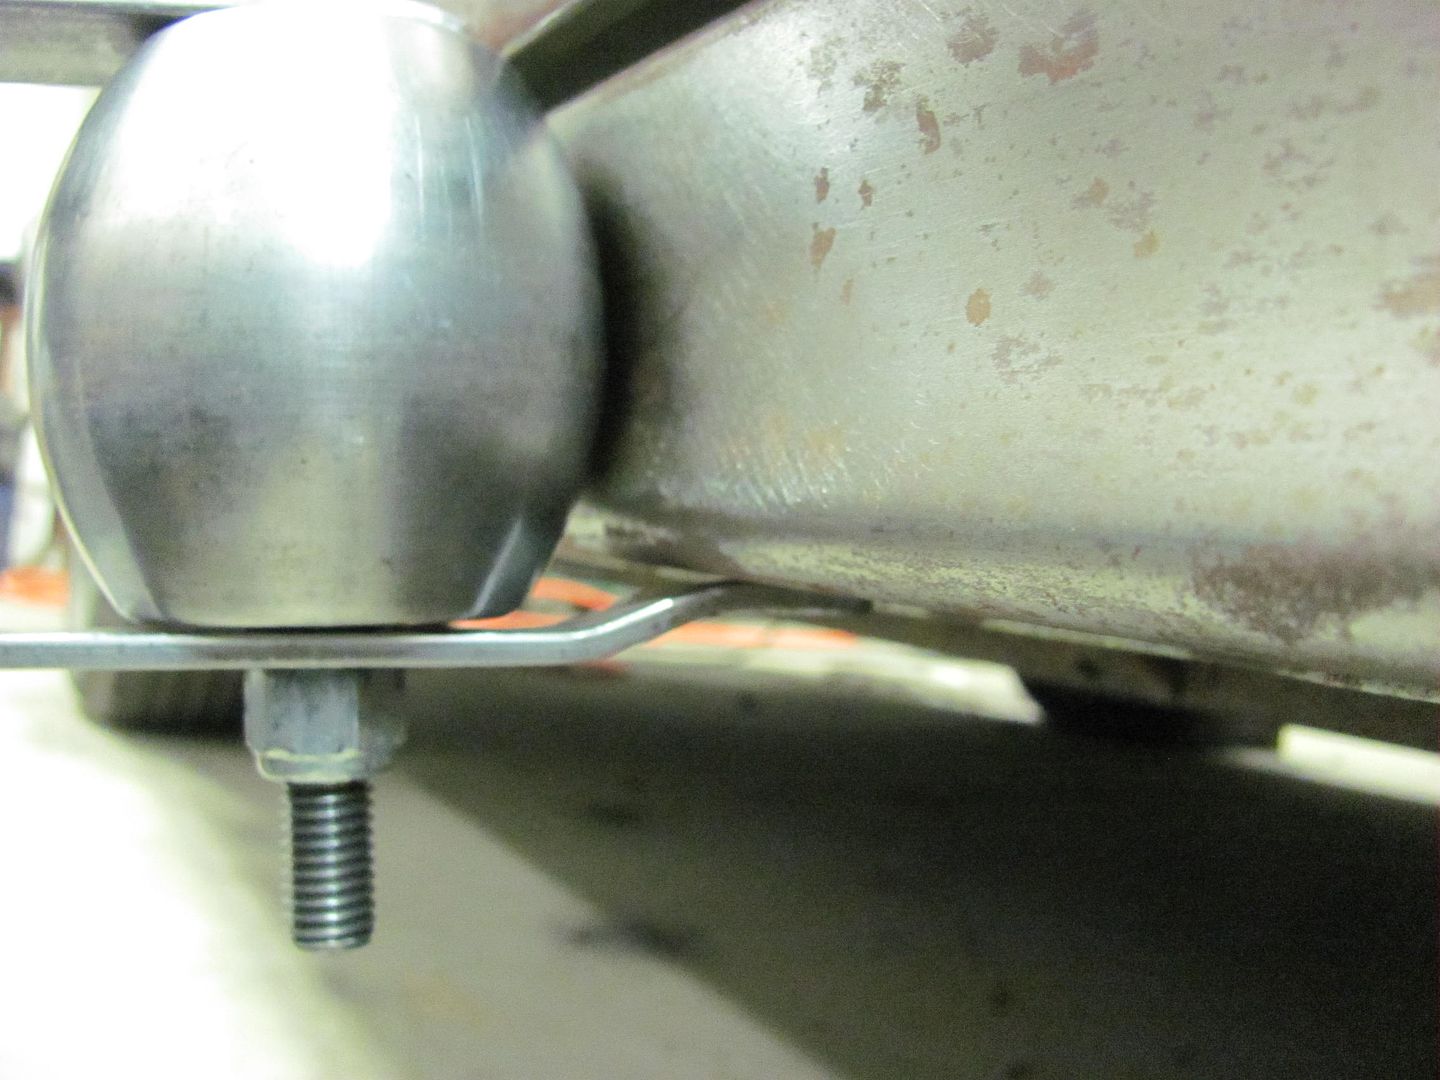
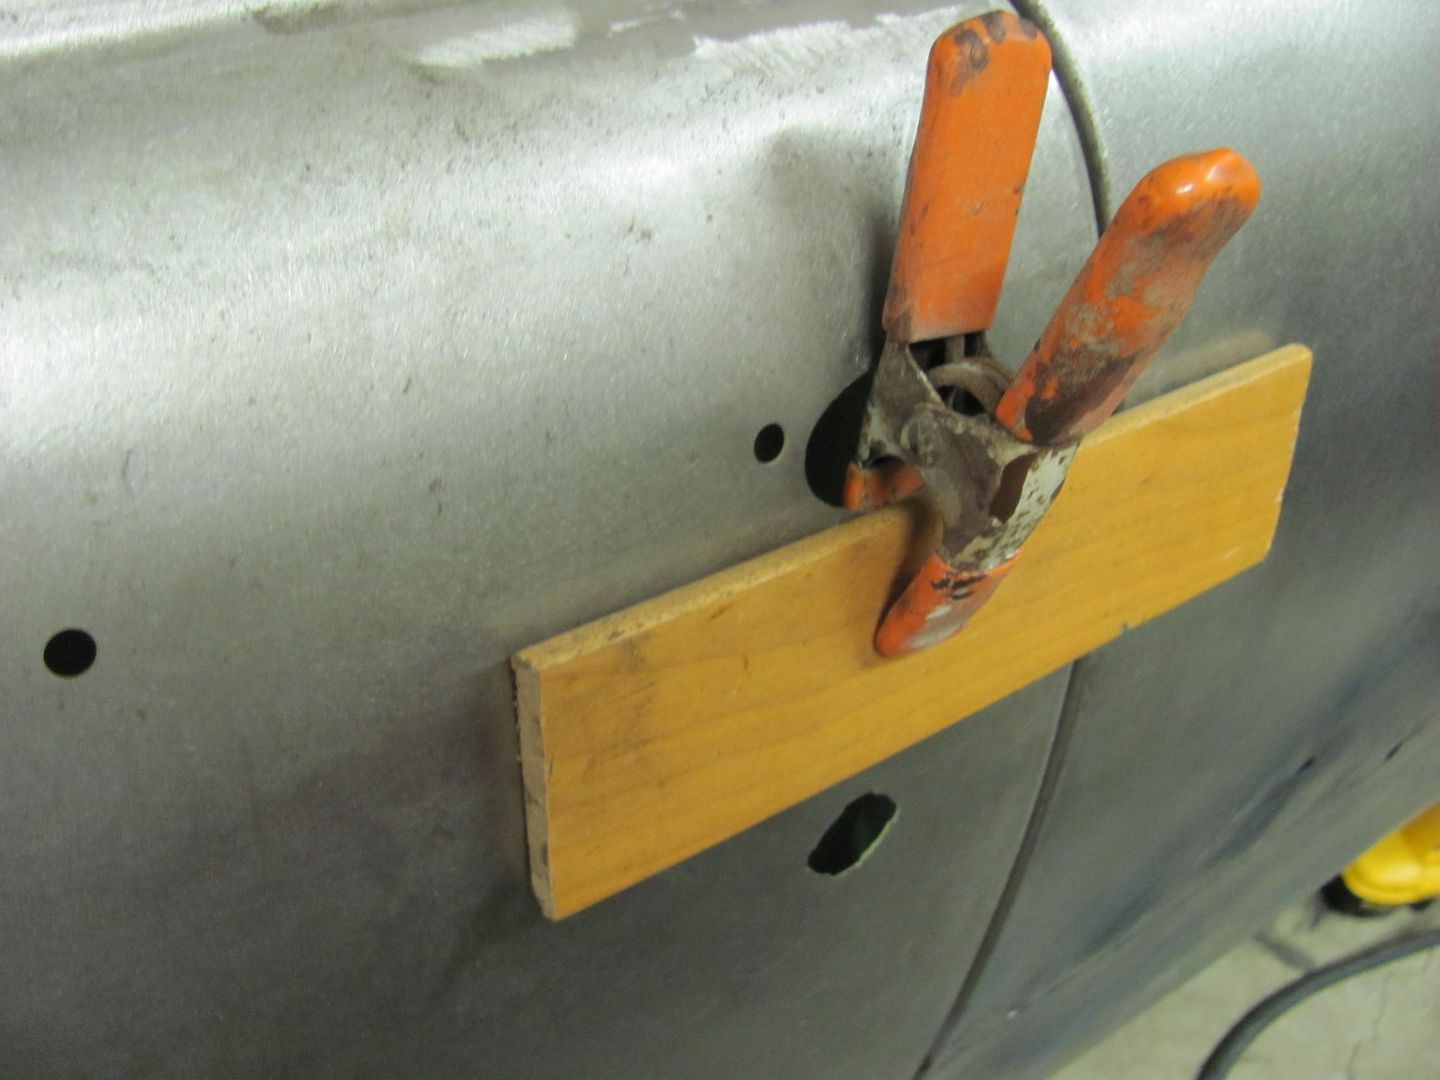
One more tip for those doing mock-up/door fitment without latches, this will hold the door flush with the jamb. (Thanks to Laszlo Nobi for that idea)
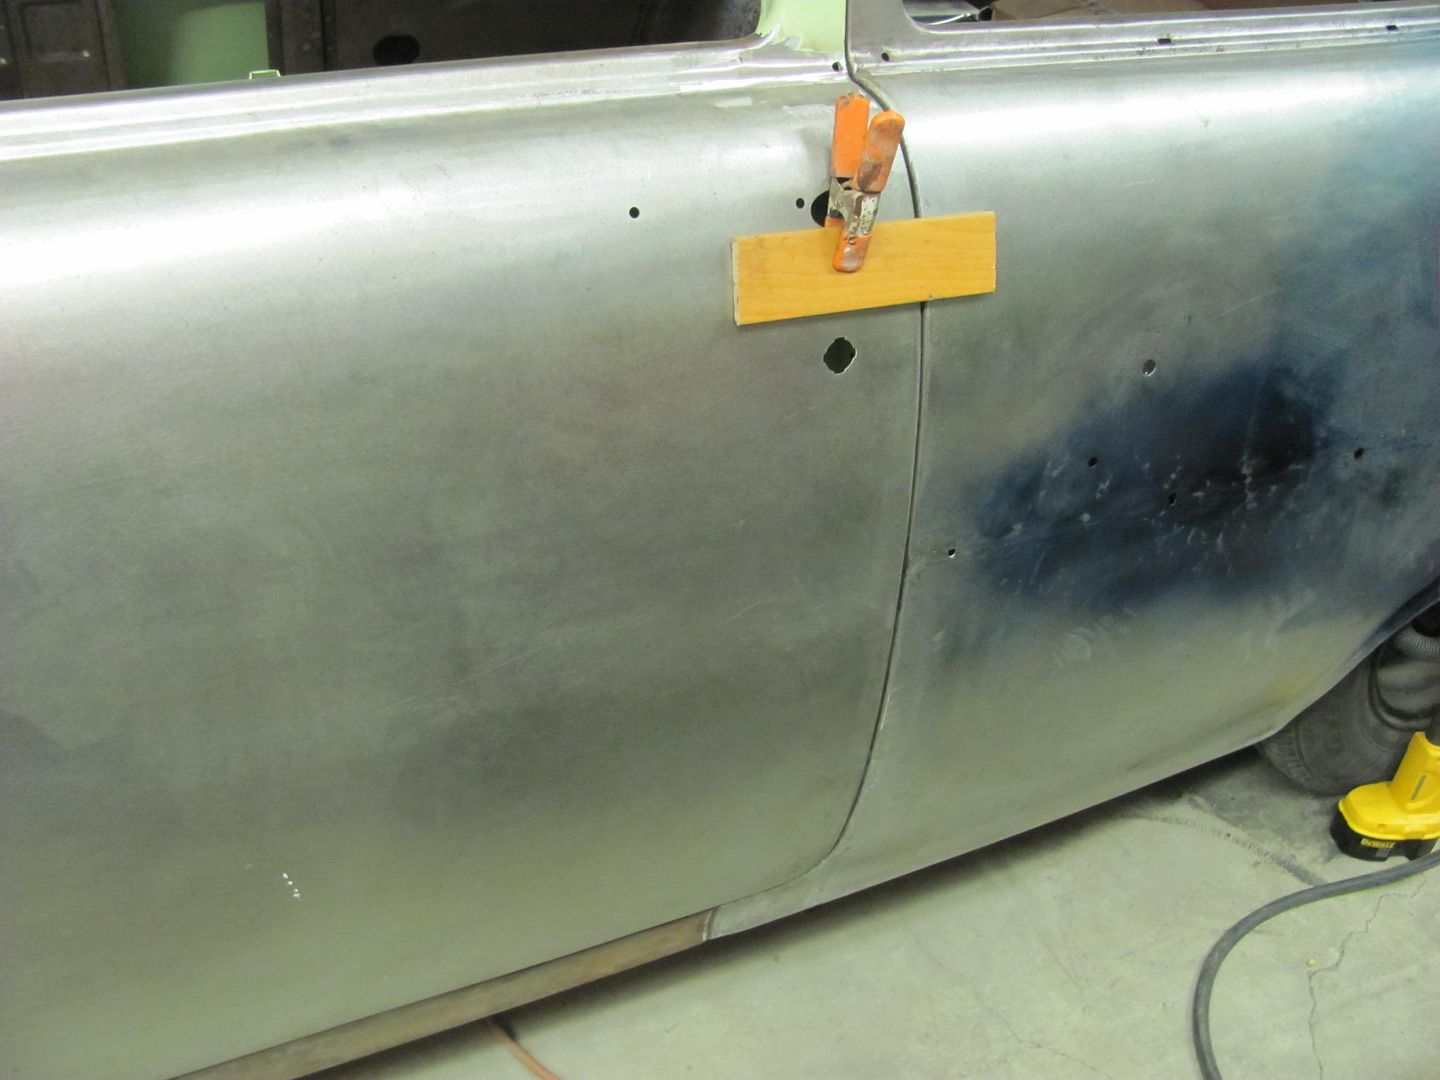
Robert
-
09-08-2014 04:31 PM #10
CHR Member
- Join Date
- Apr 2011
- Location
- Prairie City
- Car Year, Make, Model: 40 Ford Deluxe, 68 Corvette, 72&76 K30
- Posts
- 7,301
- Blog Entries
- 1
Great work and thanks for another great tip!Ryan
1940 Ford Deluxe Tudor 354 Hemi 46RH Electric Blue w/multi-color flames, Ford 9" Residing in multiple pieces
1968 Corvette Coupe 5.9 Cummins Drag Car 11.43@130mph No stall leaving the line with 1250 rpm's and poor 2.2 60'
1972 Chevy K30 Longhorn P-pumped 24v Compound Turbos 47RH Just another money pit
1971 Camaro RS 5.3 BTR Stage 3 cam, SuperT10
Tire Sizes
-
09-10-2014 08:19 PM #11
CHR Member
- Join Date
- Jun 2008
- Location
- Leonardtown
- Car Year, Make, Model: Walking
- Posts
- 1,228
Thanks!
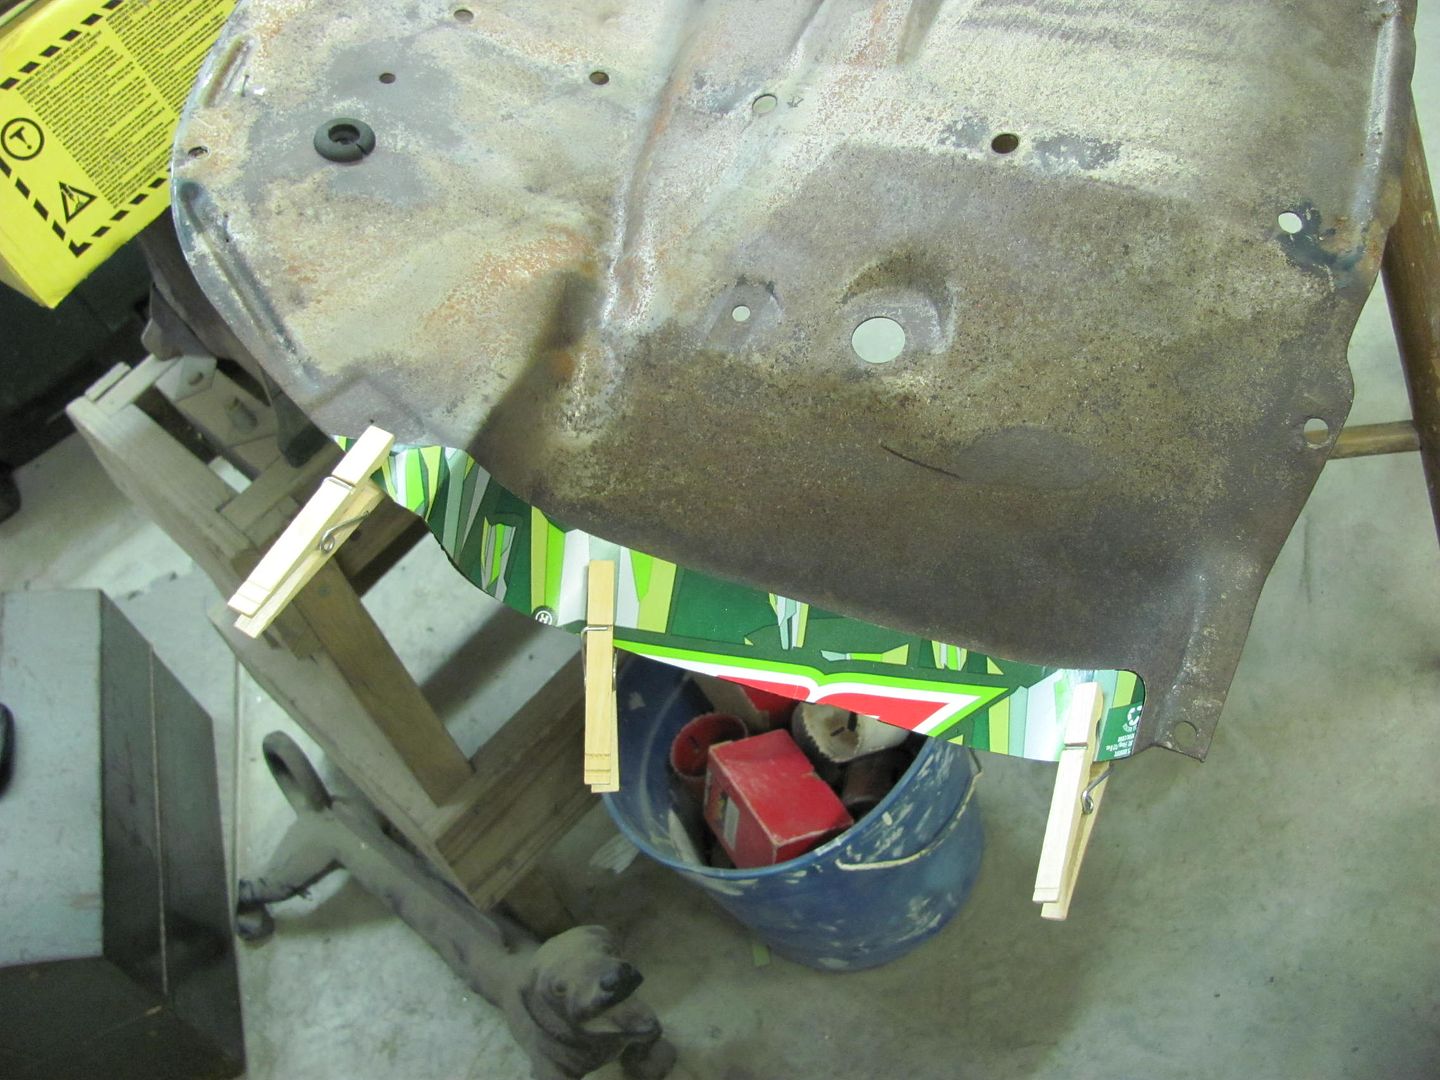
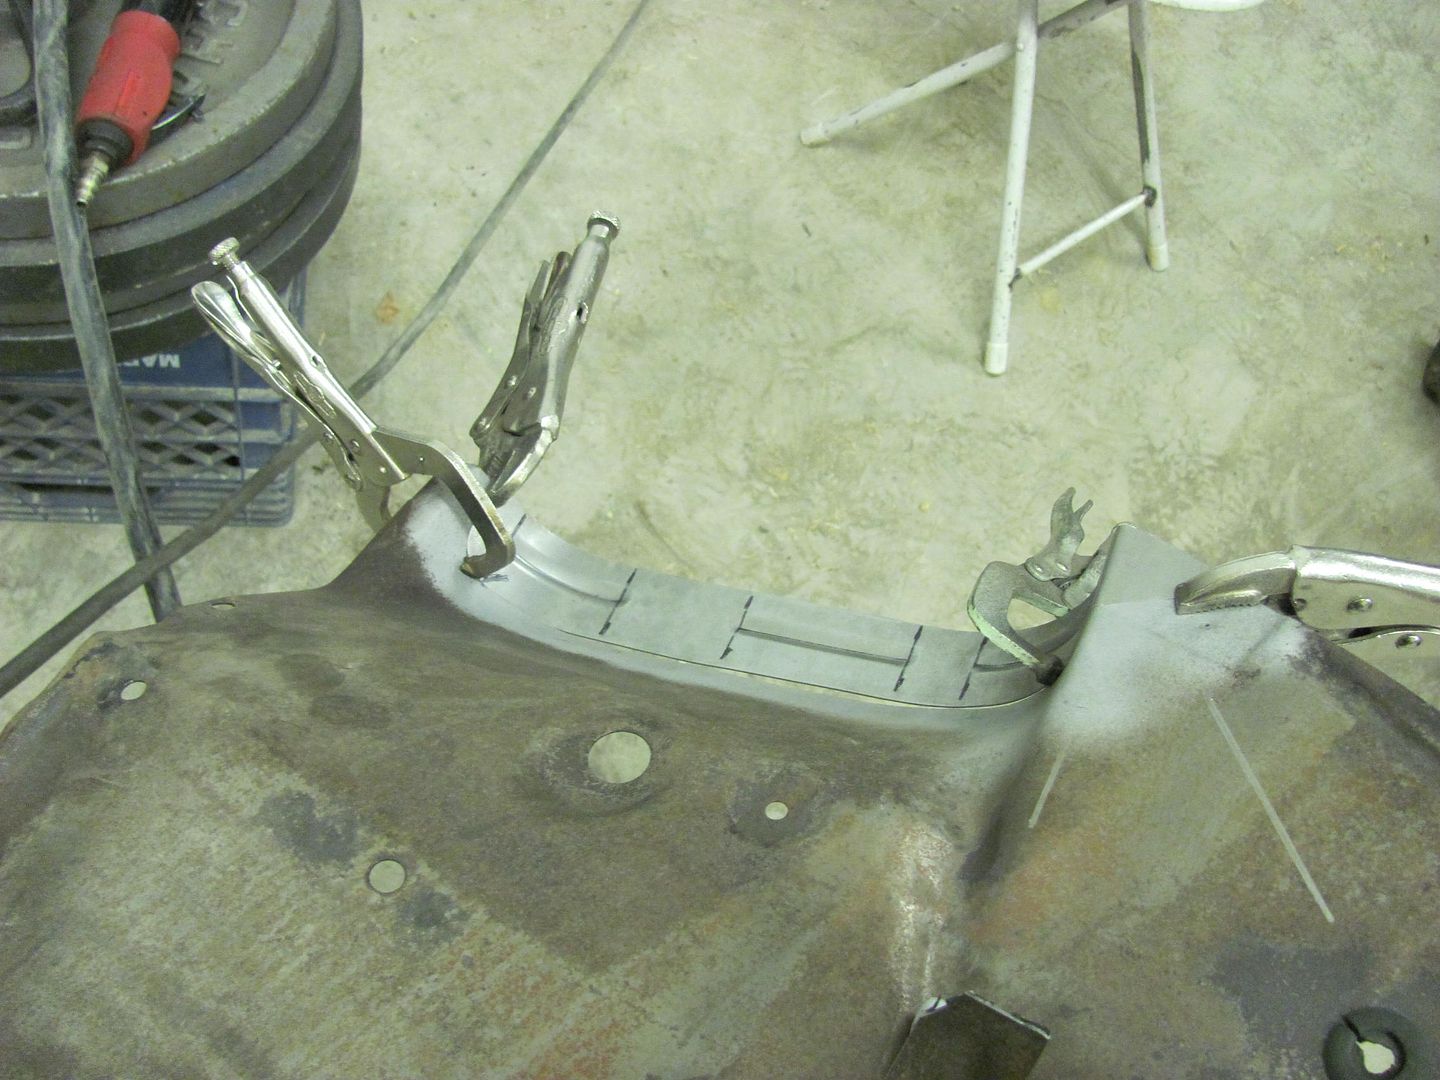
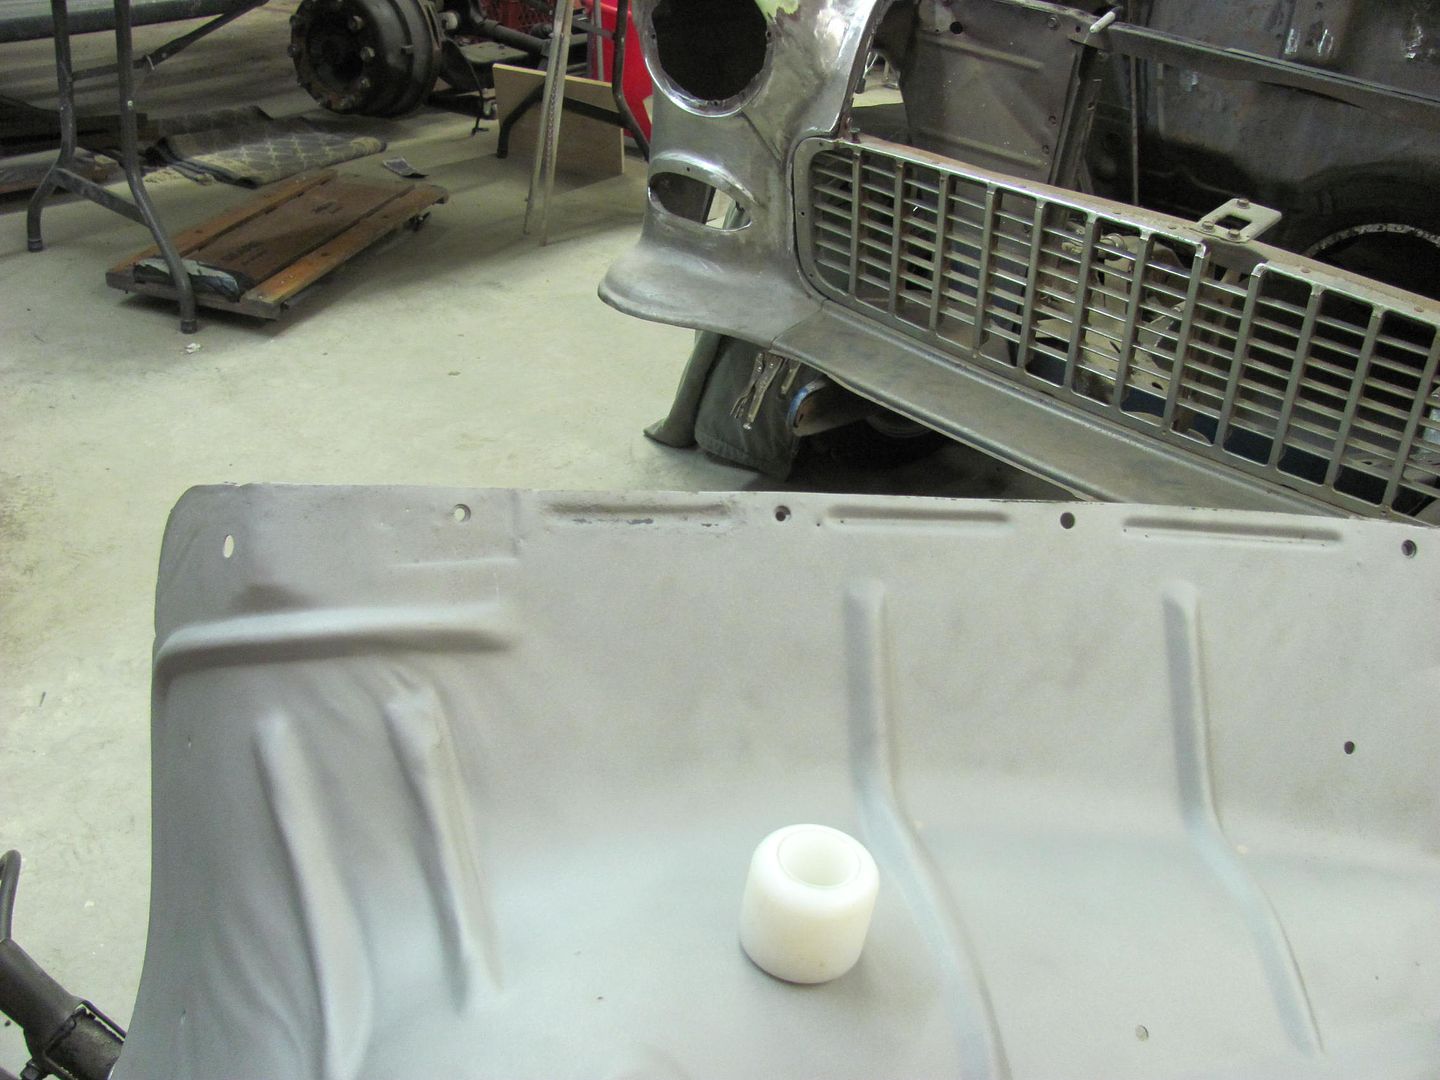
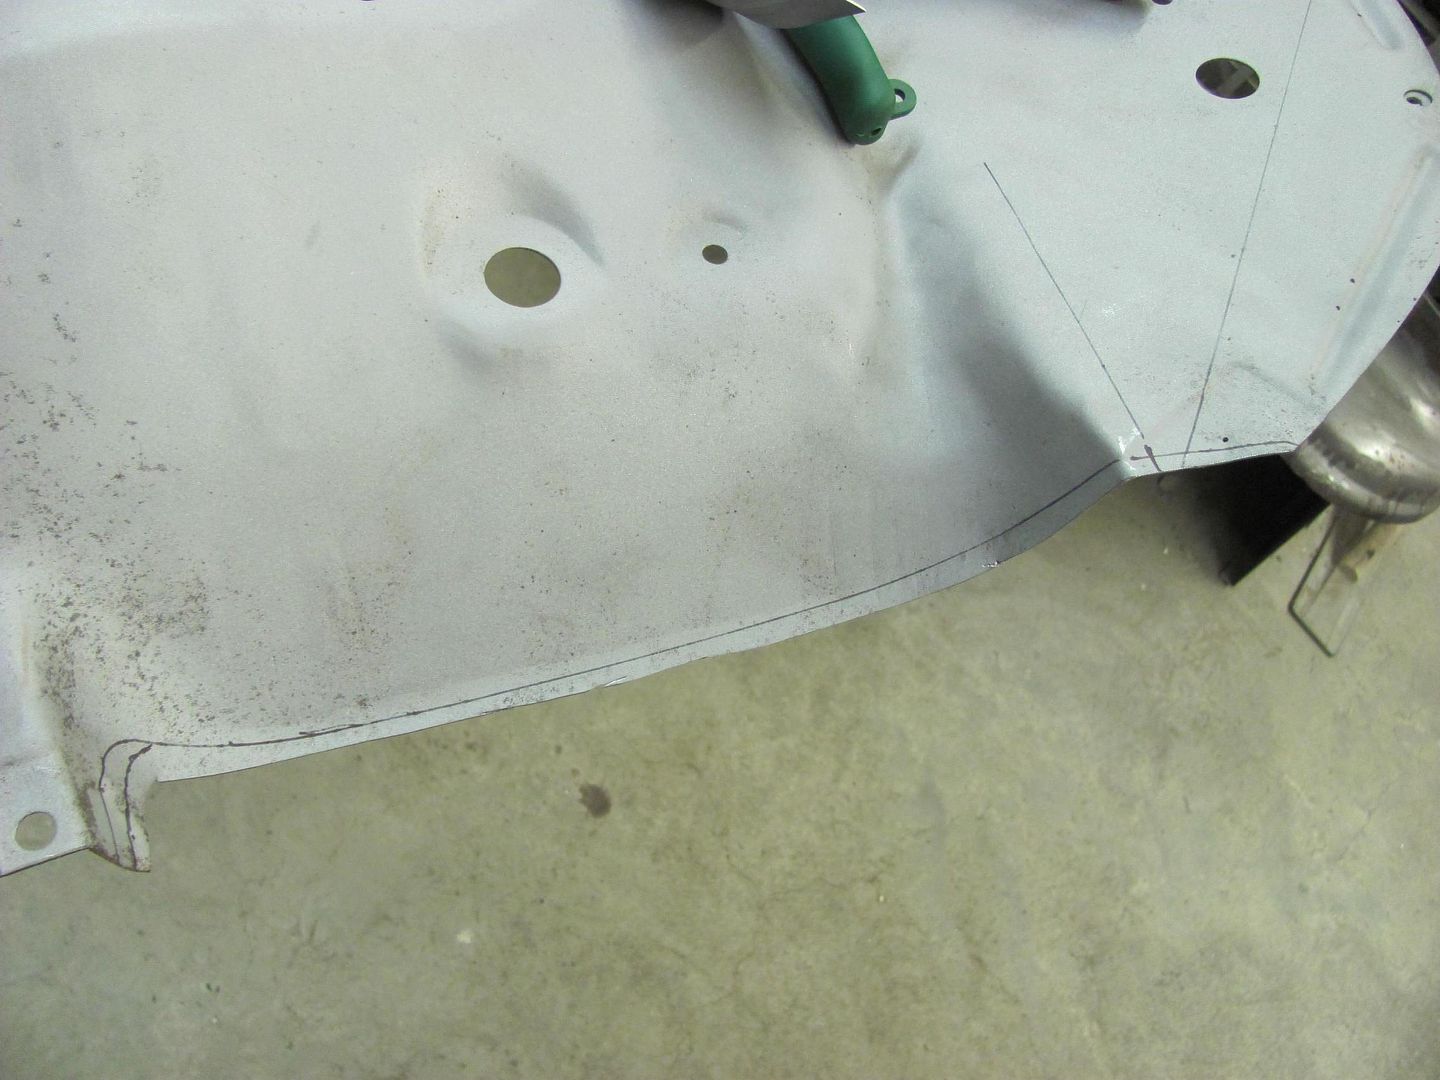
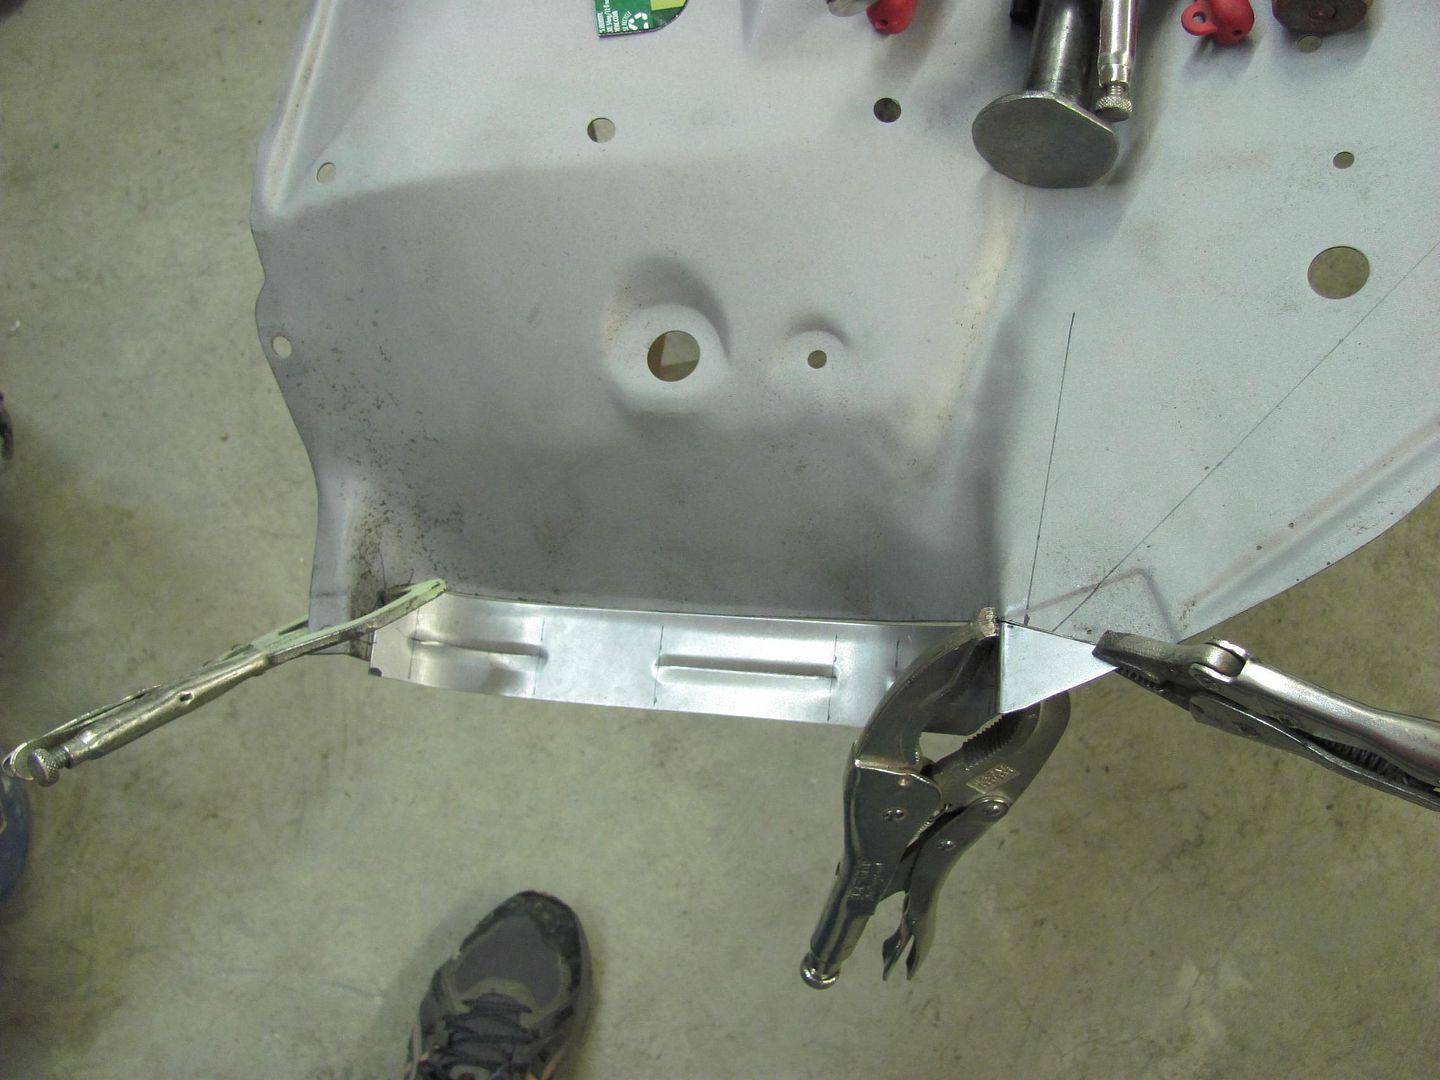
Tonight we turned our attention to inner fenders. We've got some items slated for powder coating, and these will get added to the pile.
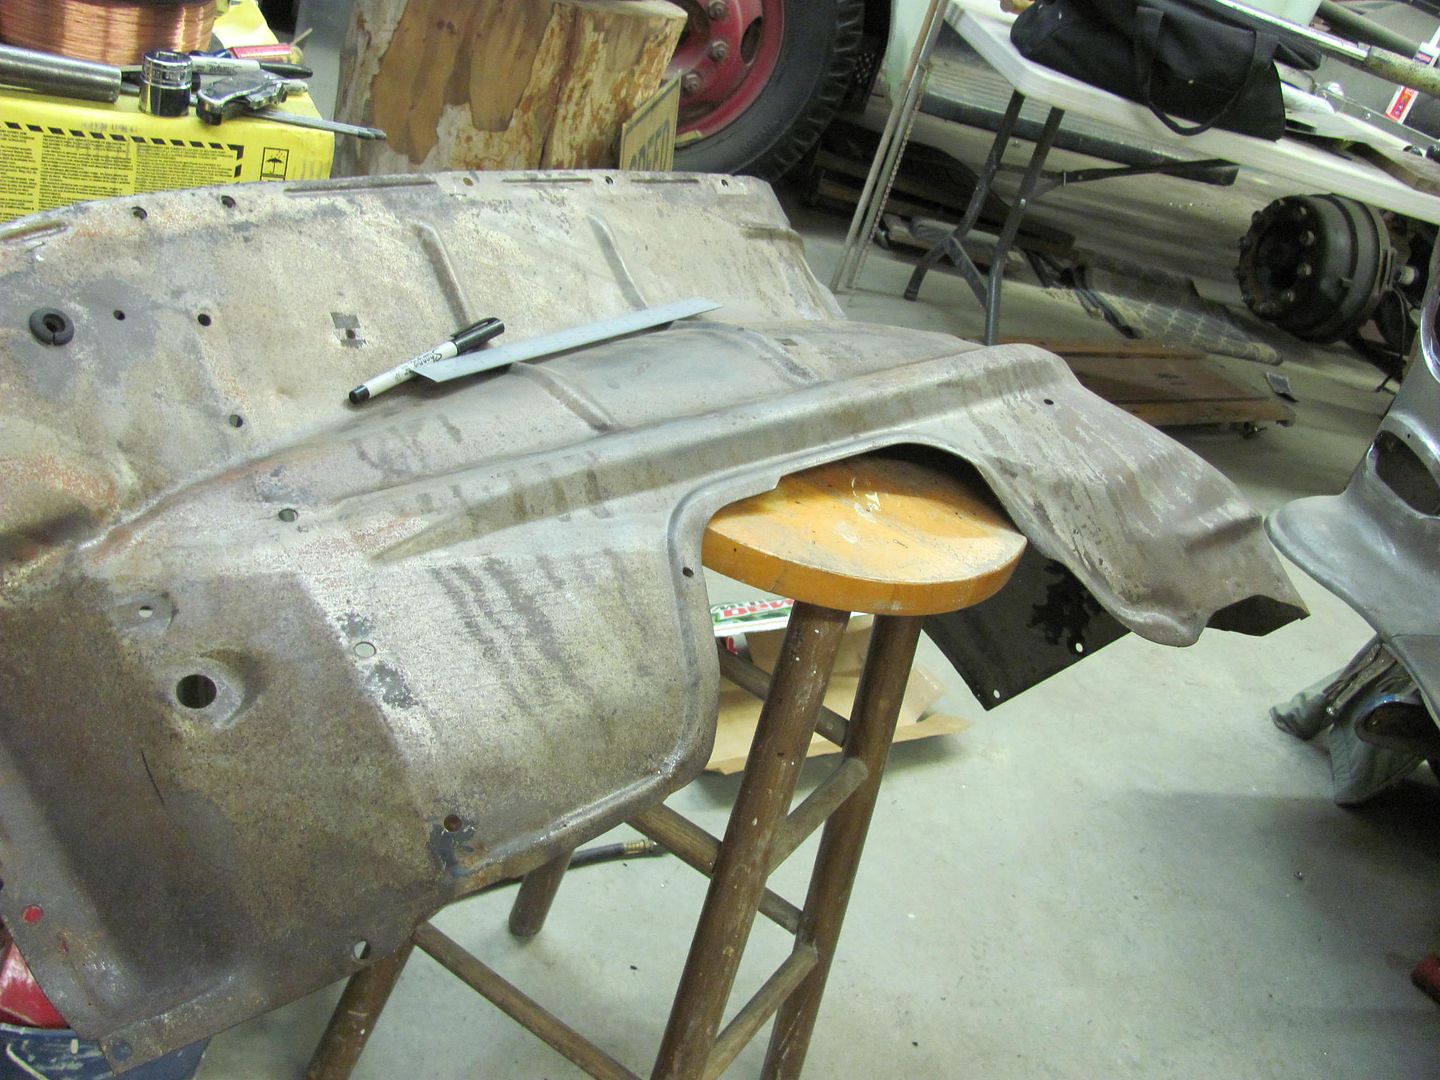
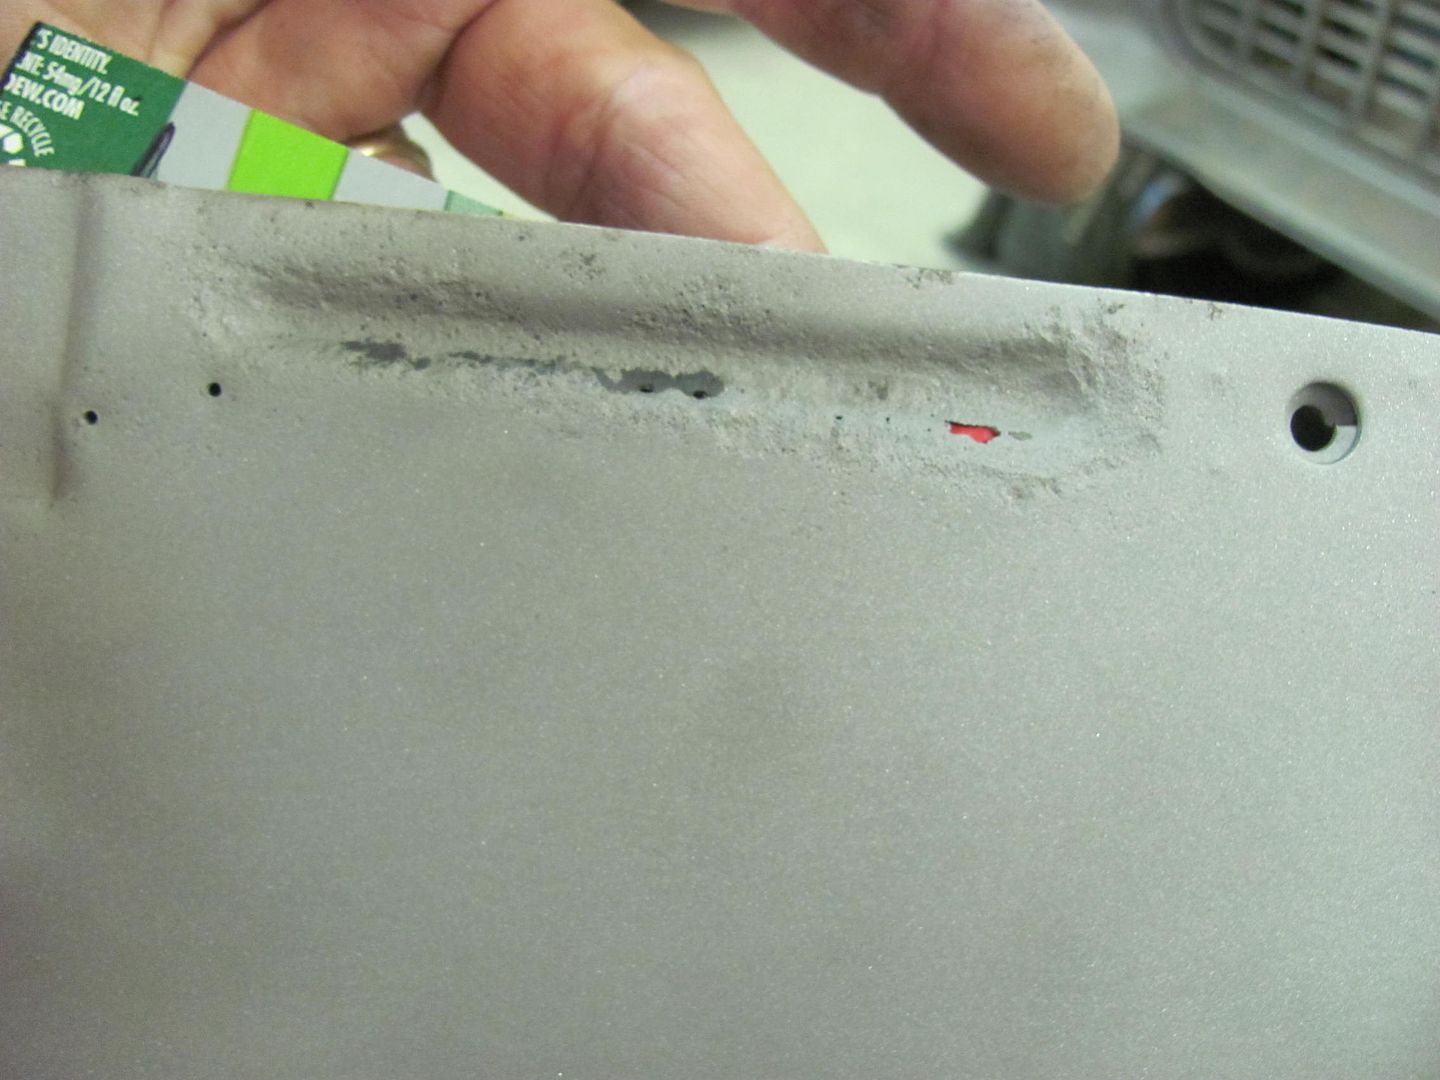
The front edge that bolts outside the grille is showing remnants of water retention...
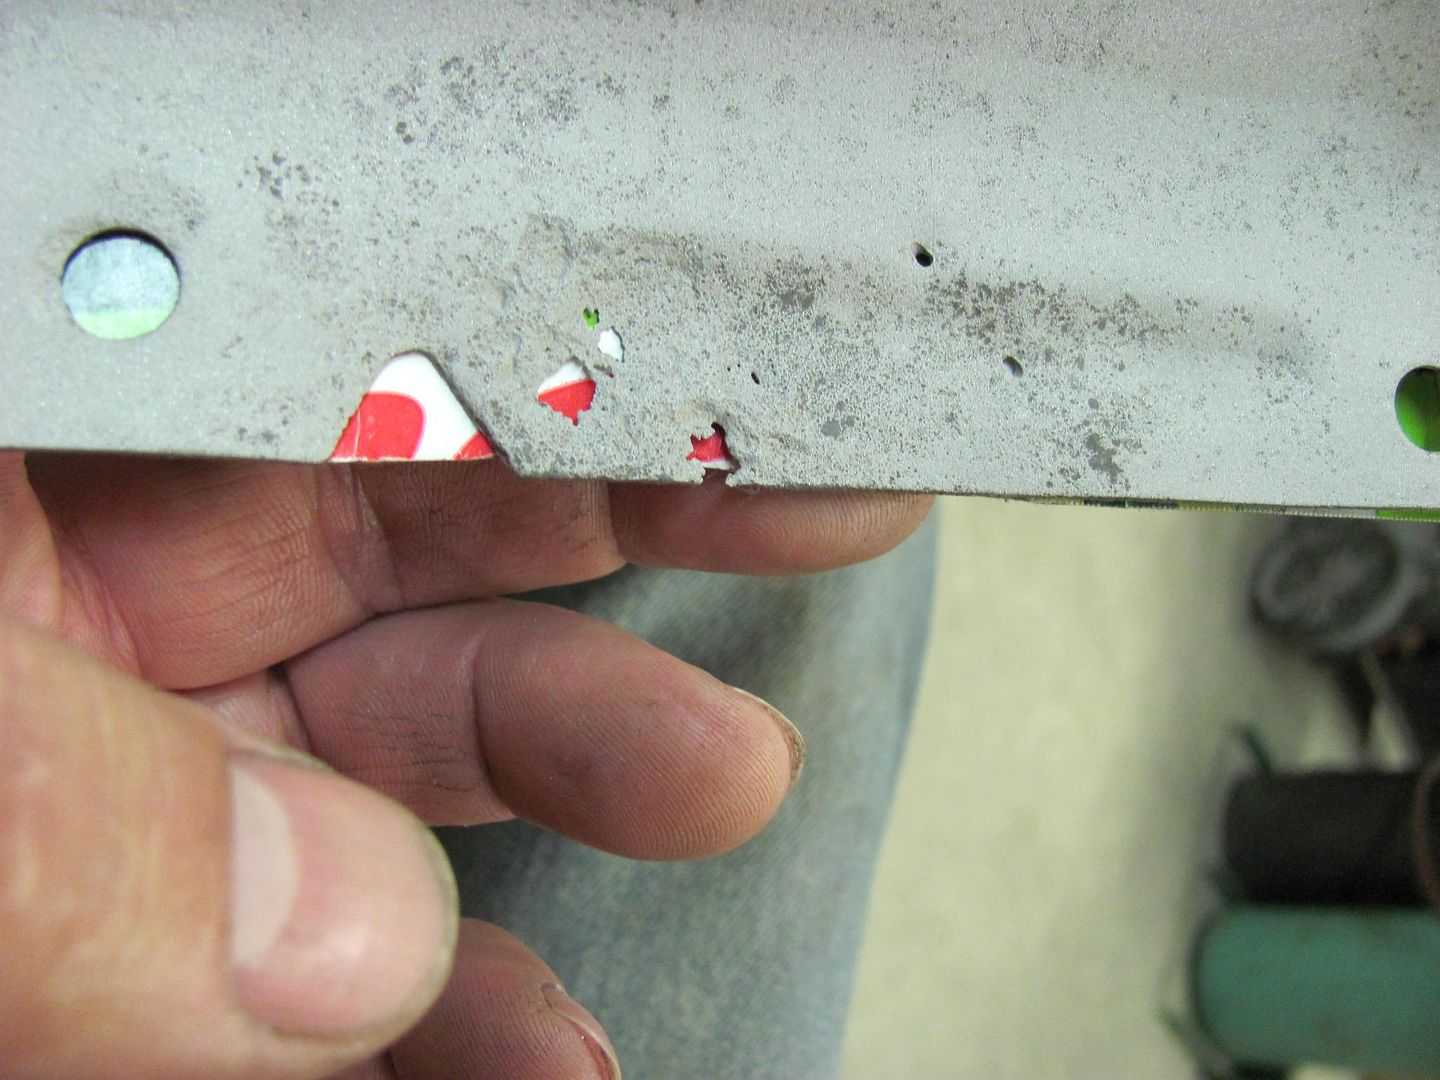
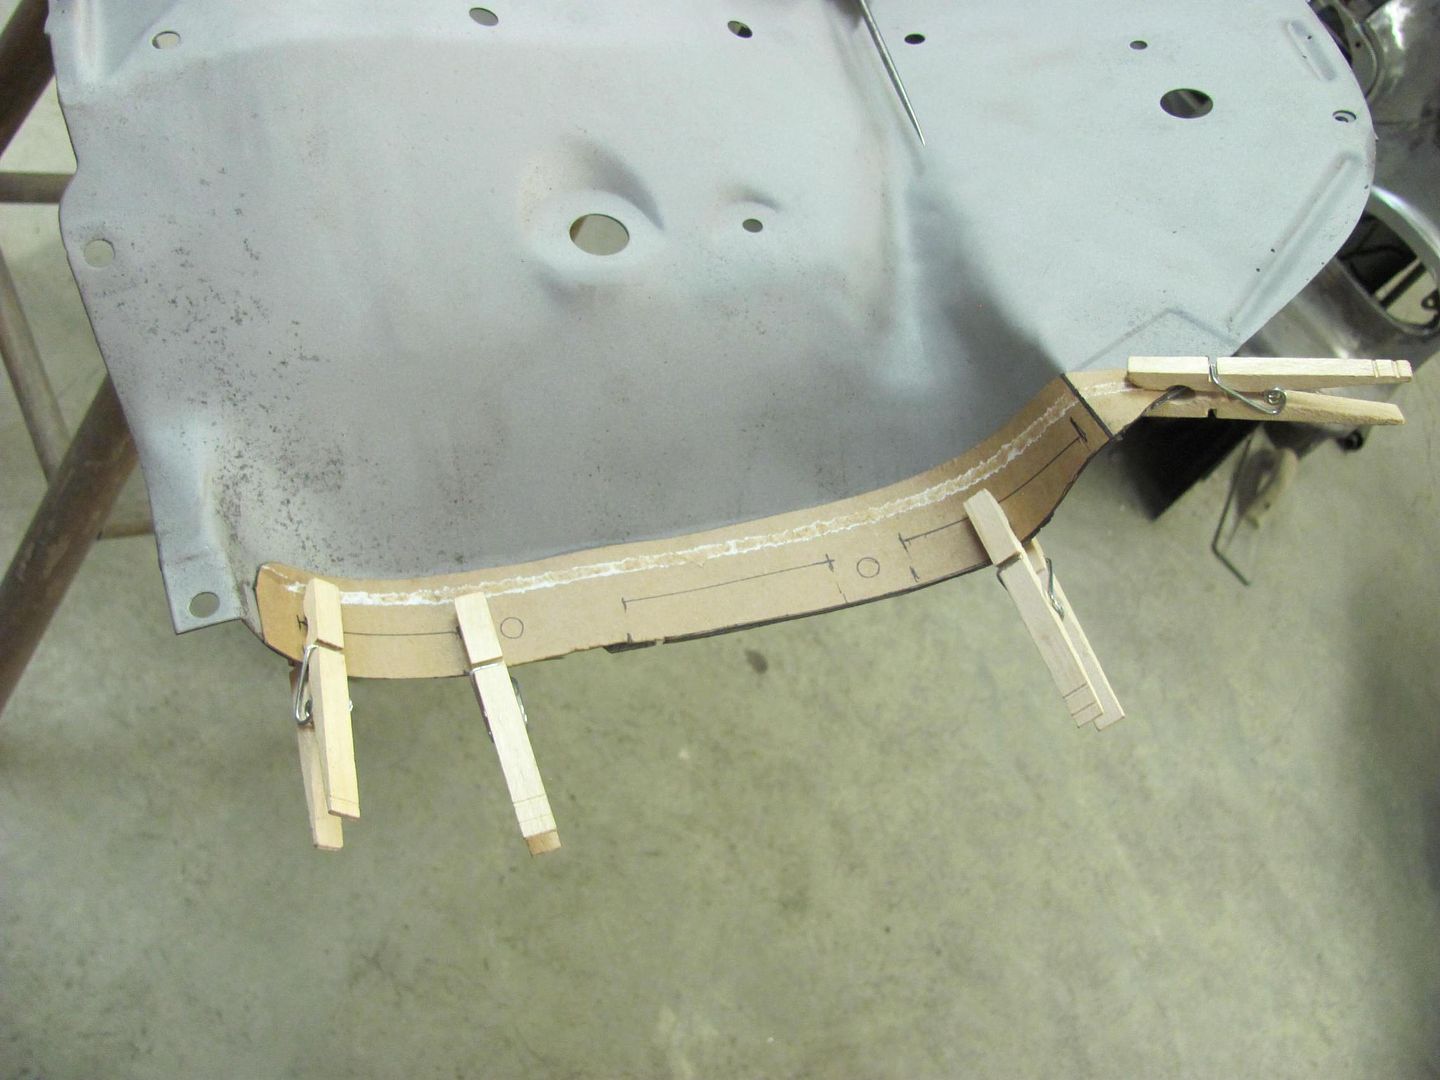
Mountain Dew template
Bead details to match the originals.....
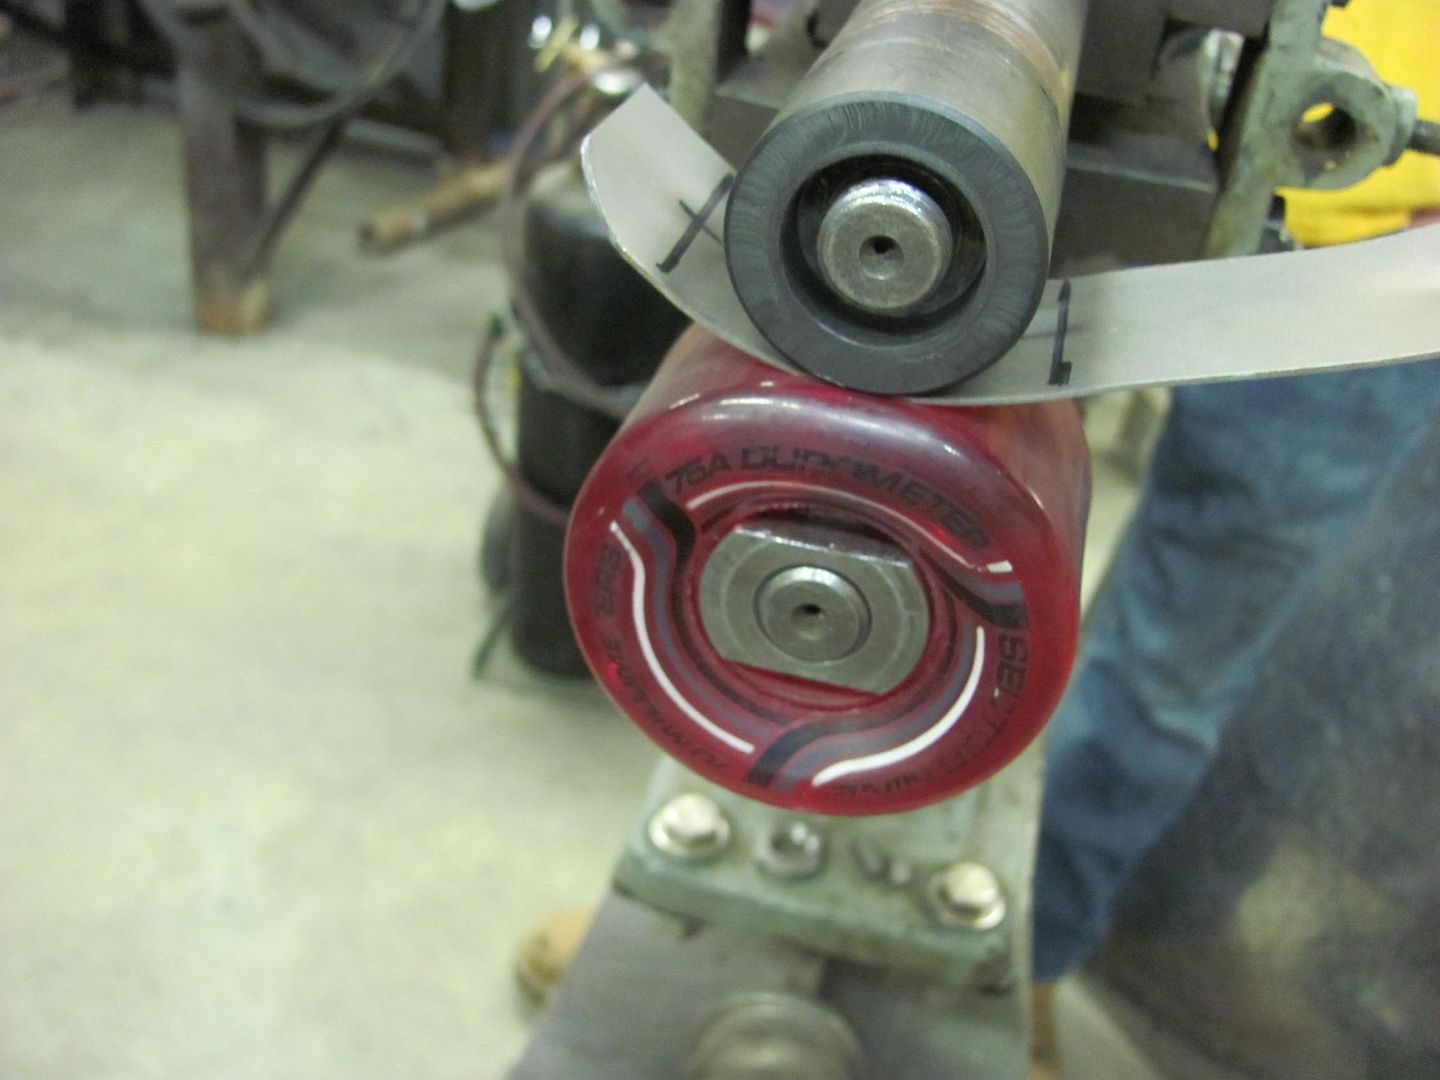
Bead roller was set up with a backstop die...

Skateboard wheel and "rolling" wheel used to add radiused ends....
Grabbed a suitable scrap from the pile and used the sander to make a bead ender tool thingie, used on the treated 6x6 anvil...
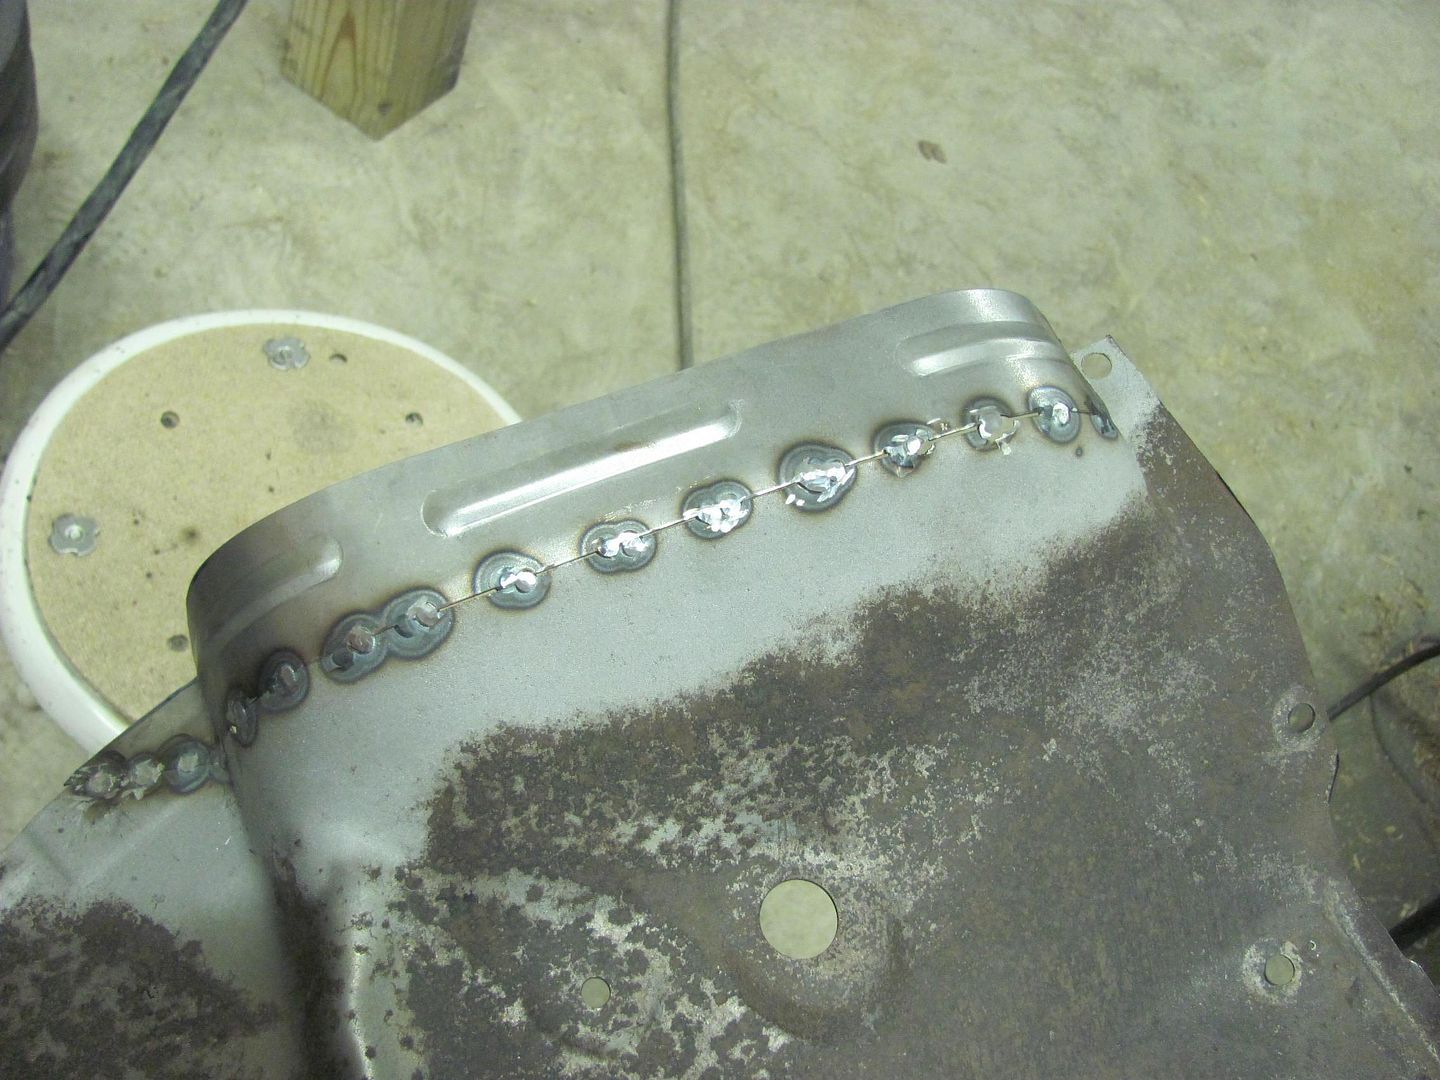
Clamped and tacked....
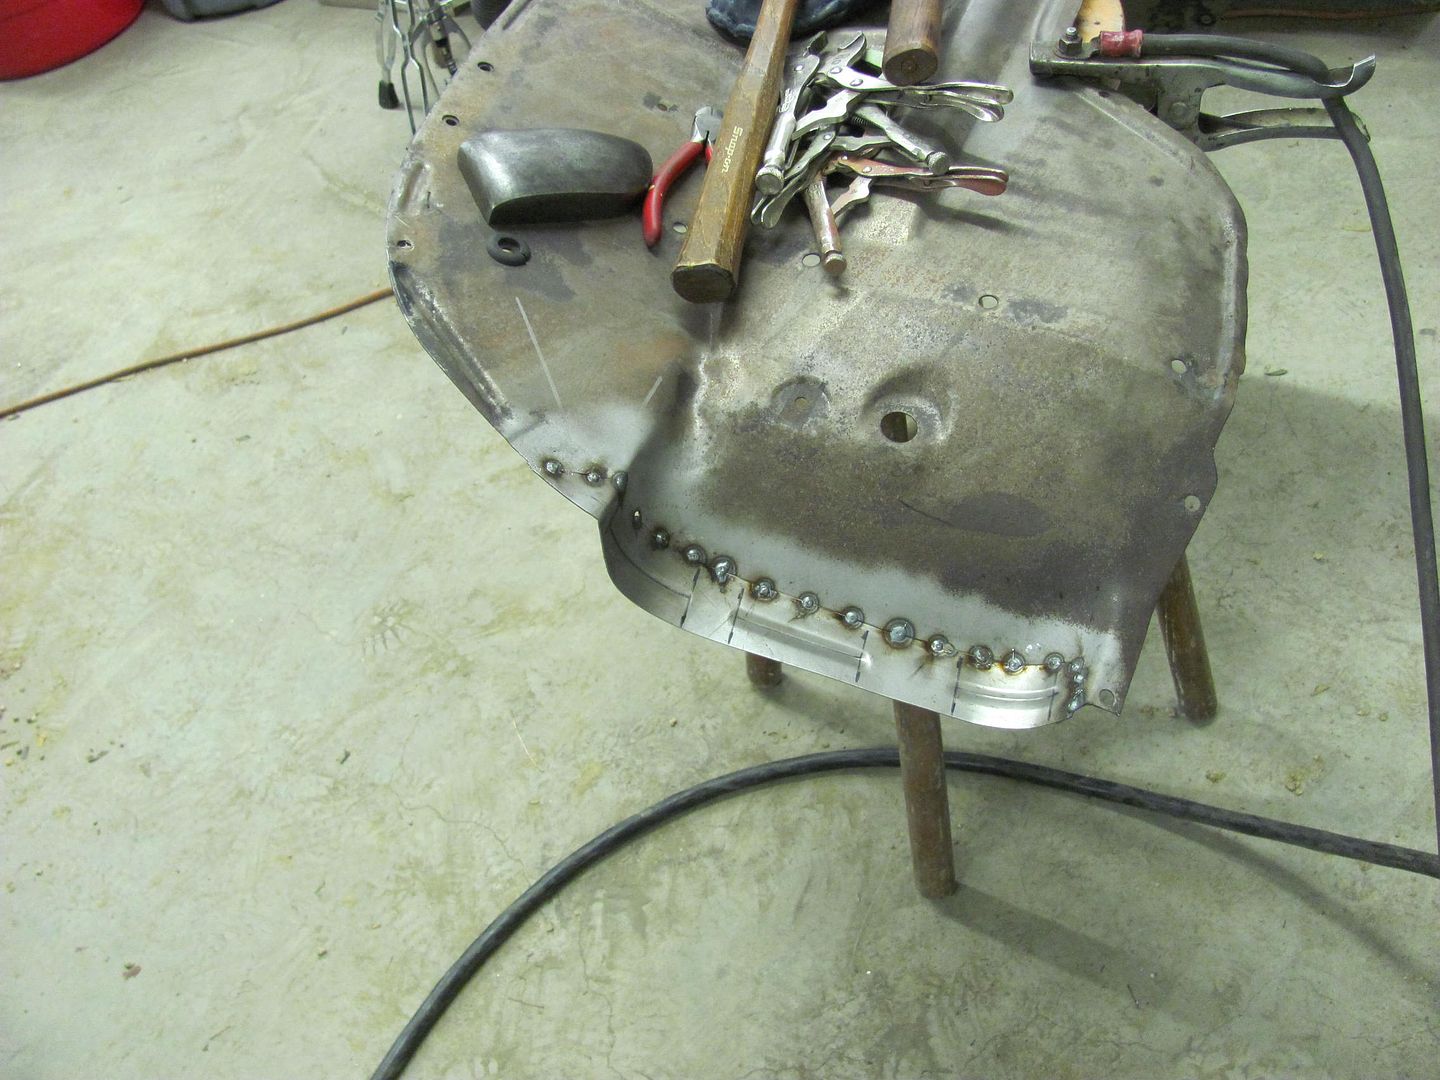
More tomorrow......Robert
-
09-11-2014 05:28 AM #12
CHR Member
- Join Date
- Sep 2005
- Location
- Hamilton
- Car Year, Make, Model: 69 nomad, 73 charger, 74 vega
- Posts
- 3,900
Adds meaning to DO THE DEW!.
Education is expensive. Keep that in mind, and you'll never be terribly upset when a project goes awry.
EG
-
09-11-2014 01:01 PM #13
CHR Member
- Join Date
- Apr 2011
- Location
- Prairie City
- Car Year, Make, Model: 40 Ford Deluxe, 68 Corvette, 72&76 K30
- Posts
- 7,301
- Blog Entries
- 1
Great work! I really need to get a bead roller!Ryan
1940 Ford Deluxe Tudor 354 Hemi 46RH Electric Blue w/multi-color flames, Ford 9" Residing in multiple pieces
1968 Corvette Coupe 5.9 Cummins Drag Car 11.43@130mph No stall leaving the line with 1250 rpm's and poor 2.2 60'
1972 Chevy K30 Longhorn P-pumped 24v Compound Turbos 47RH Just another money pit
1971 Camaro RS 5.3 BTR Stage 3 cam, SuperT10
Tire Sizes
-
09-11-2014 02:21 PM #14
CHR Member
- Join Date
- Jan 2006
- Location
- Constantine
- Car Year, Make, Model: 57 chevy 2 dr wagon
- Posts
- 9,476
A must have tool when doing floorsCharlie
Lovin' what I do and doing what I love
Some guys can fix broken NO ONE can fix STUPID
W8AMR
http://fishertrains94.webs.com/
Christian in training
-
09-11-2014 08:17 PM #15
CHR Member
- Join Date
- Jun 2008
- Location
- Leonardtown
- Car Year, Make, Model: Walking
- Posts
- 1,228
Ryan, the bead roller is one of the most versatile tools in the shop, highly recommended!
Well the Wheeling Machine finally has paint!
Napa Econo-etch primer....
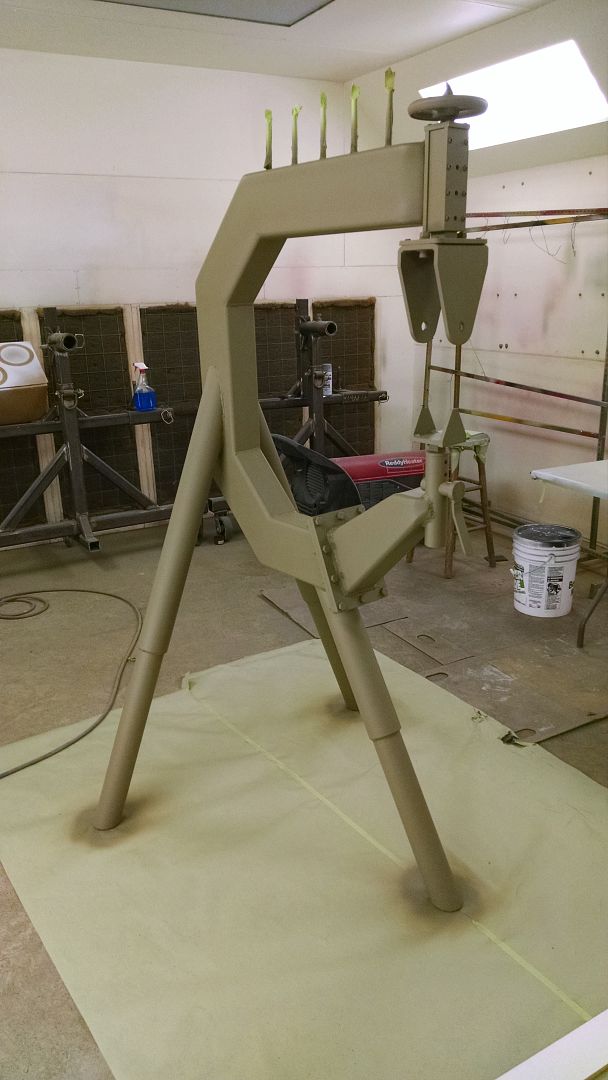
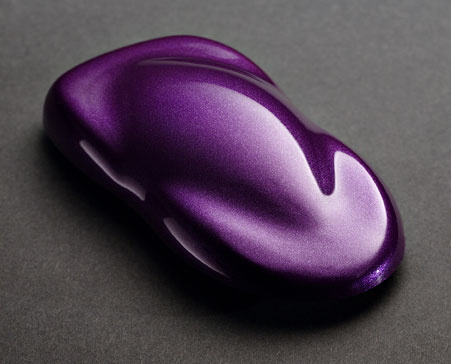
H/K Pavo Purple and Flo Klear. I tried playing with the camera settings to get it to capture the true color, but it just wasn't happening. It may look blue in the pic, but it's about as close to Chrysler's Plum Crazy as you can get without putting a HEMI under the hood..
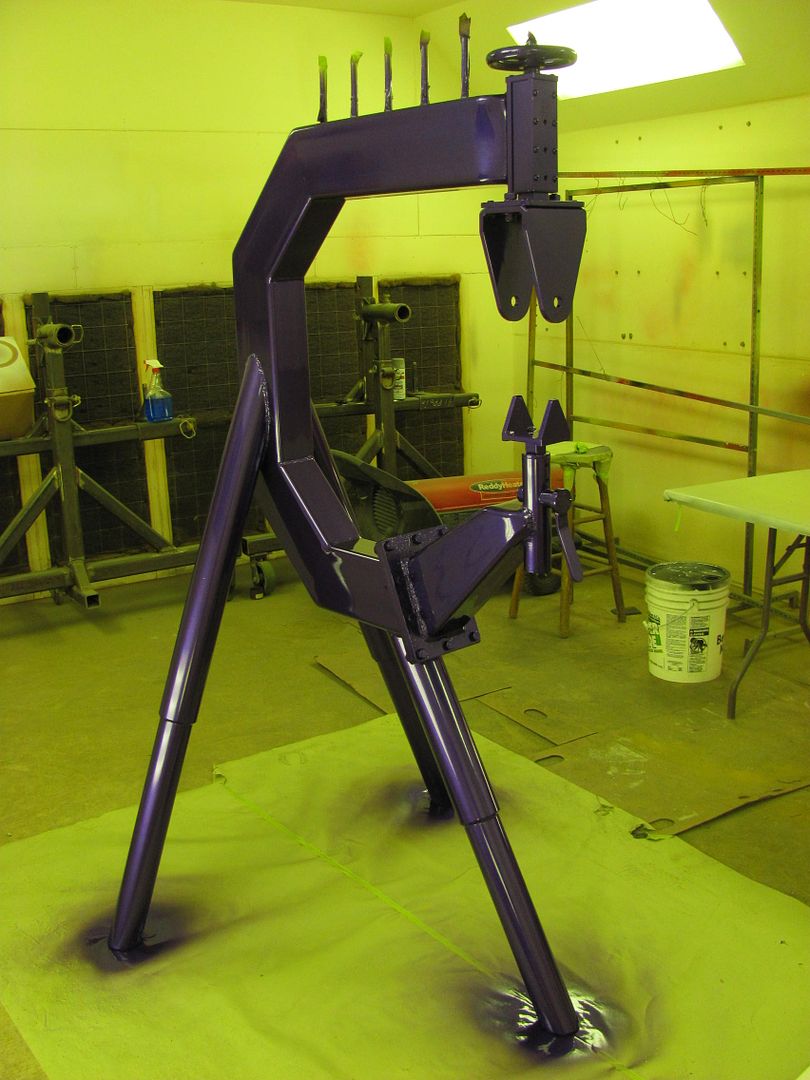
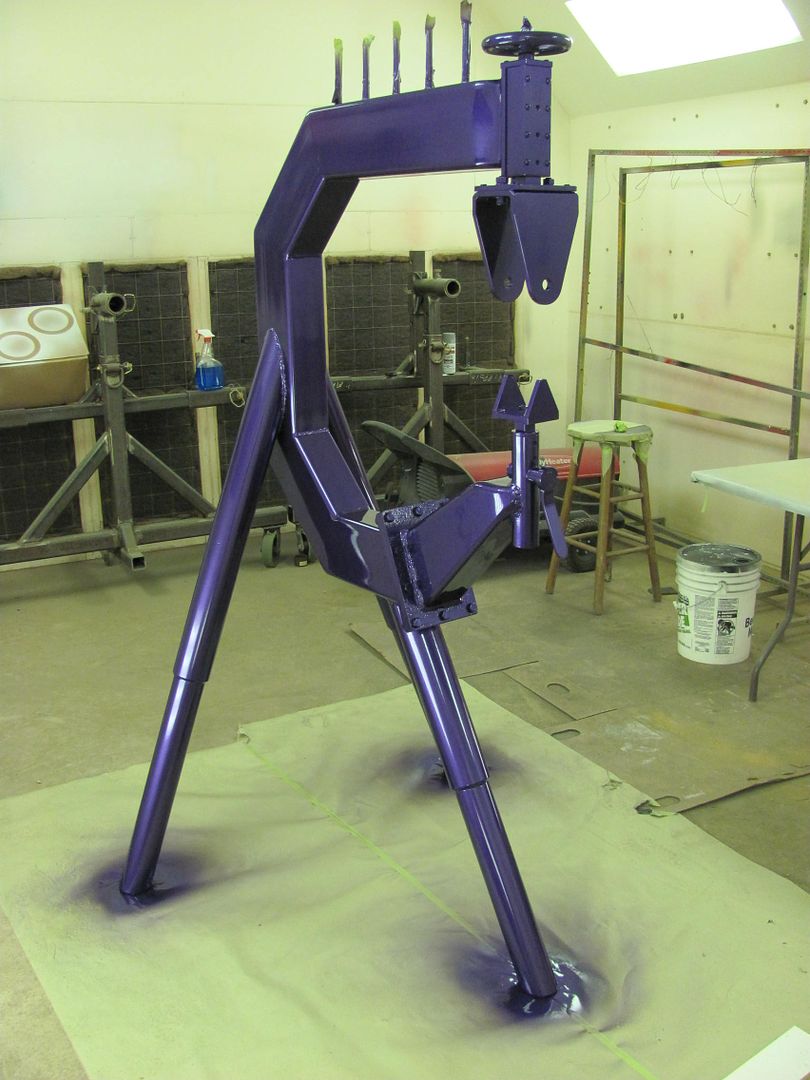
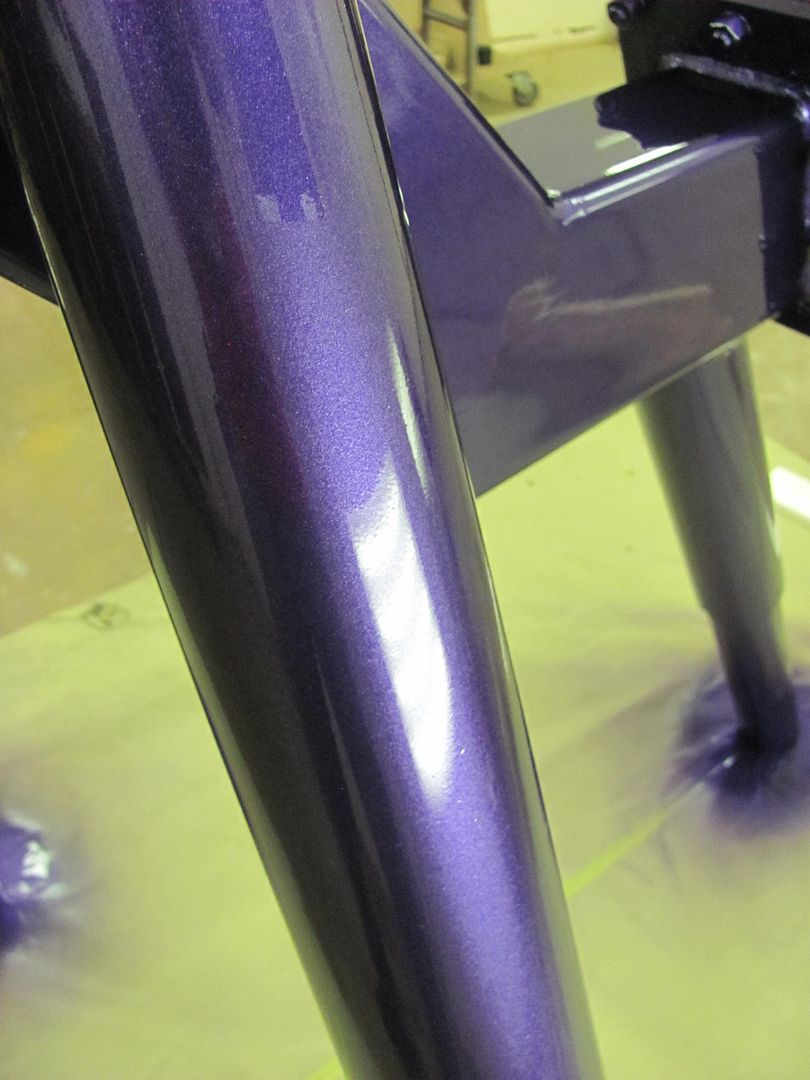
Here's the actual color...
While I was finishing up the paint on the English Wheel, Kyle stripped the driver's inner fender. This one has the same issues in the front as well as a spot up top where the flange of the fender had some rust issues we previously repaired..
Looks like our same template will work here as well..
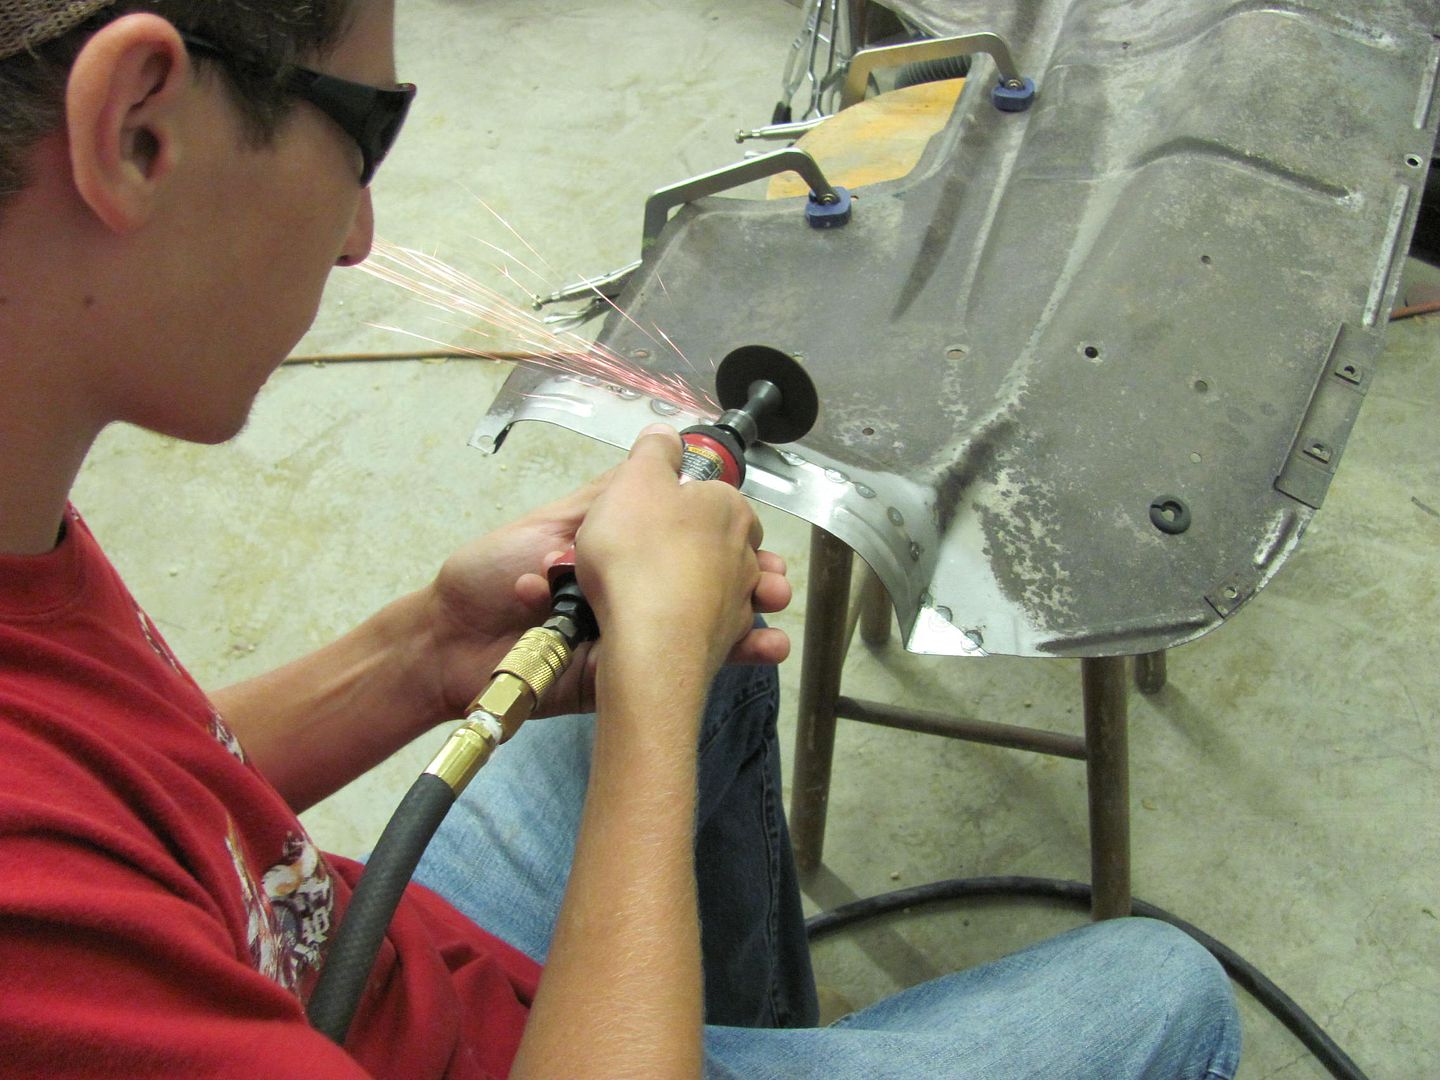
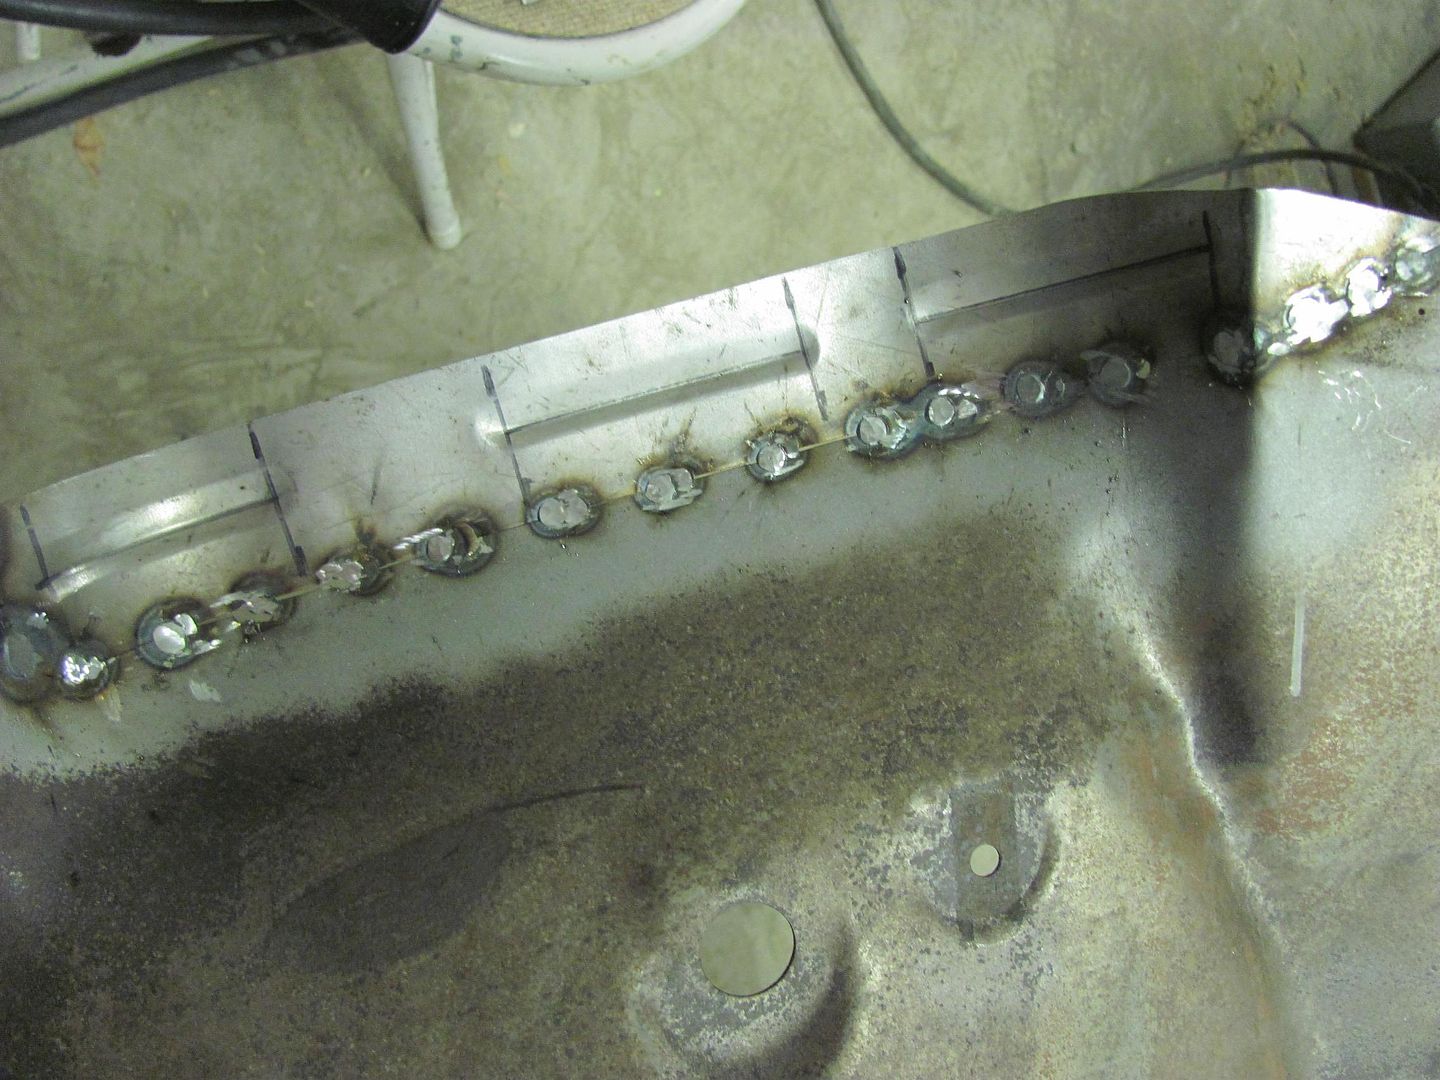
And while I was trimming more rust away, Kyle was working on the passenger side learning the fine art of dressing welds...
Last edited by MP&C; 09-11-2014 at 08:49 PM.
Robert
 Reply With Quote

Posting Permissions
- You may not post new threads
- You may not post replies
- You may not post attachments
- You may not edit your posts

This website will not be worth anything until if becones SECURE!
Not Secure