


 3390Likes
Thread: 55 Wagon Progress


Results 1,021 to 1,035 of 1865
 LinkBack URL
 About LinkBacks
Hybrid View
-
03-25-2017 08:45 PM #1
 CHR Member

- Join Date
- Feb 2007
- Location
- Santa Monica
- Car Year, Make, Model: 37 Ford tudor humpback
- Posts
- 1,988
I knew you had a good reason! Originally Posted by MP&C


"It is not much good thinking of a thing unless you think it out." - H.G. Wells
-
04-04-2017 07:49 PM #2
CHR Member
- Join Date
- Jun 2008
- Location
- Leonardtown
- Car Year, Make, Model: Walking
- Posts
- 1,228
Back in the shop this evening, time to make some bolting brackets to hold the seat back frame to the floor..
Locating...
Brackets TIG welded on....
This shows it in place, we have about 1/4" clearance at the tight spots....
https://www.youtube.com/watch?v=jB5qRfP7IxY
The cleco's were removed and 1/4-20 AVK rivet nuts installed in the floor... Missed that picture...
Next will be the top support....Last edited by MP&C; 04-05-2017 at 09:19 AM.
Robert
-
04-05-2017 12:57 PM #3
CHR Member
- Join Date
- Apr 2011
- Location
- Prairie City
- Car Year, Make, Model: 40 Ford Deluxe, 68 Corvette, 72&76 K30
- Posts
- 7,300
- Blog Entries
- 1
More great work! Those brackets are very nice. I don't think I can do that with my vice.
Ryan
1940 Ford Deluxe Tudor 354 Hemi 46RH Electric Blue w/multi-color flames, Ford 9" Residing in multiple pieces
1968 Corvette Coupe 5.9 Cummins Drag Car 11.43@130mph No stall leaving the line with 1250 rpm's and poor 2.2 60'
1972 Chevy K30 Longhorn P-pumped 24v Compound Turbos 47RH Just another money pit
1971 Camaro RS 5.3 BTR Stage 3 cam, SuperT10
Tire Sizes
-
04-09-2017 07:42 PM #4
CHR Member
- Join Date
- Jun 2008
- Location
- Leonardtown
- Car Year, Make, Model: Walking
- Posts
- 1,228
The vise was used in making them...
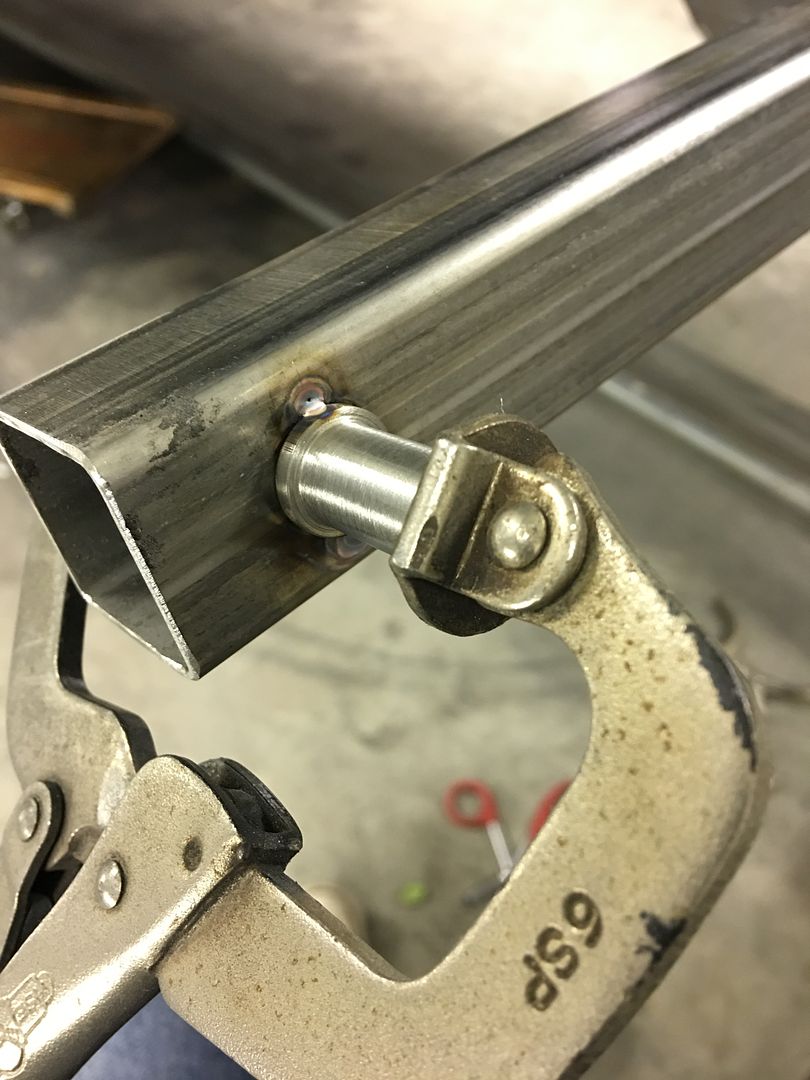
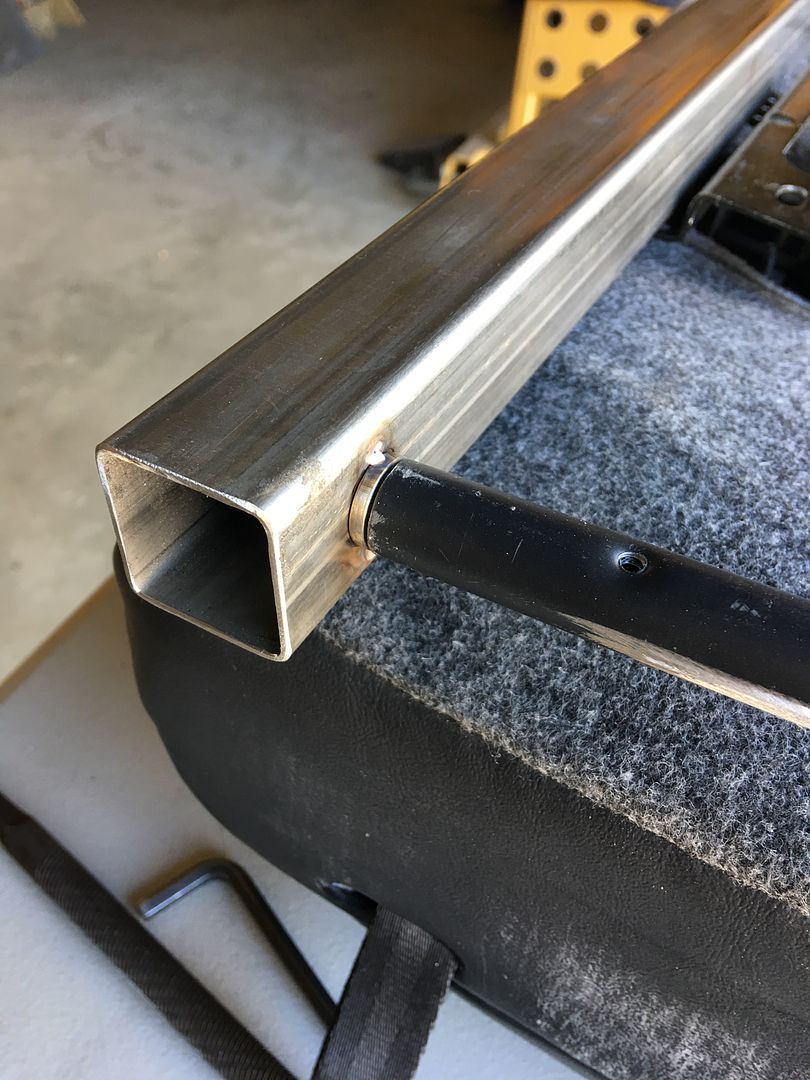
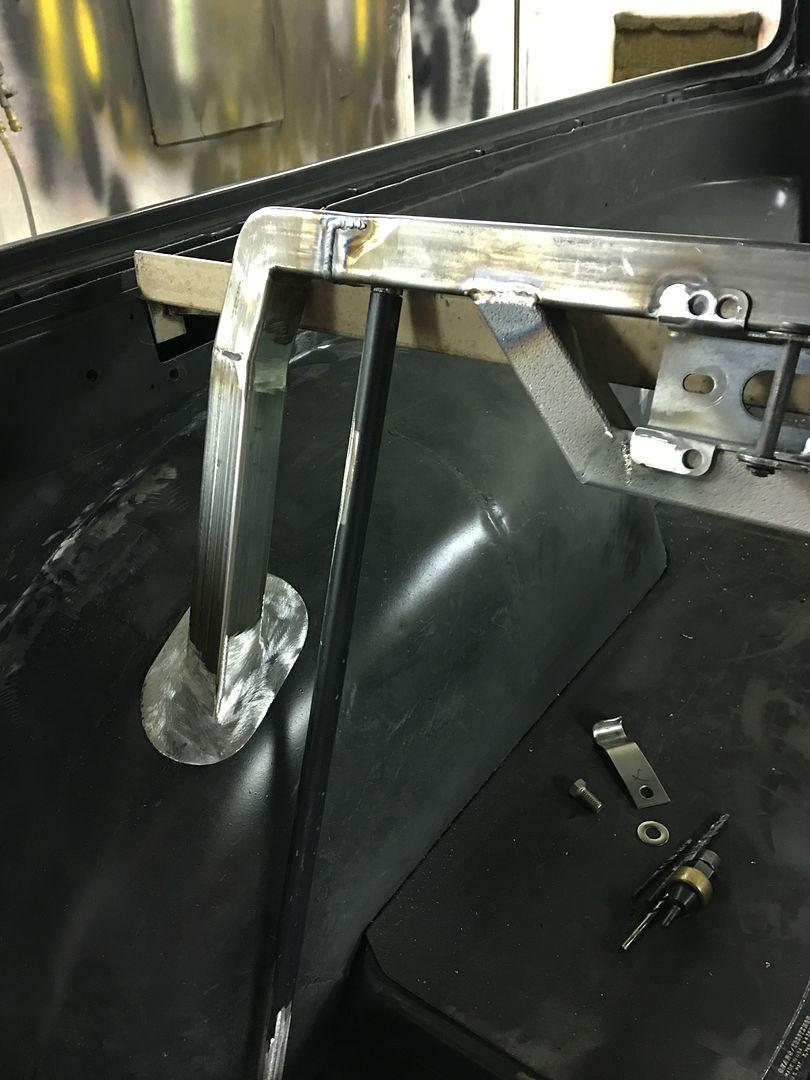
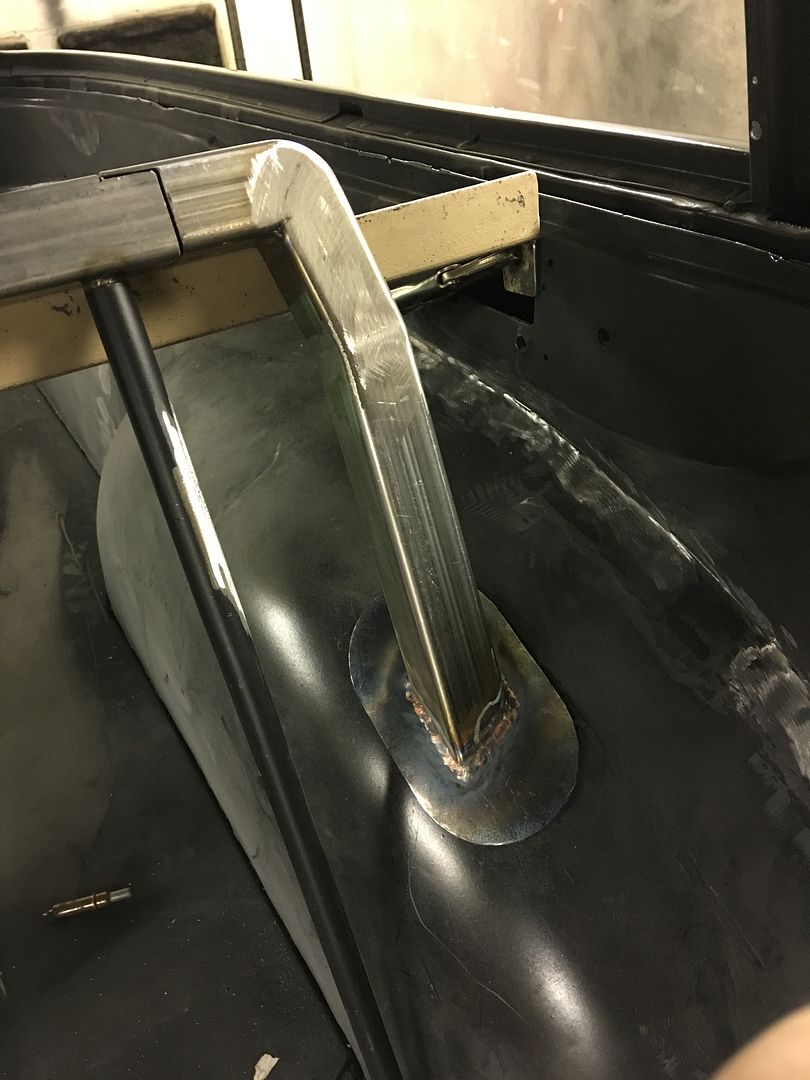
Now for the top of the seat frame... We started with some 3/8-16 standoffs that are 5/8 diameter, and turn them to 1/2 diameter to fit inside the seat frame tube...
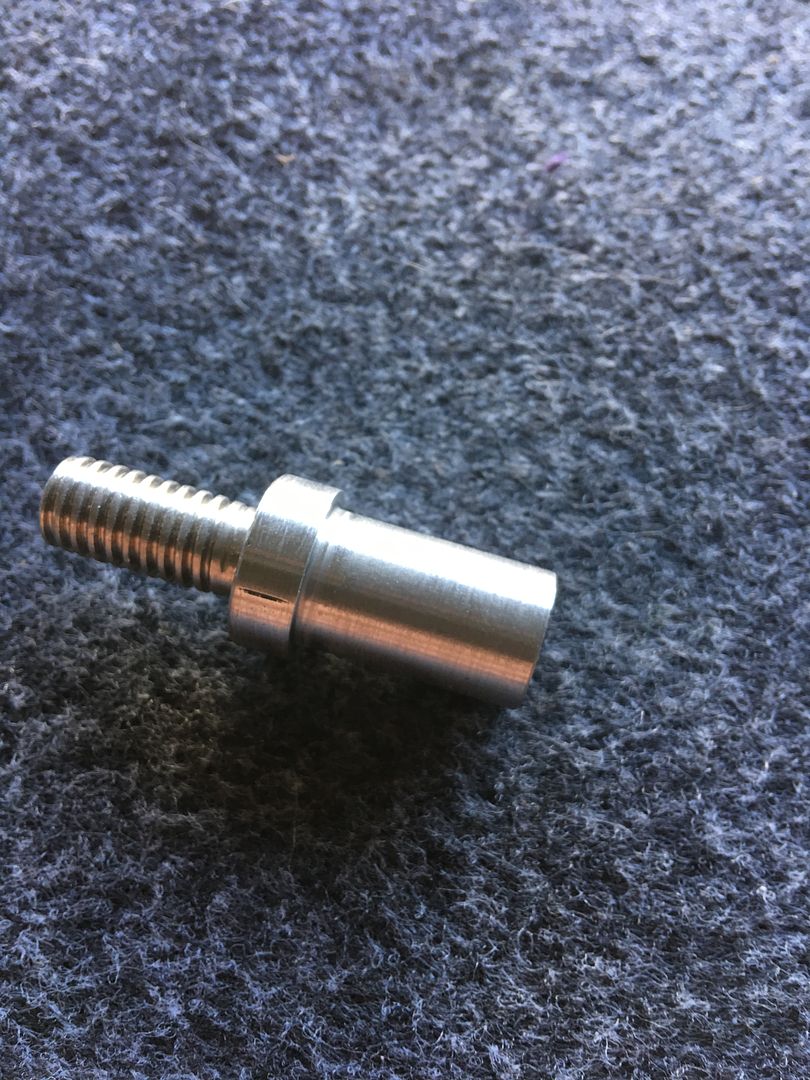
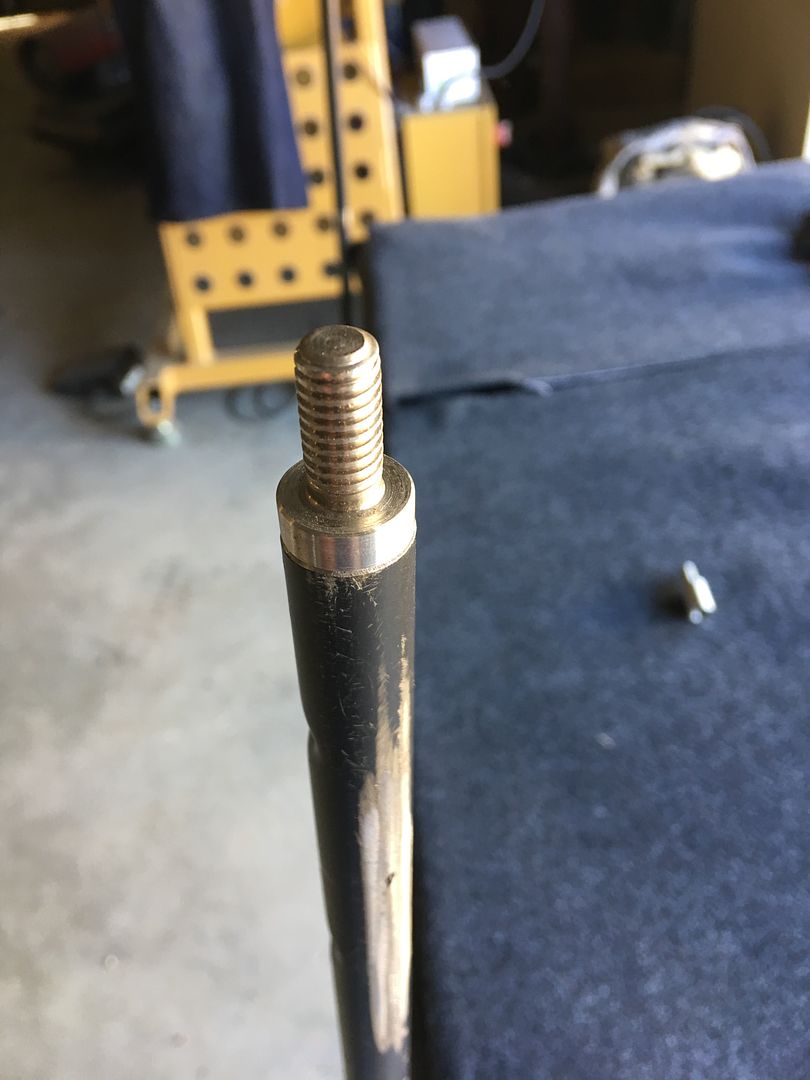
Then holes are drilled in some 1.25 square tubing...
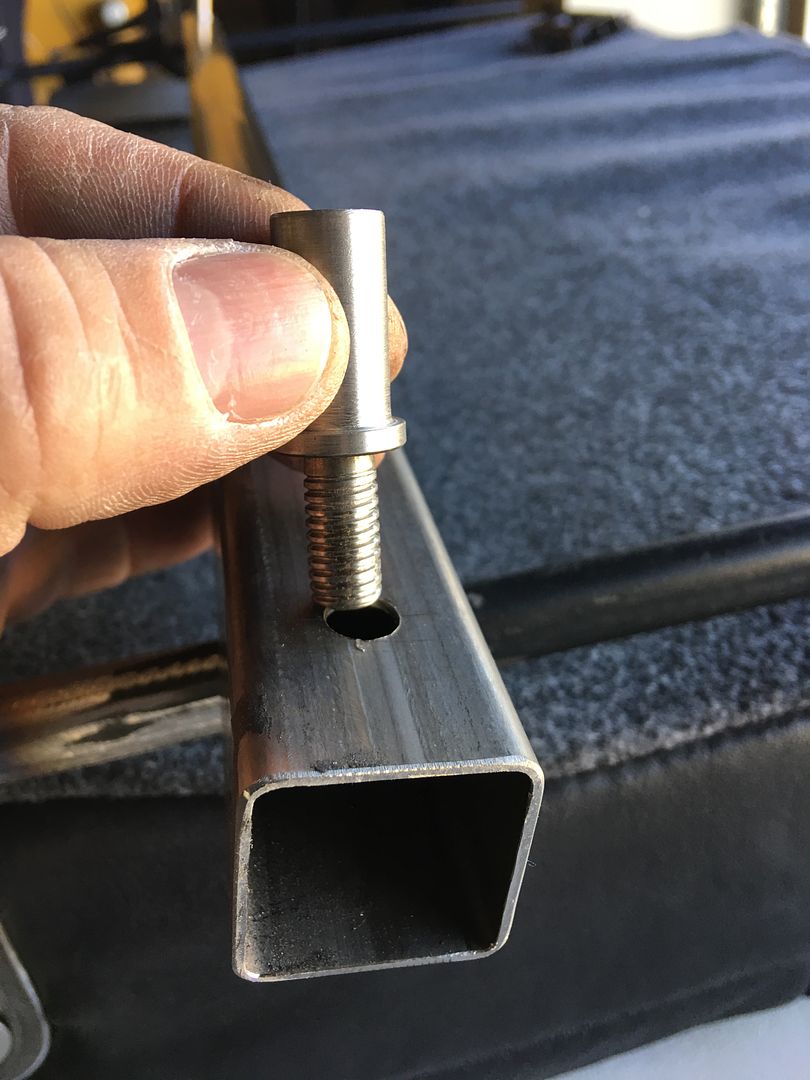
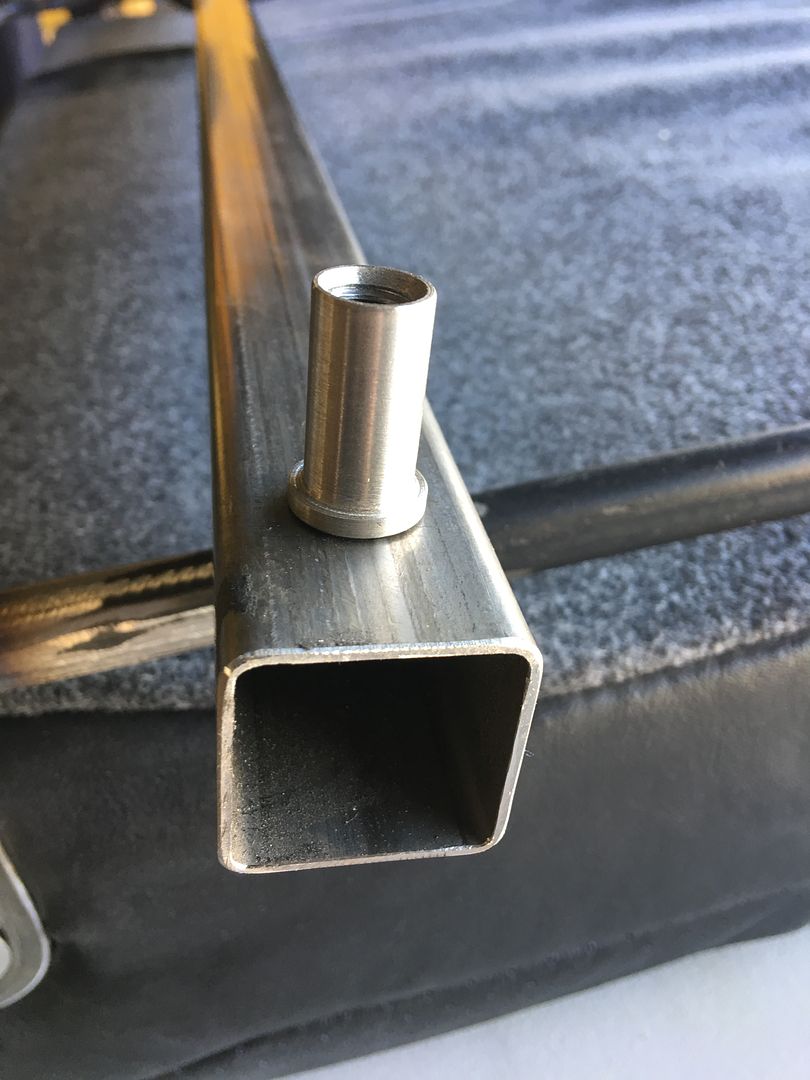
Tacked in place and a nut used for added insurance...

Seat latches plug welded in place...
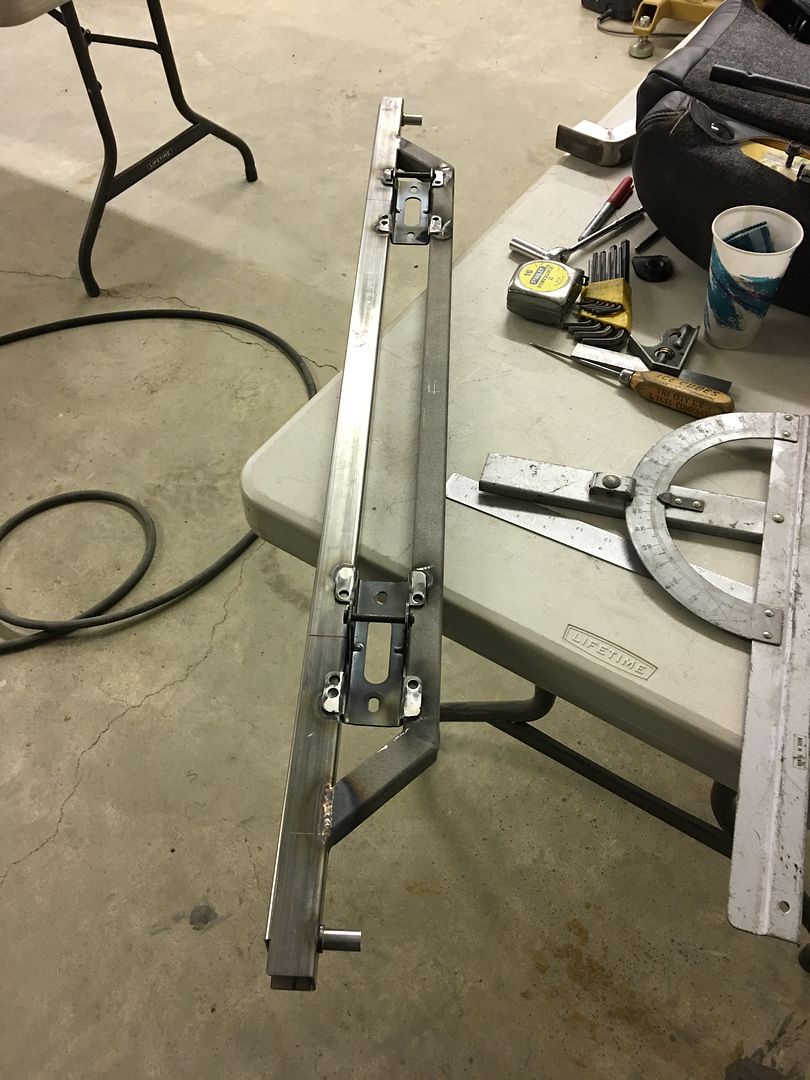
Side pieces formed....

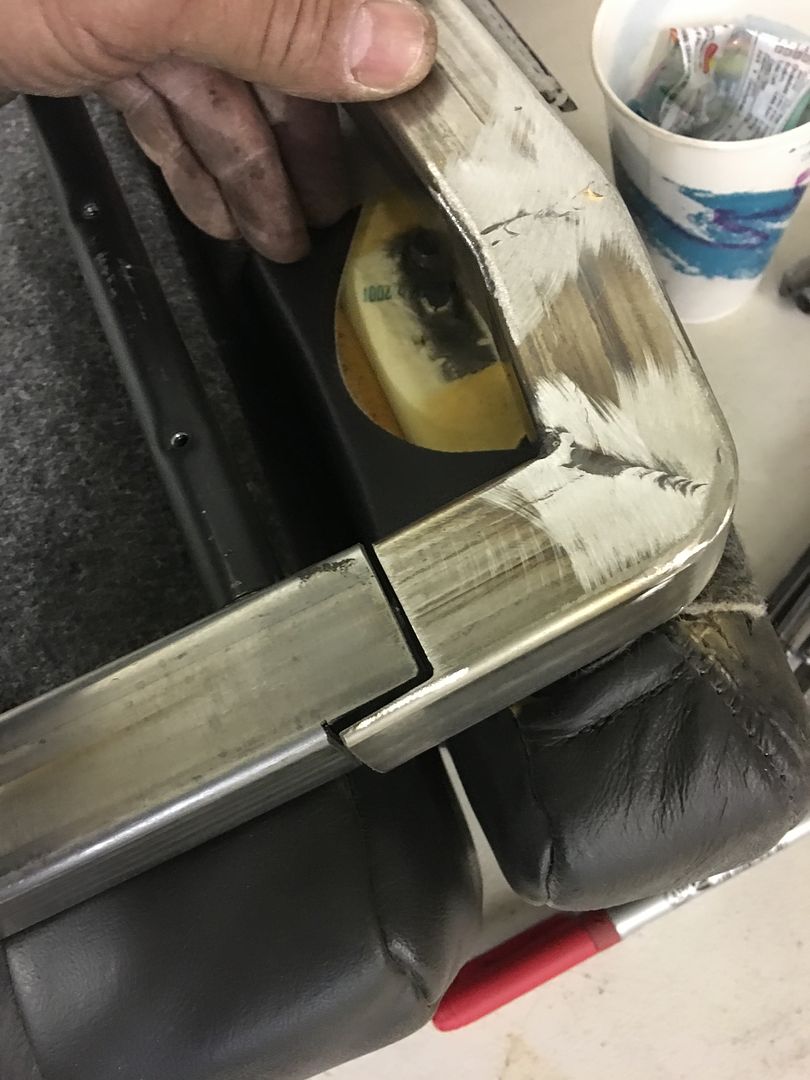
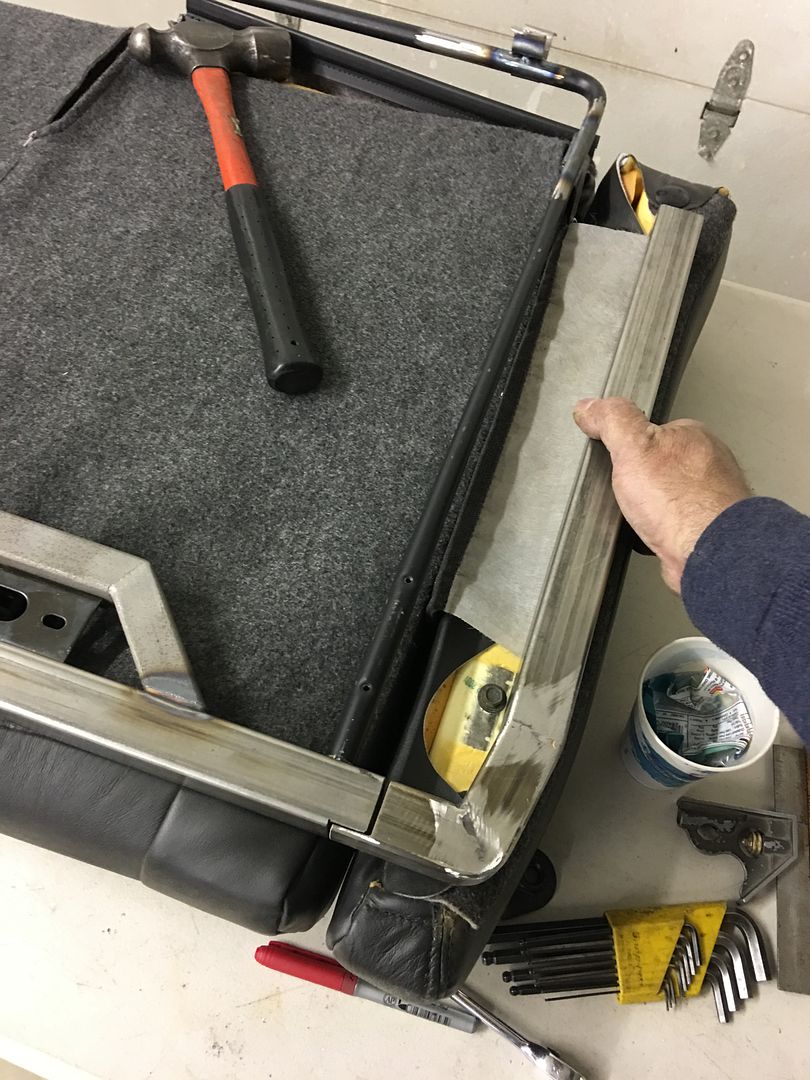
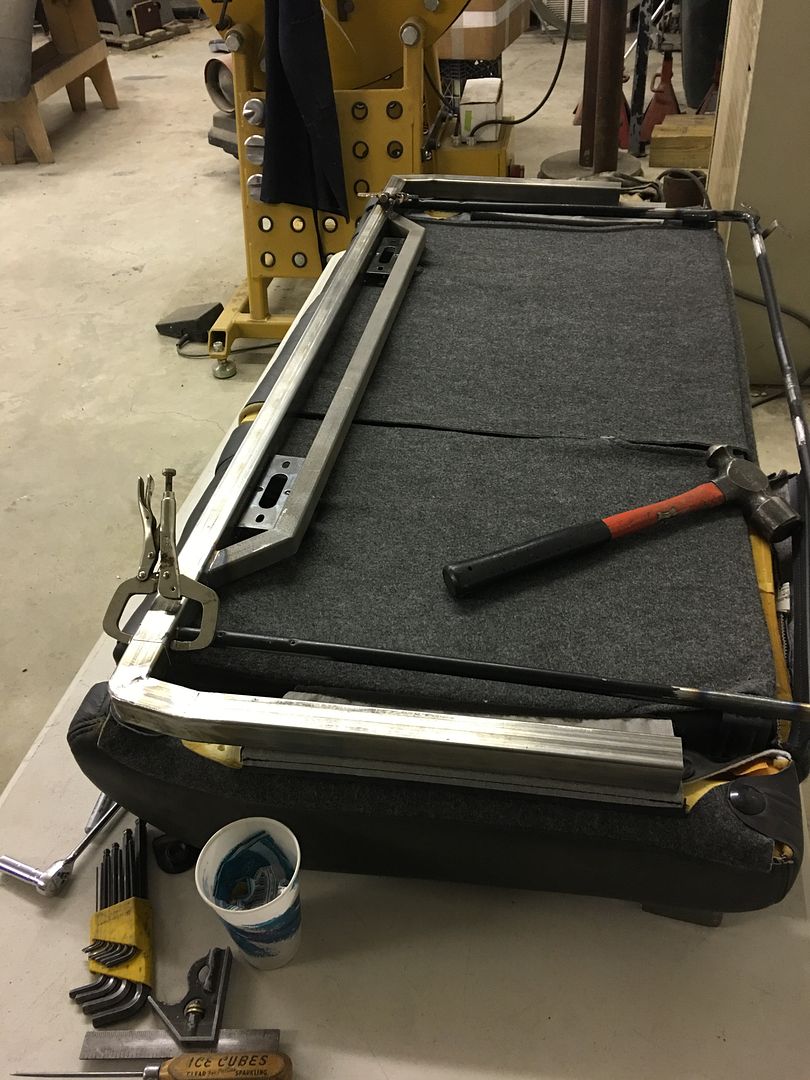
The side pieces will be trimmed, fitted, and welded to the wheel well...
Robert
-
04-10-2017 12:36 PM #5
CHR Member
- Join Date
- Apr 2011
- Location
- Prairie City
- Car Year, Make, Model: 40 Ford Deluxe, 68 Corvette, 72&76 K30
- Posts
- 7,300
- Blog Entries
- 1
Very nice pics showing how to cut those tubes to get the rounded corners! Thanks for that. I'll have to remember that one.Ryan
1940 Ford Deluxe Tudor 354 Hemi 46RH Electric Blue w/multi-color flames, Ford 9" Residing in multiple pieces
1968 Corvette Coupe 5.9 Cummins Drag Car 11.43@130mph No stall leaving the line with 1250 rpm's and poor 2.2 60'
1972 Chevy K30 Longhorn P-pumped 24v Compound Turbos 47RH Just another money pit
1971 Camaro RS 5.3 BTR Stage 3 cam, SuperT10
Tire Sizes
-
04-10-2017 12:40 PM #6
CHR Member
- Join Date
- Feb 2007
- Location
- Santa Monica
- Car Year, Make, Model: 37 Ford tudor humpback
- Posts
- 1,988
This whole thread is like a masters class in metal working & fabrication!!!!! Thanks again, Robert, for being so detailed and willing to share your expertise! Originally Posted by 40FordDeluxe

"It is not much good thinking of a thing unless you think it out." - H.G. Wells
-
04-10-2017 07:27 PM #7
CHR Member
- Join Date
- Jan 2005
- Location
- Doon, Ia
- Car Year, Make, Model: 53 Chevy 3100
- Posts
- 2,715
Randyr nailed it, I'm always at kind of a loss for words on your talent so I just hit the "like" link, everything is so perfect. For you others, sometimes I just hit the "like" link to make you feel good. Originally Posted by randyr
Seth
God cannot give us a happiness and peace apart from Himself, because it is not there. There is no such thing. C.S.Lewis
-
04-10-2017 06:48 PM #8
CHR Member
- Join Date
- Sep 2007
- Location
- New Bedford
- Car Year, Make, Model: 34 Ford 3W Coupe Replica
- Posts
- 14,754
Couldn't have said it any better.. thanks R2
-
04-10-2017 07:38 PM #9
CHR Member
- Join Date
- Apr 2011
- Location
- Prairie City
- Car Year, Make, Model: 40 Ford Deluxe, 68 Corvette, 72&76 K30
- Posts
- 7,300
- Blog Entries
- 1
Seth,.
Ryan
1940 Ford Deluxe Tudor 354 Hemi 46RH Electric Blue w/multi-color flames, Ford 9" Residing in multiple pieces
1968 Corvette Coupe 5.9 Cummins Drag Car 11.43@130mph No stall leaving the line with 1250 rpm's and poor 2.2 60'
1972 Chevy K30 Longhorn P-pumped 24v Compound Turbos 47RH Just another money pit
1971 Camaro RS 5.3 BTR Stage 3 cam, SuperT10
Tire Sizes
-
04-10-2017 10:58 PM #10
CHR Member
- Join Date
- Jun 2008
- Location
- Leonardtown
- Car Year, Make, Model: Walking
- Posts
- 1,228
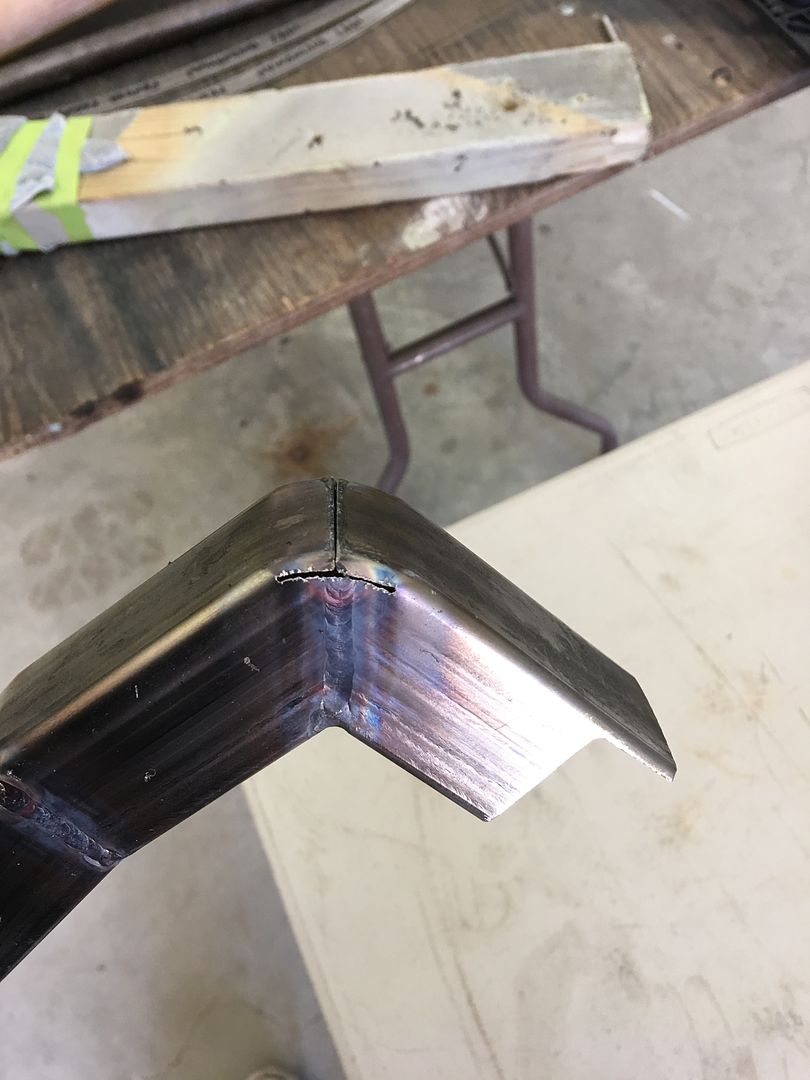
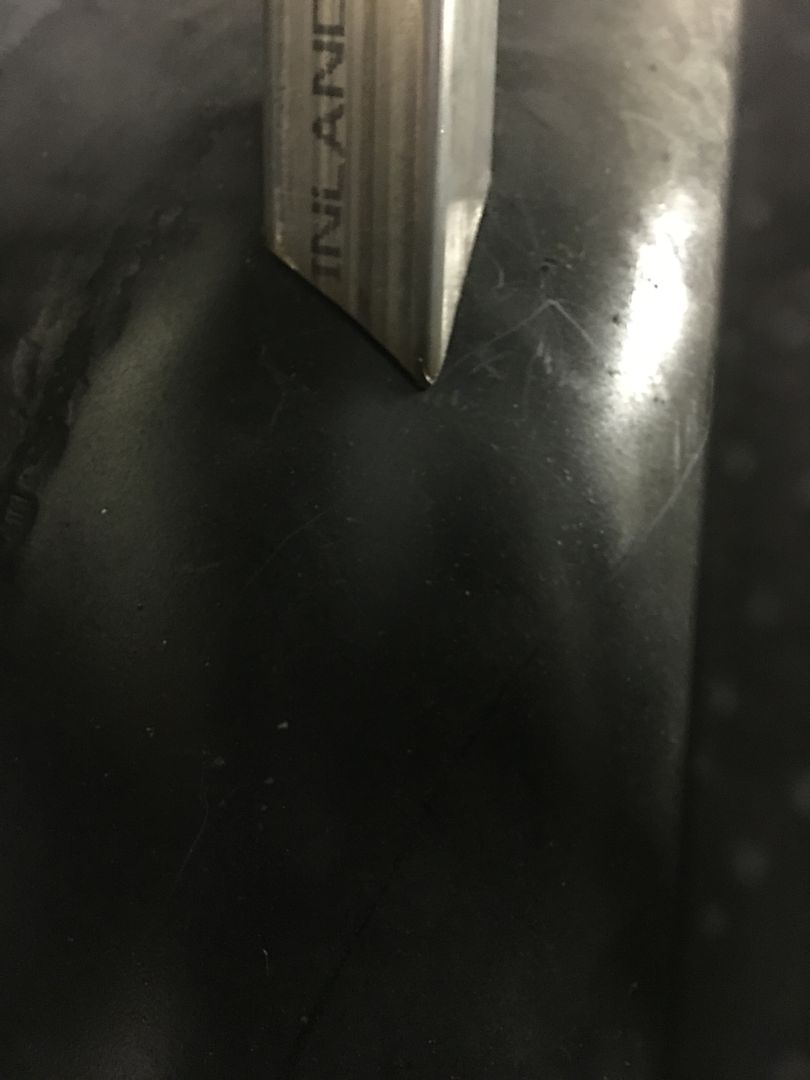
After making the relief cuts, tap the corners around first, then worry about the flats in the center of the tube. If you hit the center first, you may wind up with a low area in the center.
Thanks for the comments guys!Last edited by MP&C; 04-11-2017 at 05:48 AM.
Robert
-
04-11-2017 07:57 AM #11
CHR Member
- Join Date
- Feb 2008
- Location
- Caldwell
- Car Year, Make, Model: 34 ford 3 window/461 pontiac
- Posts
- 918
It's amazing how the smallest "Tip" can make a big difference. Thanks Robert for the visual and verbal tips.
Jack.www.clubhotrod.com/forums/showthread.php?t=44081
-
04-15-2017 09:45 PM #12
CHR Member
- Join Date
- Jun 2008
- Location
- Leonardtown
- Car Year, Make, Model: Walking
- Posts
- 1,228
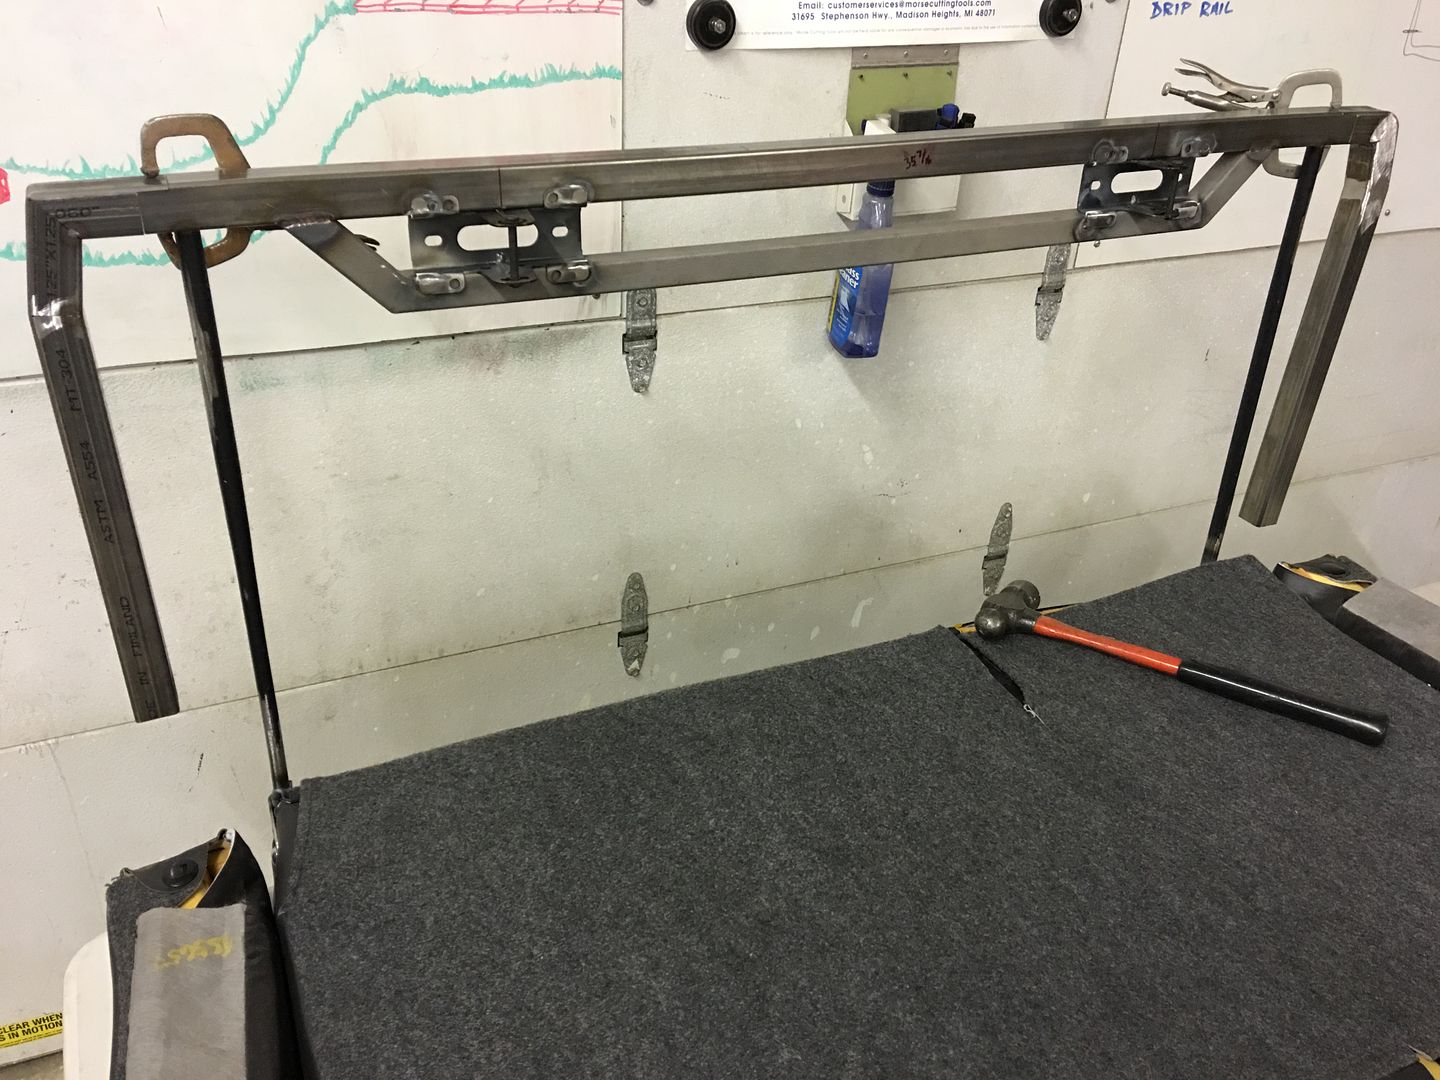
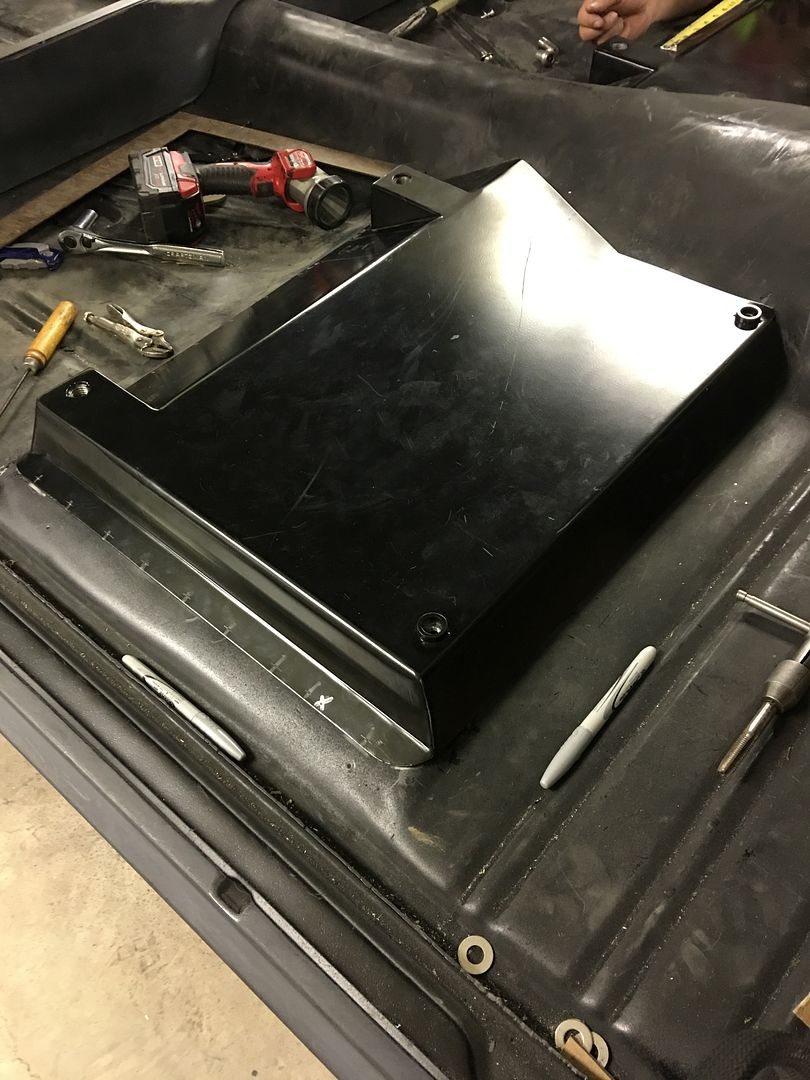
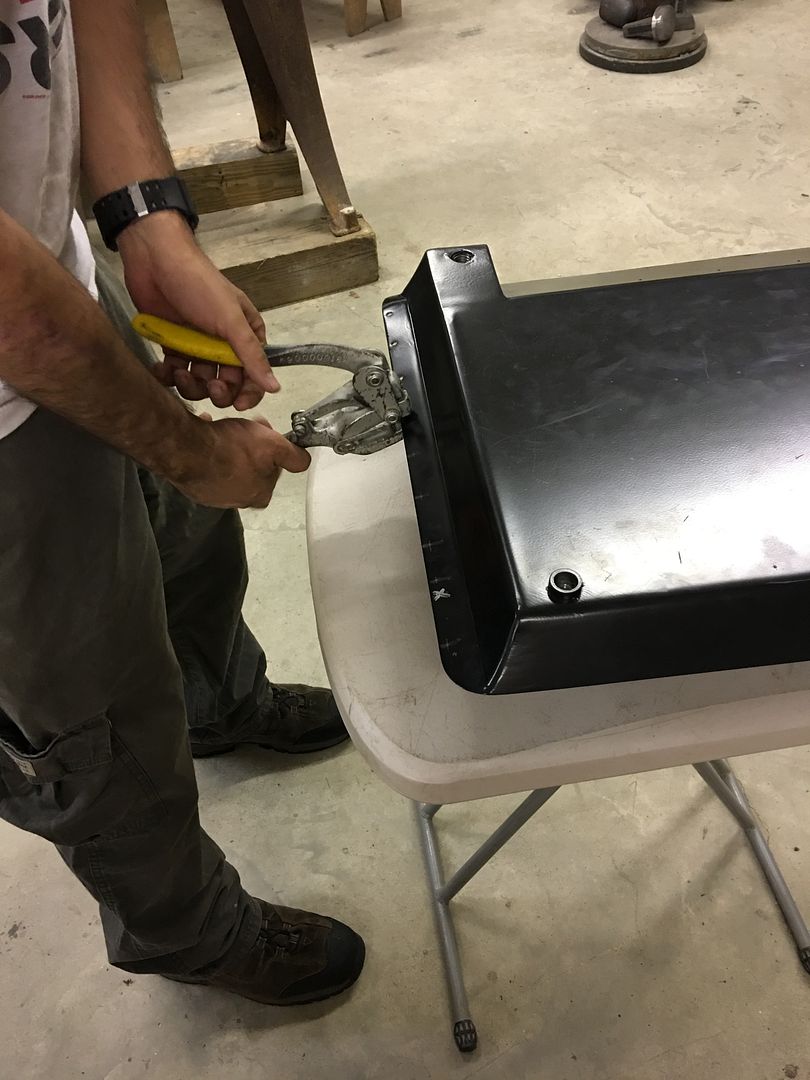
More work on the seat back bracket... Trimming the side pieces to match the wheel well...
Adding welding flange, hammered out of 16 gauge steel..
Test drive....
https://www.youtube.com/watch?v=mpFl01yHvKw
Used the Roper Whitney hand punch to make our plug weld holes..
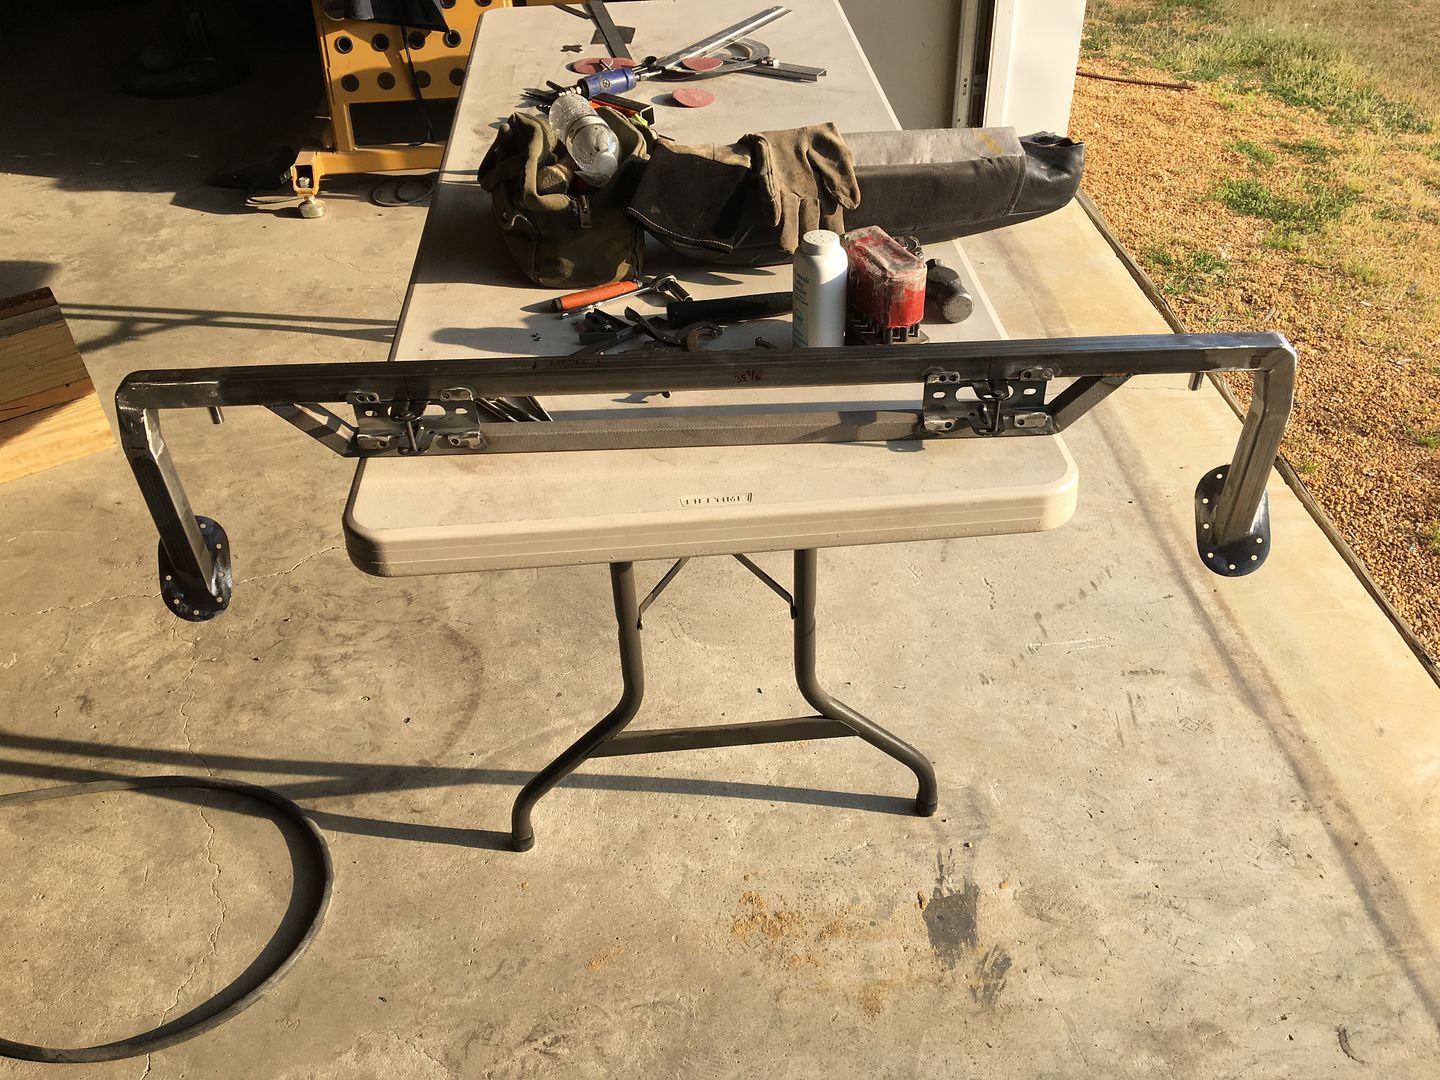
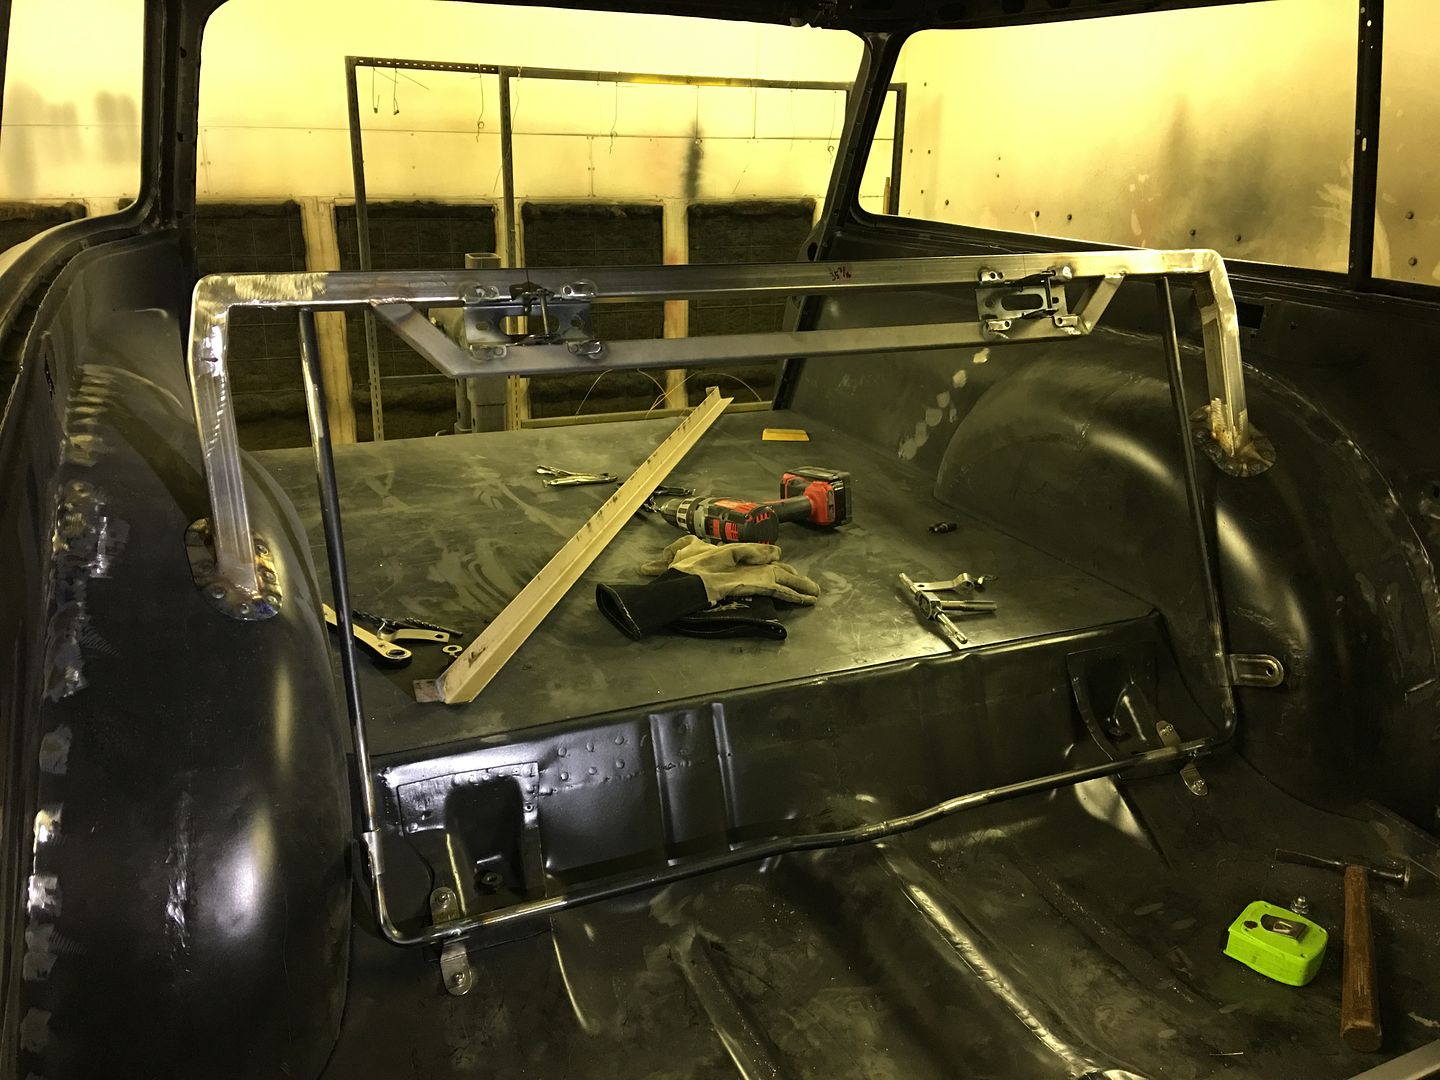
Next we'll close off the back area to contain the amp and bass speaker.Robert
-
05-17-2017 04:18 AM #13
CHR Member
- Join Date
- Jun 2008
- Location
- Leonardtown
- Car Year, Make, Model: Walking
- Posts
- 1,228
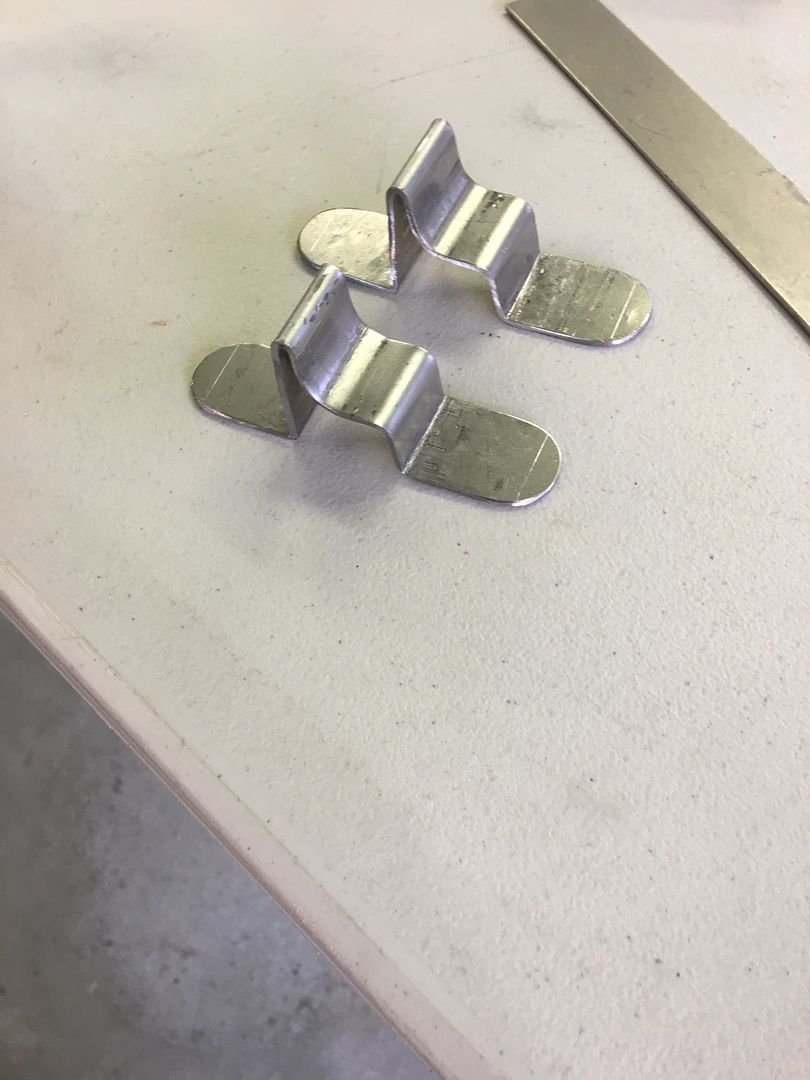
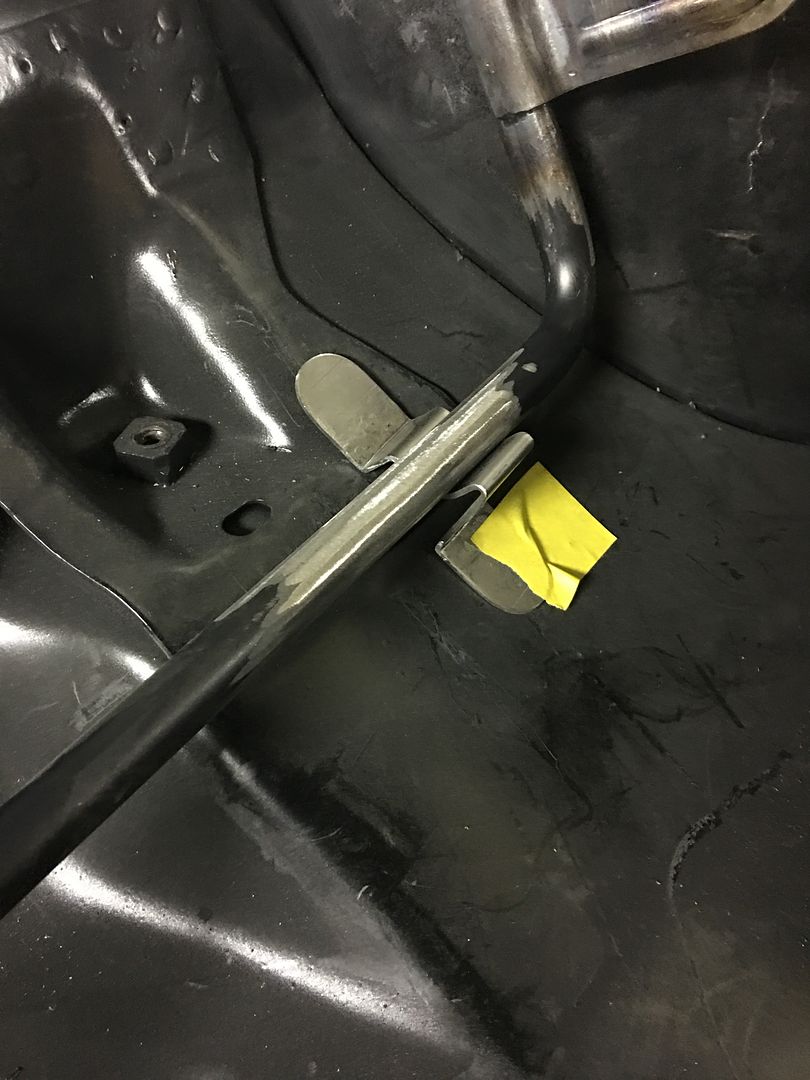
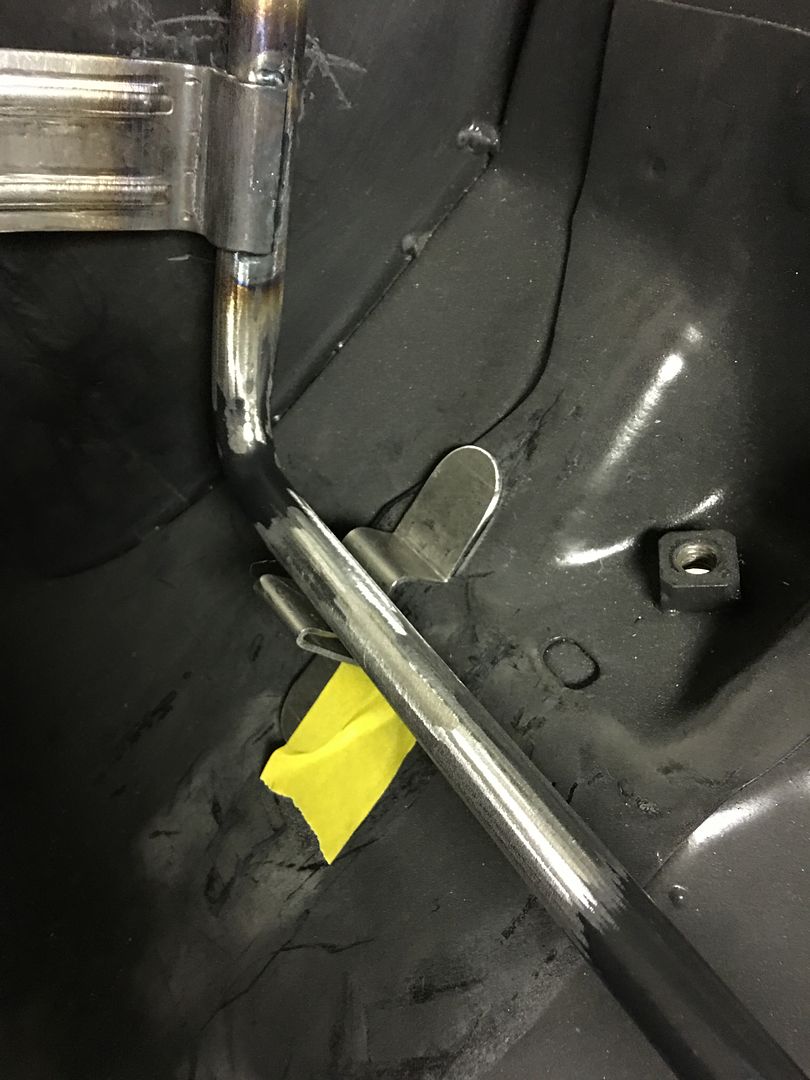
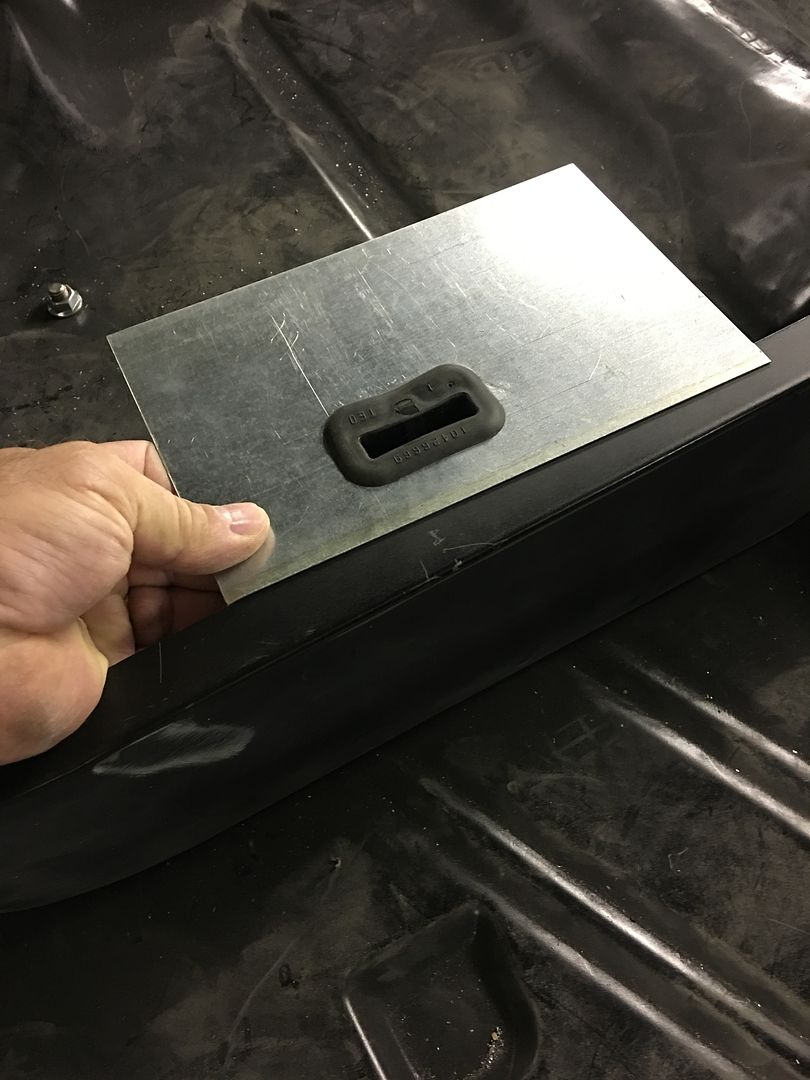
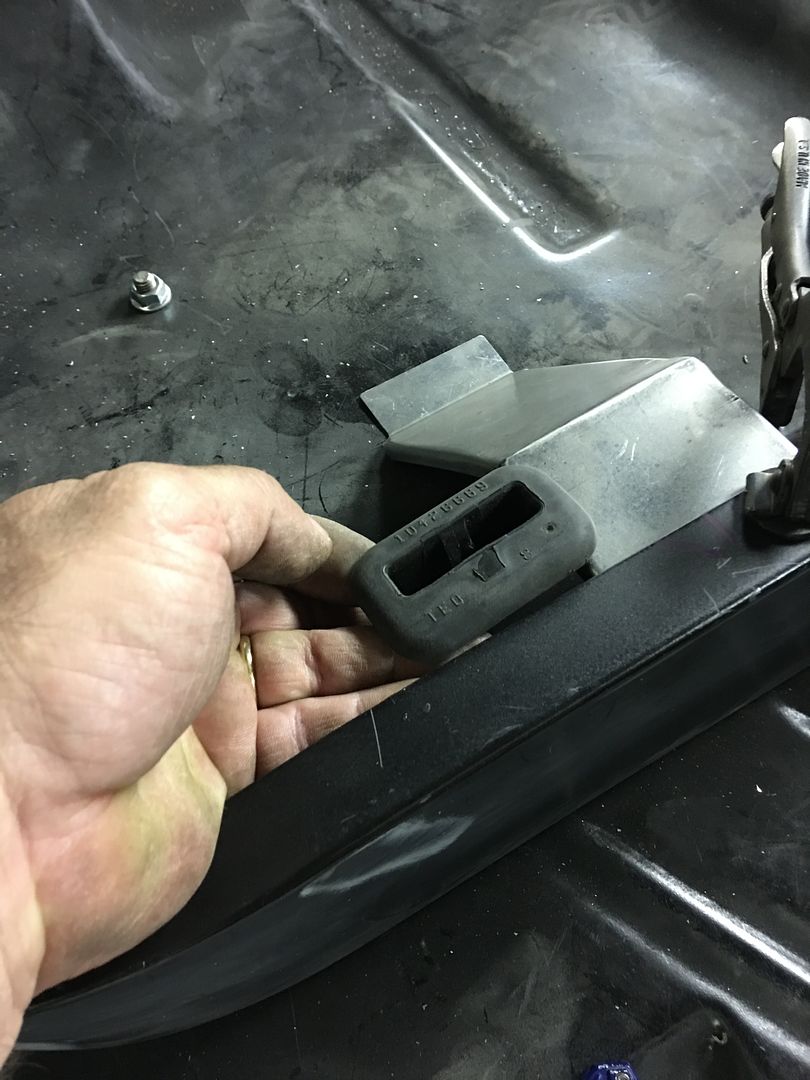
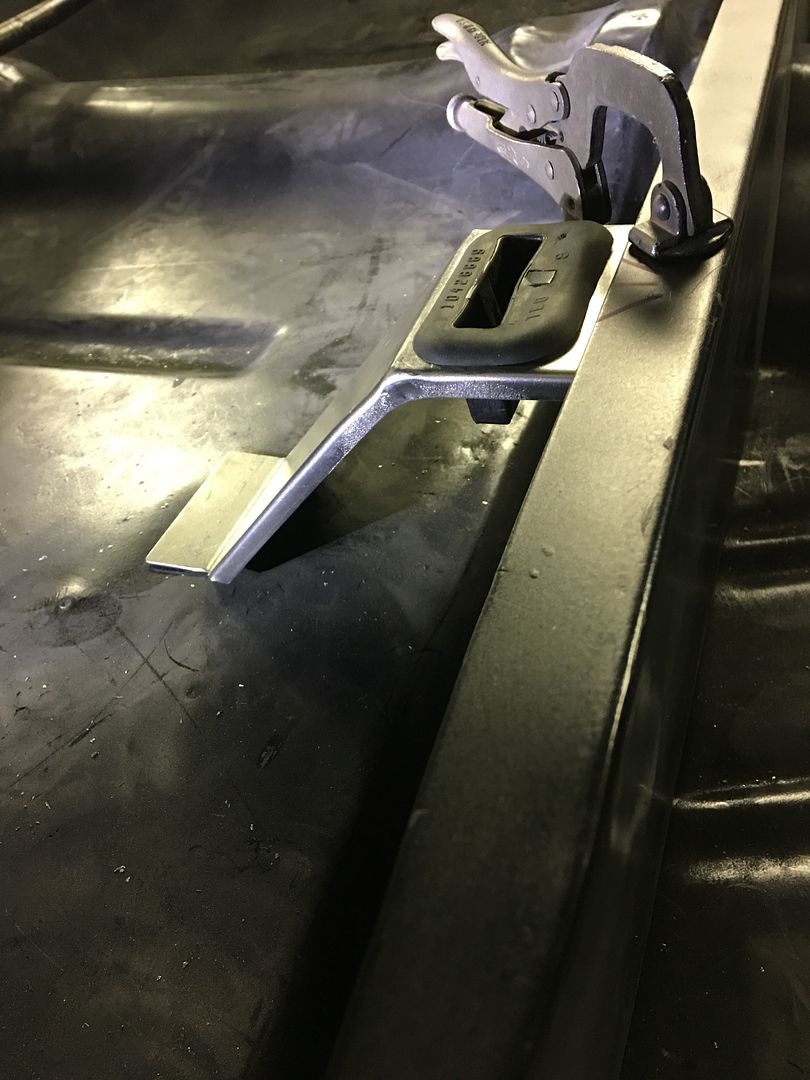
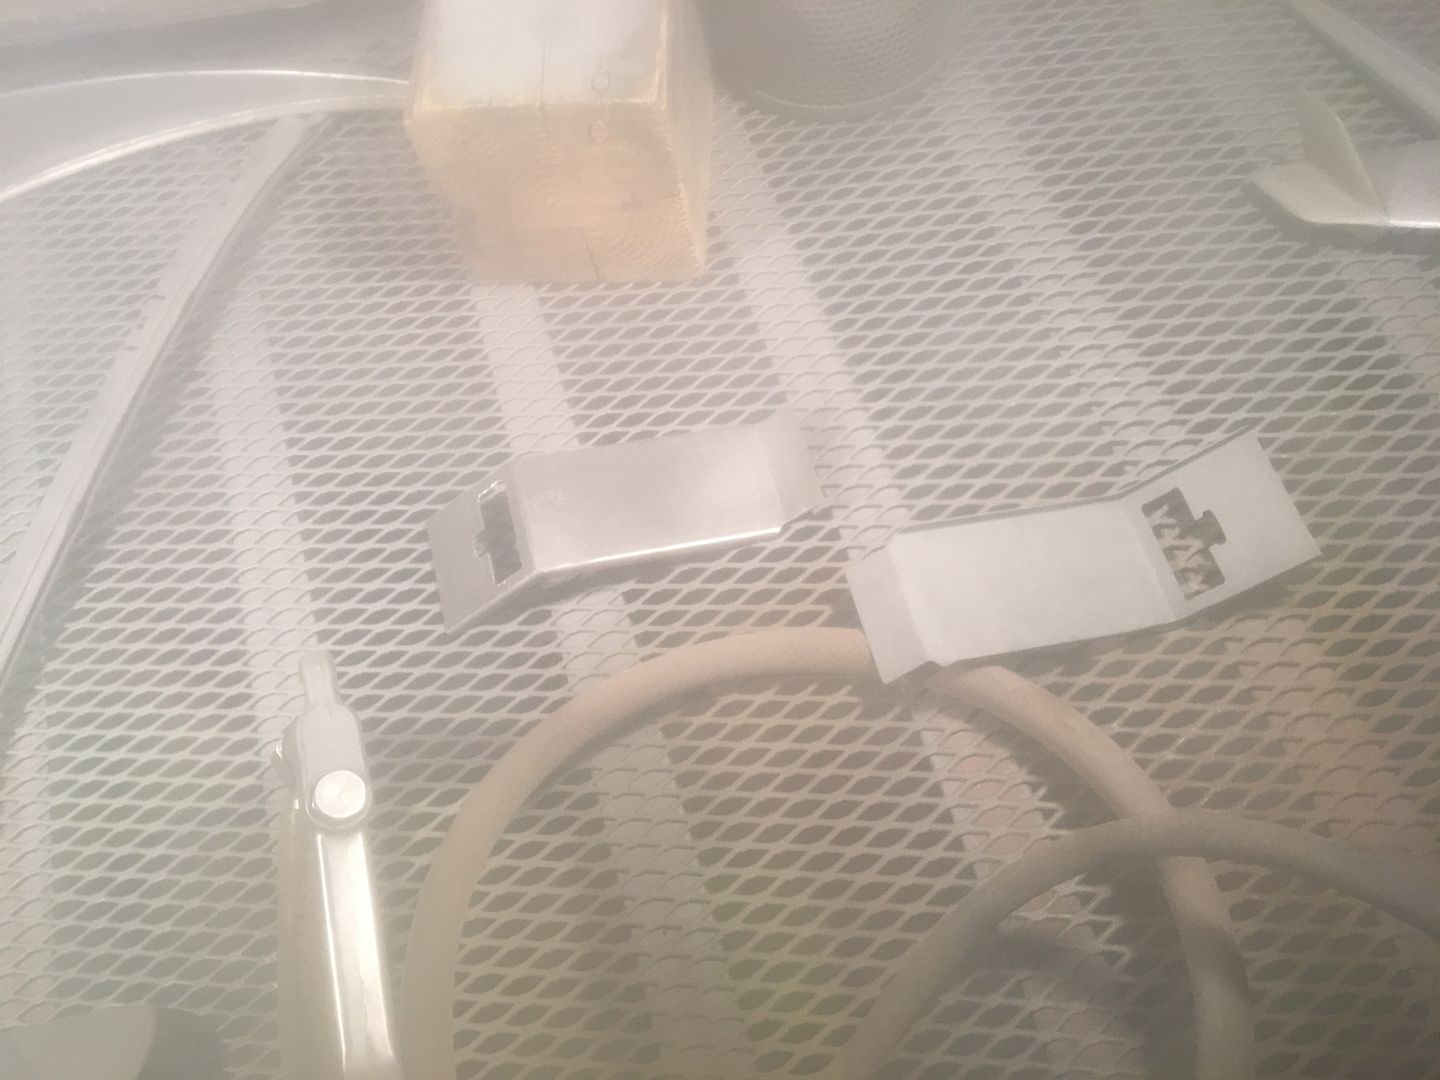
Had a short evening in the shop as I was busy packing the neon clock for shipment, so the remainder was spent working on some of the many final details of the rear seat. Here are the factory seat clips to hold the seat bottom in place.

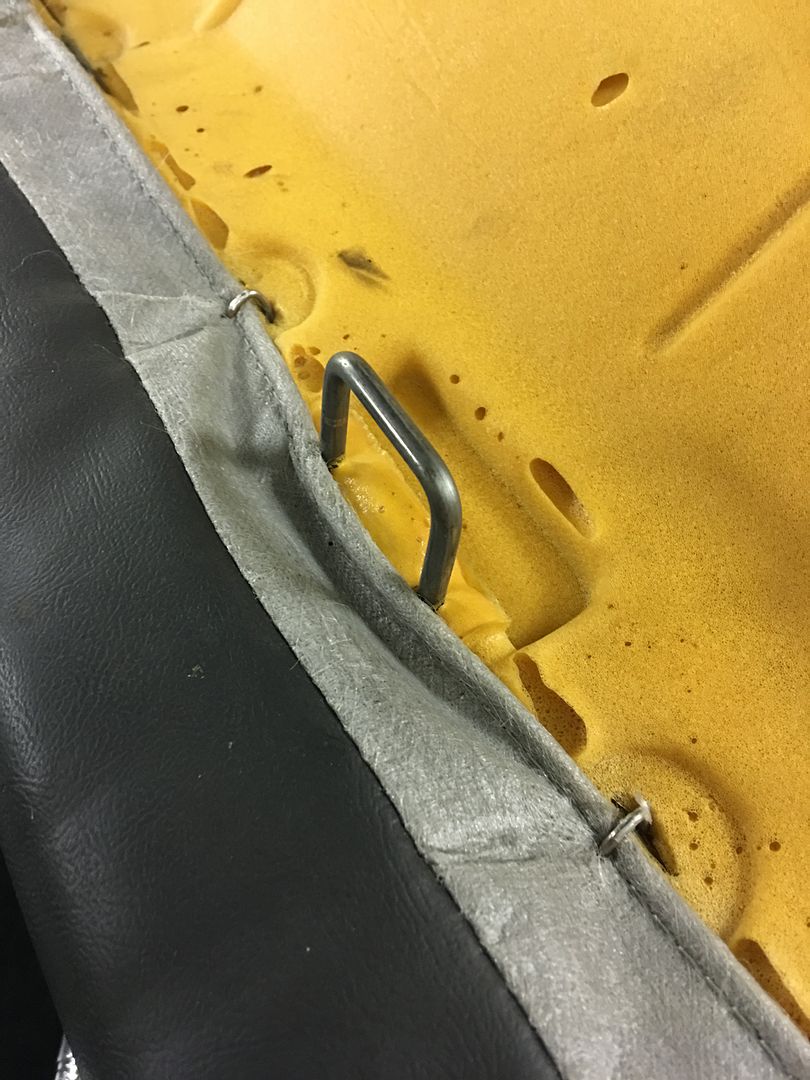
In order to use these, let's do a sample and see if we cut a hole in some sheet metal that they'll fit into..

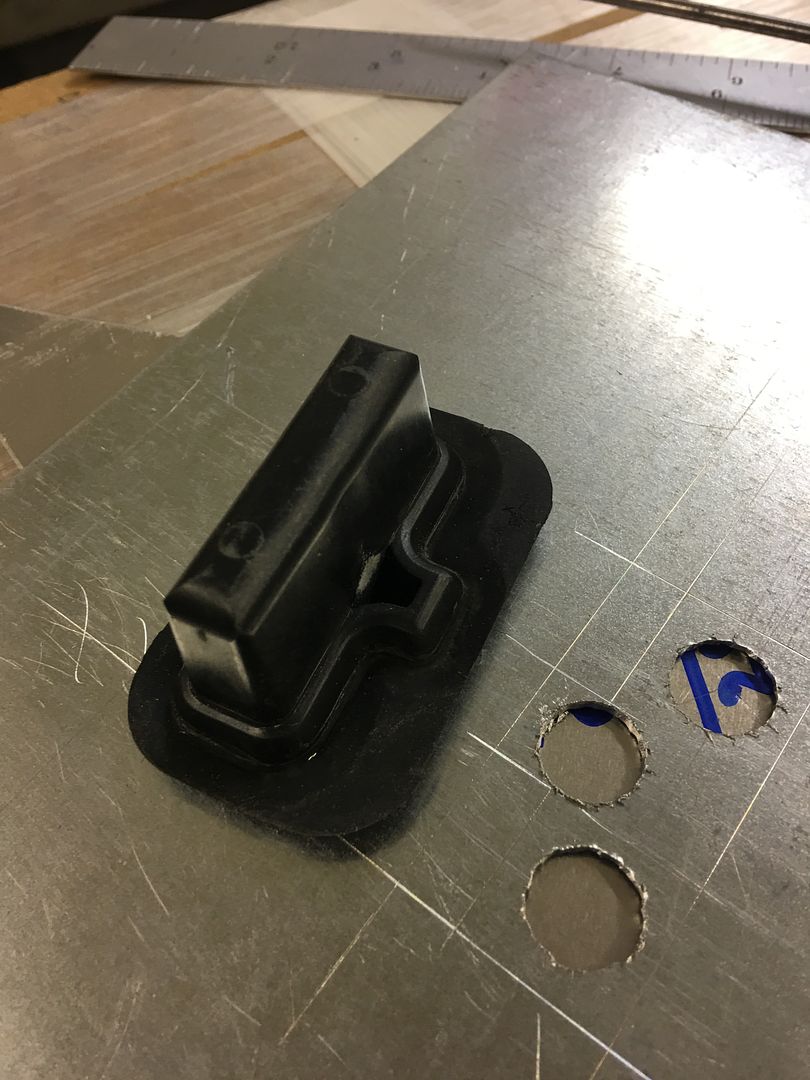
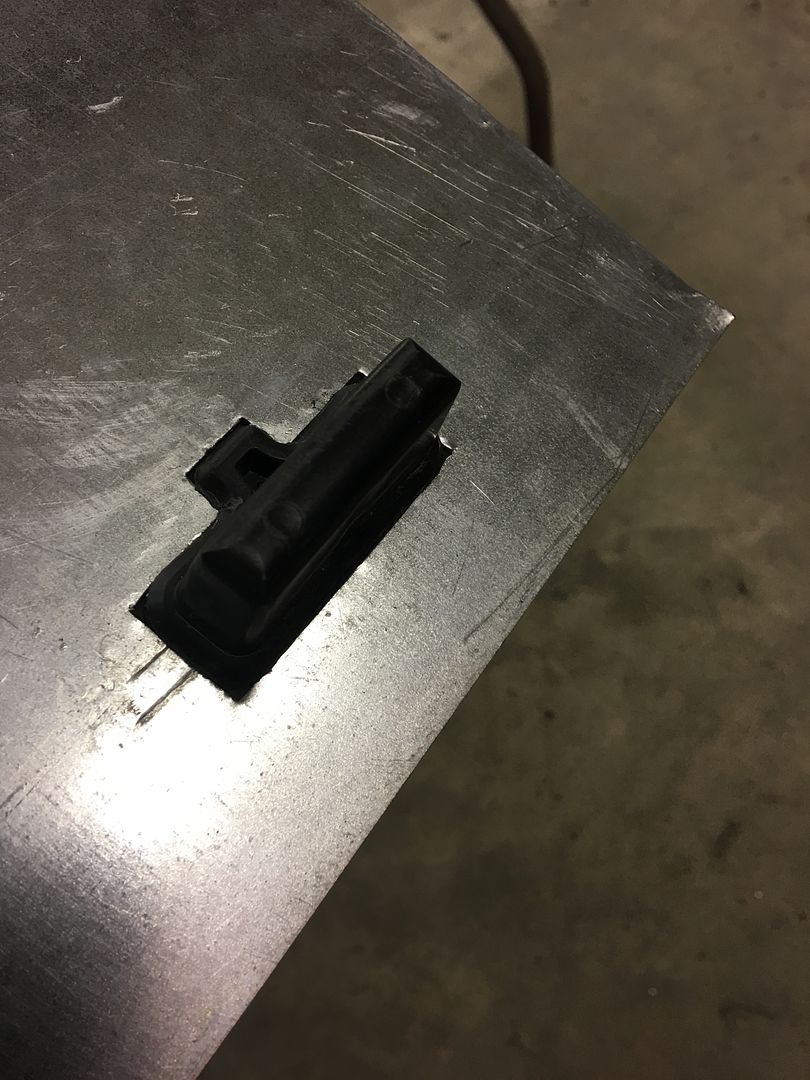
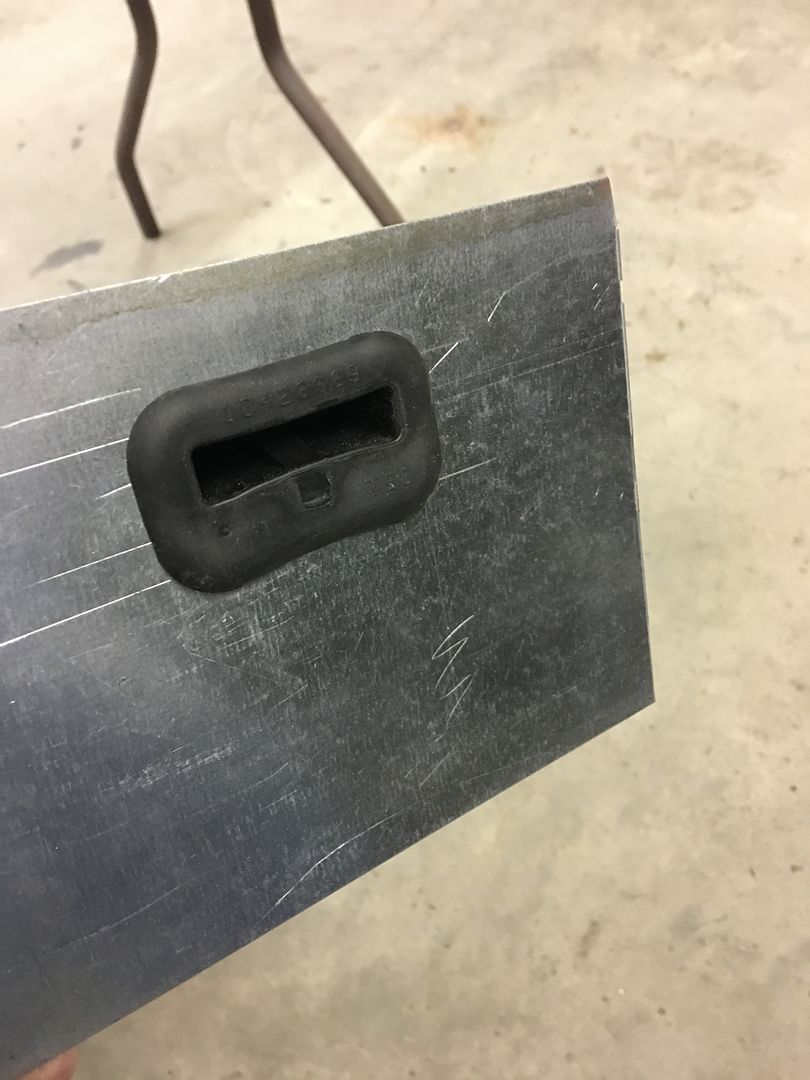
This looks like it will work, we'll get some 18 gauge strips made to hold these that 45 down to the floor, adding some bead details for strength..
Robert
-
05-18-2017 08:18 PM #14
CHR Member
- Join Date
- Jun 2008
- Location
- Leonardtown
- Car Year, Make, Model: Walking
- Posts
- 1,228
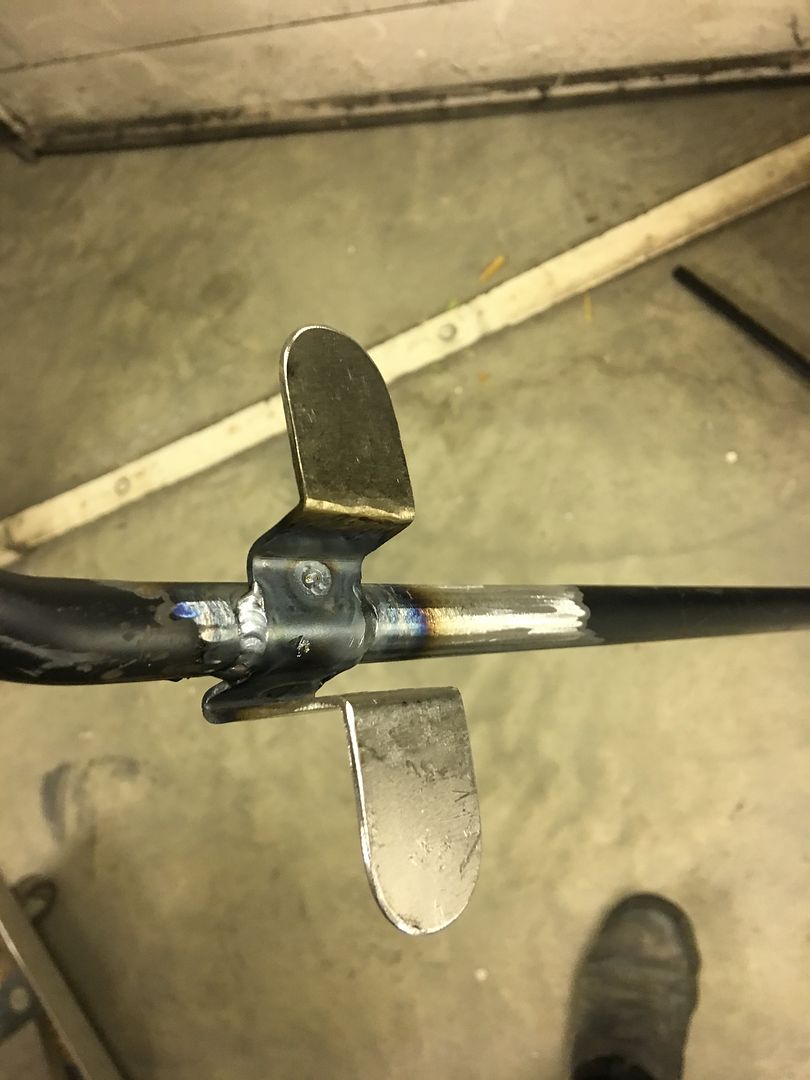
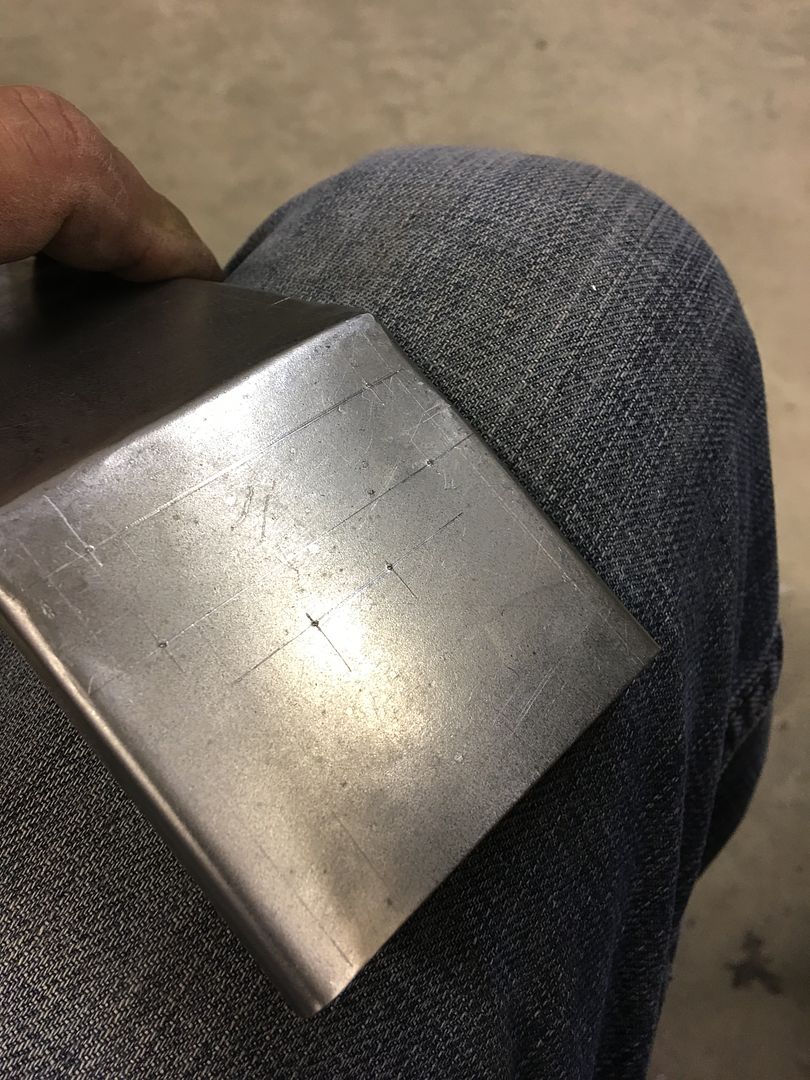
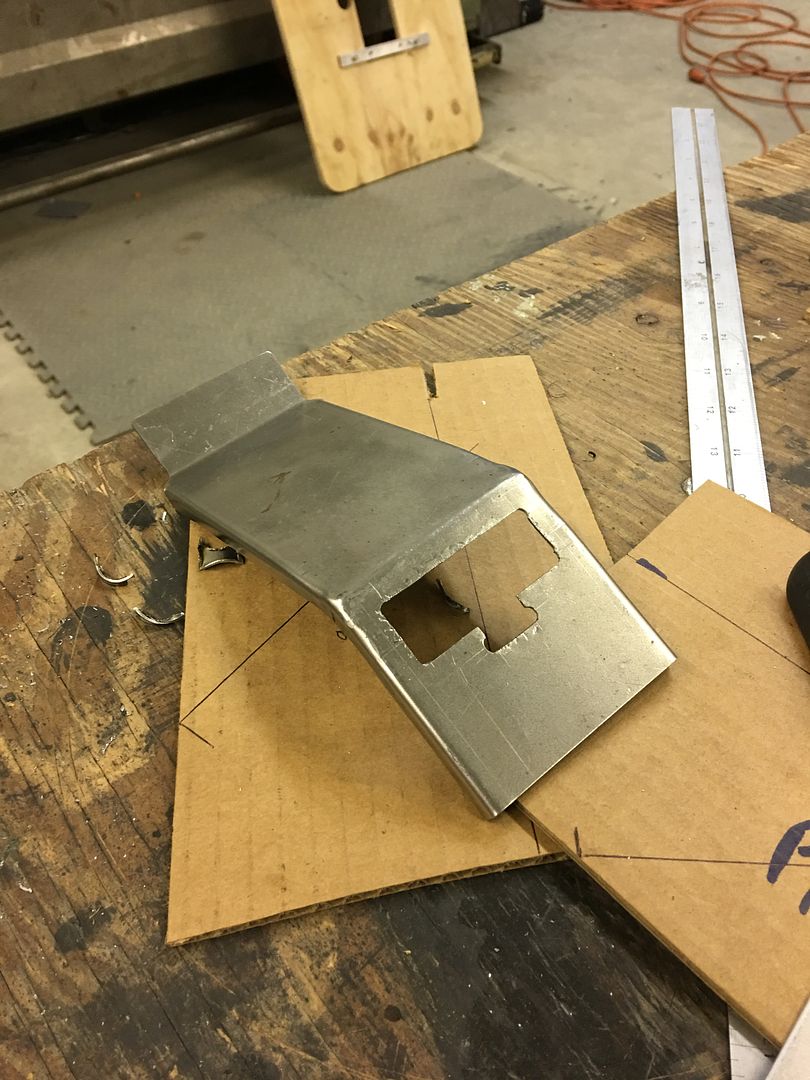
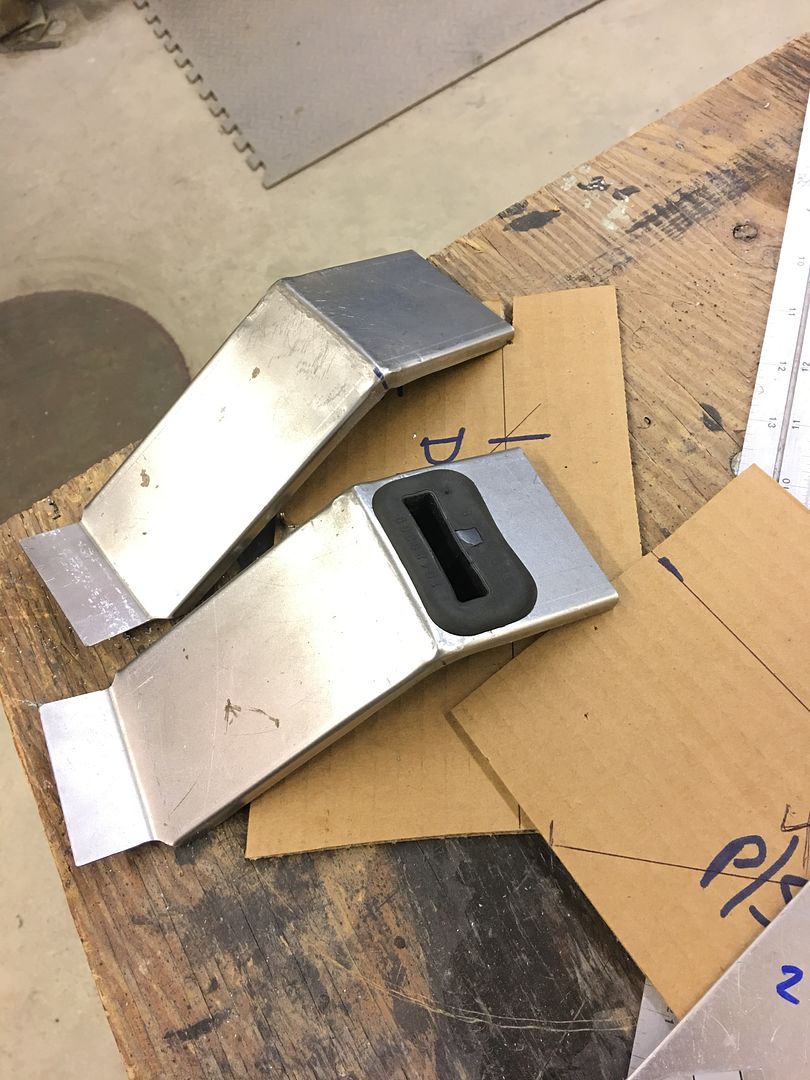
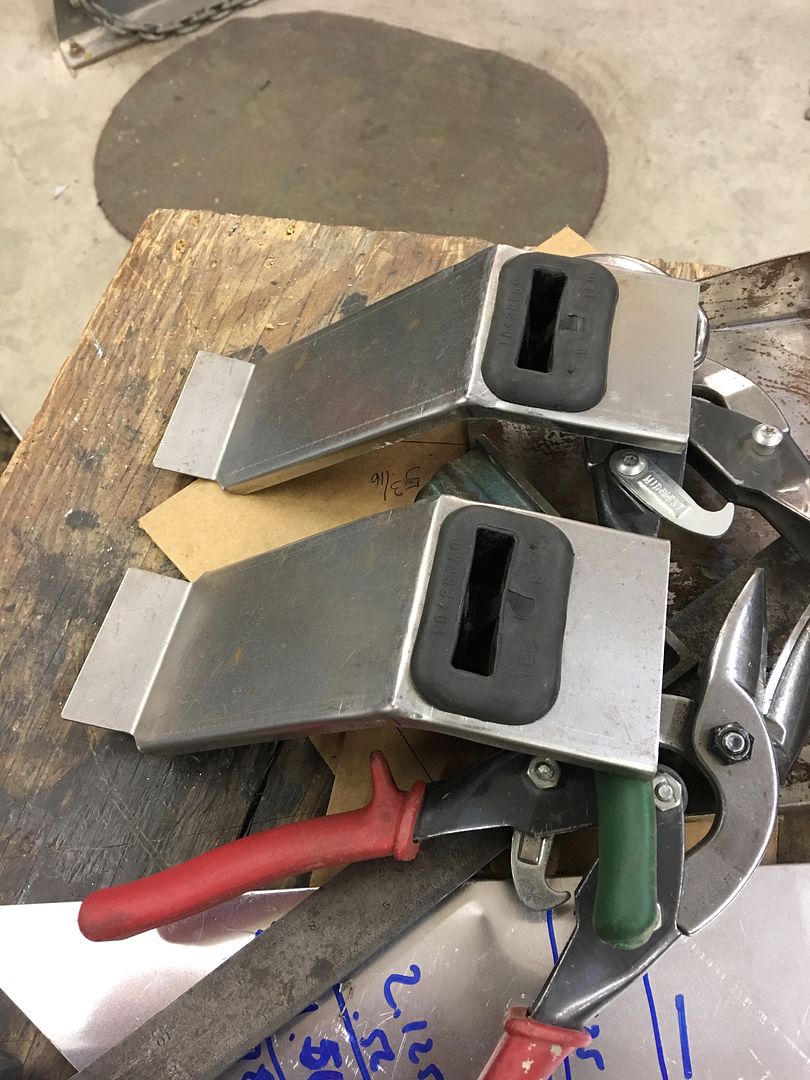
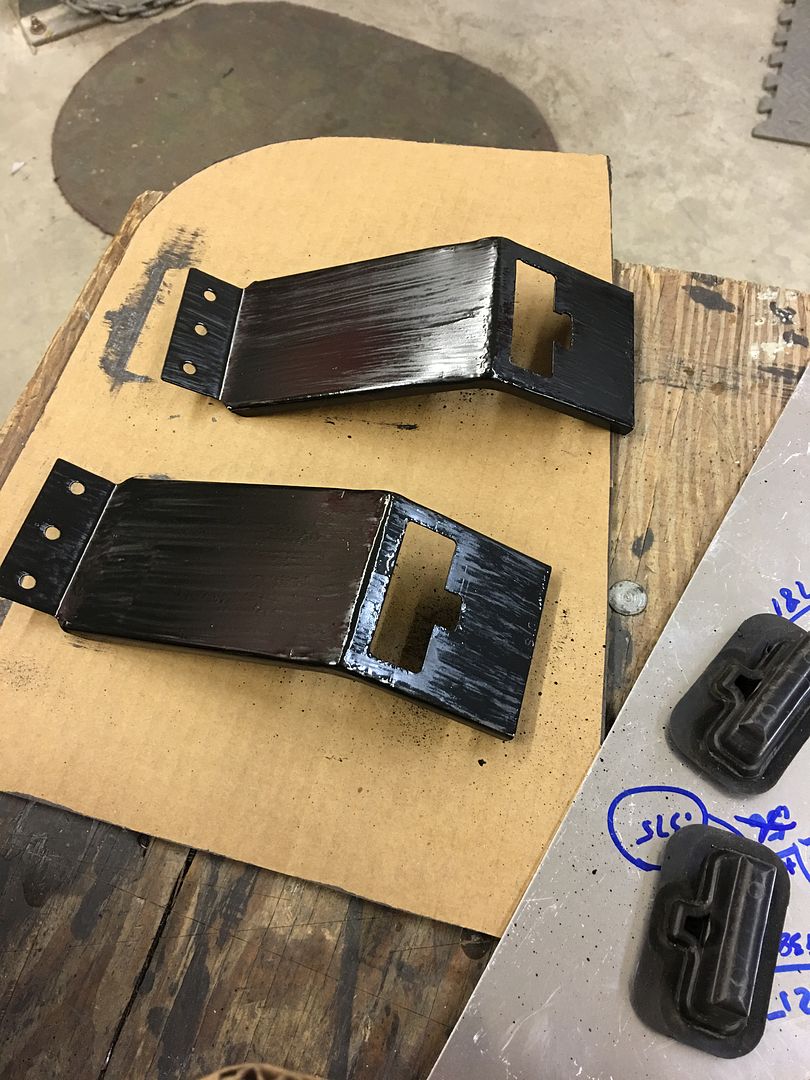
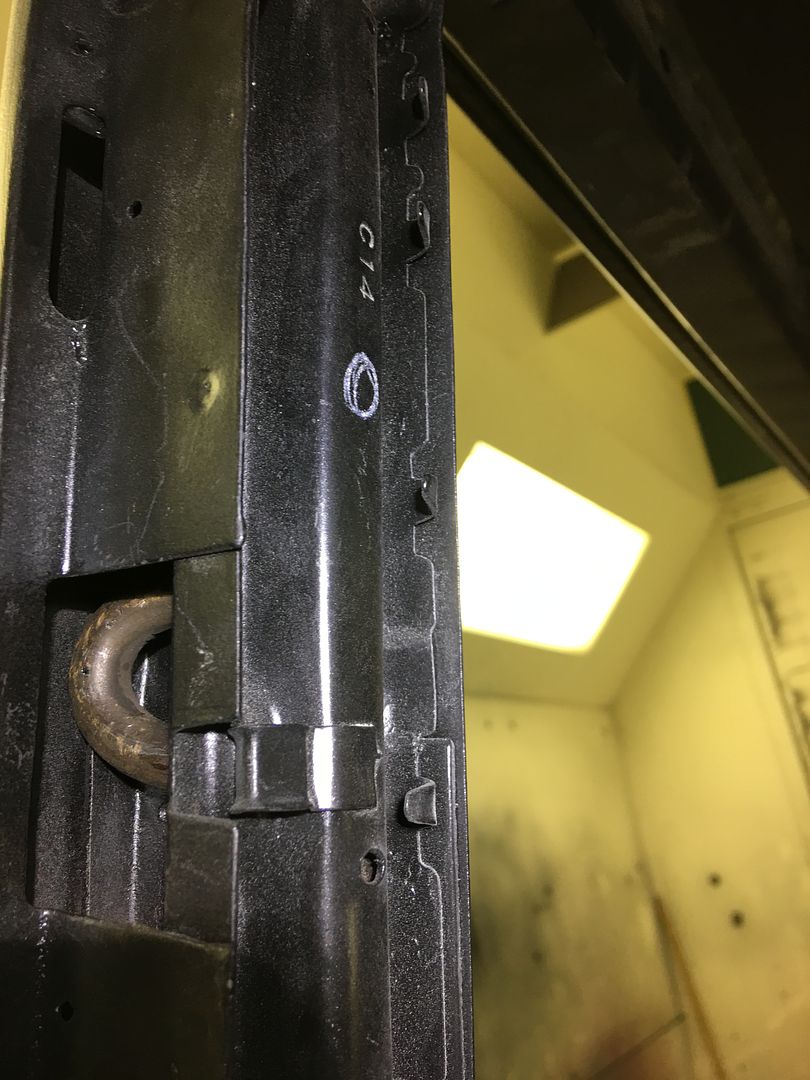
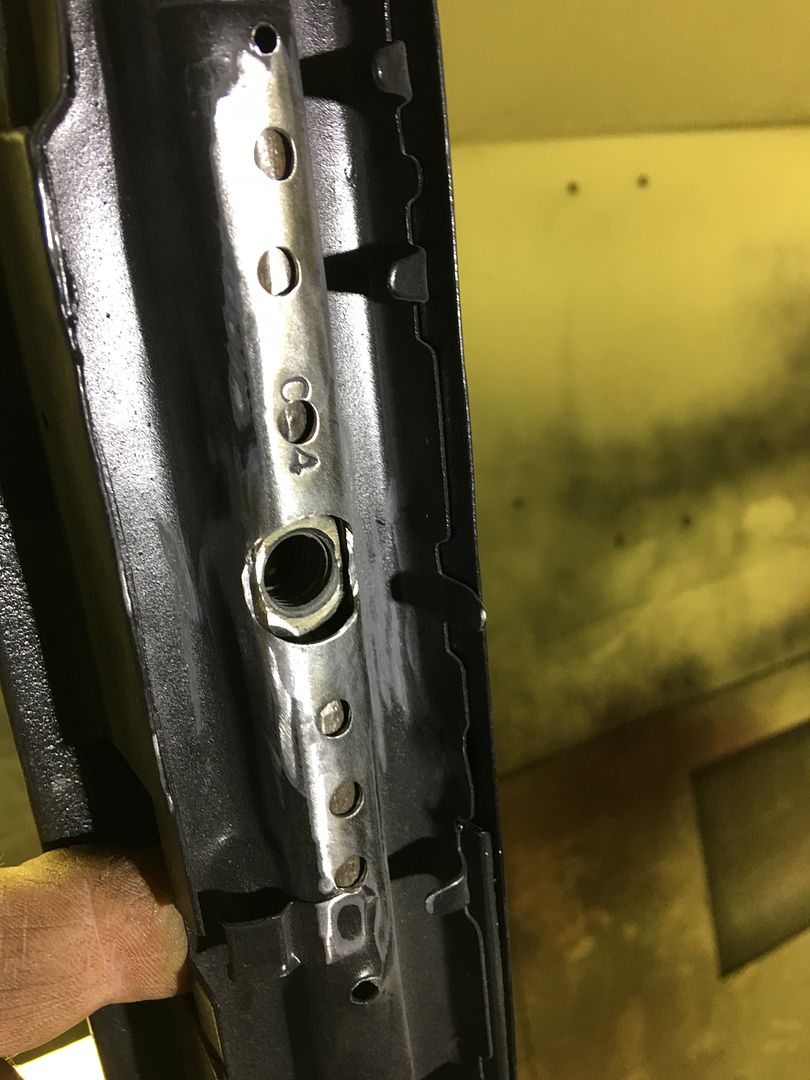
Time for some brackets for the rear seat bottom retainers. Cut out some 19 gauge...
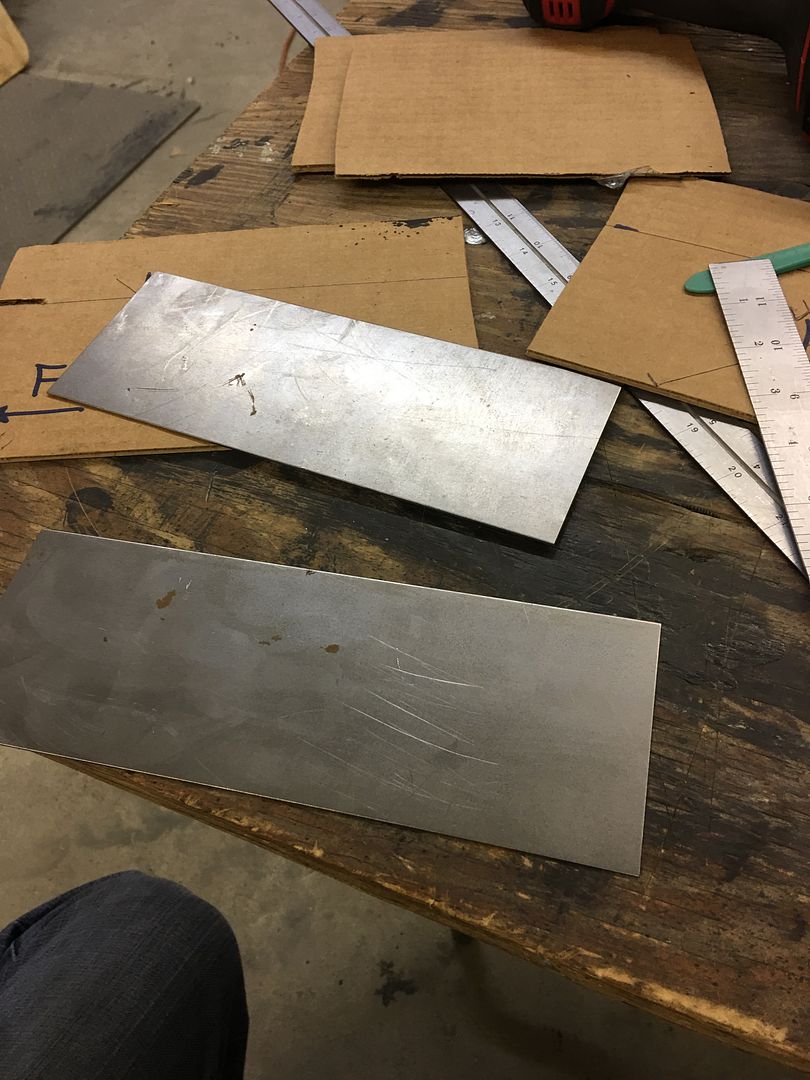
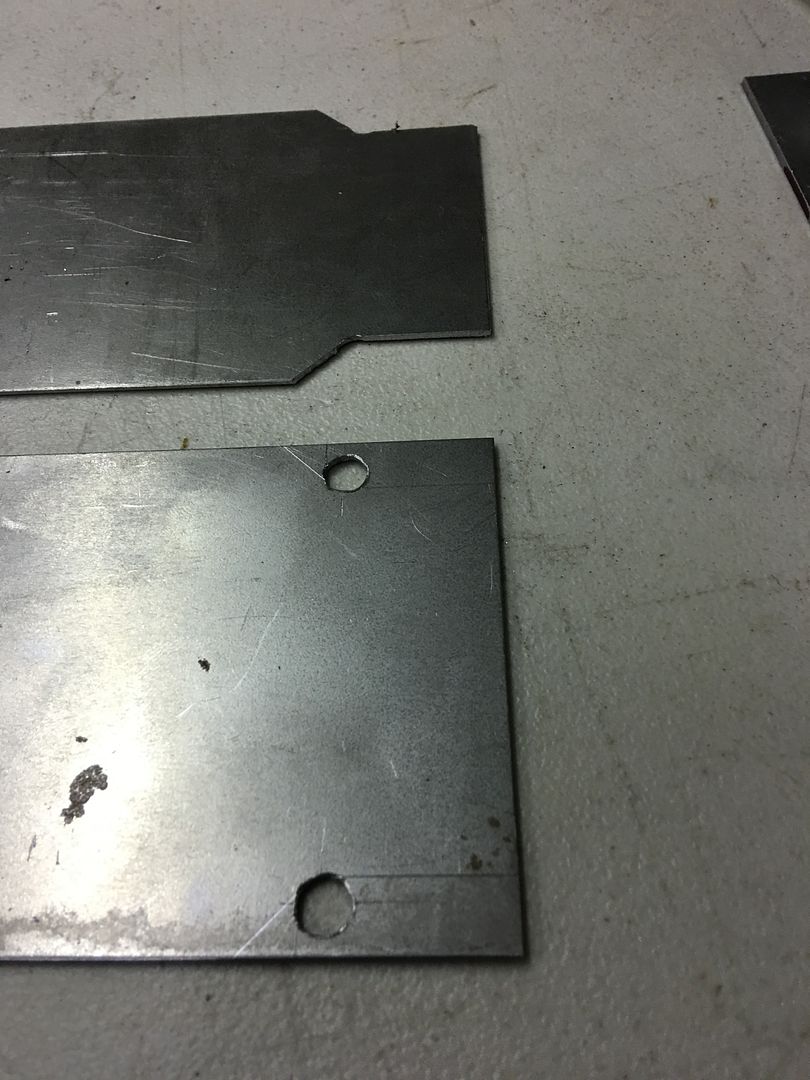
Drilled some holes for an inside radius, and trimmed the corners for the floor pan flange..
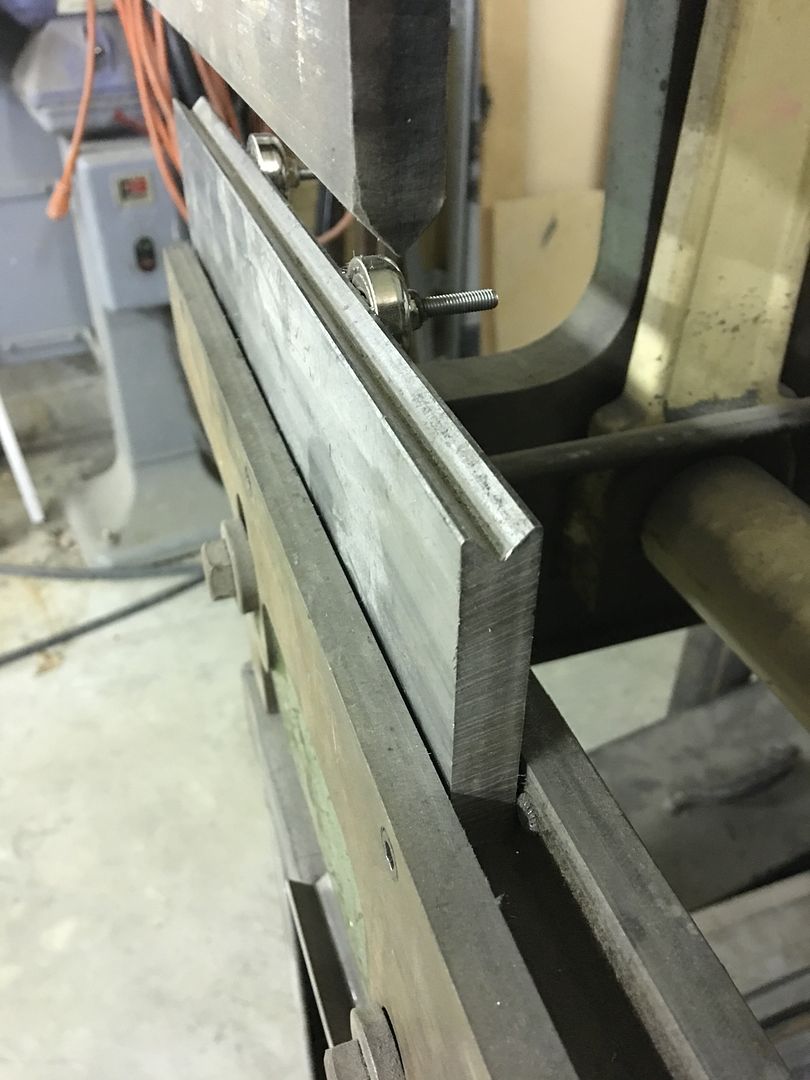
Now to fold some flanges on the sides for strength, using the Diacro press brake and a 1/2" thick lower die. By adding some rare earth magnets to the back side to serve as a back stop, we get a perfect 1/4" flange...
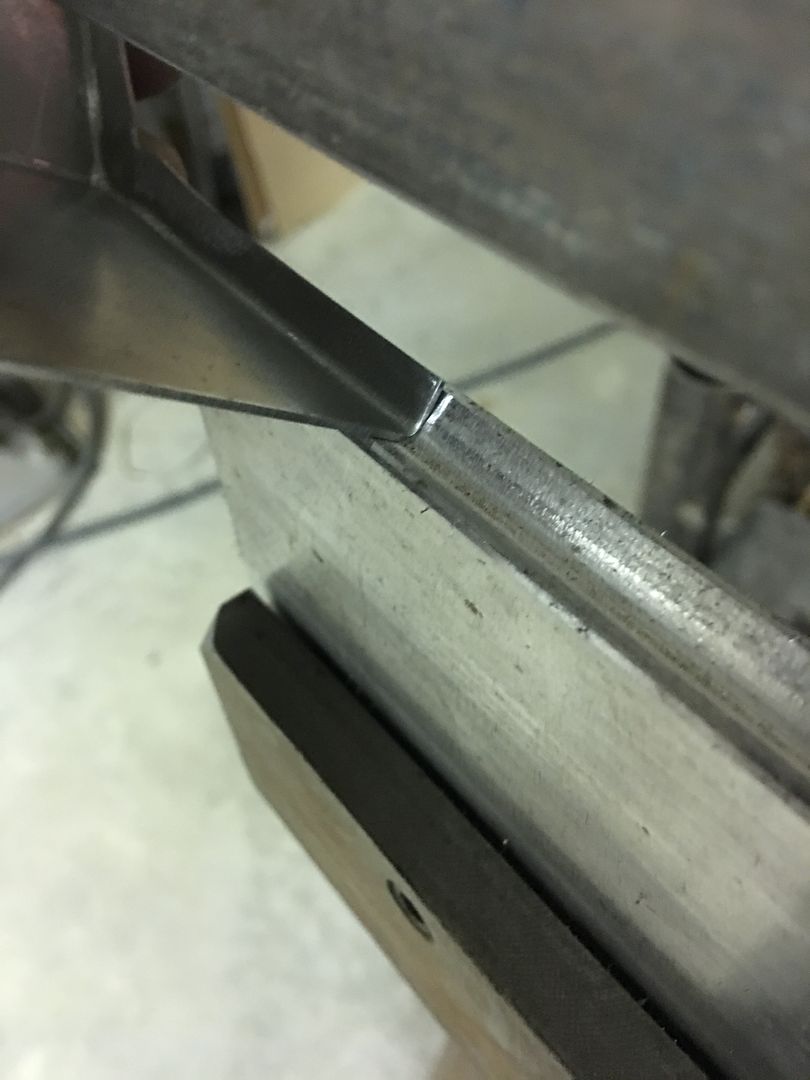
Then some back and forth between the Erco kick shrinker and the press brake with a narrow die inside the folds.... and we have 45* bends on either end of our brackets...
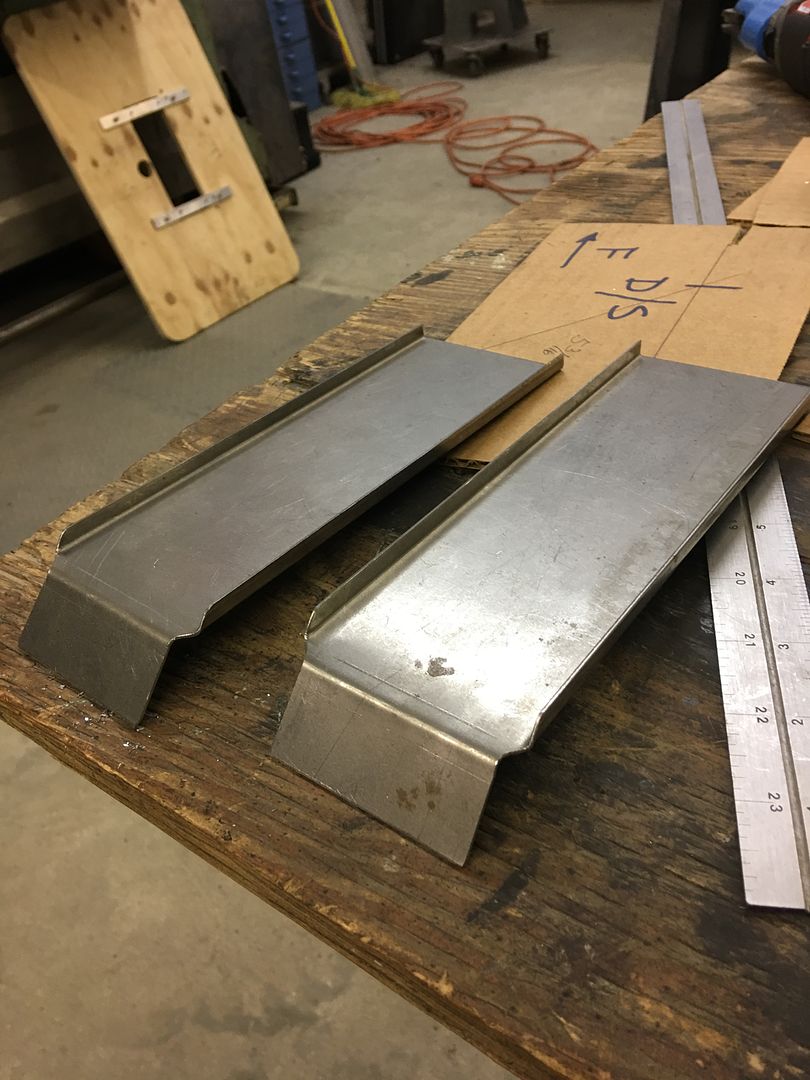
Test fit.... and trimming the retainer hole...
Robert
-
05-21-2017 06:51 PM #15
CHR Member
- Join Date
- Jun 2008
- Location
- Leonardtown
- Car Year, Make, Model: Walking
- Posts
- 1,228
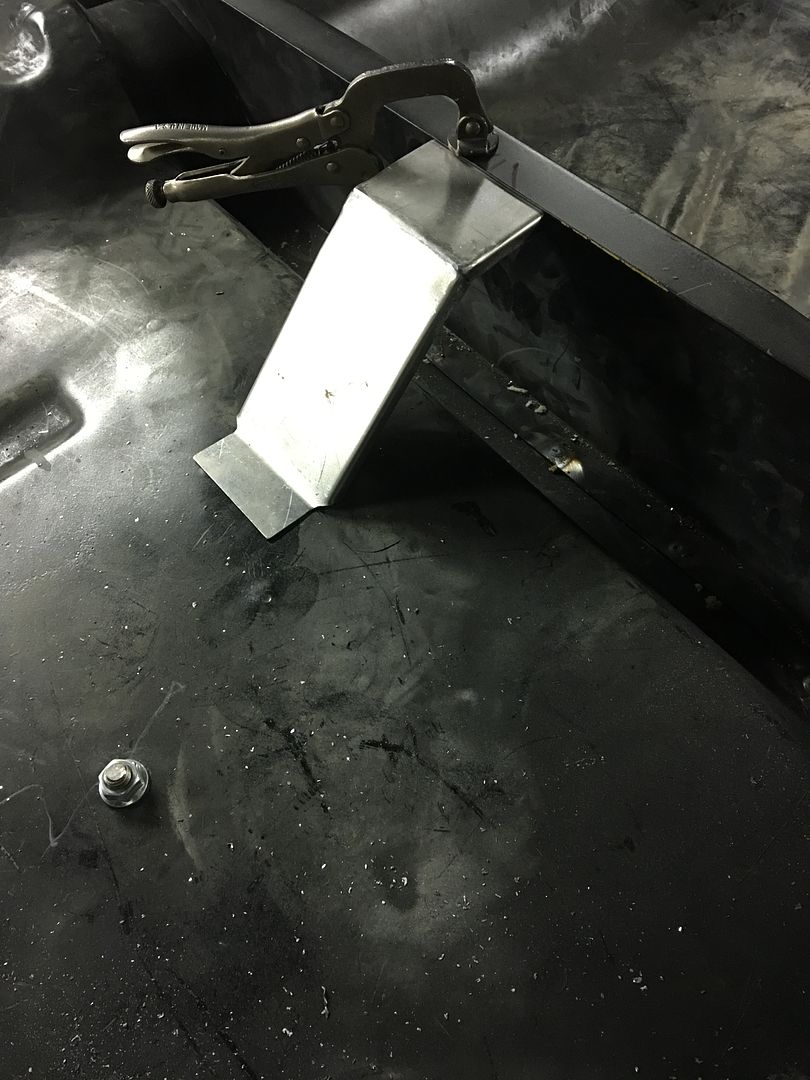
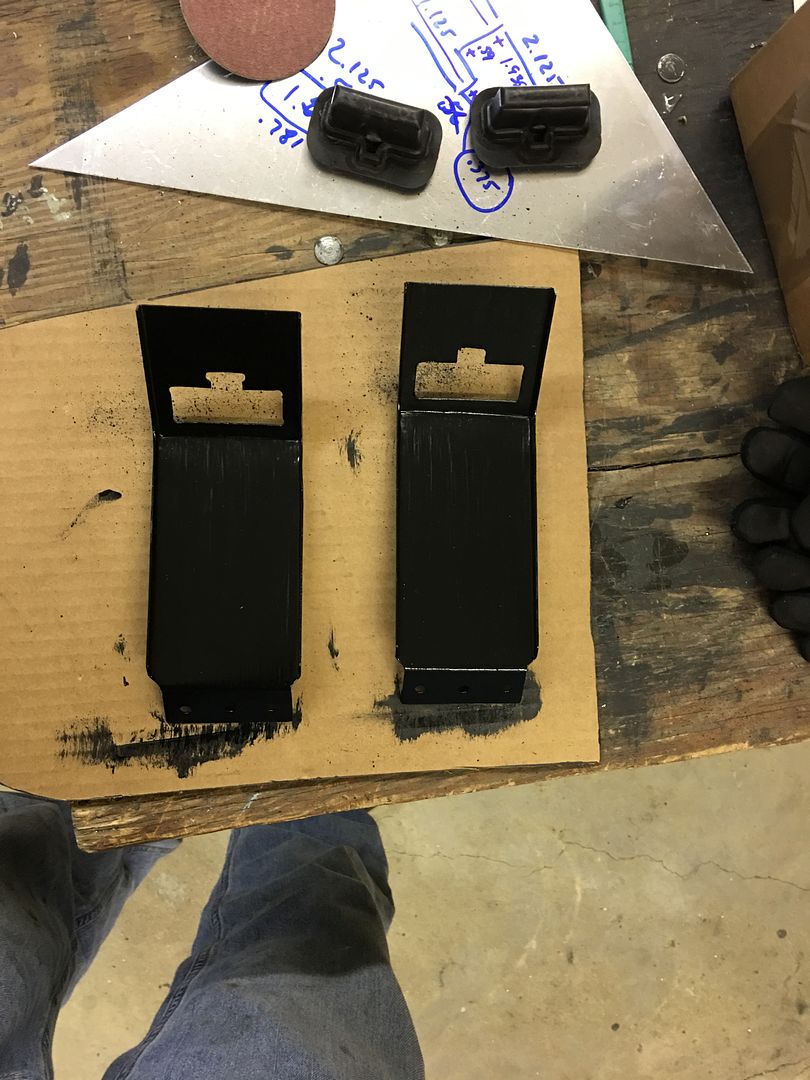
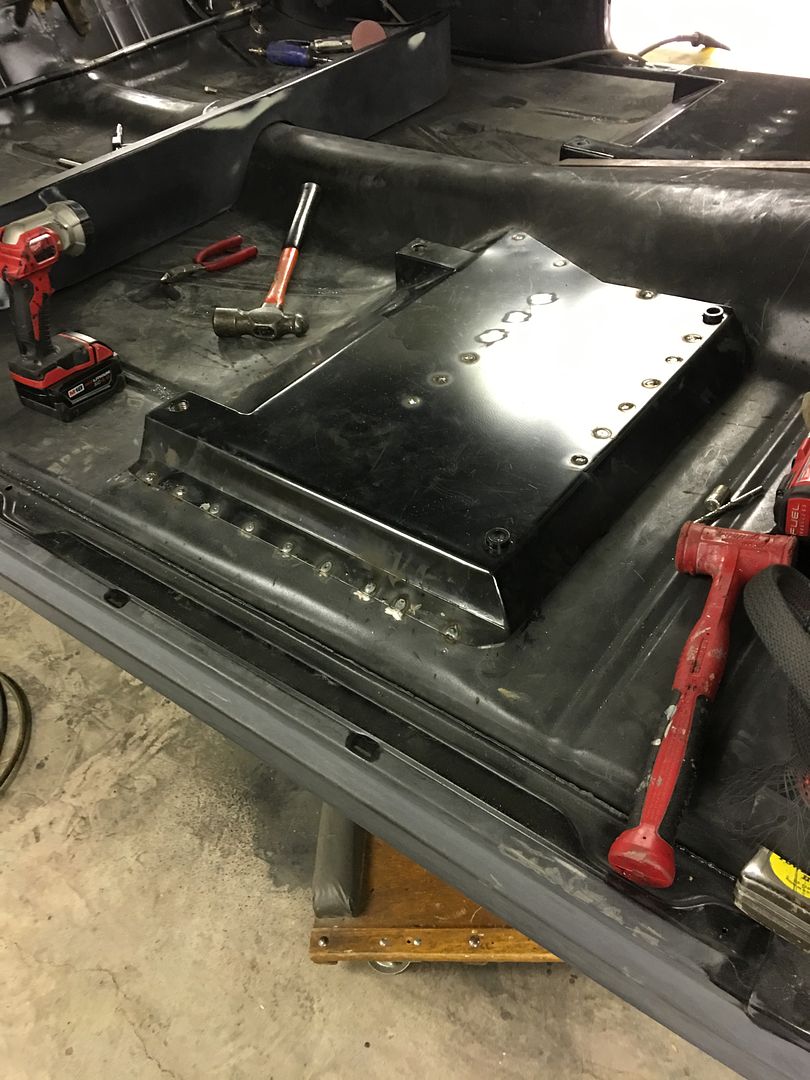
Had our new apprentice started today, while I cut out the hole in the second seat bracket, Mike got started on punching and drilling holes for plug welding the passenger bucket seat bracket...
After I got the bracket hole cut out, E media blasted the brackets and added some SPI epoxy using a brush. We mainly wanted to get the bottom side well covered as it will be inaccessible once welded in place..

First coat...
Two coats, that should hold us for under a seat...
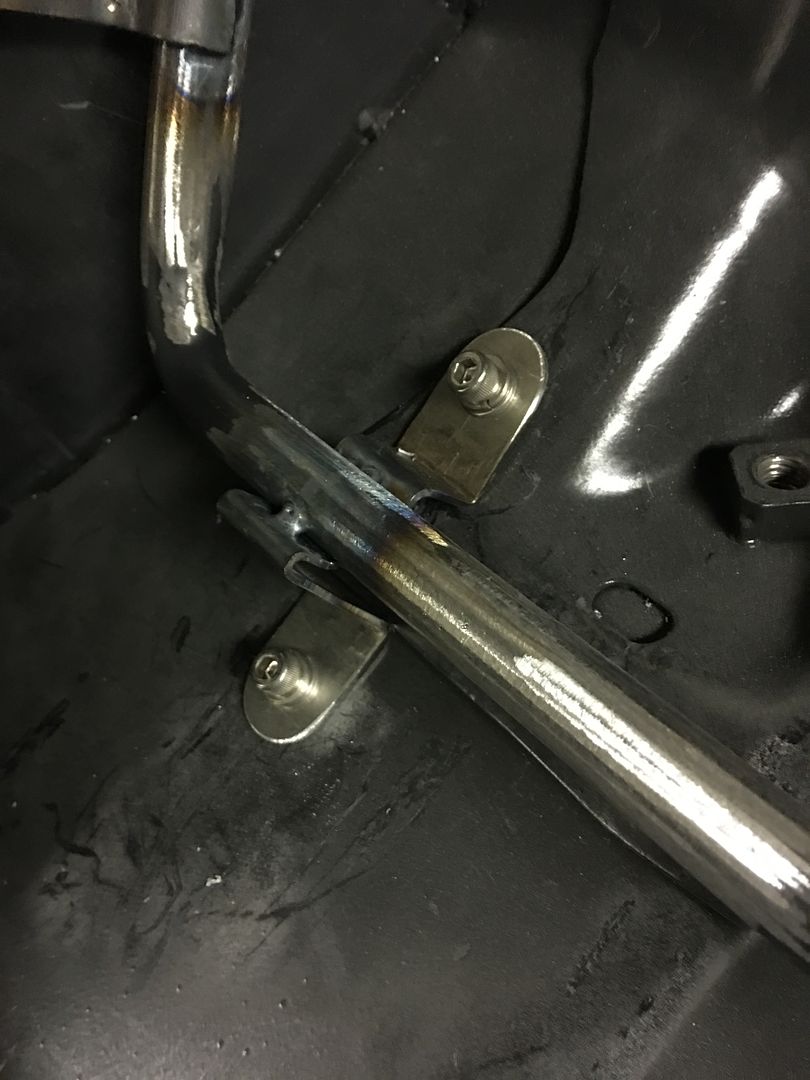
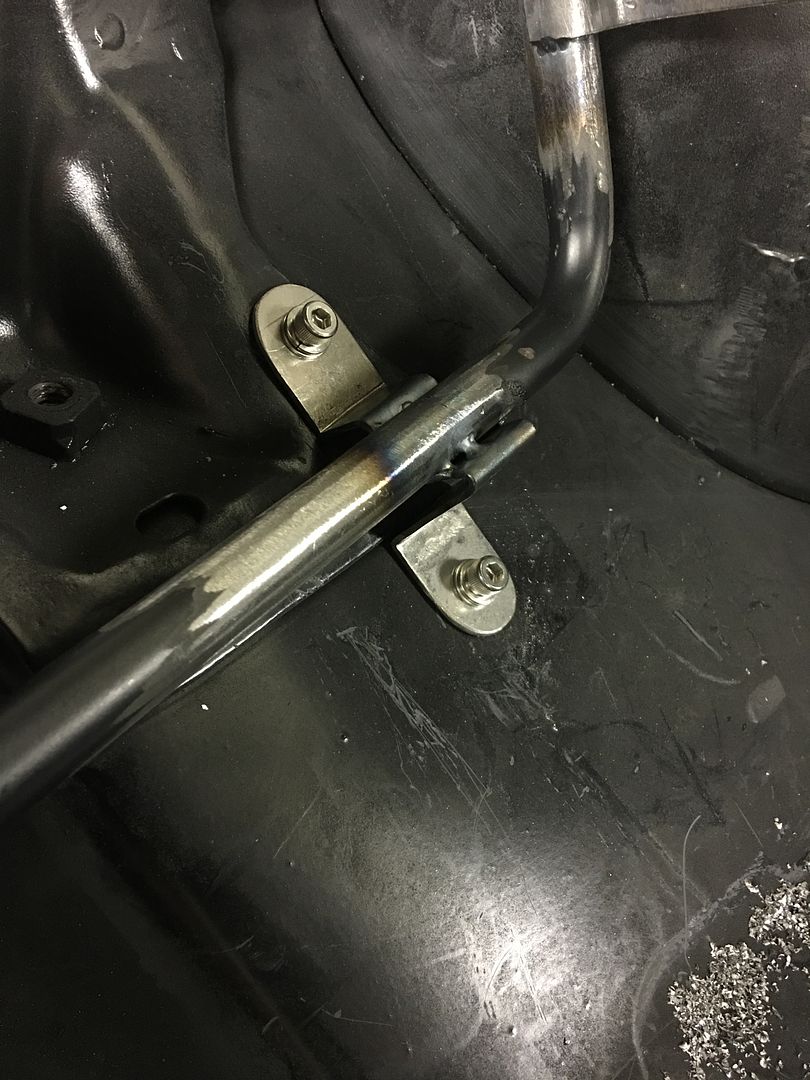
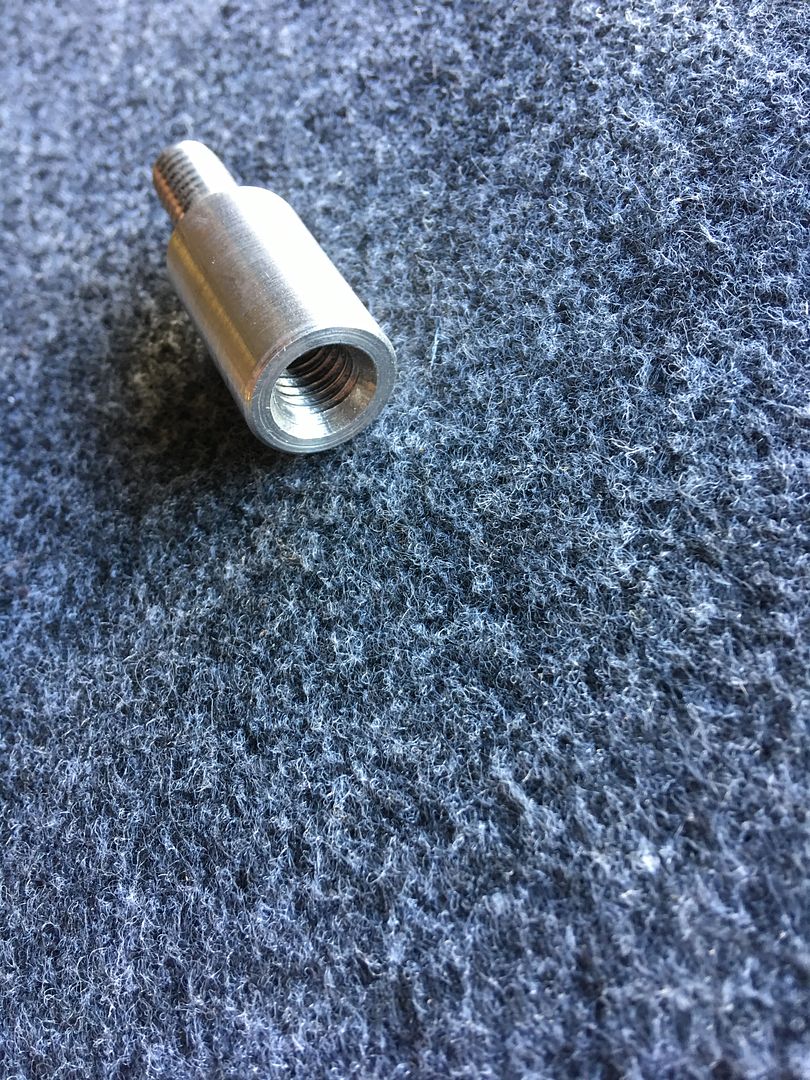
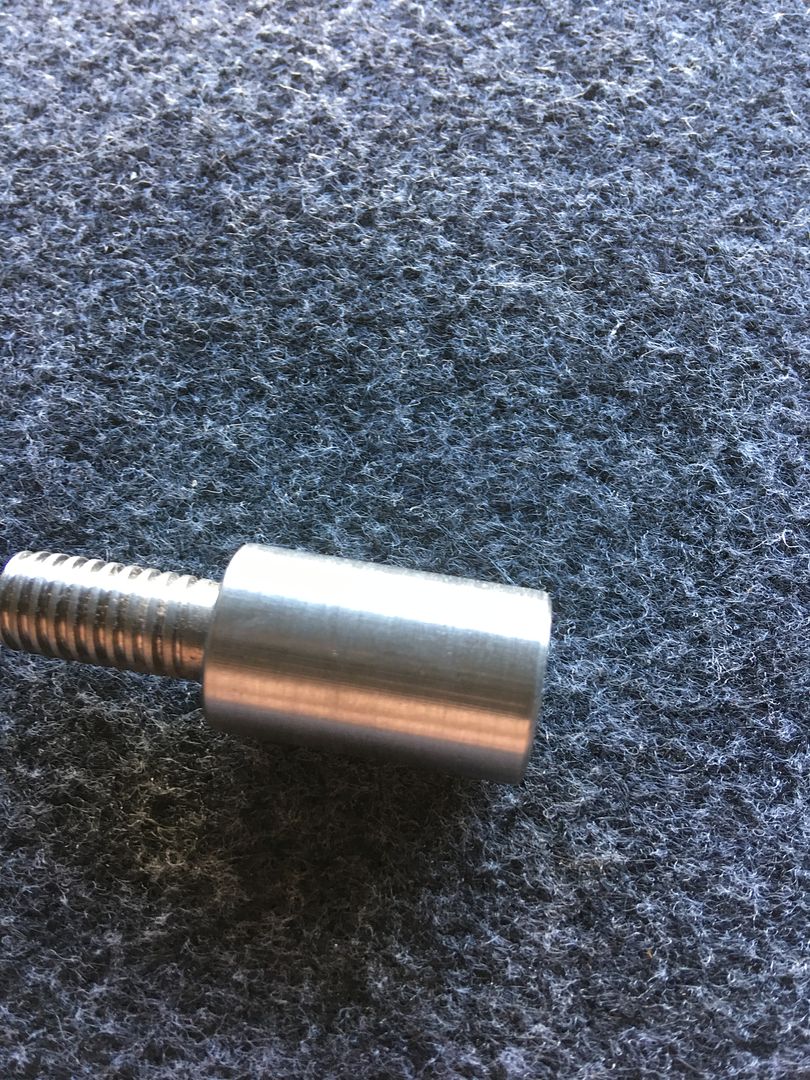
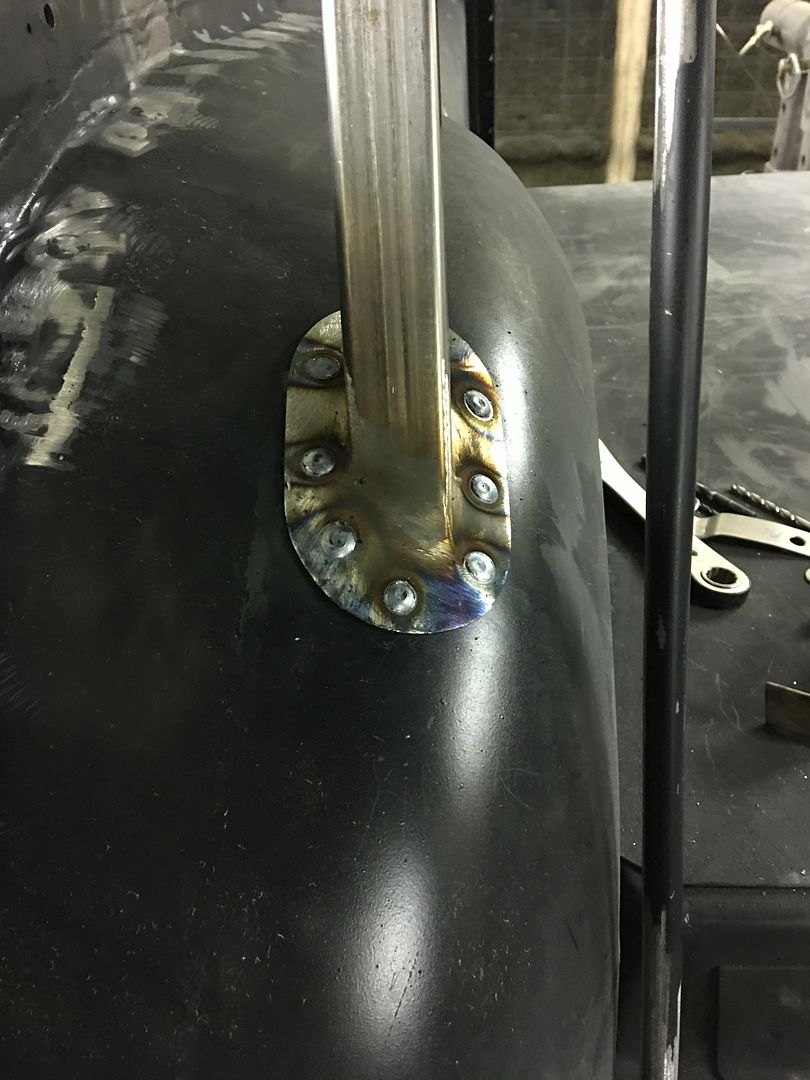
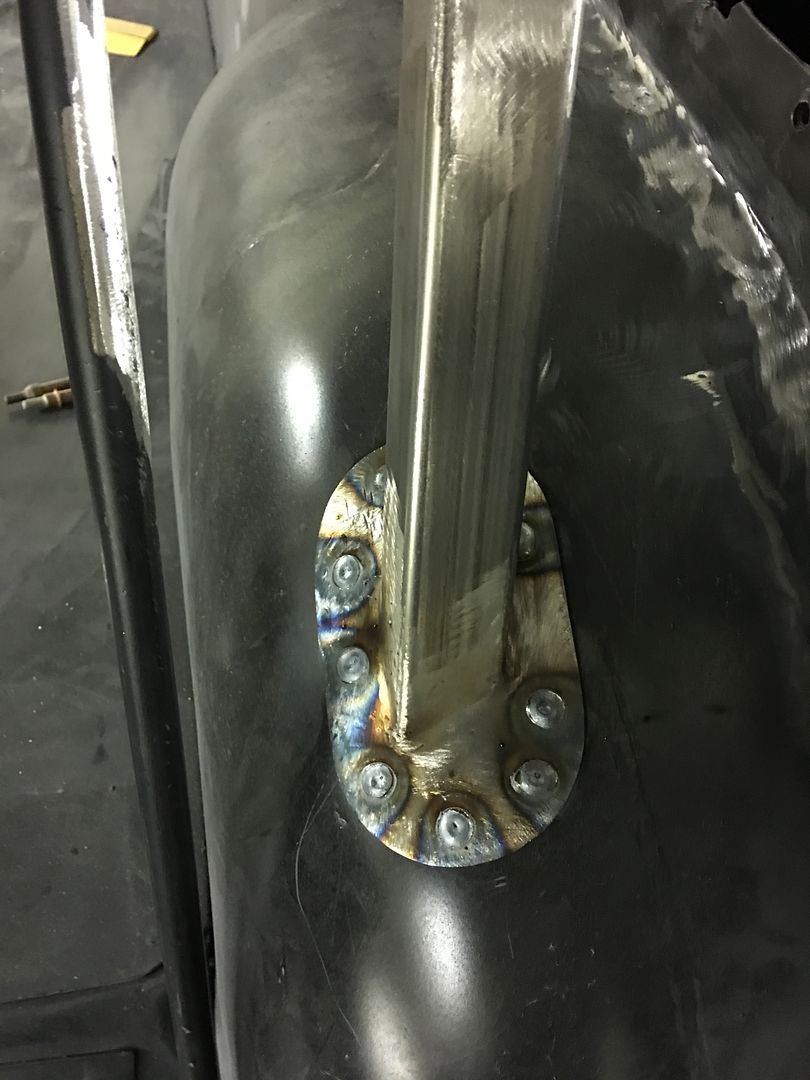
Meanwhile I got out the John Deere rod bender to see if we could make up some anchors for the shoulder belt..
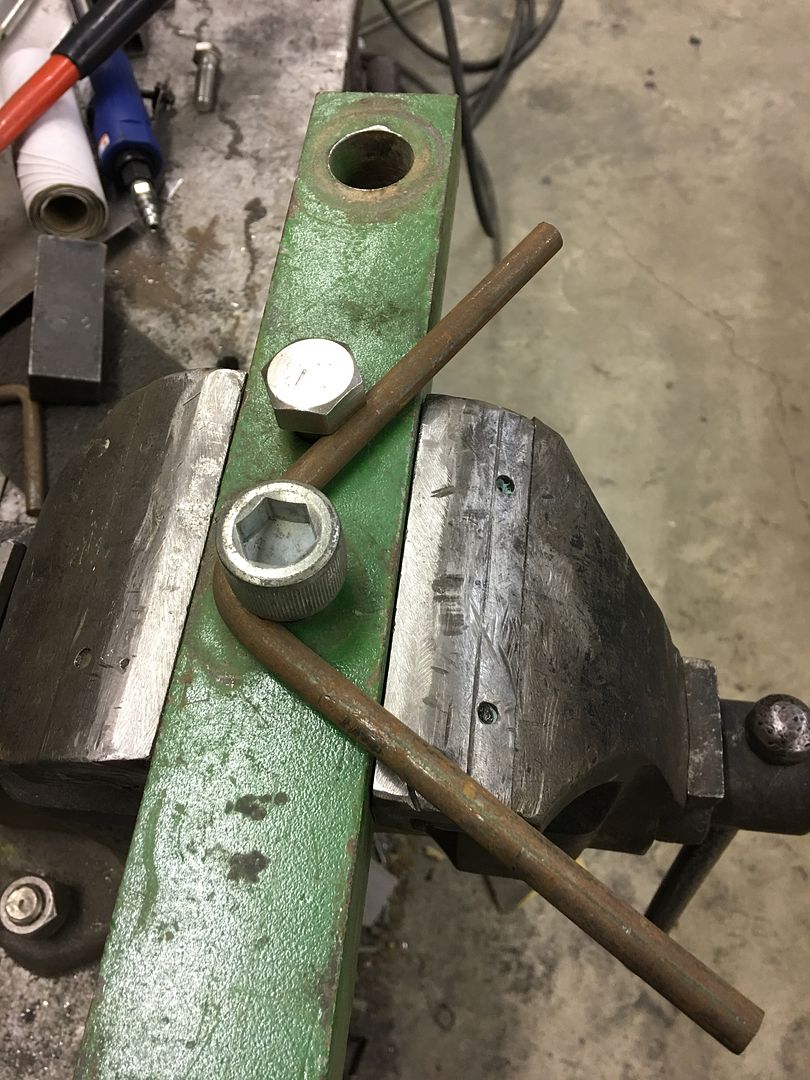
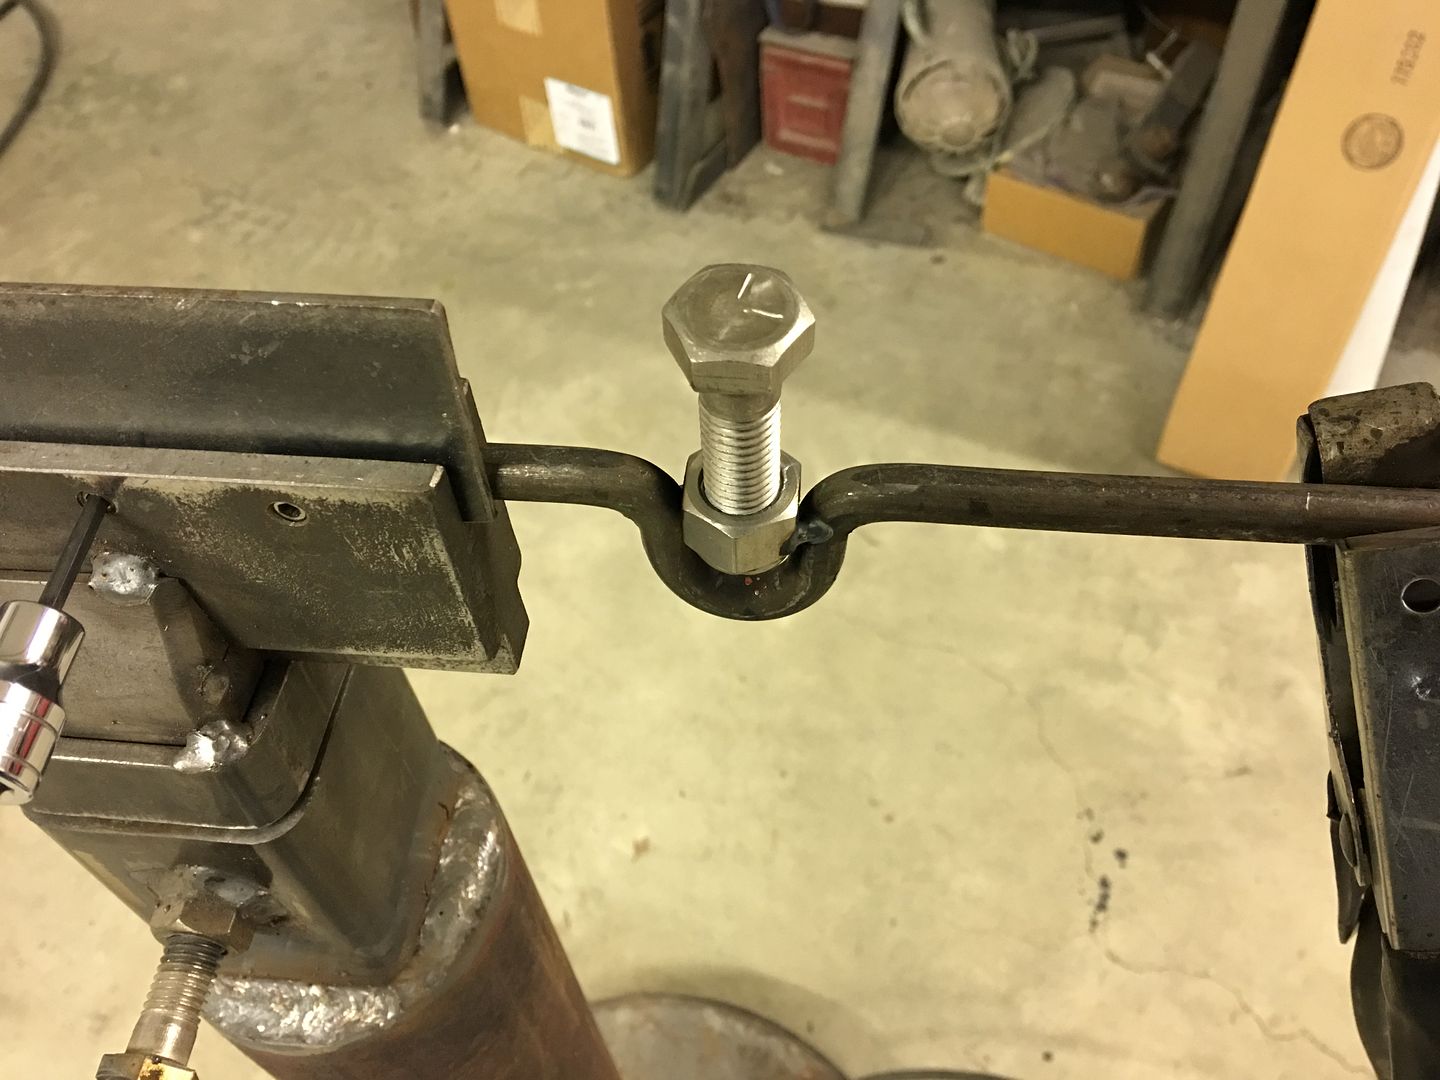
Bent with relief for a 1/2-13 lock nut..
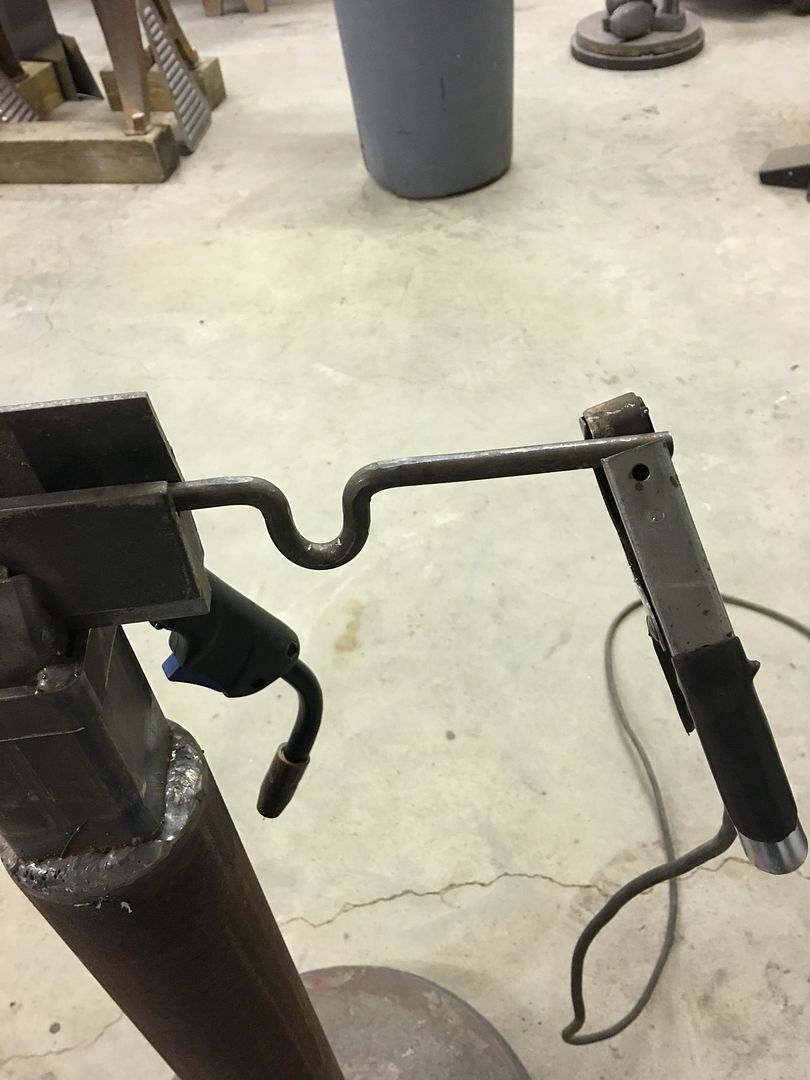
Welded with short bursts and plenty of cooling between to keep the nylon lock intact..
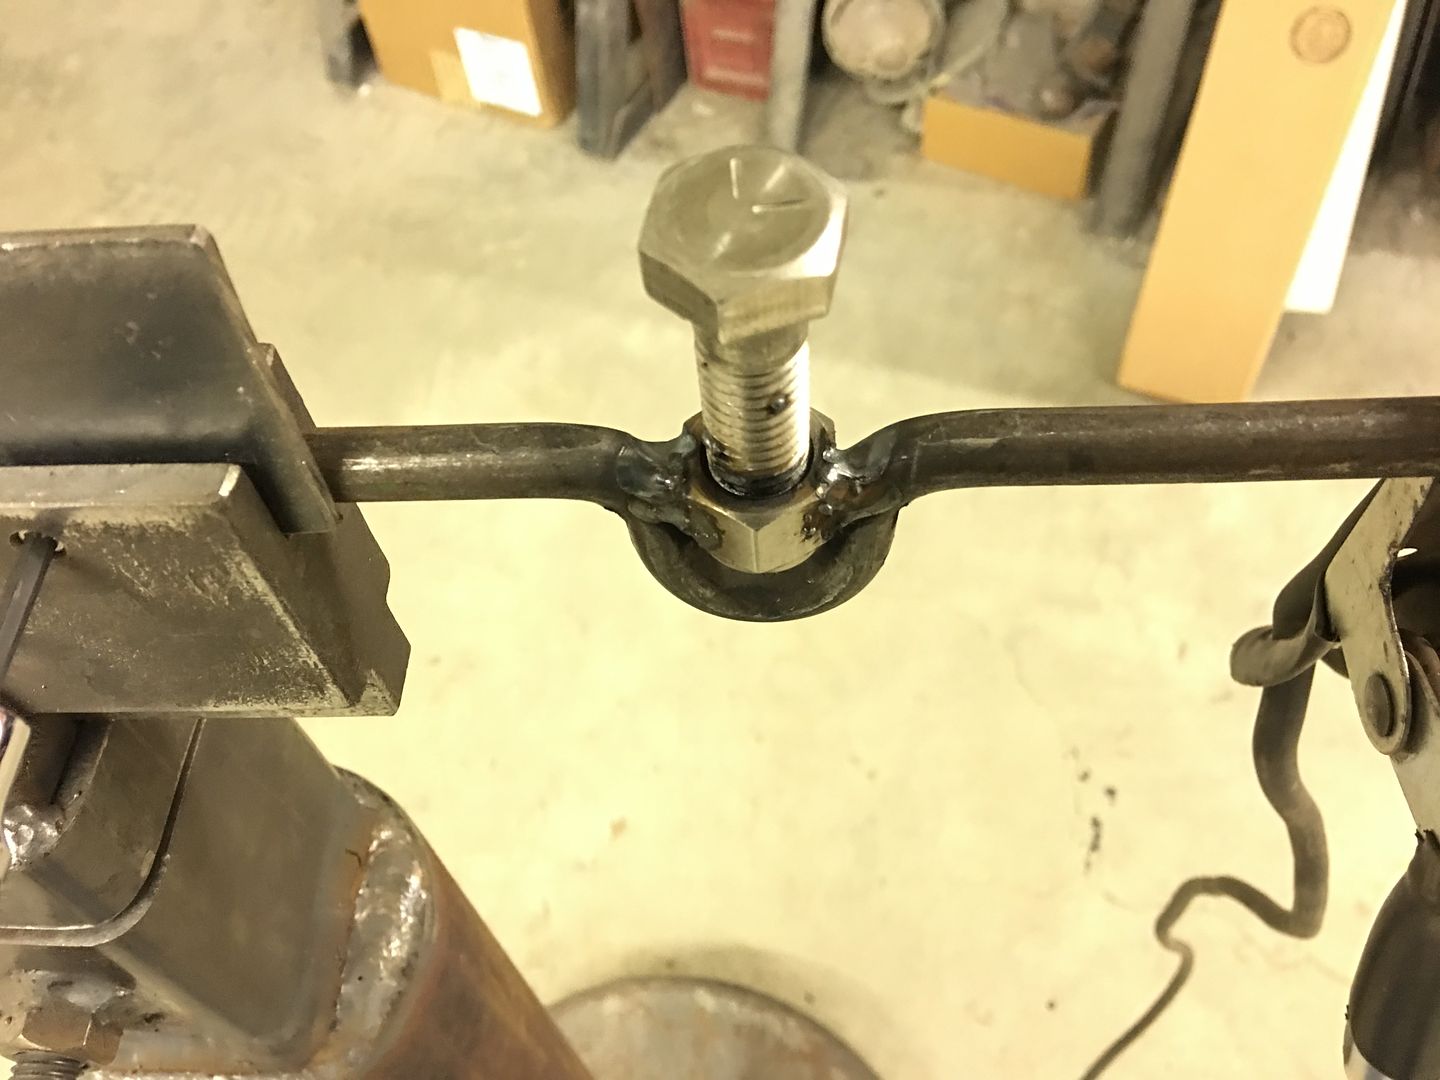
test fit...
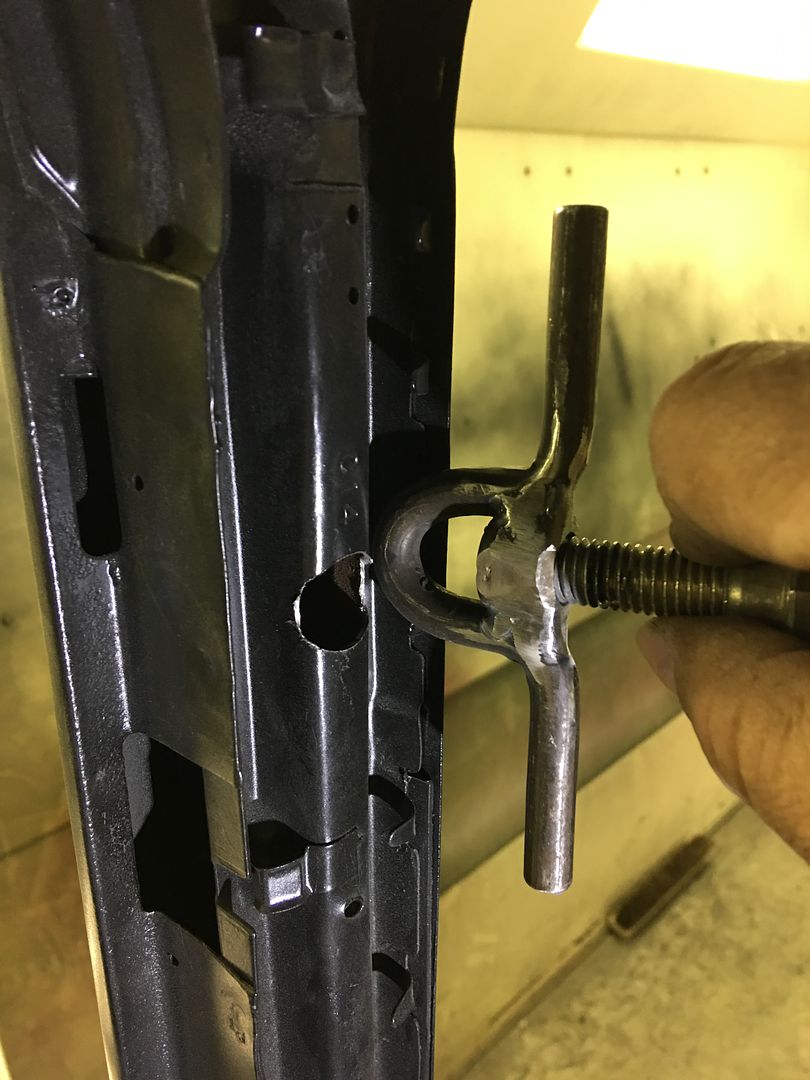
plug weld holes drilled and welded in place....
Mike finished up plug welding the seat bracket in place...
Robert
 Reply With Quote

Posting Permissions
- You may not post new threads
- You may not post replies
- You may not post attachments
- You may not edit your posts

And then a newer model....
Montana Mail Runner