Thread: 1940 Ford Pickup
Hybrid View
-
04-08-2013 10:42 AM #1
If you'll post the casting numbers off the heads (in between the valve guides), I'll run a a DynoSim of affordable parts and spit out a hp and torque figure for you, in the event you want to keep the motor and build it as a vintage 327. Also, get me the stamped alpha-numeric suffix number on the block. It's on the passenger side of the block, at the very front, on the deck where the head bolts on. If you can't see the suffix number on the block deck, that means that the block has been decked in the past and the alpha-numbers have been destroyed. On the back of the block just before the bellhousing flange, at the top of the block, is another casting number. Post that one as well please.
As Uncle Bob said, it may be to your advantage to sell the 327 stuff to help finance the build. So if you'll post the numbers, we can nail down the application of the parts for sure and you can figure the best avenue.Last edited by techinspector1; 04-08-2013 at 10:48 AM.
PLANET EARTH, INSANE ASYLUM FOR THE UNIVERSE.
-
04-07-2013 04:51 PM #2
parts
opps got a double
-
04-08-2013 05:51 AM #3
Okay, just a bit of a tangent about funding a toy car since you've dangled the bait.
If you're not hot, horny for a 327 of specific vintage/origin, and 350 sbc components are all over the place, one option would be to peddle that 327 to someone in the Vette restoration crowd. Correctly numbered/identified/date coded Vette stuff can go for what some consider crazy money (and you certainly got in at a right price). I don't follow that slice of the hobby directly so you'd have to do some research (or maybe someone here knows), but if everything lined up well, you might be able to fund a well rebuilt 350 short block or better from the sale of the 327 parts.............just sayin'.......Your Uncle Bob, Senior Geezer Curmudgeon
It's much easier to promise someone a "free" ride on the wagon than to urge them to pull it.
Luck occurs when preparation and opportunity converge.
-
04-08-2013 08:52 AM #4
-
04-08-2013 09:34 AM #5
Navy, you might try exploring here: C1 & C2 Corvettes - Corvette Forum
A buddy of mine just restored a '63 Corvette and has had good experience with peeps on this forum. He said if you list your engine, be sure to include all the casting numbers on the various parts because they seem to be important to the GM guys.
Good luck!"It is not much good thinking of a thing unless you think it out." - H.G. Wells
-
04-08-2013 05:06 PM #6
I wanted to add that my SD still has original transverse rear cross member. The Chassis Engineering kit positions the rear end such that the center section clears. When i purchased the CE kit, they included list of rear ends that were direct bolt in. If i remember correctly, the rear i used is a 74 Nova 10-bolt. Spring pads were in correct location and rear is correct width which made it a direct bolt in.........good luck.........
-
04-08-2013 08:07 PM #7
- Join Date
- Apr 2011
- Location
- Prairie City
- Car Year, Make, Model: 40 Ford Deluxe, 68 Corvette, 72&76 K30
- Posts
- 7,298
- Blog Entries
- 1
Fordflambe, that is a sweet SD!Ryan
1940 Ford Deluxe Tudor 354 Hemi 46RH Electric Blue w/multi-color flames, Ford 9" Residing in multiple pieces
1968 Corvette Coupe 5.9 Cummins Drag Car 11.43@130mph No stall leaving the line with 1250 rpm's and poor 2.2 60'
1972 Chevy K30 Longhorn P-pumped 24v Compound Turbos 47RH Just another money pit
1971 Camaro RS 5.3 BTR Stage 3 cam, SuperT10
Tire Sizes
-
04-08-2013 09:13 PM #8
Ok Guys here's another question for you. Radiators is the topic. I'm looking at $305 to $812.99
All listed as US made and all are welded Aluminum, all with tranny coolers
Dissrad radiators has there's at $305 plus $45 in shipping
Griffin radiators $649.99 free shipping
Walker radiators $812.99
I'm sure there are more out there. What do you feel is the best manufacture to use and is aluminum better then copper/brass ? Thanks again
-
04-08-2013 10:36 PM #9
I've used Walker copper/brass. Nice piece. Call Ron Davis before you pull the trigger....
Ron Davis custom aluminum race car radiator contact information. Custom RadiatorsPLANET EARTH, INSANE ASYLUM FOR THE UNIVERSE.
-
04-09-2013 04:29 AM #10
I used U.S. Radiator, copper/brass construction without a killing price.
They also have aluminum if you prefer.
U.S. Radiator | The Difference Is In The Tooling
-
04-09-2013 04:49 AM #11
Another one to check is PRC Radiators - Aluminum Racing Radiators, Reservoirs, Oil Coolers, Cooling Components, Chassis, Brakes : Indiana Illinois Kentucky Tri-State Good guys with a history built on racing, now supplying a ton of street rod applications.Roger
Enjoy the little things in life, and you may look back one day and realize that they were really the BIG things.
-
04-18-2013 06:36 PM #12
That's basically the same idea as what I did to my '37 except I bought a bolt-in kit instead of making my own. I'm not sure about the exact distance between the spring and the frame without measuring but I don't think it's more than an inch.
My kit had the shackle sleeve and 2 mounting bolt sleeves welded to an angled piece that is bolted both horizontally and also vertically through the bottom of the frame rail. I had to drill a 1.25" hole it the frame rail for the shackle sleeve. The kit uses rubber bushings. What you're planning looks like it will work just as well and probably better!
What may look a little weird in the pics is the foot or so of 3/16 angle iron welded to the tail end of my frame rails..... My dad & I first built this car back when I was in college. He thought the end of the frame looked a little thin to be holding up springs so he beefed it up!
 It looks kinda like crap but it's been there for many years......in a perfect world, I would just buy a beautiful new frame but that's not in the cards at this juncture....
"It is not much good thinking of a thing unless you think it out." - H.G. Wells
-
04-26-2013 07:30 PM #13
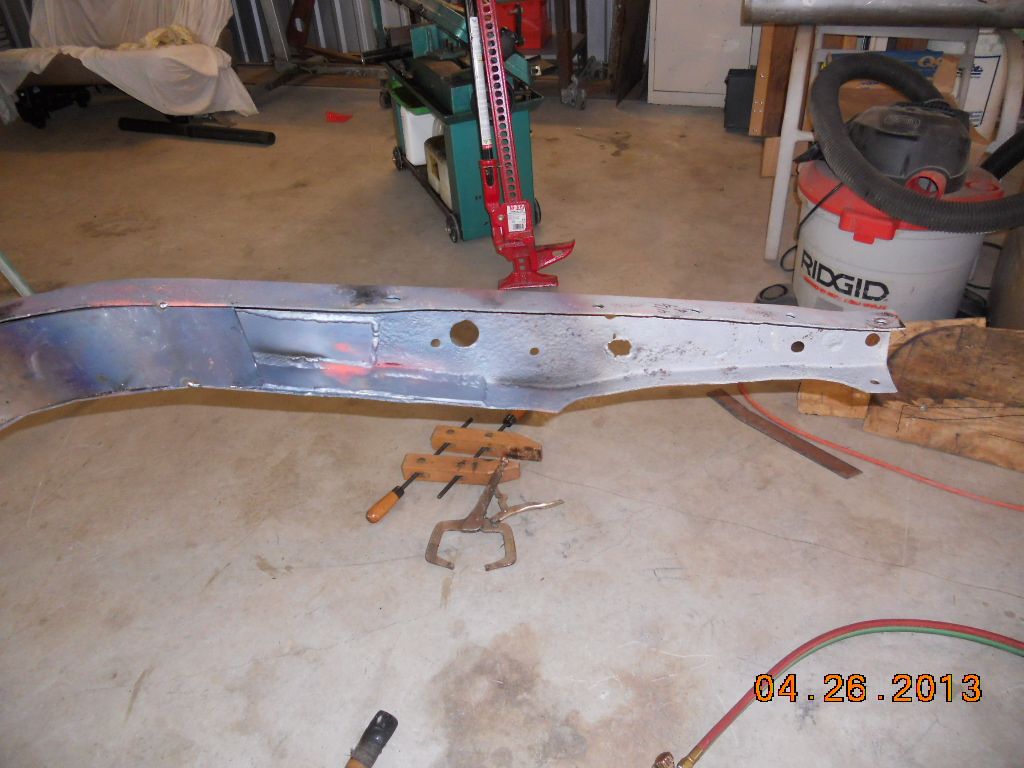
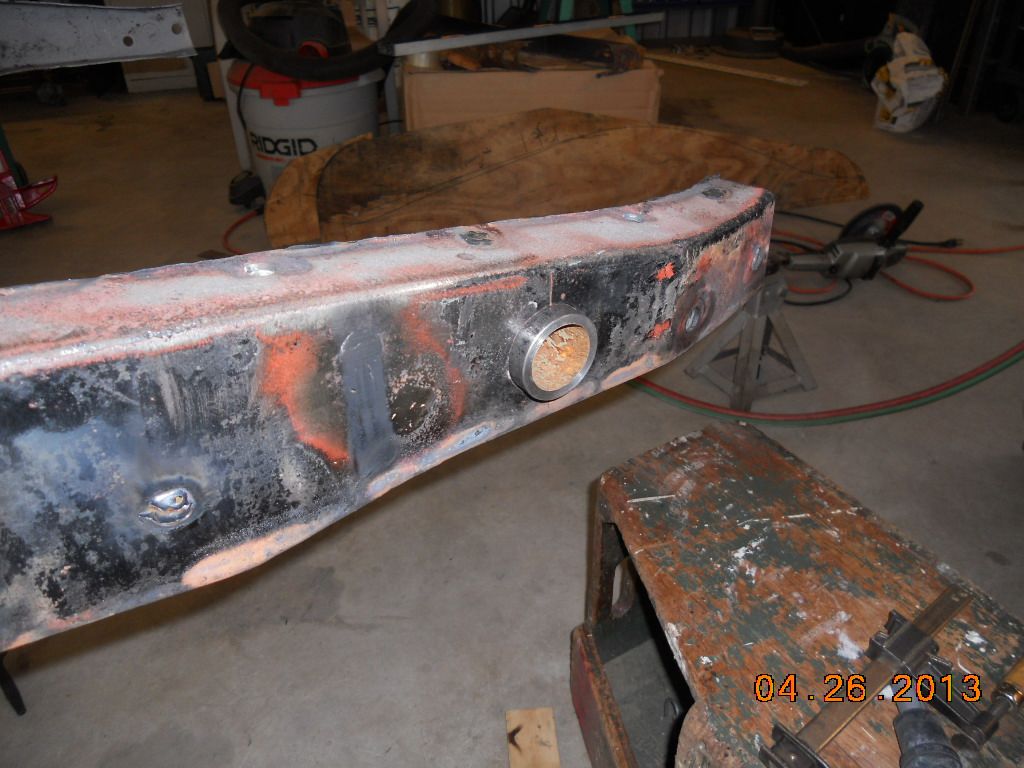
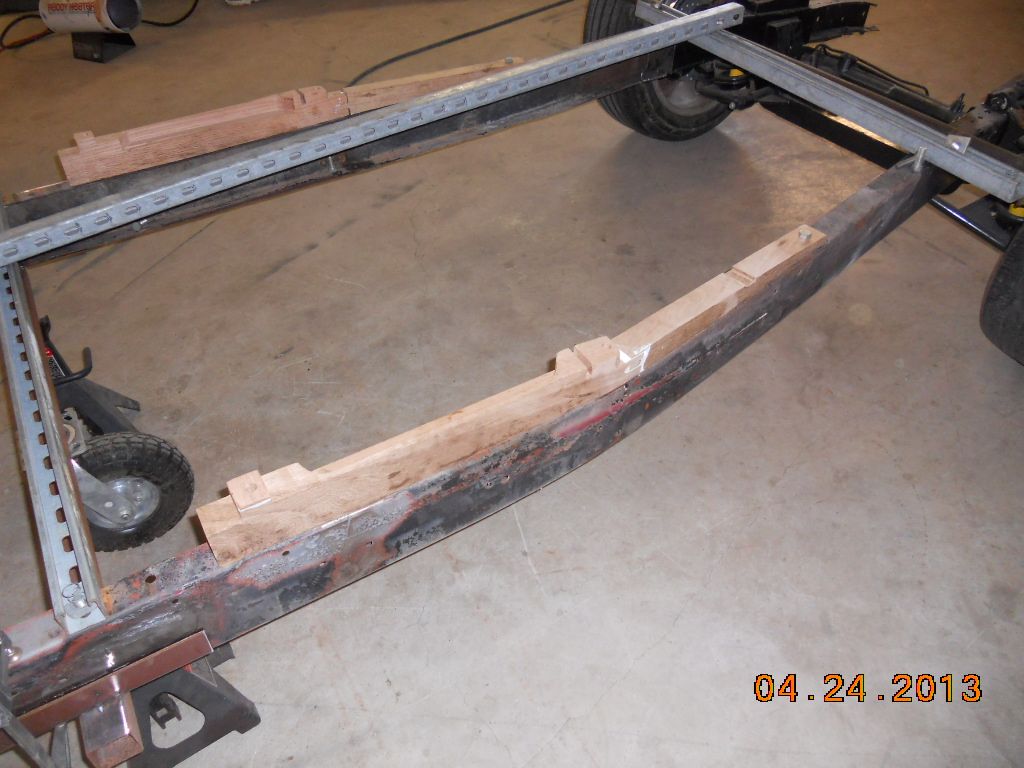
Well here's what I did this week to the 40. I started measuring things and using a level and found out that the back 25 inches of the rails didn't line up height wise. The right side low lower by and inch than the left. Which ones right ? There really was noway to tell for sure. I put the boxing plate that I got from Welder Series in the right side and tacked it in place. Than heated the rail just past the plate and bent the rail up 1/2 inch , did the same on the other and bend it down 1/2 inch. Before I did the bending I traced a pattern off the left rail and compared it to the right and found that only the last 25 inches were out. When it was all cooled off everything measured up good. Sometimes I get lucky and it seems that today was one of them or at least till someone chimes in and tells me that I screwed up. Still have to weld the bushing to the frame for the shackle .


Also finished my cab mounting blocks

Last edited by Navy7797; 04-26-2013 at 07:38 PM.
-
04-26-2013 11:20 PM #14
The shackle bushings are looking good, Navy!! Just curious if you measured your frame before or after you took out that last cross brace at the end of the frame...It doesn't appear that you welded any cross bracing on the rails so just wondering if the frame sprung a little when you broke that loose.......I'm just kinda thinking out loud here and you probably know this already, but most crossmember installation kits recommend tacking a crossbar to the rails before removing any crossmembers.
At any rate, sounds like you have it tweaked back into shape."It is not much good thinking of a thing unless you think it out." - H.G. Wells
-
04-27-2013 06:19 PM #15


 815Likes

 LinkBack URL
 About LinkBacks
 Reply With Quote

The first model car I built was a 32 Ford roadster by Revell in the mid 50's.
How did you get hooked on cars?