Thread: '37 Oze build
-
02-14-2015 03:26 PM #331
E-stopp parking brake actuator
One of the things that I've never dealt with is the poor performance of my Lokar parking brake lever, that will not put out enough force to actuate my Wilwood parking brakes. I trashed the Lokar brake lever and the cables - about $250 in parts and 2-3 days of work. In place of the brake lever, I put two billet aluminum cup holders into the console. Even a hot rod needs a place to put some cans of pop.
I bought an E-stopp electric parking brake actuator that puts out 600 pounds of pulling force and a new Lokar cable set, to replace the old setup. I also bought an E-stop cable combiner bracket, but found that it would not work for my installation. To use the E-stopp bracket, you must have cables that are prefabricated to the exact length needed. I also had an interference problem with a frame cross member that made the bracket unuseable.
http://www.summitracing.com/parts/esc-esk001
http://www.summitracing.com/parts/LOK-EC-81FU
http://www.summitracing.com/parts/esc-esb002
As received, the actuator has a 5-1/2 inch long cable housing (including the threaded end) and a cable that's about 11 inches long, fully extended. Apparently, that's a lot shorter cable than older units had. The longer cable made the actuator impossible to install in a lot of cars.
I made my own cable combiner bracket that was compatible with the Lokar brass cable stop that combines both cables. The Lokar stop requires the cables to be placed ¾” apart and ¾” above the frame. I made my bracket from some 3/16” x 1-1/2” and 3/16” x 3/4" 304 stainless steel bar stock that I had on hand.
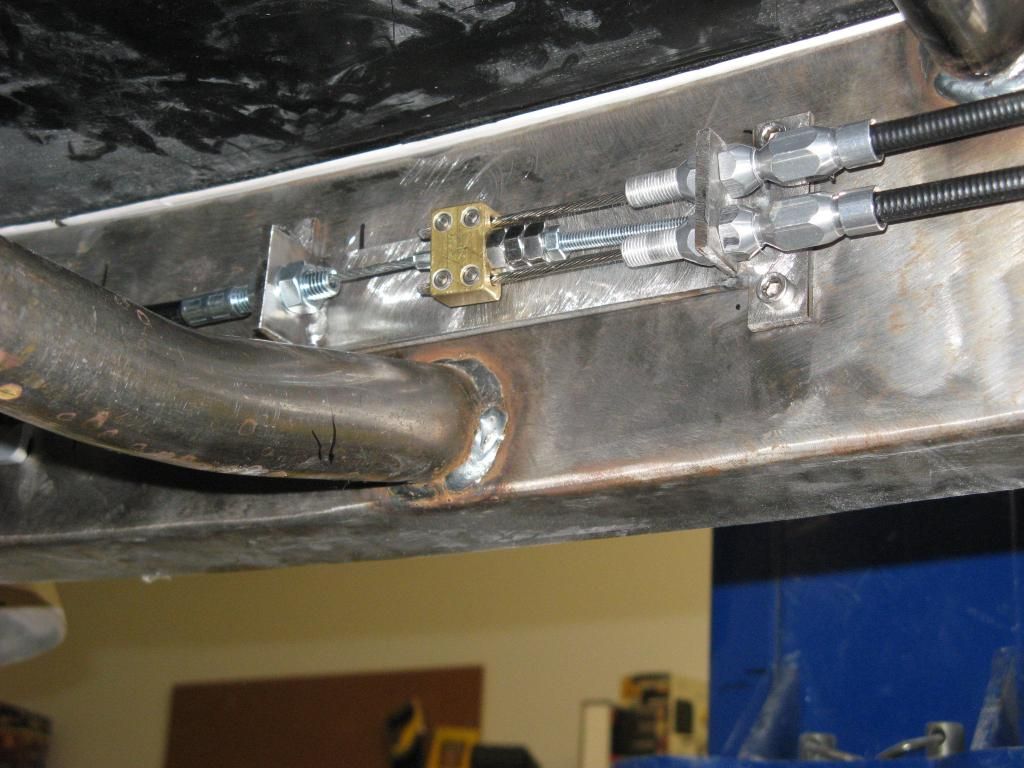
I found out the hard way that the Lokar cable stop is hard on the cables. If you just cut the cables to length and clamp them down with the two set screws, the ends will be badly frayed, if the cables are ever removed. To fix that problem , I used my TIG welder to ball the ends of the cables this time, so they wouldn’t fray. I had to turn the amperage down to 20, to get some control over the weld. A also practiced on some scrap pieces, to I wouldn’t ruin an expensive stainless steel cable.
My only complaint about the E-stopp actuator is the lack of instructions. I assumed that the actuator cable was fully released when I got the unit, since that’s where it needs to be to hook up the cables from the parking brakes. When I first hooked the actuator to the car’s battery, it immediately released about an inch of cable and fouled things up. I was able to make some adjustments and not have to relocate anything, but it was a setback. If that’s the way these units are always sent out, then they should include instructions that tell the installer to make the electrical hookup early-on and be sure that the cable is fully released, before mounting the cable combiner bracket. They should also tell you that it’s OK to retract the cable, to check the maximum cable travel, or at least tell you how much cable travel is available.
Here's the whole unit, installed. It's about 27 inches from the end of the actuator to the end of the cable combiner bracket. I have a lot more frame rail available, but my oval shaped muffler is positioned only a couple of inches behind my cable combiner bracket. If I had moved the whole thing back further, I'd have to remove a tail pipe and muffler, to make any cable adjustments. If I had no other choice, I might have done that.
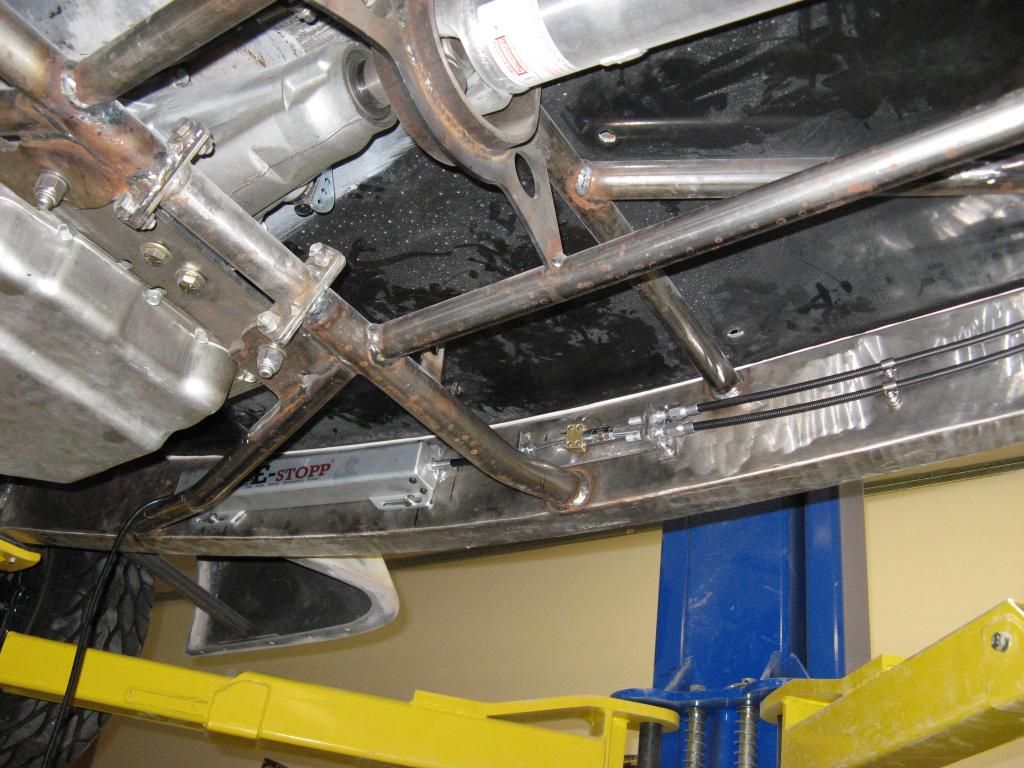
I'm seeing more metric parts all the time. The E-stop actuator has metric threads. The cable ends at the parking brake end of the Lokar cable housings are also metric and require a pair of 16mm wrenches to install.Last edited by daveS53; 02-15-2015 at 01:34 PM.
-
Advertising

- Google Adsense
- REGISTERED USERS DO NOT SEE THIS AD
-
02-20-2015 06:14 PM #332
- Join Date
- Apr 2011
- Location
- Prairie City
- Car Year, Make, Model: 40 Ford Deluxe, 68 Corvette, 72&76 K30
- Posts
- 7,300
- Blog Entries
- 1
That is a nice set up. When you remove power the actuator must set the brakes? Is that right?Ryan
1940 Ford Deluxe Tudor 354 Hemi 46RH Electric Blue w/multi-color flames, Ford 9" Residing in multiple pieces
1968 Corvette Coupe 5.9 Cummins Drag Car 11.43@130mph No stall leaving the line with 1250 rpm's and poor 2.2 60'
1972 Chevy K30 Longhorn P-pumped 24v Compound Turbos 47RH Just another money pit
1971 Camaro RS 5.3 BTR Stage 3 cam, SuperT10
Tire Sizes
-
02-21-2015 09:16 AM #333
The actuator has a latching button and "control box", with unknown components in it. Open the control box and it voids the warranty. Push the button down and it actuates the brake. The button has a green light that stays on anytime the brake is actuated. If you disconnect the power to the actuator, while the button is pushed down, it does not release the brake. As long as the unit has power hooked to it, pushing the button again, to unlatch it, releases the brake.
-
02-21-2015 10:10 AM #334
David, Nice job. I made my own by downloading the autoloc instuctions which had a pretty detailed pic of the inside and used a 2" stroke actuator, which theirs had in it. I simply used a power window switch with relays for the controls and a microswitch with LED to show when its on, really pretty simple inside, all contained in a 1/8" fabricated steel box (autolocs download even had the sizes, mines actually now made in the US as theirs isn't) I think another nice feature is that is the switch if hid makes a pretty simple theft deterrent as well. I am using it to pull GM metric calipers with parking brake and it seems to work quite well. Everythings lookin' good on your ride! And thats a great tip on balling the end of the cable as I used the lokar cables too, after removing them once its a pain to get them back through the clamp. Thanks MatthyjWhy is mine so big and yours so small, Chrysler FirePower
-
02-22-2015 03:42 AM #335
- Join Date
- Aug 2009
- Location
- CENTRAL FLORIDA
- Car Year, Make, Model: 1939
- Posts
- 147
- Blog Entries
- 1
MATTHYJ, care to share detailed info on your ebrake setup. I'd like to do the same thing. Info like what acuator, relays, switches you used and how you hooked everything up? Lot of us could use it.
Thanks
-
02-22-2015 06:38 AM #336
Here's a detailed article on making you own actuator. Making the unit stop automatically with a given amount of pulling force really complicates the job. You can get a more powerful actuator, with at least 400 pounds of pull at a reasonable cost and perhaps eliminate the lever arm that multiplies the pulling force. The E-stop puts out 600 pounds, but a lot of brakes probably don't need that much. It has about 1-3/4 inches of travel, which is far more than I needed.
If you make a cable combining bracket, the plate that connects the two angled ends is important, since it absorbs the pulling force, so the bolts holding the bracket are not being pulled against. That's really important if the combiner is bolted to the floor pan.
Give Me a Brake – Building a Smart Electric Parking Brake | World of Rods
Heavy Duty Rod Actuators – Firgelli AutomationsLast edited by daveS53; 02-22-2015 at 09:26 AM.
-
02-24-2015 03:39 PM #337
Removed by author.Last edited by daveS53; 08-28-2015 at 04:00 PM.
-
02-24-2015 07:32 PM #338
- Join Date
- Apr 2011
- Location
- Prairie City
- Car Year, Make, Model: 40 Ford Deluxe, 68 Corvette, 72&76 K30
- Posts
- 7,300
- Blog Entries
- 1
Nice work. The body work is coming along nicely.Ryan
1940 Ford Deluxe Tudor 354 Hemi 46RH Electric Blue w/multi-color flames, Ford 9" Residing in multiple pieces
1968 Corvette Coupe 5.9 Cummins Drag Car 11.43@130mph No stall leaving the line with 1250 rpm's and poor 2.2 60'
1972 Chevy K30 Longhorn P-pumped 24v Compound Turbos 47RH Just another money pit
1971 Camaro RS 5.3 BTR Stage 3 cam, SuperT10
Tire Sizes
-
03-01-2015 06:54 PM #339
OK, After spending way to much time trying to figure out how to post a file (never did to many kb's) you can go to the american shifter web site, then to power emergency brake link and then at the bottom of the page go to downloads and follow the links and they will email you the instructions which has a wiring diagram and all parts with dimensions and parts numbers used in their unit (with detailed diagrams), I simply got on ebay and ordered their actuator they have in the breakdown, if I remember it was a 2" stroke actuator I got for 60 some bucks, this things really simple for most basic fabricators to make, the power of the actuator is pretty much dead on for my application as they have no torque limiter other than the strength of the actuator in the unit and the length of pull, there is no lever or multiplier in it. As far as cable I used lokars, the cable combiner is internal in the unit, I used 1/8" steel to fab the housing and it bolts to my frame with bolts that go through the back plate (also 1/8" plate), I used a face cover made from 20 gauge stainless. After you get the instructions you will find out no rocket science, it pulls with a window switch and thats about it using relays, nothing fancy really. I am not a Auto loc fan but the diagrams and instructions are top notch if your wanting to copy the stuff, I think they originated the "copying trick" anyway, you know what go's around come's around I guess. Let me know if you have any questions. Best of Luck Matthyj
Dave, Looks like your getting ready for the "fun part" Color!! Gonna look sharp!Why is mine so big and yours so small, Chrysler FirePower
-
03-01-2015 07:15 PM #340
Roger
Enjoy the little things in life, and you may look back one day and realize that they were really the BIG things.
-
03-02-2015 02:07 PM #341
E brake pics
Roger I think that will work, I converted them to jpgs!
emergency1 copy.jpgemergency2 copy.jpgWhy is mine so big and yours so small, Chrysler FirePower
-
03-02-2015 02:23 PM #342
-
03-02-2015 02:34 PM #343
dimensions
OK, I now remember that Speedway use to sell the American Shifter variety and someone asked their online guy the dimensions, they are 19" long x 6" tall x 3" deep and that's the size I made my box out of 1/8" steel, except the stainless cover. It all fit in quite nicely after I duplicated their (american Shifter) inside, I even put all the relays insideEbrake37.JPG. As you can see of my pick I powder coated it black used a stainless cover and bought Lokars stainless brake cables to use instead of black (one of the main reasons I made my own besides seeing if I could do it)Why is mine so big and yours so small, Chrysler FirePower
-
03-23-2015 02:09 PM #344
body work nightmare
Here are a few photos to explain why I've spent the last several months, mainly doing body work. In addition to the ridiculously poor construction, I'm doing a lot of reshaping that's mostly likely caused by worn-out molds.
I've shown before, some of the outside corners, that were inside corners of the mold, with super-thick gel coat. This gel coat was removed not by sanding, but merely applying pressure with a utility knife. When it's that thick, gel coat is extremely brittle. Both of the door edges on this side were ground down to about a 1/2" wide chamfer and totally rebuilt.
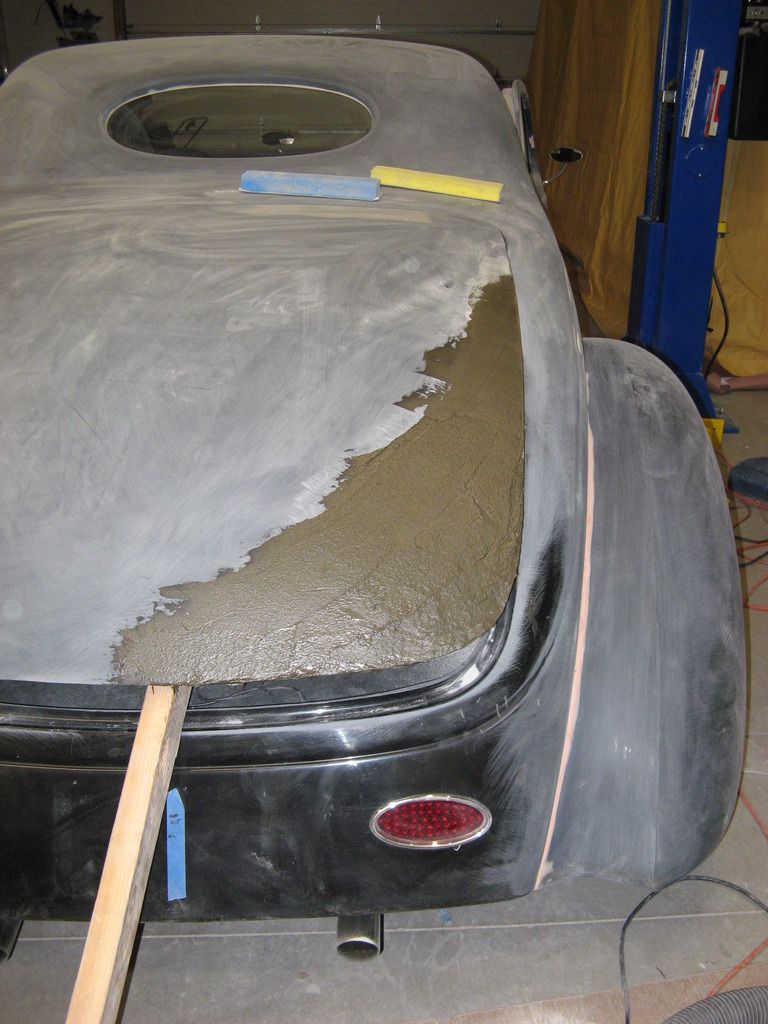
I've dubbed the trunk lid the "twisted sister". In the picture, you can see one spot in the upper right, that is bare fiberglass. The spot had to be ground down with a belt sander. The lower right corner needed about 1/4" of filler to bring it up to the proper level. There's bondo all around the outer 6-8" of the entire trunk lid.
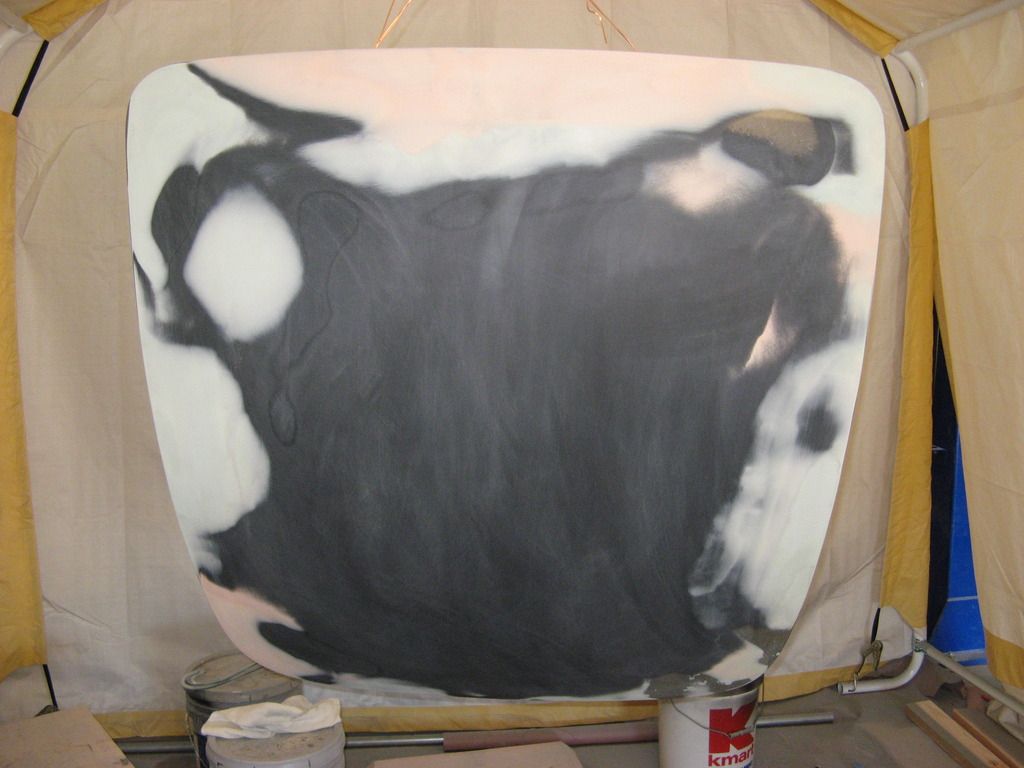
On the inside of the trunk lid, I decided to make it a smoothy, so it would not need any upholstery. I filled in several long ribs and three recesses that were 3" x 12" and 3/4" deep. The deep recesses took 4 pounds of bondo hair to fill them.
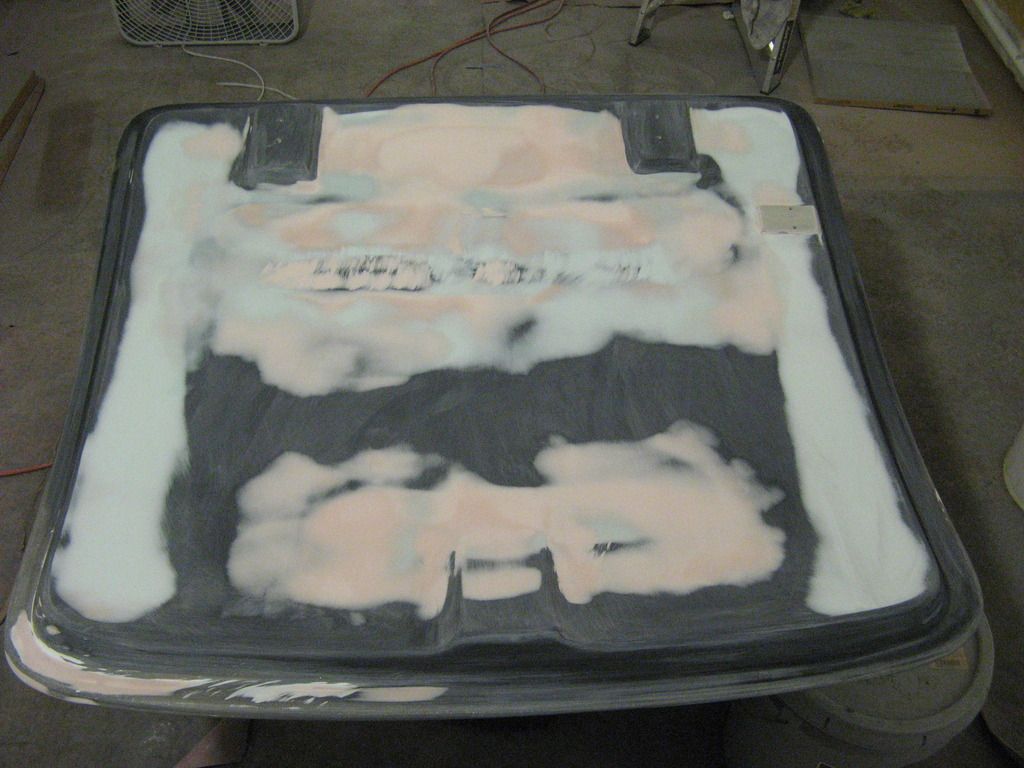
The trunk lid looks much better after several coats of Evercoat Superbuild polyester primer.
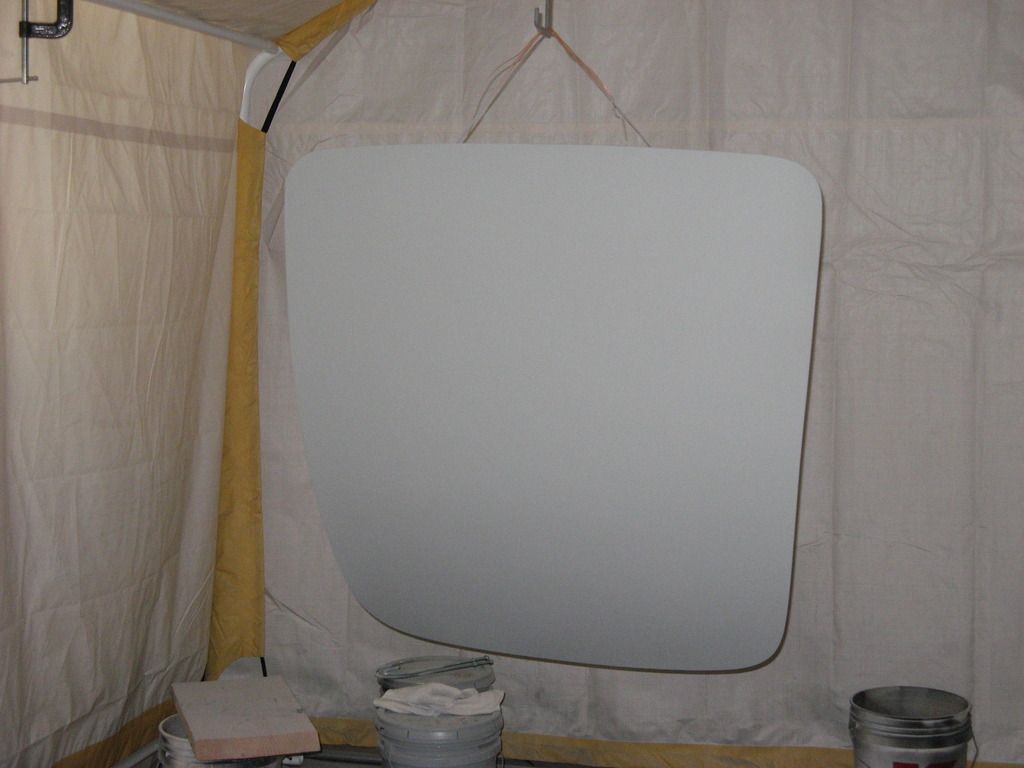
[IMG]
http://i1282.photobucket.com/albums/a540/dashepherd298/IMG_3632_zpsy6k9vapi.jpg[/IMG]
Here's the start of the trunk lid body work, a full year ago. That's a big batch of bondo hair.
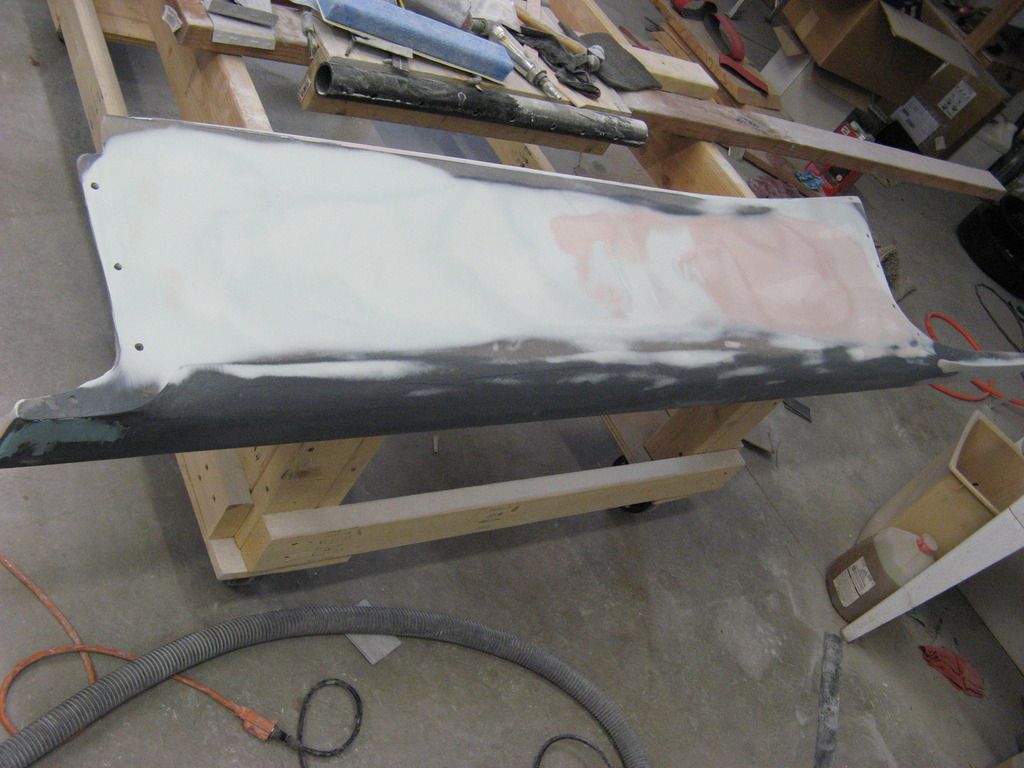
The running boards were both cupped - one about 1/16" and the other closer to 1/8". Filling an area that large with bondo was fun, but both running boards are now much flatter. Several coats of Evercoat Superbuild polyester primer (sprayable body filler) were also applied and block sanded.
Here's a typically flawed window frame area, ready for some Superbuild and more sanding.
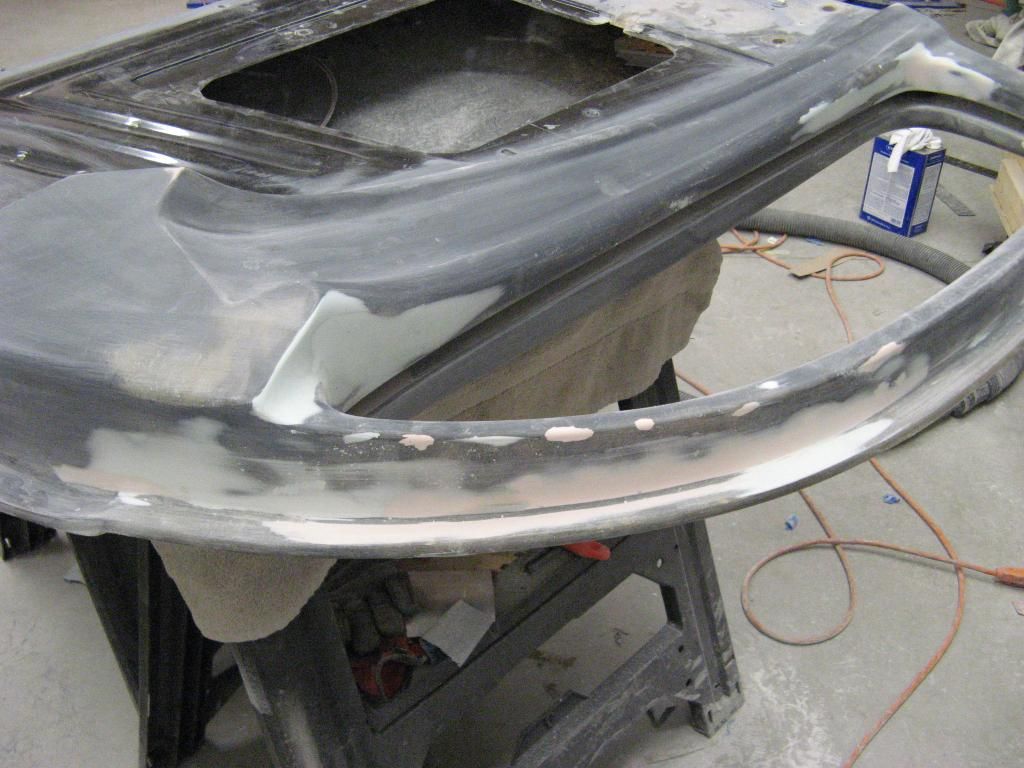
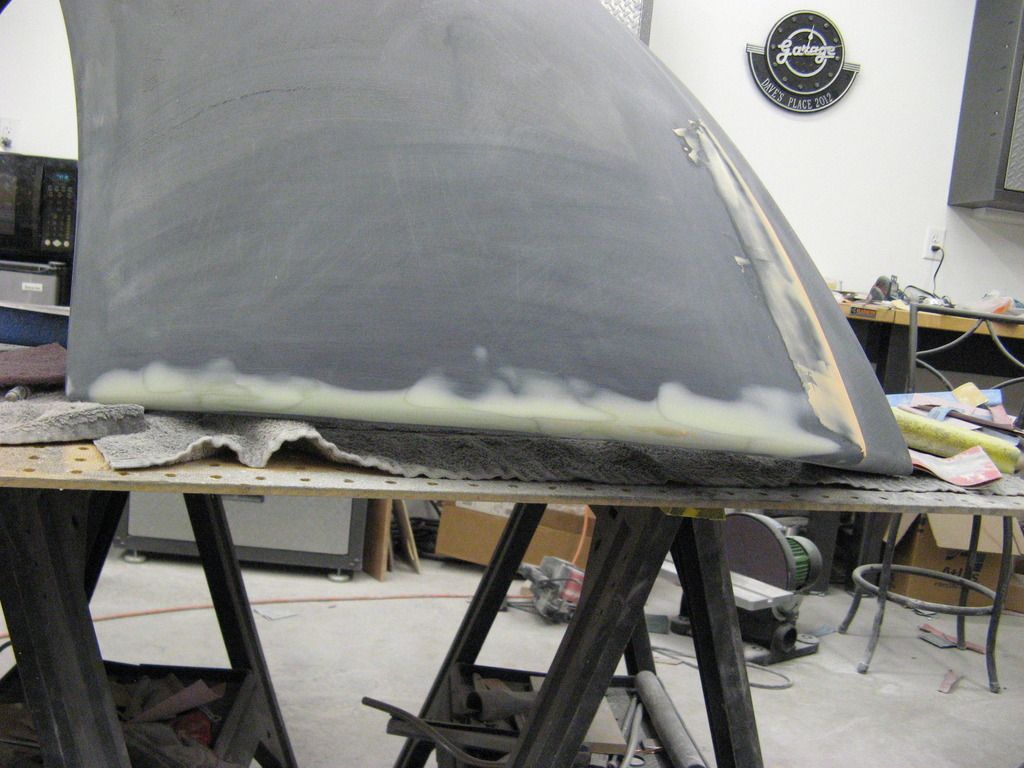
Here's the last of many hours of work on the rear fenders. I thought I was done, but found that the entire lower edge of this fender did not have a uniform rolled edge, so it was reshaped. The fender peak was also a little off, so it got some U-pol liquid glaze to fix it up. After that, I spot primed the areas with Evercoat featherfill G2 polyester primer. Tomorrow I really expect to finish the sanding required to get the rear fenders ready for the FINAL coats of primer, prior to paint. Of course, that final coats of primer will get blocked with 400 grit.
Last edited by daveS53; 03-24-2015 at 03:06 PM.
-
05-09-2015 01:36 PM #345
I haven't posted in quite a while, mainly because I'm running out of things to do, while I wait for my new Alumicraft grille to arrive. I sent my last poorly built steel grille to alumicraft, back in December, to use a mock-up for the new grille. A lot of mods and some bondo made the old grille fit the car well. I never asked for a delivery date, but expected it to take at least 4 months. It will take more like 5-6 months, so I may get it, late in May or early June. It's good that I called Alumicraft last week, because they completely forgot about the need to make an aluminum top plate for the grille, like those used on Wild Rod cars.
I can't do all of the body work until I get the new grille, because the hood and hood sides must both be fitted to it. It may only take a day or two to apply and sand the necessary filler, but I want to do it, before taking the car completely apart for paint.
I decided to take the hood and hood sides off the car and do all that I could do to them, while I wait for the grille. Both were given several coats of Evercoat Super Build polyester primer, followed by block sanding.
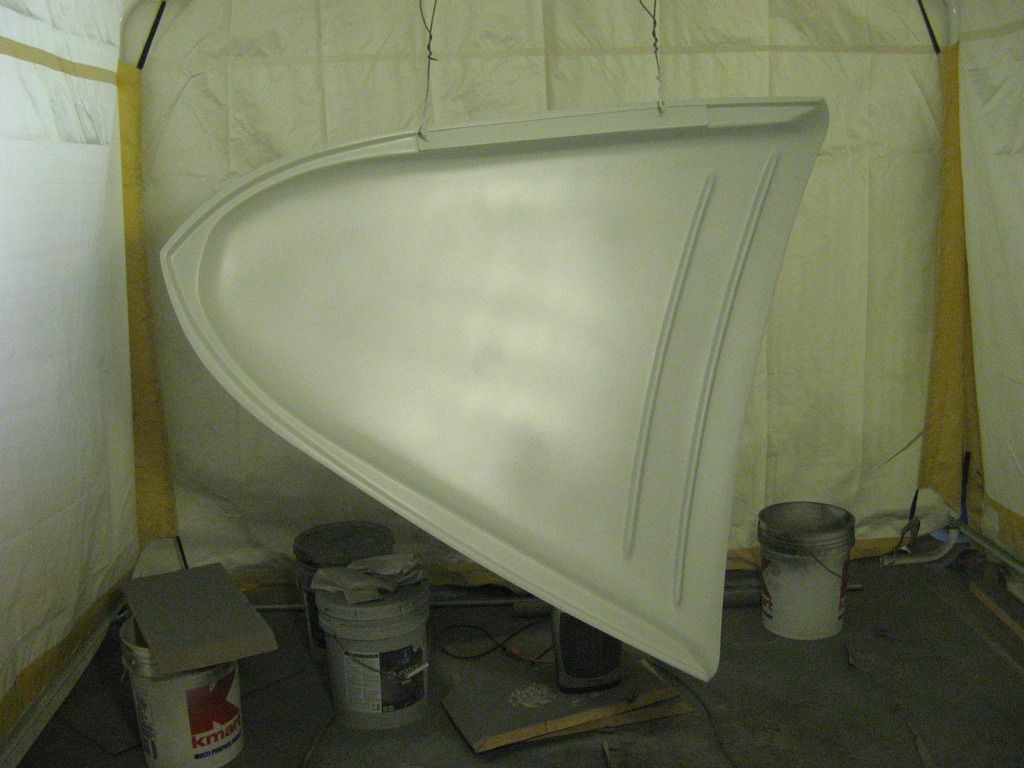
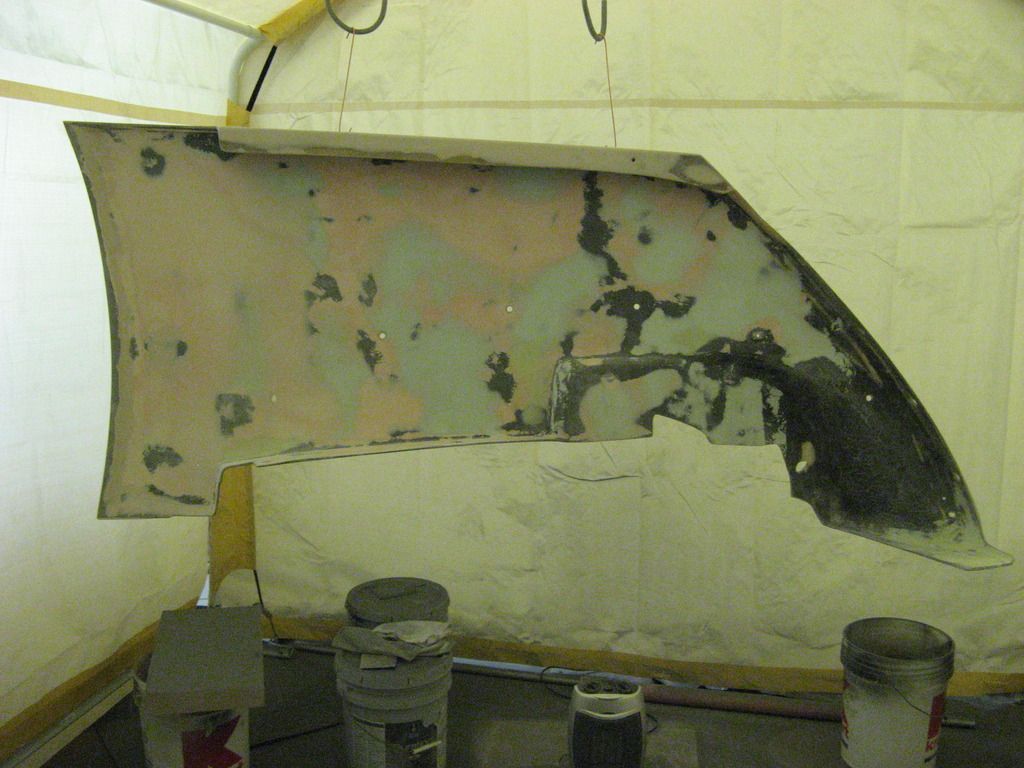
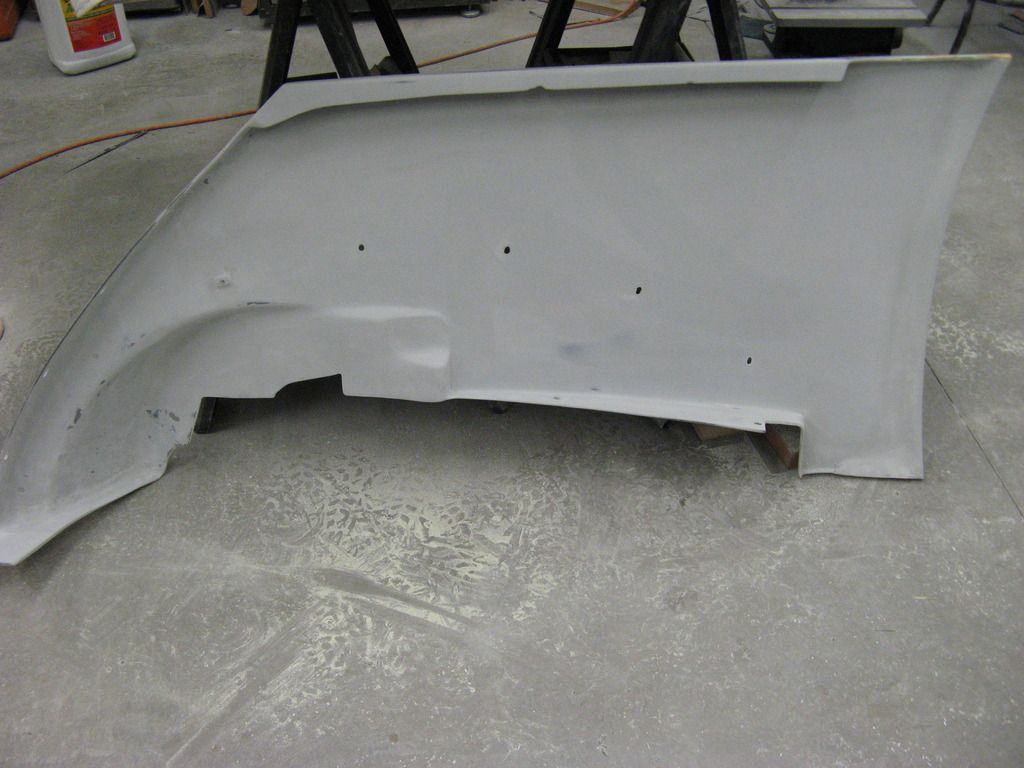
Here's the inside of the hood side, before and after priming. The inside won't be ripple-free like the outside, but it will be a lot smoother than the original rough fiberglass.
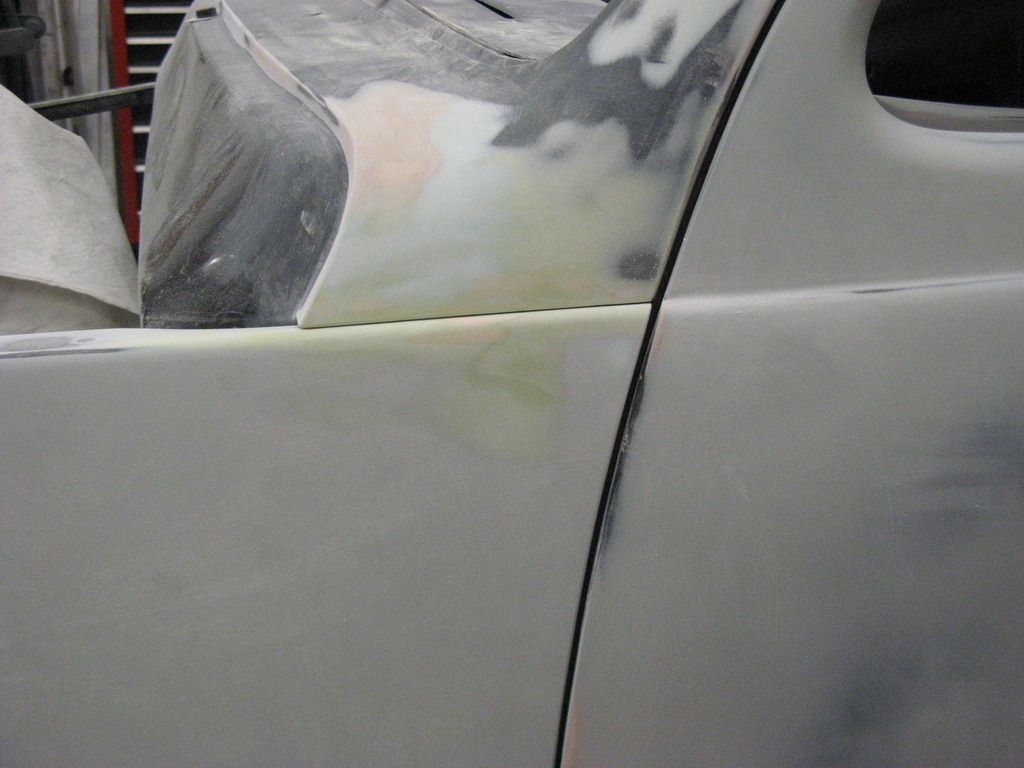
The area where the hood side meets up to the cowl and the belt line on the door took a lot of work, on both sides.
I've got the curvature of the hood side matched to the door, with only about 1/64" gap between the hood side and the cowl. I'm really glad I have the U-pol featherweight filler and gold glaze to use here.
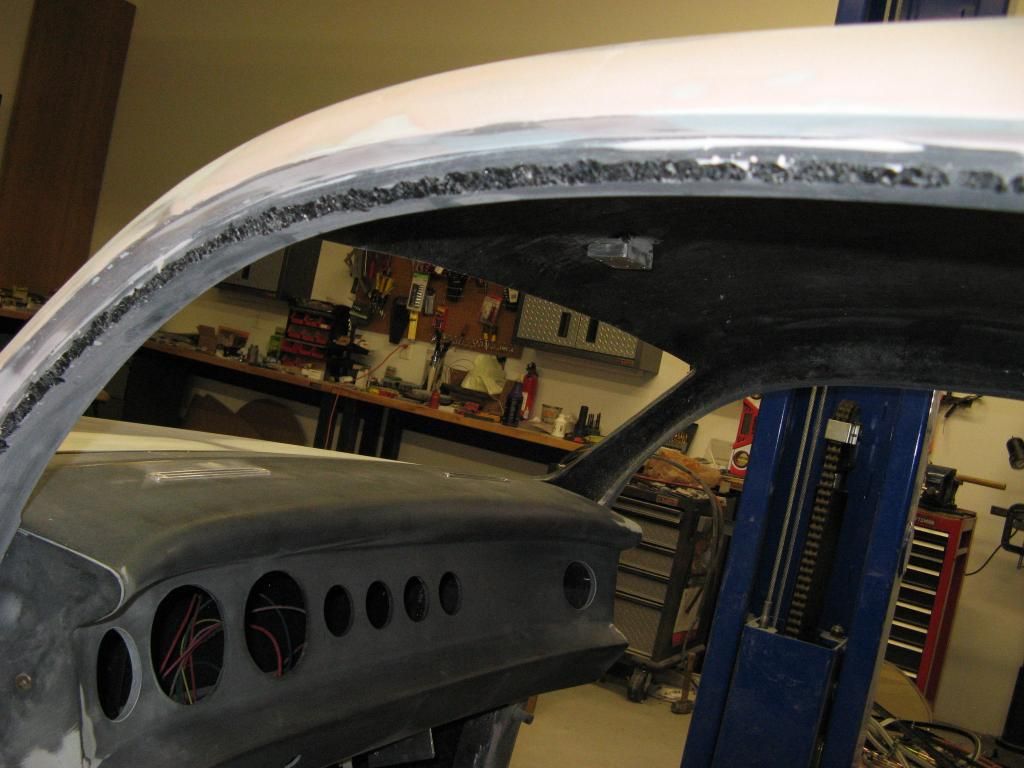
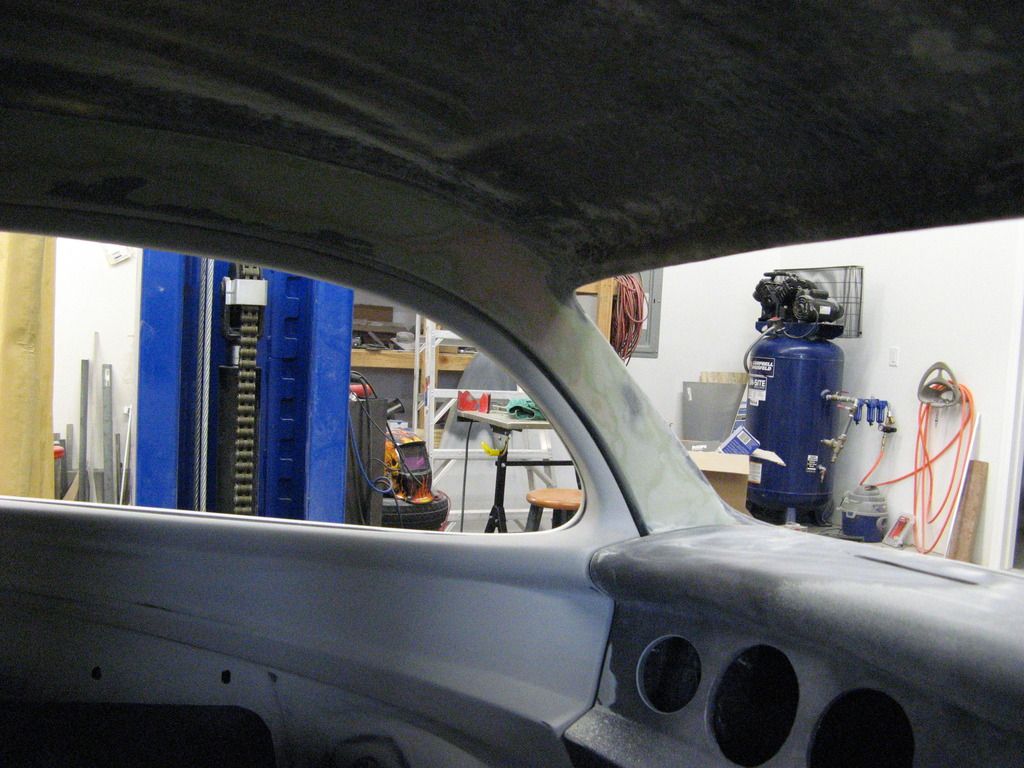
I've also been doing some work on the car's interior. I noticed that the A-pillar area is often a problem for the upholsterer, so I decided to completely fill the hollow A-pillar and an area above the door, so they can be painted. I'm now considering what to do with the area at the top of the windshield. I may make a fiberglass "header" that smooths the area, so it will mate up with foam that's 3/4" thick. There's a big stretch of the headliner that's about 45" wide, where I could either apply headliner material to 3/4" upholstery foam or apply a special 3/4" rigid/heat formable foam that's made to fiberglass over (core foam). The later would have to be done after the body is off the frame and probably require a rotisserie to turn the body upside down, so I could fiberglass the headliner area.
I've also been looking at how some real pro upholstering companies make custom panels for the Oze car. This company does some amazing work, making fiberglass panels, after the cars are completely painted. They have four Oze cars shown in their portfolio. The silver and blue roadster has the same engine and power steering pump as my car. The alternator must be located, where my AC compressor is, since this car has no AC. Don't know how they will ever get a decent sized air cleaner on the engine.
'37 Oze RoadsterLast edited by daveS53; 05-12-2015 at 06:35 AM.


 262Likes

 LinkBack URL
 About LinkBacks


Christine asked that I post the link to Mike's Obituary -...
We Lost a Good One