Thread: Project Sebring GT Spyder
-
09-07-2015 07:06 PM #46
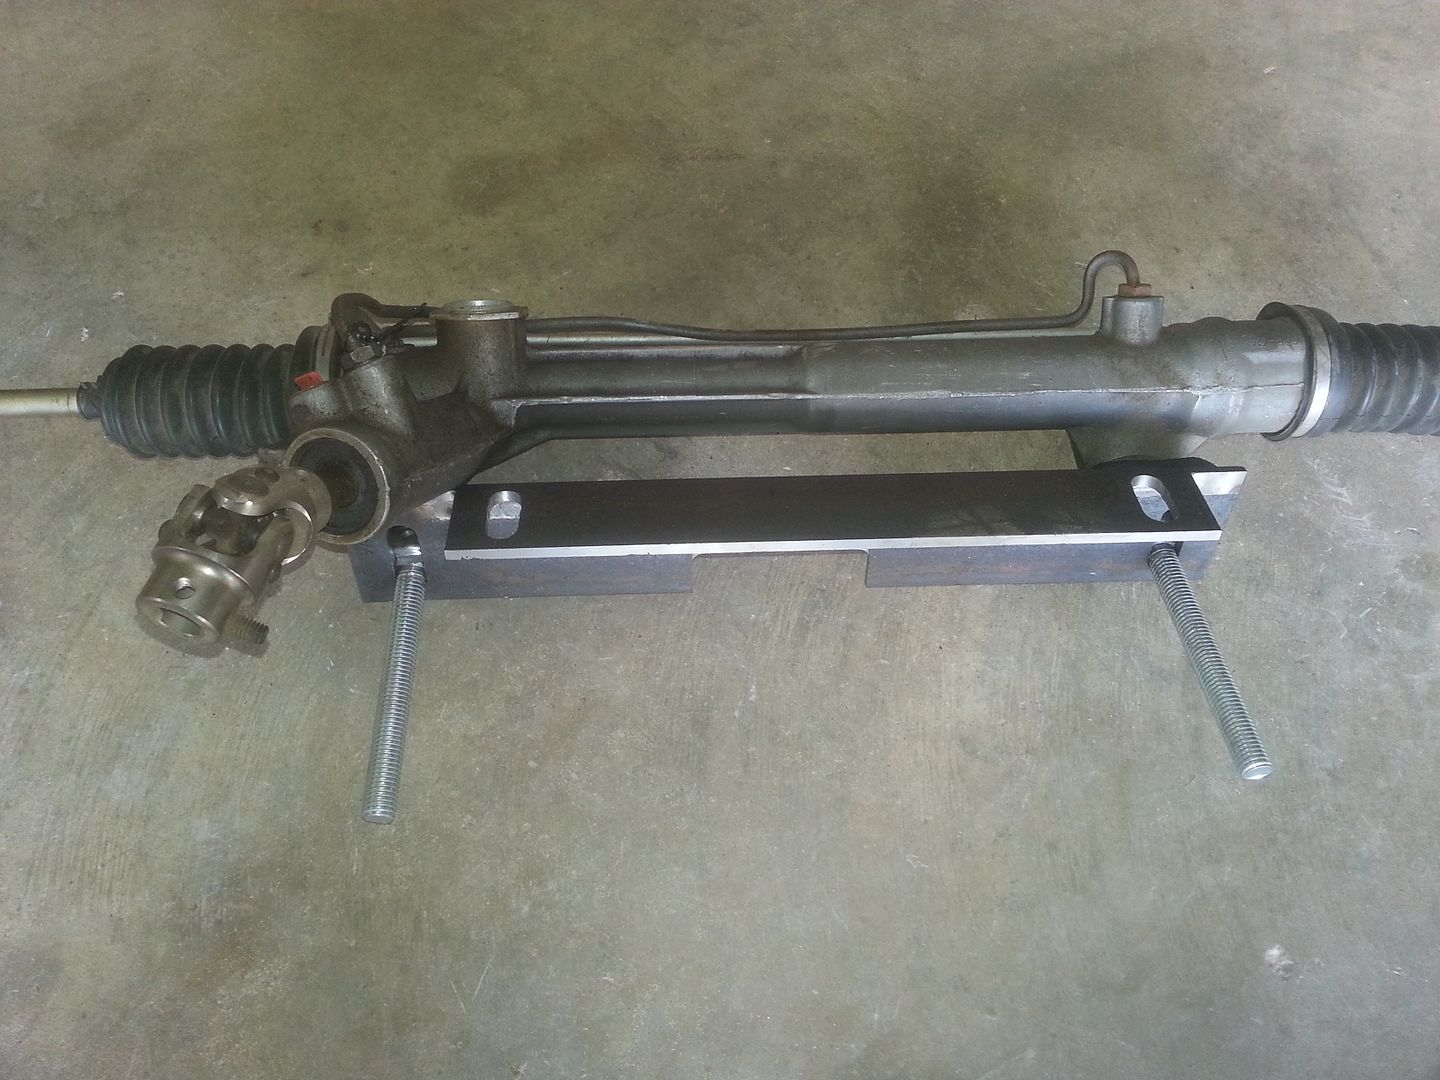
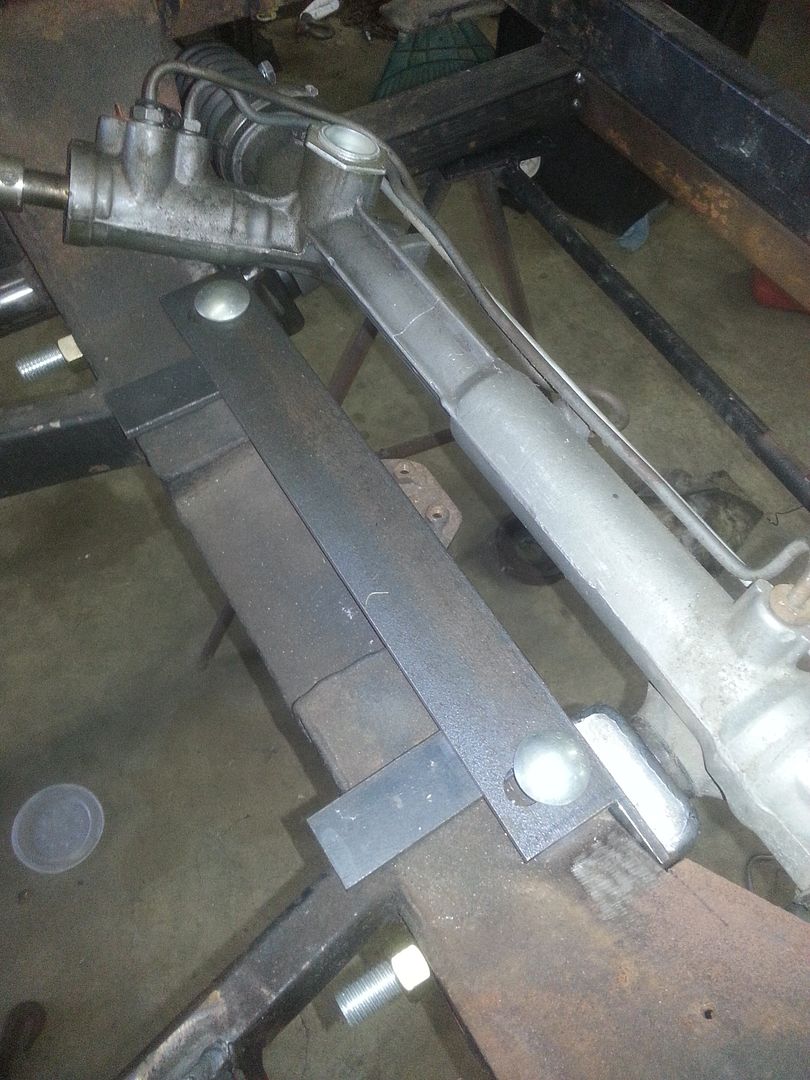
I also built an adjustable steering rack mount. It adjusts both vertically as well as forward and backward by adding or removing shims. It's common for the Mustang II front end to have some bumpsteer. There are kits available that lower the outer tie rod ends and allow adjusting most or all of this out. The aftermarket kits use long studs and aircraft rod ends (heim joints) to replace the stock tie rod ends. The heims are probably plenty strong enough, but I would prefer to use parts purpose built for steering.
My setup allows the rack to be raised and accomplish the same results while retaining the stock tie rod ends. Most cars don't have room to raise the rack because of oil pan clearance issues, but this isn't an issue with the Sebring due to the engine being well behind the axle centerline. I also laid the rack back a few degrees. This is a street rod trick to give a little more clearance around the engine and straighten the steering u-joint angIe out.
The new rack mount is built for the later model Fox body Mustang rack. These have slightly narrower mounting hole spacing than the Mustang II parts, but are supposed to have better feel and ratios. The Fox power racks can use standard pressure GM pumps, too. MII racks need lower pressures and can have sensitivity problems as well as leaking issues if used with the wrong pump pressure. I have experienced that over boosted sensitivity on my 46 coupe and it isn't fun. I mocked up with a regular Fox power rack(3 turns lock to lock) of unknown origin, but I may use a faster ratio unit in the final assembly.
-
Advertising

- Google Adsense
- REGISTERED USERS DO NOT SEE THIS AD
-
09-07-2015 07:23 PM #47
I decided that the next thing to attack was the engine. I wanted to get it and the trans in before moving to the rearend.
I had said earlier that I was going to use a 383 small block, but that was actually my second choice. I was originally thinking of going with one of the newer LS type engines, but really didn't know anything about them. I was studying them, when I learned that there was going to be an issue with the LT1 T56 transmission that I already had. The model of trans I have can't be converted to LS configuration. The input shaft is not available for my gearset and synchro setup. I either had to sell the trans I had and buy another or go with a Gen 1 small block. I didn't have any luck selling the T56, so I just moved on from the LS to a small block.
Then I went on the Power Tour and it seemed that every car I looked at had an LS engine of some kind. Everything from dragged-out-of-the-weeds beaters to show cars. I really wanted to see what all the hype was about. Everyone I talked to raved about them. I decided on that trip that I would look at them again.
I bought (and read) several books, read a bunch of articles on the net and poked around on some LS forums. I consigned myself again to trying to sell the LT1 T56 so that I could buy an LS trans. I had talked with some of the vendors on the PT and was quoted prices in the $4500-$5000 range for a new trans package, but there was no way that was going to happen.
One evening I was reading an article on adapting older 4 speeds to the LS and a (somewhat dim) light bulb went on over my head!
-
09-07-2015 07:37 PM #48
See, if you use the right aftermarket flywheel, you can bolt a regular Gen 1 Chevy bellhousing and trans to an LS and use the regular old Chevy clutch. You wind up short one bellhousing bolt, but there are a bunch of folks running them like this.
I had already bought a special T56 bellhousing for the small block made by a guy in California named Weir. It allowed the LT1 trans to be used on any big or small block Chevy. You could use a 1 or 2 piece rear seal and any size flywheel. It came with a custom hydraulic throwout bearing that made all this possible.
I started thinking that if you could hang a regular 4 speed on an LS with the right flywheel, why couldn't I hang my LT1 trans on one using the bellhousing I had? It turns out after some measuring that it will work. It's not the ideal setup, because it actually costs more to do it this way. The Weir bellhousings are kind of rare (I found mine on EBAY)and I don't know if he even still makes them. I already had the parts so it was cheaper for me. Boy, that sounds like hard justification if I ever heard it, but where there's a will there's a way!
Soooo, I decided to go back to the LS engine I wanted to start with. The trouble was, I didn't have one.
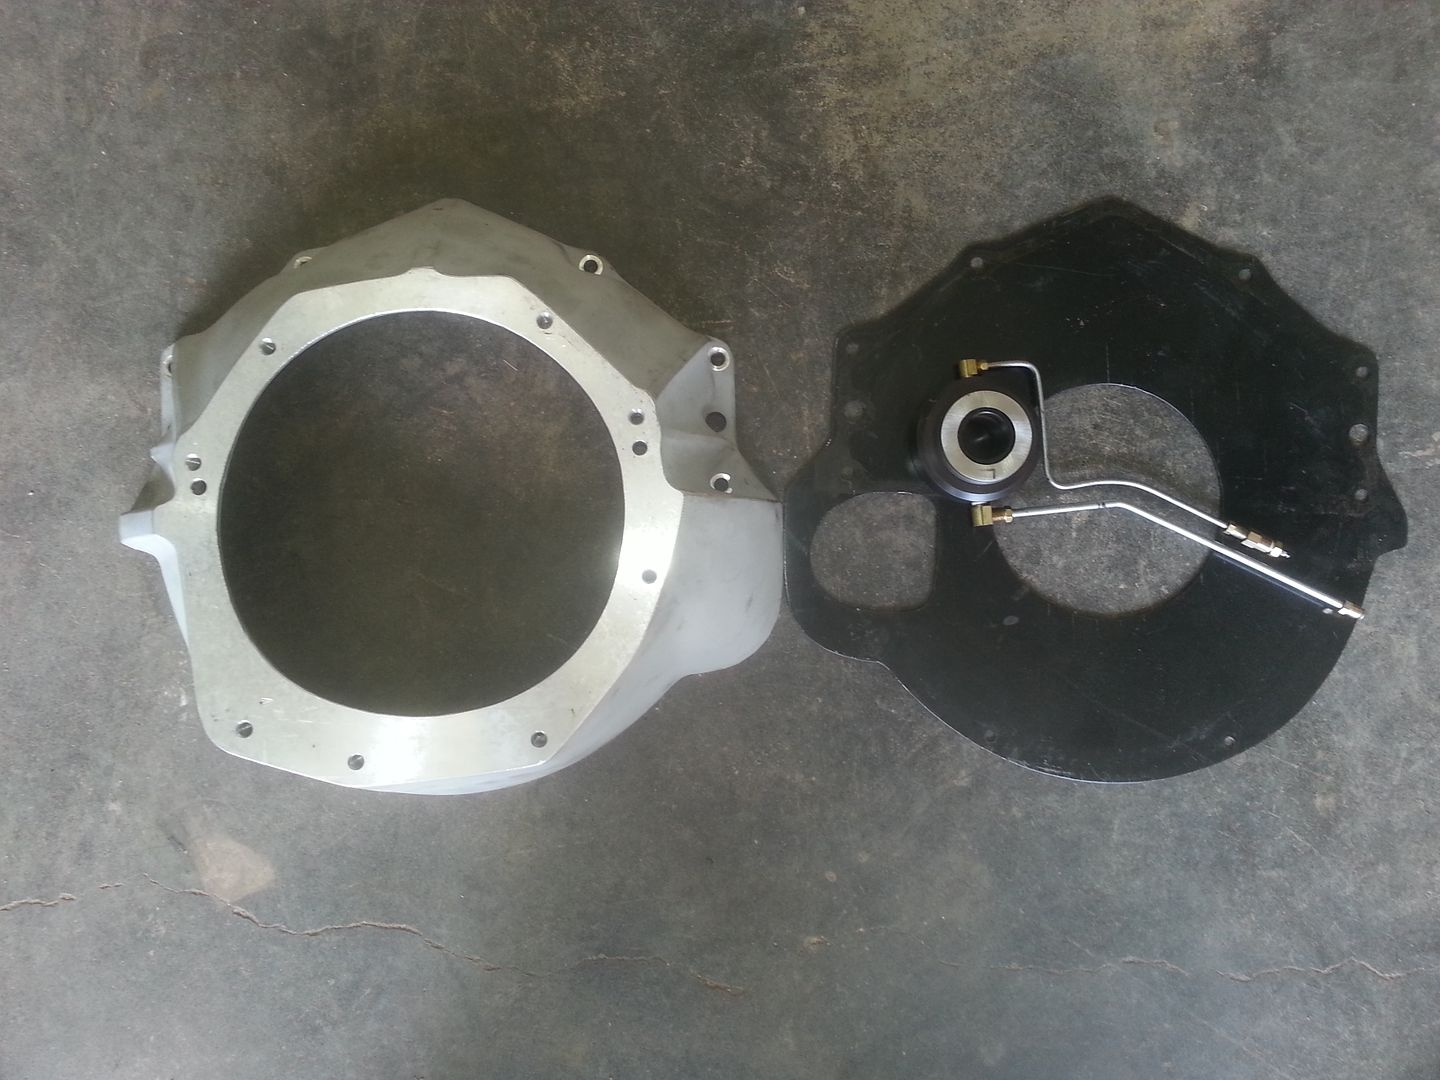
The Weir bellhousing is very well made and heavy duty. It isn't rated as a scattershield, but it is a very thick casting. You could make several of the stock LT1 bellhousings with the metal in the Weir part.
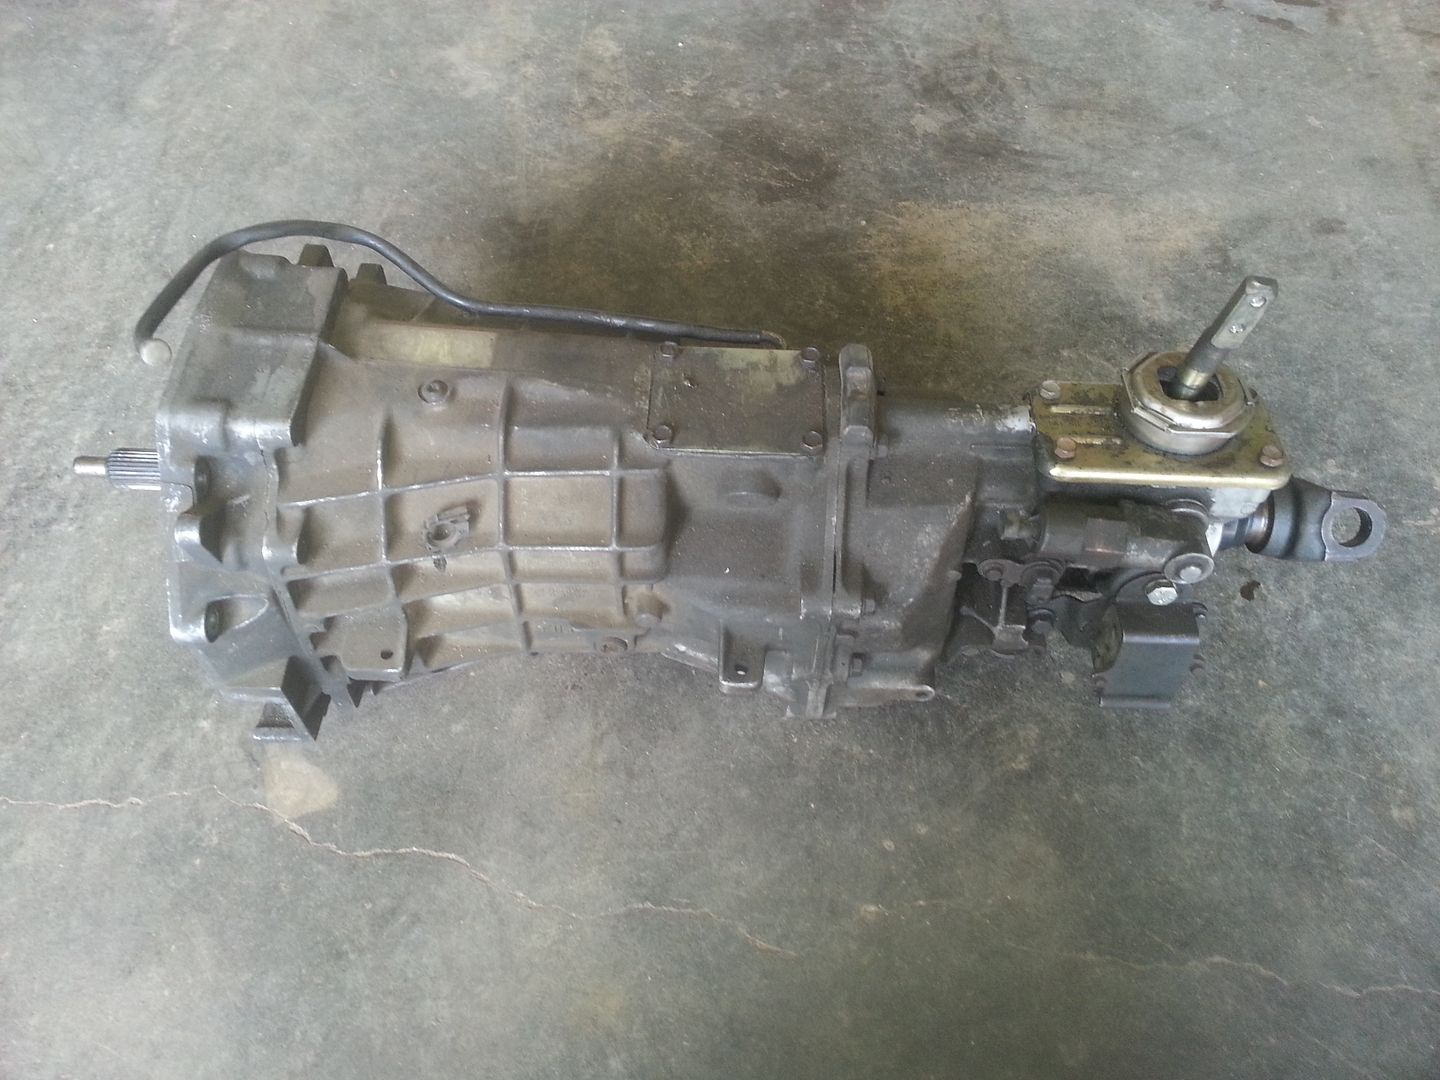
This is the LT1 T56 I have. It has a 2.97 1st gear and a .64 6th. It's my understanding that this is considered a close ratio unit.
-
09-08-2015 12:13 PM #49
- Join Date
- Apr 2011
- Location
- Prairie City
- Car Year, Make, Model: 40 Ford Deluxe, 68 Corvette, 72&76 K30
- Posts
- 7,300
- Blog Entries
- 1
Great work, nice welding, and great execution. I was thinking of going with an LS and a 4 speed too but I ran into the issue you had as well. I just decided to keep the original plan I had and quit trying to make it more difficult. It seems 5.3's can be found all over for $500-$950. I wanted to go with a 6.0 and those seem to be about double or more than the 5.3.Ryan
1940 Ford Deluxe Tudor 354 Hemi 46RH Electric Blue w/multi-color flames, Ford 9" Residing in multiple pieces
1968 Corvette Coupe 5.9 Cummins Drag Car 11.43@130mph No stall leaving the line with 1250 rpm's and poor 2.2 60'
1972 Chevy K30 Longhorn P-pumped 24v Compound Turbos 47RH Just another money pit
1971 Camaro RS 5.3 BTR Stage 3 cam, SuperT10
Tire Sizes
-
09-08-2015 03:43 PM #50
Thanks 40! I still have a lot to learn about the LS engines. Like you. I wanted something bigger than a 5.3. However, all the folks I've talked with say that the little engines are stronger than you would think (especially with a little tune on the ECM). The big difference seems to be that everybody says they don't make as much torque down low as a 350 SBC, but make up for it with a higher rev range than a typical stock based 350. The stock LS heads have pretty big ports compared to a typical Gen 1 350.
Everybody recommended gearing them so that you can use the revs. Just about to a man, they said to let'em rev and you'll be surprised. I did wind up with something a little bigger than a 5.3 and I'm hoping I will be surprised. I'll post that part of the story ASAP.
-
09-08-2015 06:43 PM #51
After searching for some time I learned that 4.8 and 5.3 truck engines are plentiful and fairly cheap, but I really wanted something bigger. The 6.0 and 6.2 engines are in demand and their price reflects that. The big engines were either high mileage and expensive or low mileage and even more expensive. The early 5.7's that I found were fairly simple and most had cable operated throttles, but all were pretty high mileage and since they came in Camaros and Corvettes, they were pretty expensive too in spite of their mileage.
Also, many of the really late model engines have displacement on demand (cylinder deactivation) and/or variable valve timing. They also have drive by wire throttle bodies. I didn't want to deal with all those things on my first LS swap.
I finally located what I thought was a pretty good engine in Arkansas, about 350 miles from my house. It's an almost new 97 5.7 Corvette engine. This was a long block replacement engine that sat for years in a guy's unfinished project before he decided to part it out. He said it had only been test fired. His project was unfinished so I tend to believe him. The engine doesn't appear to have been "cleaned up" and is too clean in hidden areas to have been run much. It came with an aftermarket wiring harness and a reprogrammed computer. I heard it run on video and he had it pulled out of the Jeep and strapped to a pallet when I got there.
-
09-08-2015 07:04 PM #52
Now we've all heard about the engine that "came out of my brother's/uncle's/whoever's 'Vette" and was 375 HP, even if it had a 2 barrel carb! I can say that this engine still had the factory paper bar-code tags on it and they did indeed identify it as 97 LS1. After the previous owner told me how the engine was setup when he got it leads me to believe that it really is a Corvette engine. 97 is the first year and they had a few changes made in later years, but this engine was rated at 345 HP at the crank as installed in the Corvette.
Most folks I've talked to say that with a good exhaust system and a little computer tune, it should make 30-50 more HP without turning a wrench. I know the ECM has a sticker saying that it has an "off road" tune, but that probably just means it had the after CAT O2 sensors and other pollution stuff disabled.
The previous owner swapped the Corvette's drive by wire throttle body out for a cable operated one and that's OK by me. He also swapped the water pump and harmonic balancer out for Camaro parts because of the special power steering pump he had on it. No problems there either. The shorter Corvette parts would have been nice, though.
The one thing he did that will have to be changed is that he swapped out the nice "batwing" Corvette oil pan for a truck pan. The truck pan is way too deep for my car. The shallow Corvette pan was heavily baffled to prevent oil starvation in corners. That would have worked out nice. The engine also had a set of Advance Adapters steel motor mounts, a set of "no name" stainless truck headers, a Camaro alternator and a starter.
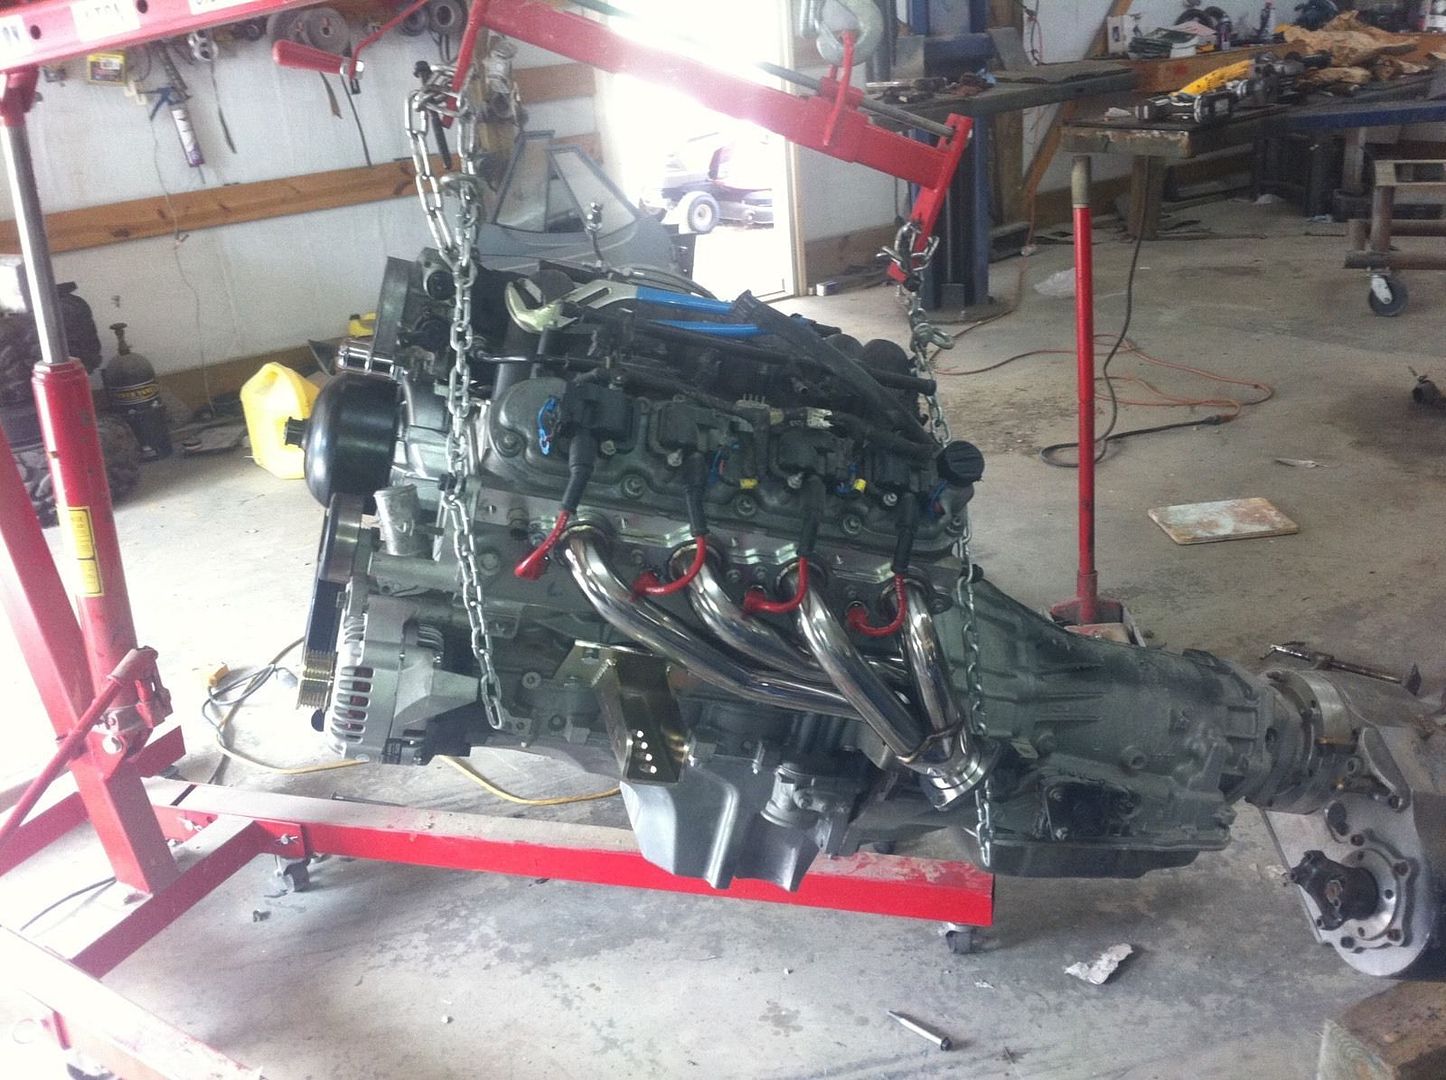
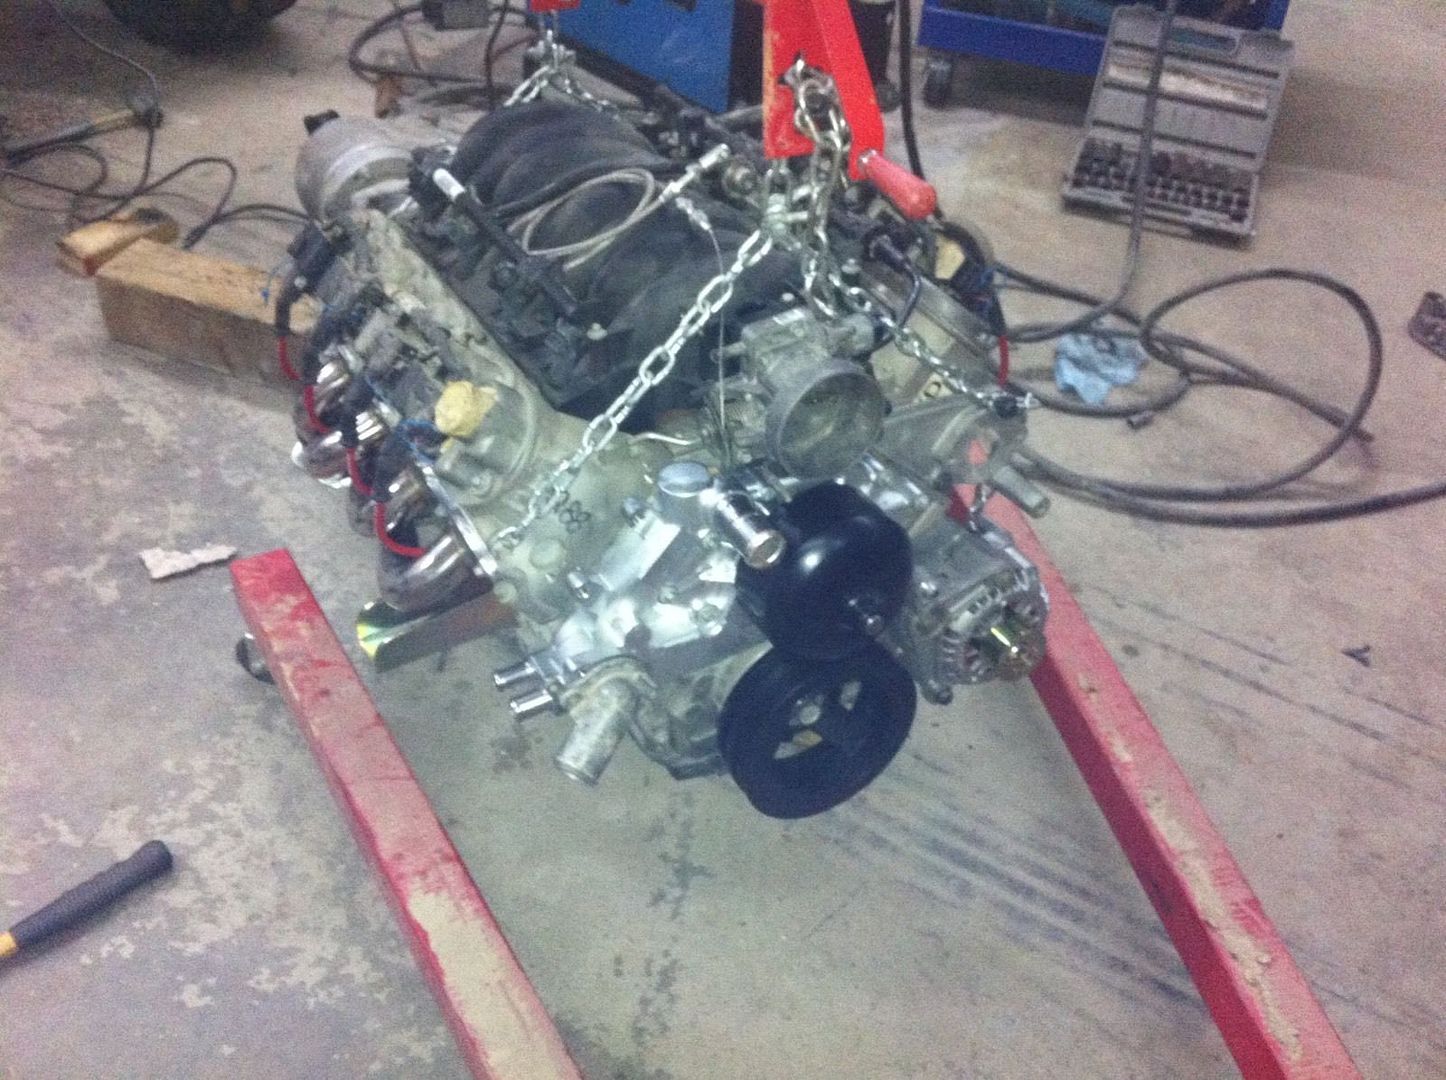
These are the previous owners pics. I forgot to take any when I went to pick it up.
-
09-08-2015 07:11 PM #53
I paid more for the engine than I wanted to, but if it truly is an "as new" engine, I got a bargain. I can tell more when I pull the oil pan to swap it.
I would like to think that I had the first Sebring to get an LS engine, but that's not the case. There are at least two others out there somewhere. I found pictures of them on another forum. Unfortunately the threads are more of a "this is my car" type thing instead of build threads. So there is not much info on what they did to get it all to work. Both cars appear to have Corvette engines or at least Corvette engine covers and accessory drives. I think both have automatics. Also, both engines appear to sit very high in the engine bay.
-
02-13-2016 06:19 PM #54
Time for another series of long overdue updates. I've gotten a good bit done since the last posts. I've been pretty busy, but not always on the car and not everything I've done on the car has worked out like I hoped.
When I left off I had just acquired a 5.7 LS1 and needed to get it in the car.
In the LS swapping world, there are dozens of adapter plates that allow Chevy motor mounts to be attached at various places on the block. I think the other cars I found online used some version of these plates to bolt up to the existing Sebring mounts.
When I finally got around to getting my engine and trans hung over in the chassis, I looked at going in that direction. The problem is that you wind up with a motor mount on an adapter and then that is bolted to the original adapter on the frame.
That's a lot of stuff and it looks awkward. The original Sebring mounting system made a lot of sense from a manufacturing standpoint. You made one chassis and a bunch of different motor mount adapters. You could fit just about any engine that way with minimal effort. The main drawback is that it's a bulky system that gets in the way of good exhaust.
I decided to get rid of the original mounts and build my own. I wanted to use the Corvette style mounts that would have originally came on the engine. They mount well forward on the block and would have given plenty of exhaust clearance, but they just didn't work out. The fluid filled mounts are pretty big and also have a tendency to leak nasty dark fluid out if they rupture(one of the ones I had was already leaking). I have read that they will fail if you use a lot of right foot. I tried swapping the fluid mounts out for the old Ford biscuit style mounts. Street and Performance recommends this route, but that didn't work either. They were going to interfere with the 1 x 2 lower frame braces.
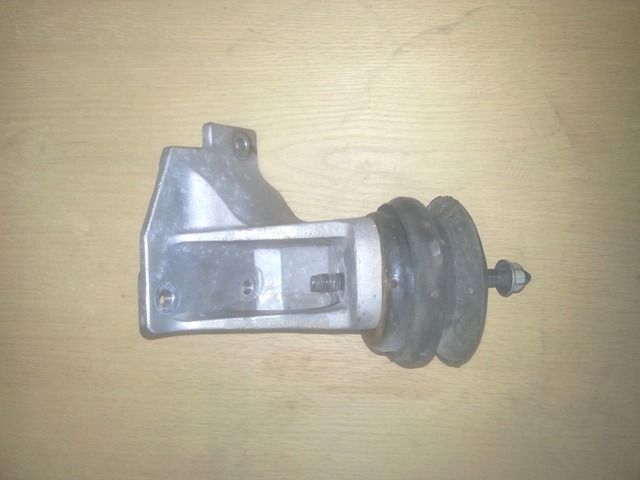
This is what the original Corvette mounts looked like.
I wound up using the steel mounts that came with the engine and the Ford biscuits. I had to fab some frame mounts. Before I could mount anything I had to get rid of the original mounts. I cut the old strut brackets off at the same time. I still need to do some grinding on the bottom of the rails, but that will have to wait until I can flip the frame over for better access.
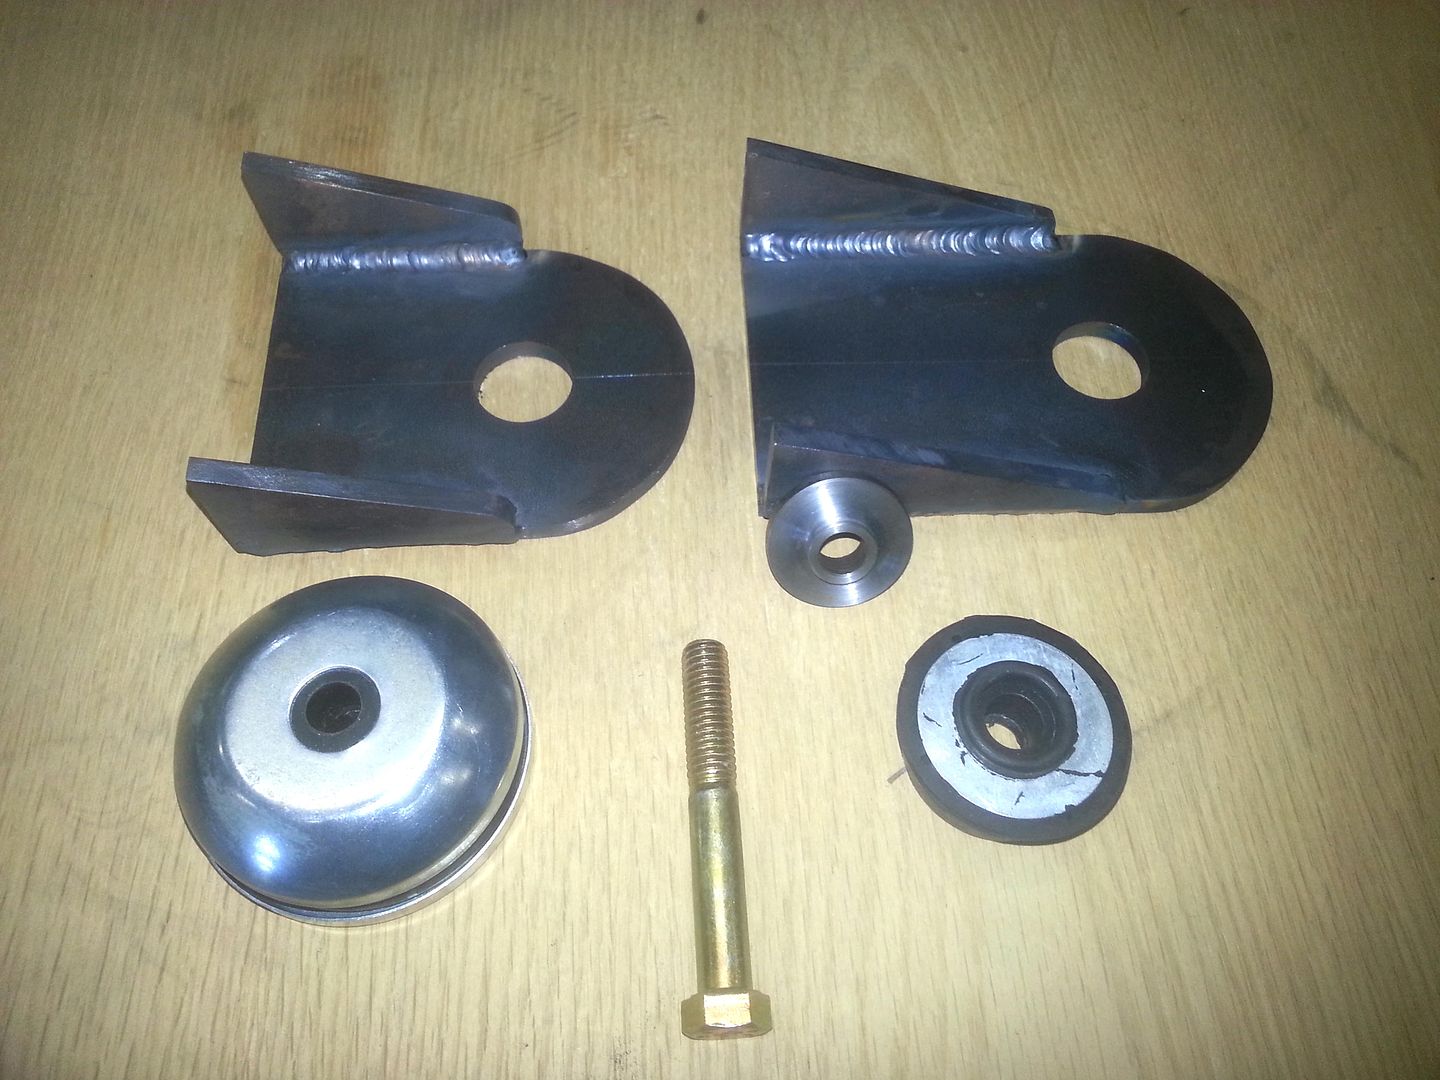
The frame mounts are pretty simple and I had to make a special stepped washer because the mount bolts are 7/16" while the holes in the engine mounts are 5/8". One is longer because the centerline of the engine and trans sits one inch to the passenger side. I had to move it over to clear the firewall on the driver side. I'm not worried about it because many cars have offset engines and it will just balance out the weight of my fat butt on the driver side.
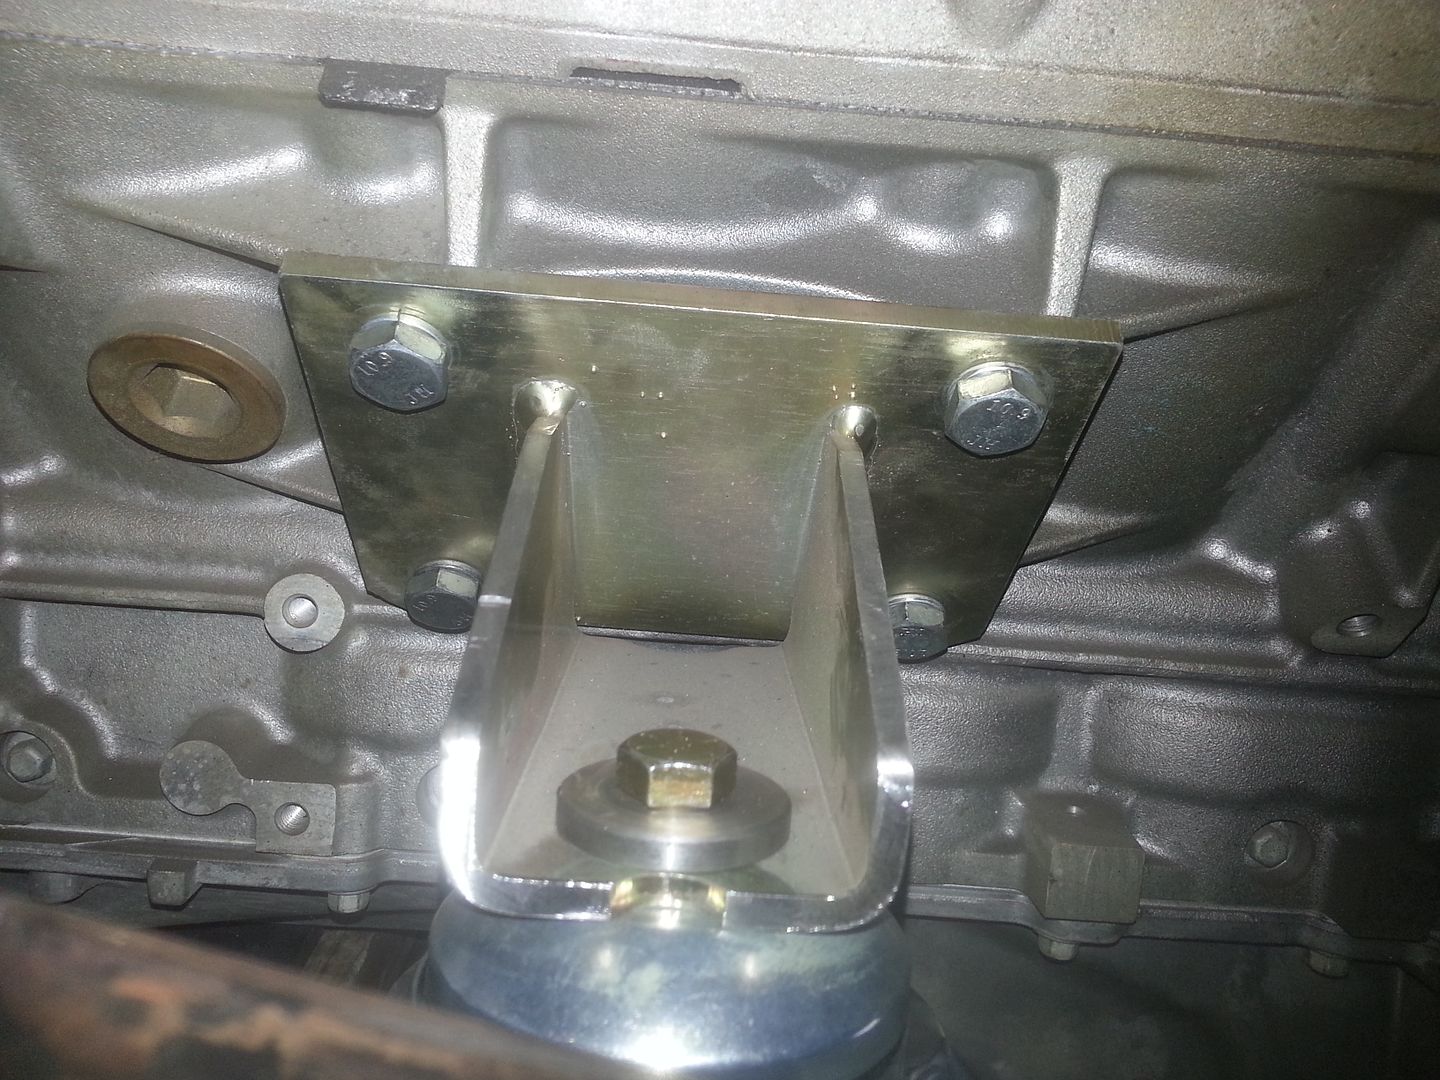
I trimmed the Advance Adapters steel engine mounts that came with the engine and reused them.
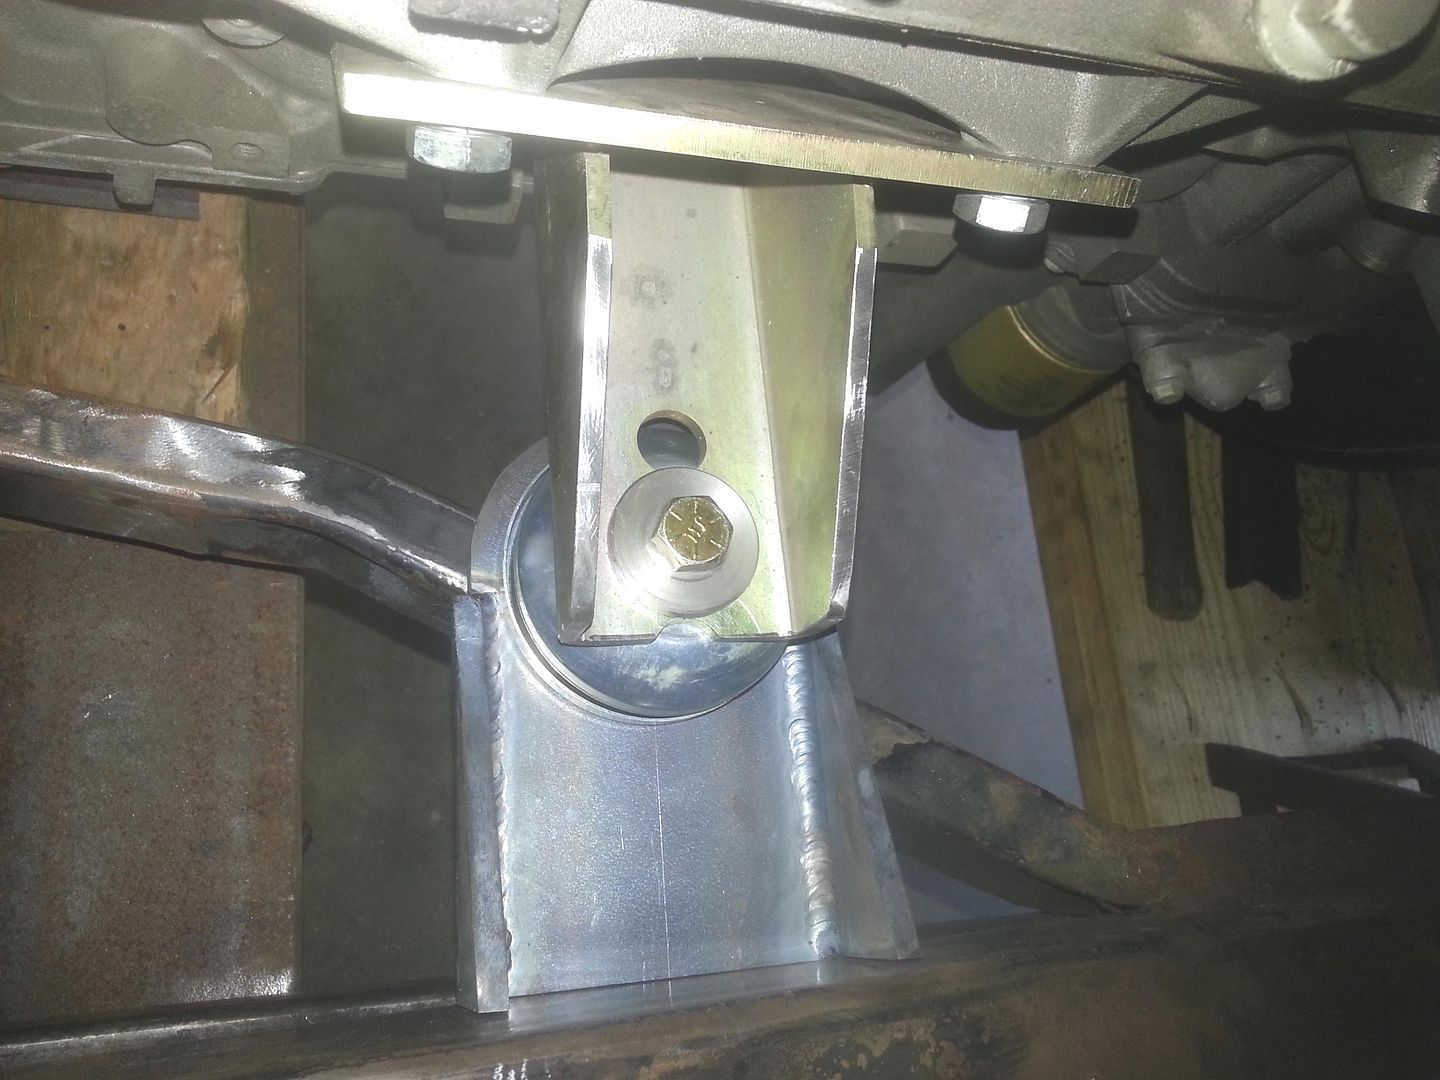
The frame mounts are actually upside down in this shot. I realized that the engine was going to be way to low with them like this.
-
02-13-2016 06:28 PM #55
I realized pretty quick that the truck headers that came with the motor wouldn't work and even if they had, the collectors would have been right next to the driver and passenger foot wells. That would have been pretty toasty.
I found a set of LS2 Corvette manifolds and they actually fit pretty good, but I had to replace the square tube rails that snake around the engine from the trans tunnel to the top of the frame. The rails just wouldn't let the me get the engine back without hitting the manifolds. I made the rails longer and higher and solved that problem. I'll eventually brace the rails to the frame, but I'm waiting until I get the steering and exhaust done in case there is any interference.
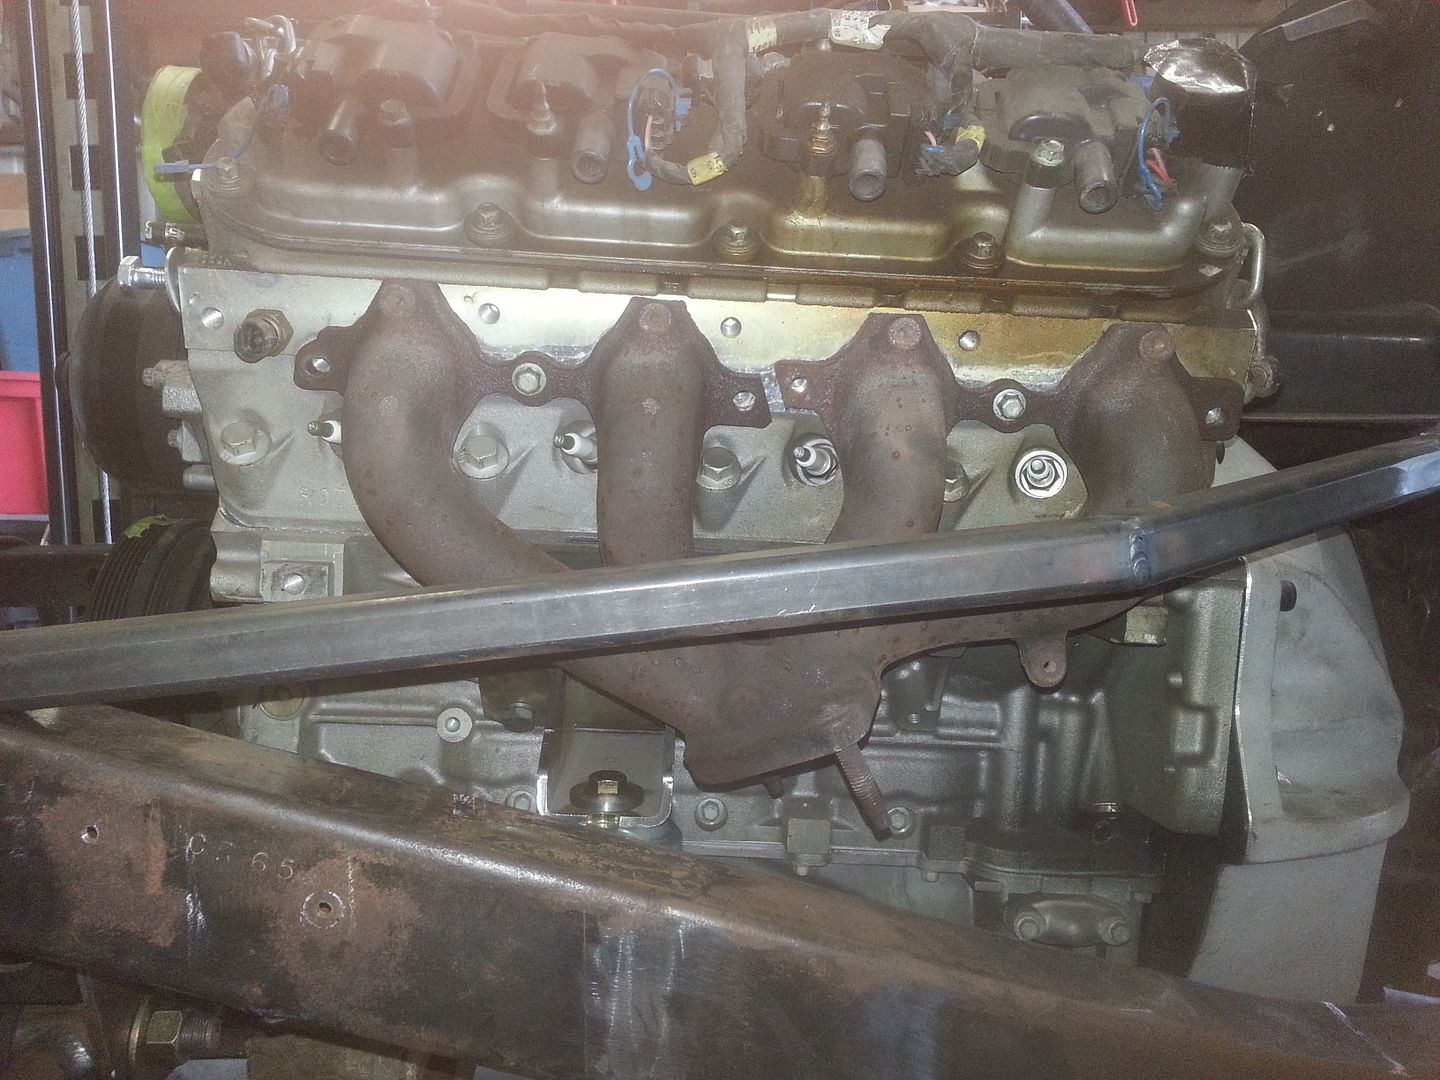
-
02-13-2016 06:34 PM #56
A few days after I got all this done, I took a short vacation to Mena, Arkansas for some motorcycle riding. That's the home town of Street and Performance.
I dropped in on their shop to pick up a straight thermostat housing, since the original angled one isn't going to work. While I was there, they took me on a tour of their operation, which is actually a manufacturing plant and full service custom rod shop. They even have their own aluminum foundry and chrome shop!
They also fab their own headers and while we were in the header shop I spied some parts that I thought might fit my car. I really wasn't planning on buying headers, but these looked too close to the right size and shape to pass up. As it turns out, they actually fit with more clearance than the iron manifolds. I actually could move the engine back some more, but I'm going to leave it as is. If I have problems with the headers, I know I can switch back to the manifolds.
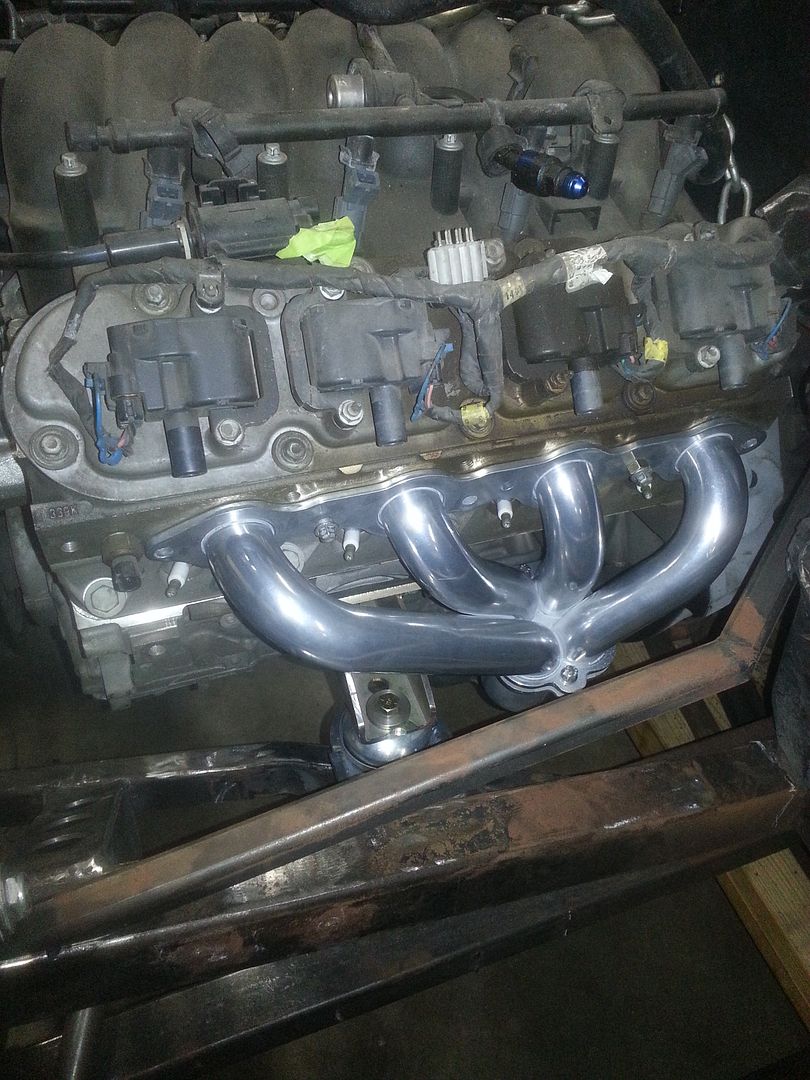
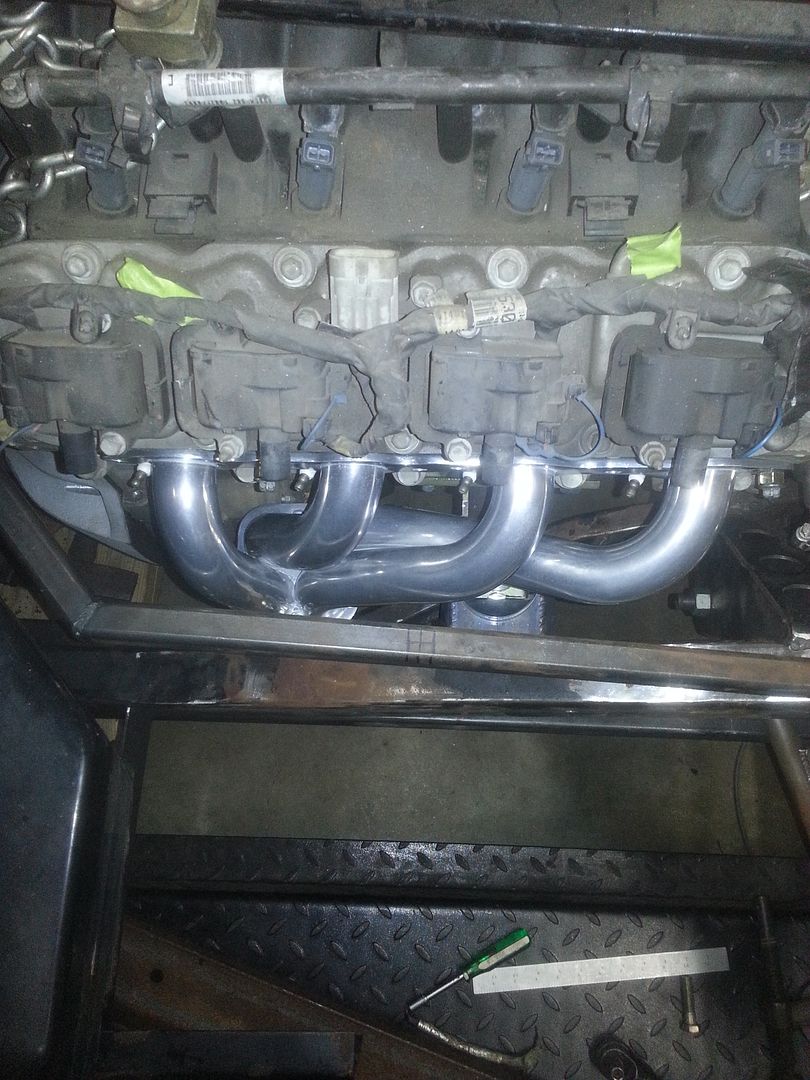
The ceramic coating should help keep underhood and footwell temps down.
-
02-14-2016 06:13 PM #57
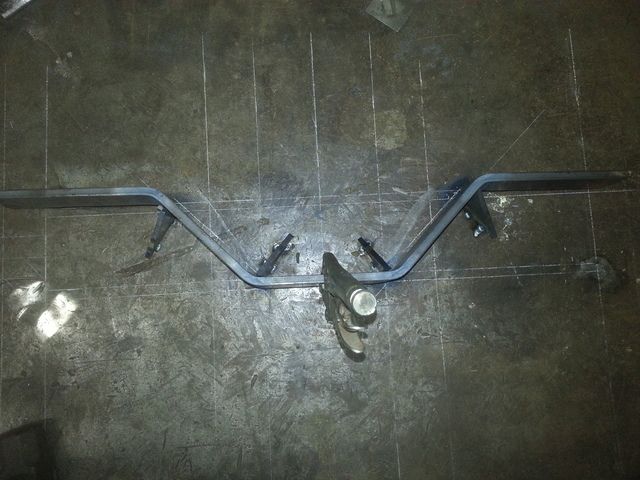
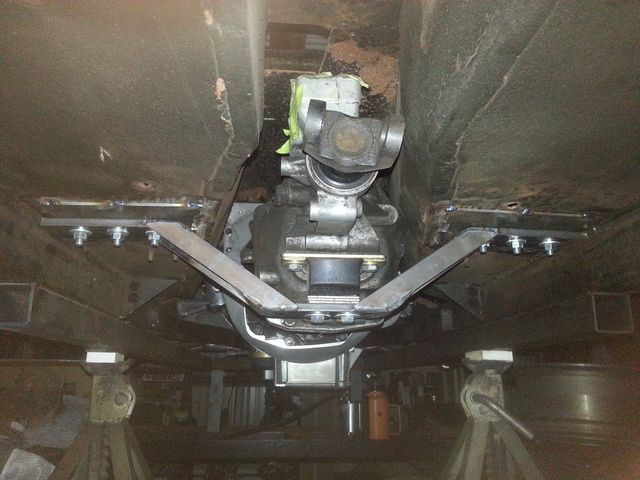
Once I had the motor mounts in I moved on to the trans mount. I have lowered the engine so the original trans mount was too high.
I thought about a few different ways to build it, but in the end I decided to just make one similar to the original. It simply bolted through some reinforced areas in the floor. The floor in this car is 16 gauge steel and the doubling plates made it almost 1/8" thick.
The new 6-speed is several inches longer than the original trans so the mount fell outside the reinforced area. I didn't have any 16 gauge on hand, so I added some 1/8" plates to the new location.
I drew the new crossmember on my welding table and bent it out of some flat bar. A few holes and simple braces and it was done.
-
02-14-2016 06:31 PM #58
With the engine finally in place and the driveline angle more or less set, I decided to tackle the rear suspension. I kicked around several options including a 4-link, 3-link and a torque arm. I wanted something that could be tuned for extra traction by adding anti-squat and all of these could do that. I spent a lot of time reading all the books I could find on suspension for handling. I poured over several websites dedicated to "pro-touring" also. General info was easy to find, but specific design stuff was very thin. I eventually had enough info that I thought I could come up with something that should work.
I eliminated the 4-link because as you add anti-squat, they can bind as the body tries to roll in a curve. The 3-link and torque arm both can roll without binding.
I was leaning toward the torque arm because they are fairly easy to package under the car, but the length of the arm was going to wind up being pretty short on this car. Actually 36 inches or less. When you get a TA that short, you will have very high anti-squat, but it can cause loss of traction under braking even to the point of "brake hop". In extreme cases, the rear axle can actually lift off the ground. Also, the TA has very limited tuning capability, so what you build is pretty much what you're stuck with.
This meant that the 3-link was what I was left with, but that's not really a bad thing. The 3-link can have a high anti-squat percentage and still roll without bind. The main downside to the 3-link is that they are notoriously hard to package under a passenger car. The upper link is the culprit, because it wants to intrude into the passenger compartment.
There was another option that I considered and that's a decoupled torque arm. It's a hybrid combination of the 3-link and the torque arm. A very short TA is used for high anti-squat under acceleration and the arm is set up to decouple from the chassis under braking. A sliding upper link (like a 3-link) is set up to do nothing under acceleration and come into play under braking. The upper link is arranged to give a long virtual swing arm during braking so there is no loss of traction. This suspension theoretically does everything well, but it's complicated and heavy because of all the different links that are needed. From what I could gather during my research, tuning the transition from acceleration to braking is tricky, too. It looked very interesting and I was tempted to try it, but I decided my limited knowledge might get me in trouble with this setup. So I passed on it.
-
02-14-2016 06:41 PM #59
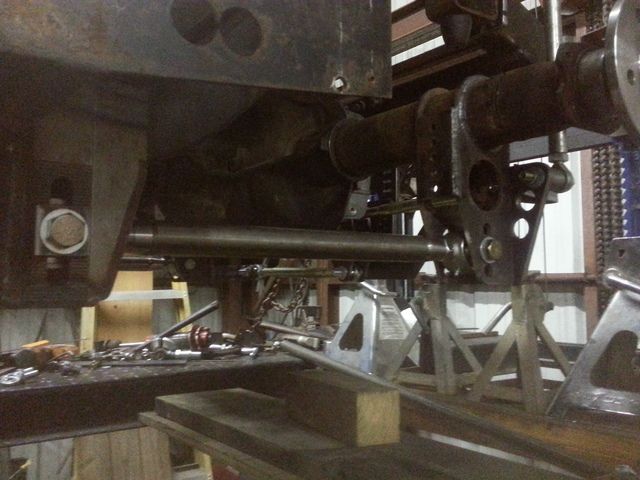
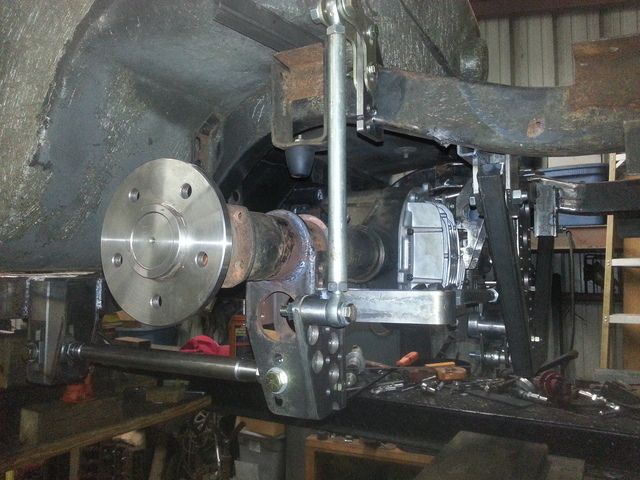
No matter which suspension I used, I was going to need something locate the rearend laterally, too. The 2 most common ways are either a panhard bar or a watts link. The panhard bar is simple, but forces the rearend to move side to side slightly as the suspension travels. The bar needs to be as long as possible to keep this to a minimum. Because this car is fairly narrow, the PB was going to be short, so that option went to the bottom of the list.
I went with a Watts link. It has the advantage of only allowing the rearend to move straight up and down, but not side to side. Also, the roll center is literally a fixed pivot and can't change. It is a lot more complicated than a panhard bar, though.
-
02-14-2016 06:55 PM #60
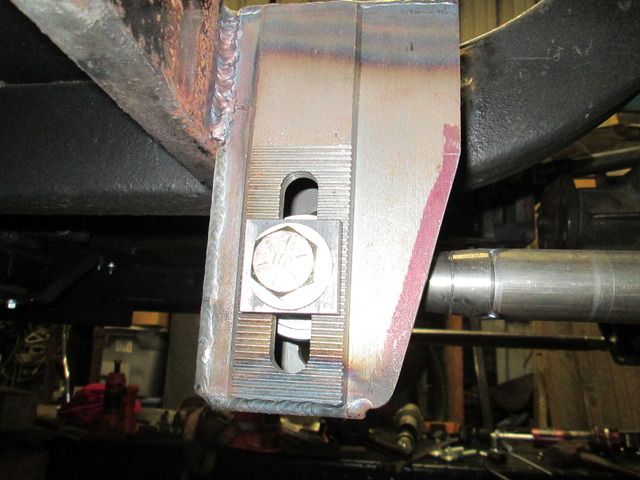
I built a lot of adjustment into my setup. Probably finer than actually needed. I cut serrations into the front link mounts that allow me to move the bars in .100" steps. The serrations allow the adjustments are locked in so they can't slip. I also have 3 holes on the lower rearend mounts. The roll center can be raised or lowered by moving the watts link center rocker (propeller). The upper and lower shock mounts can be raised and lowered, so getting the ride height spot-on should be easy.
I used heavy duty rod ends on the upper and lower links. These are from Spohn Performance. I picked them because they are adjustable for tension, rebuildable, and greaseable. They're forged 4130 and should last forever. The lower links are 1.25 OD with a .120 wall. According to the 3-link spreadsheet that I found (after I started building, of course), the upper link has an 18x safety factor under acceleration and the lower links have a 26x safety factor! The calculations in this spreadsheet are supposed to be based on 1 G of acceleration (which I seriously doubt is going to happen), so I guess they're just a tad overbuilt. At least I could go drag racing without worrying about failure due to weak parts! 3-links usually aren't used for drag racing because of the single upper link.


 1584Likes

 LinkBack URL
 About LinkBacks
 Reply With Quote

Borrowed from a FB post... Bubba loved to hunt, and every Friday after work he would fire up his grill and stoke up his smoker for the weekend and cook venison steaks, roasts and an occasional...
the Official CHR joke page duel