Welcome to Club Hot Rod!  The premier site for everything to do with Hot Rod, Customs, Low Riders, Rat Rods, and more. 

  •  » Members from all over the US and the world!
  •  » Help from all over the world for your questions
  •  » Build logs for you and all members
  •  » Blogs
  •  » Image Gallery
  •  » Many thousands of members and hundreds of thousands of posts! 

YES! I want to register an account for free right now!  p.s.: For registered members this ad will NOT show

 
Like Tree516Likes

Thread: 1931 Model A Coupe


Reply To Thread
Page 2 of 35 FirstFirst 1 2 3 4 5 6 7 8 9 10 12 ... LastLast
Results 16 to 30 of 515
  1. #16
    Bob Parmenter's Avatar
    Bob Parmenter is offline CHR Member Visit my Photo Gallery
    Join Date
    Apr 2001
    Location
    Salado
    Car Year, Make, Model: 32, 40 Fords,
    Posts
    10,869

    Gotta love it!
    Your Uncle Bob, Senior Geezer Curmudgeon

    It's much easier to promise someone a "free" ride on the wagon than to urge them to pull it.

    Luck occurs when preparation and opportunity converge.

  2. #17
    t-top havoc is offline CHR Member Visit my Photo Gallery
    Join Date
    Feb 2012
    Location
    Streator,
    Car Year, Make, Model: 87 Camaro
    Posts
    347

    Much patience, big skills, many hours!!!
    Did you use all - original wood, or did you have to replace any?

    As said earlier, thanks for sharing!

  3. #18
    RichB's Avatar
    RichB is offline CHR Member Visit my Photo Gallery
    Join Date
    Sep 2013
    Location
    Portage
    Car Year, Make, Model: 31 A Coupe
    Posts
    567

    Thanks so much for the kind words guys! This is going to be my last full build, and I'm in no hurry to get it done.

    [IMG][/IMG]

    This shows the "good" firewall in for body integrity. I repaired the body edges
    where the firewall attaches, and filled all the old spot weld holes. I wanted it
    removable so I used 1/4" 20 nuts spaced like the ones across the top to attach
    to the car. I have plans for this area in the future.
    Rich

  4. #19
    rspears's Avatar
    rspears is offline CHR Member/Contributor Visit my Photo Gallery
    Join Date
    Sep 2007
    Location
    Gardner, KS
    Car Year, Make, Model: '33 HiBoy Coupe, '32 HiBoy Roadster
    Posts
    11,147

    Amazing process! Great to see one being saved that was pretty far gone!
    Roger
    Enjoy the little things in life, and you may look back one day and realize that they were really the BIG things.

  5. #20
    RichB's Avatar
    RichB is offline CHR Member Visit my Photo Gallery
    Join Date
    Sep 2013
    Location
    Portage
    Car Year, Make, Model: 31 A Coupe
    Posts
    567

    t-top havoc, I replace all the wood with new except for the lower door jam
    piece. The upper piece by the quarter window I replaced so I could weld
    inside when I chopped the top.

    [IMG][/IMG]

    In the previous pic everything looked O.K., but the roof panels did not fit right.
    A close look will show the body is now sitting on the frame, and the frame is clamped to the jig. This is many weeks later after repairing the front mounts by the lower cowl, and fitting all the wood blocks for the rest of the body mounts. The visor does not fit well, and is very flimsy.

    Rich

  6. #21
    RichB's Avatar
    RichB is offline CHR Member Visit my Photo Gallery
    Join Date
    Sep 2013
    Location
    Portage
    Car Year, Make, Model: 31 A Coupe
    Posts
    567

    [IMG][/IMG]

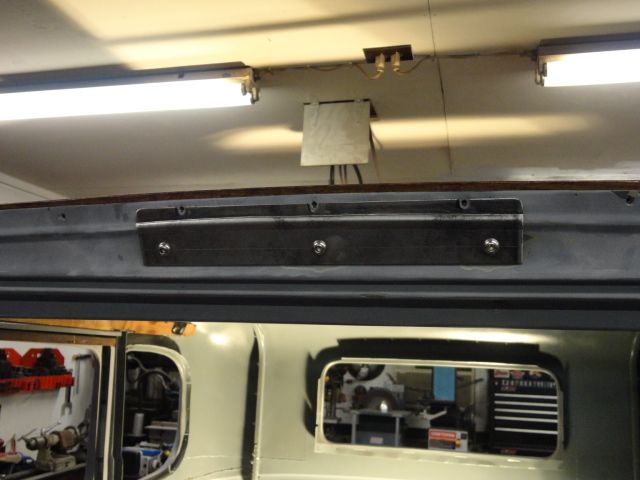
    I wanted to add some support to the visor (they start to flutter at 120mph) so I made up a piece of 16 ga to fit against the upper windshield panel. There are 1/4" 20 nuts
    welded to the backside, and the wood is relieved so it lays flat.
    [IMG][/IMG]
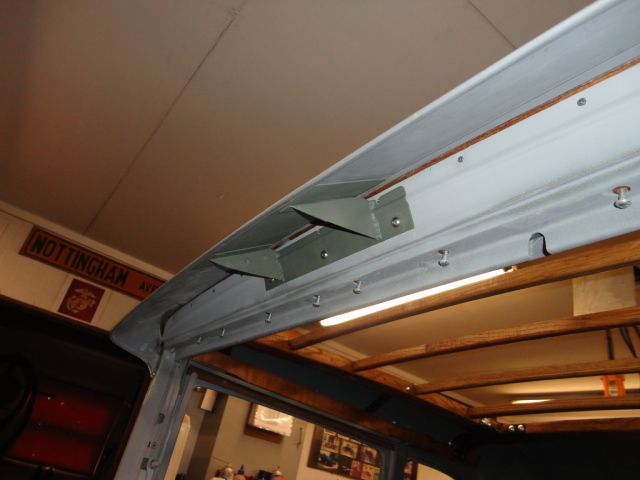
    Heres the finished support which is not visible when the car is at ride height.
    Rich

  7. #22
    RichB's Avatar
    RichB is offline CHR Member Visit my Photo Gallery
    Join Date
    Sep 2013
    Location
    Portage
    Car Year, Make, Model: 31 A Coupe
    Posts
    567

    [IMG][/IMG]

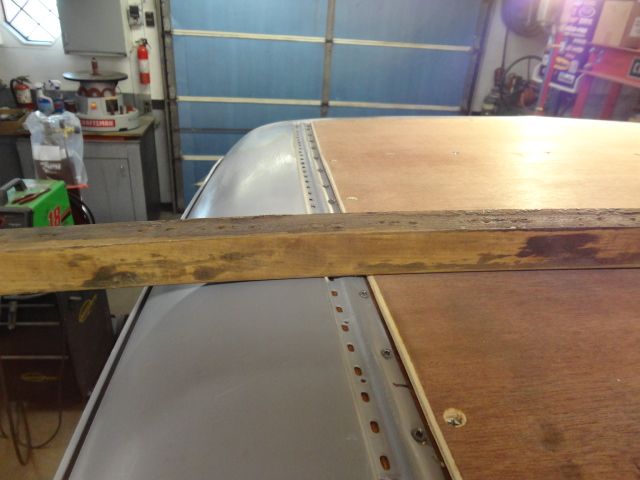
    I have had the wood in, and out of the car many, many times sanding shaping
    trying to make things fit right! I have finally commited to welding the visor to the top.
    There are steps in the panels where they meet the visor which I hammered flat, and slit the top to make them meet correctly.
    [IMG][/IMG]
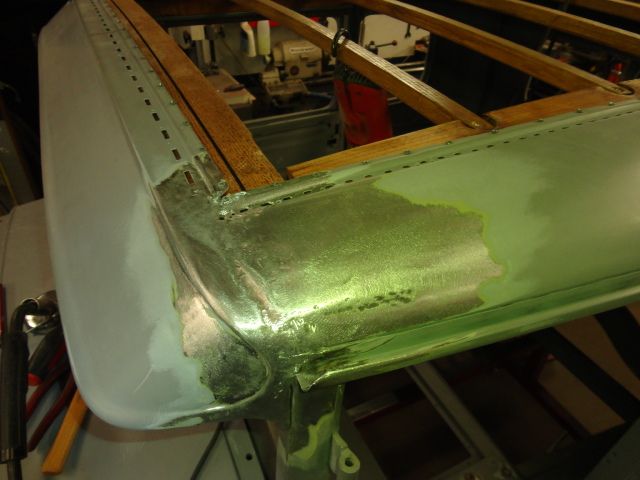
    Here I have ground everything down, but cannot get to the backside to metal finish.
    I have a cure for that.
    Rich
    stovens likes this.

  8. #23
    RichB's Avatar
    RichB is offline CHR Member Visit my Photo Gallery
    Join Date
    Sep 2013
    Location
    Portage
    Car Year, Make, Model: 31 A Coupe
    Posts
    567

    [IMG][/IMG]

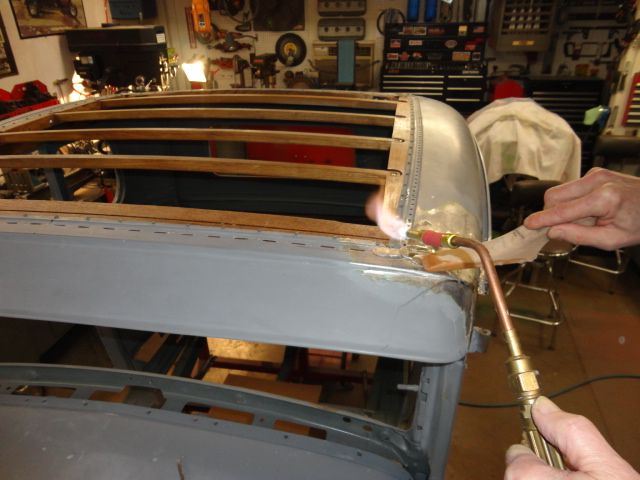
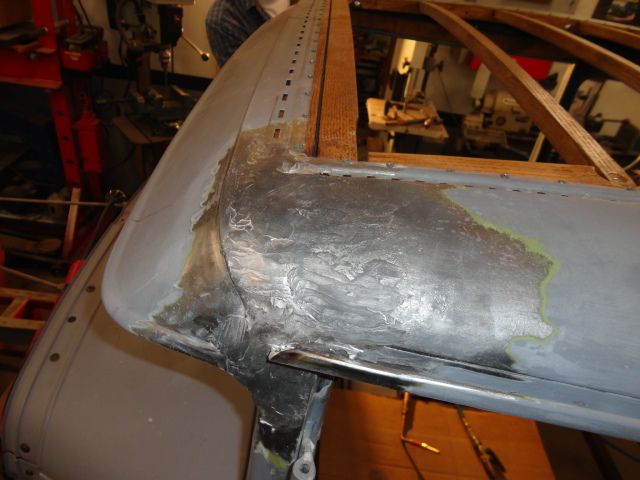
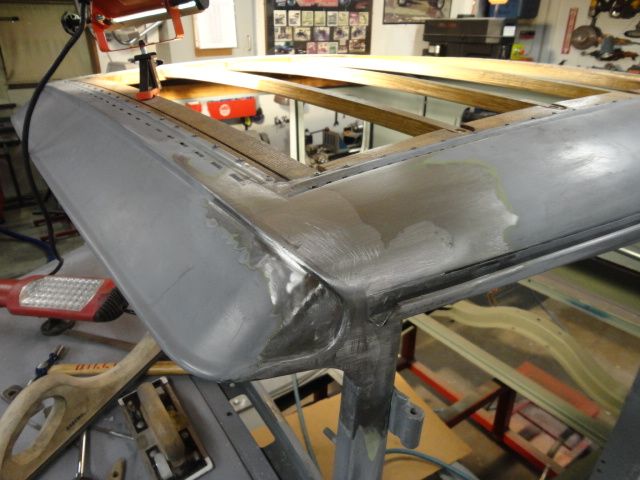
    Been awhile since Iv'e done any leading! I have seen too many Model A's with
    cracks in this area so no bondo.
    [IMG][/IMG]
    Ready to work it.
    Rich

  9. #24
    RichB's Avatar
    RichB is offline CHR Member Visit my Photo Gallery
    Join Date
    Sep 2013
    Location
    Portage
    Car Year, Make, Model: 31 A Coupe
    Posts
    567

    [IMG][/IMG]

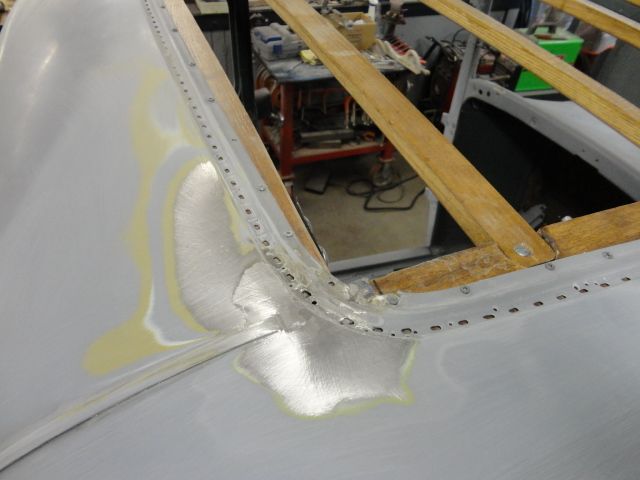
    Heres the finished area.
    [IMG][/IMG]
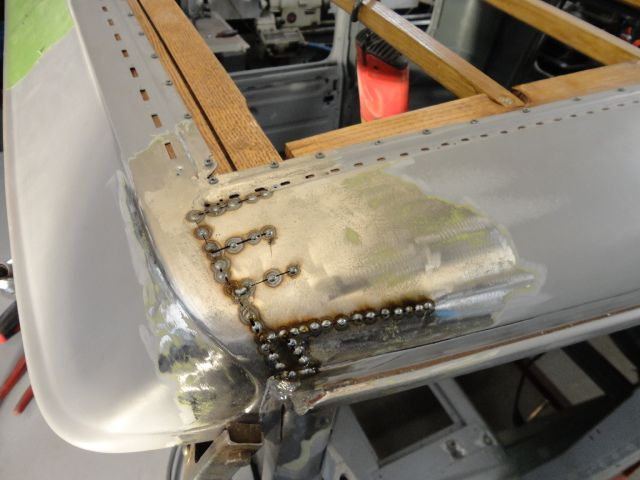
    I had repaired all the cracks in the top opening, now I welded the area at the
    Tee moulding area, and a little lead to cover it. I also ground the Tee moulding
    back about a 1/2" to clear future vinyl top trim.
    Rich

  10. #25
    RichB's Avatar
    RichB is offline CHR Member Visit my Photo Gallery
    Join Date
    Sep 2013
    Location
    Portage
    Car Year, Make, Model: 31 A Coupe
    Posts
    567

    [IMG][/IMG]

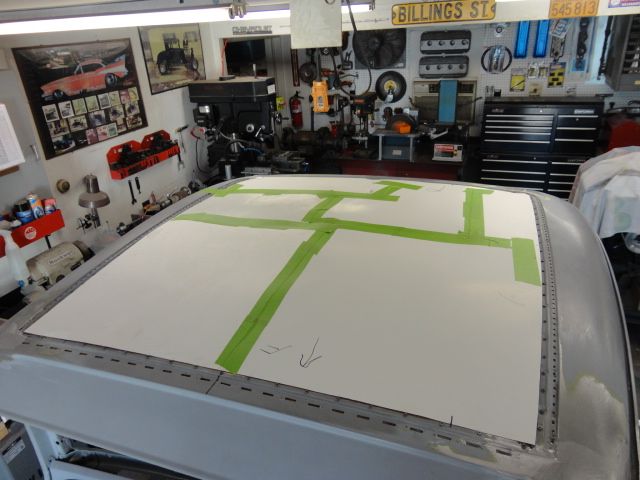
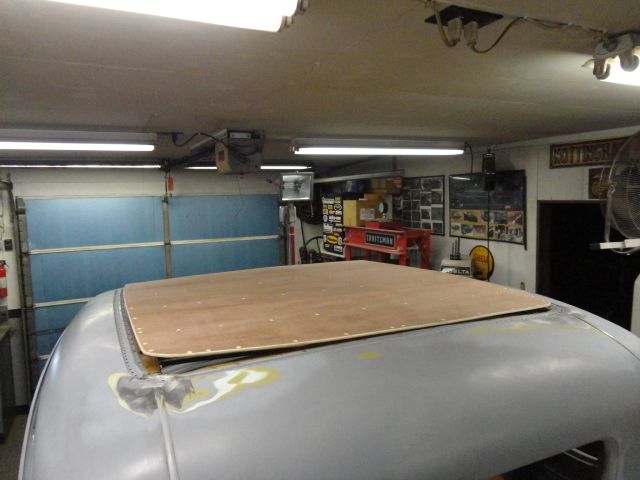
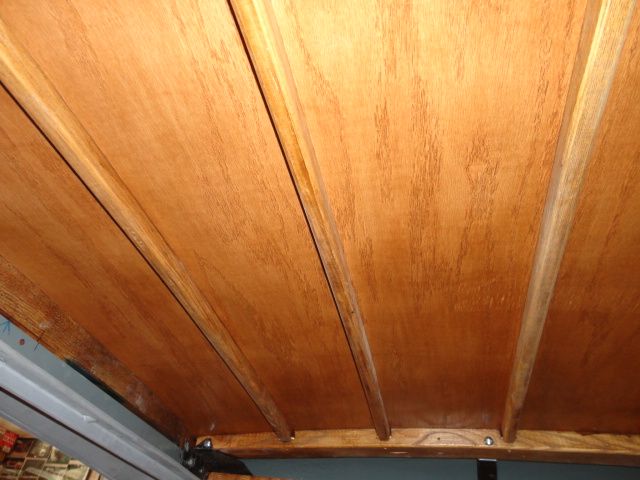
    I decided I did not want chicken wire, or a steel insert. I like the look of the
    fabric top. Here I'm making the pattern for 1/4" oak paneling.
    [IMG][/IMG]
    Of course it will not lay flat, but I'll fix that.
    Rich

  11. #26
    RichB's Avatar
    RichB is offline CHR Member Visit my Photo Gallery
    Join Date
    Sep 2013
    Location
    Portage
    Car Year, Make, Model: 31 A Coupe
    Posts
    567

    [IMG][/IMG]

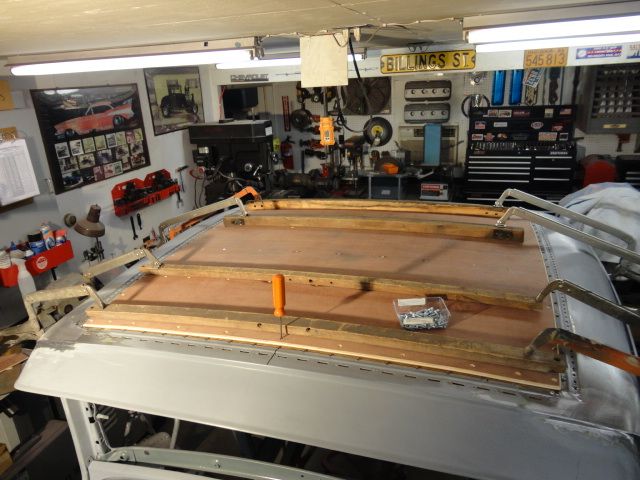
    I soaked it in water, clamped it, and let dry in place.
    [IMG][/IMG]
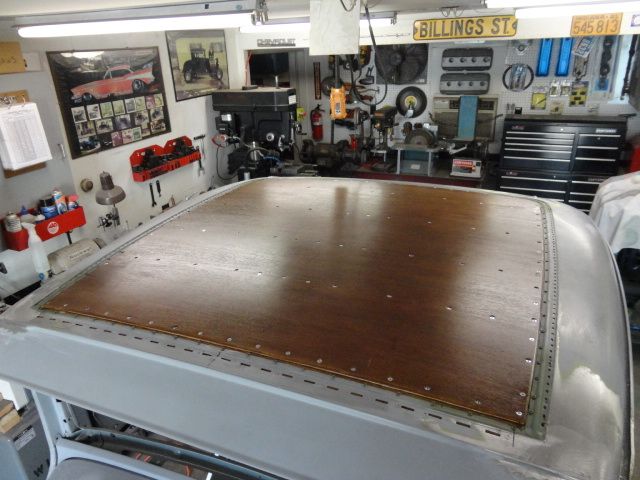
    Heres the finished piece after staining, and polyurathane.
    Rich
    stovens likes this.

  12. #27
    RichB's Avatar
    RichB is offline CHR Member Visit my Photo Gallery
    Join Date
    Sep 2013
    Location
    Portage
    Car Year, Make, Model: 31 A Coupe
    Posts
    567

    [IMG][/IMG]
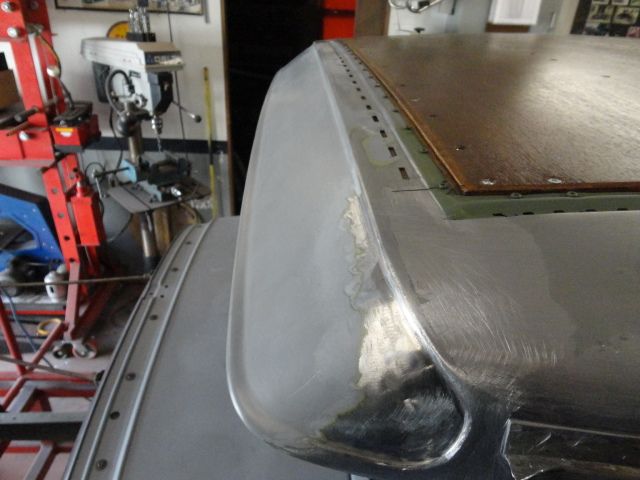
    I tapered the leading edge for a smooth transition for the top install.
    [IMG][/IMG]
    This shows the the side panel relationship.
    [IMG][/IMG]
    I may not install a headliner!
    Rich
    stovens likes this.

  13. #28
    firebird77clone's Avatar
    firebird77clone is offline CHR Member Visit my Photo Gallery
    Join Date
    Sep 2005
    Location
    Hamilton
    Car Year, Make, Model: 69 nomad, 73 charger, 74 vega
    Posts
    3,900

    Leave the headliner out, that's pretty.

    Slinging lead, now that's old school.
    .
    Education is expensive. Keep that in mind, and you'll never be terribly upset when a project goes awry.
    EG

  14. #29
    RichB's Avatar
    RichB is offline CHR Member Visit my Photo Gallery
    Join Date
    Sep 2013
    Location
    Portage
    Car Year, Make, Model: 31 A Coupe
    Posts
    567

    Thanks for the comments guys, and I'll probably never puy a headliner in it Firebird.

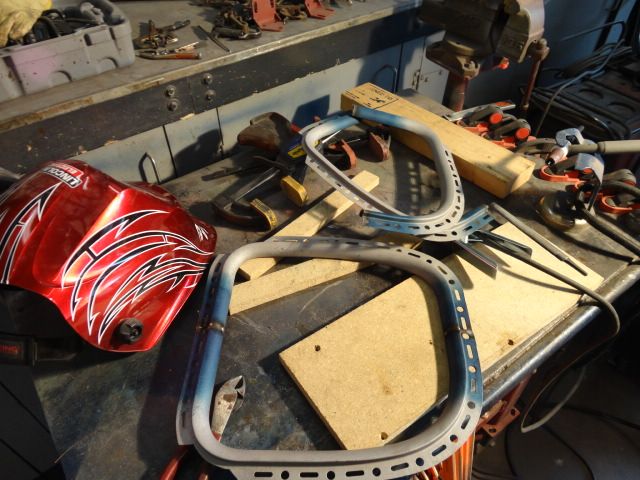
    [IMG][/IMG]

    I started cutting all the window frames.

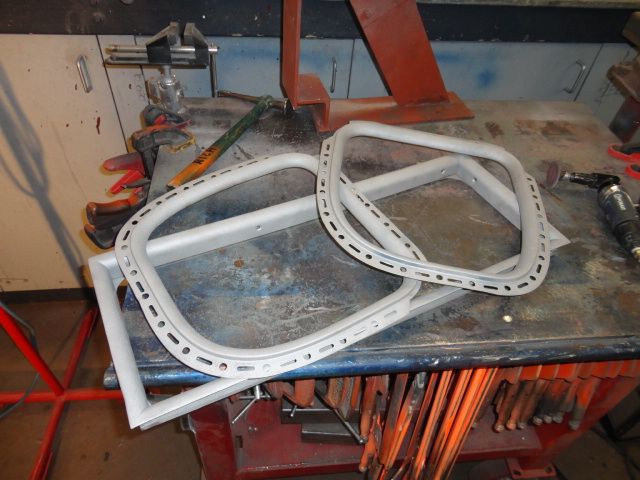
    [IMG][/IMG]

    All done, welds ground, sand blasted ready for etch prime.

    Rich

  15. #30
    RichB's Avatar
    RichB is offline CHR Member Visit my Photo Gallery
    Join Date
    Sep 2013
    Location
    Portage
    Car Year, Make, Model: 31 A Coupe
    Posts
    567

    [IMG][/IMG]

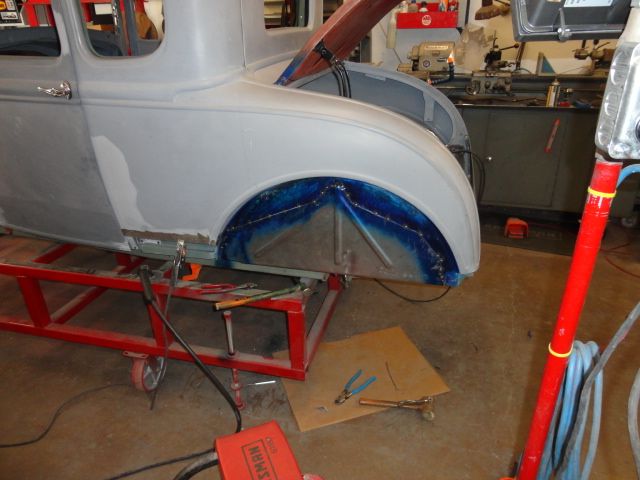
    Started replacing the rear panels, none of the reveal would line up with the originals so
    I replaced a bigger piece than I had planned on. I wrapped the bottom edge around
    the sub frame like the originals.

    [IMG][/IMG]
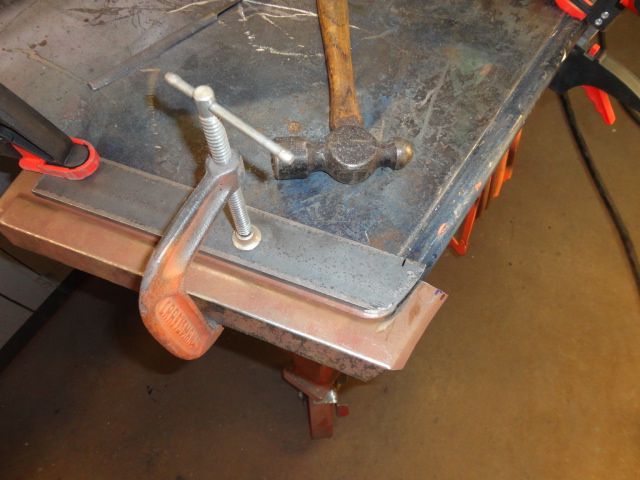
    Here I'm beating the snot out of the patch panel to make the reveal line match
    the one on the car.

Reply To Thread
Page 2 of 35 FirstFirst 1 2 3 4 5 6 7 8 9 10 12 ... LastLast

Posting Permissions

  • You may not post new threads
  • You may not post replies
  • You may not post attachments
  • You may not edit your posts
Links monetized by VigLink