Thread: '37 Dodge sedan
Hybrid View
-
01-13-2018 09:02 PM #1
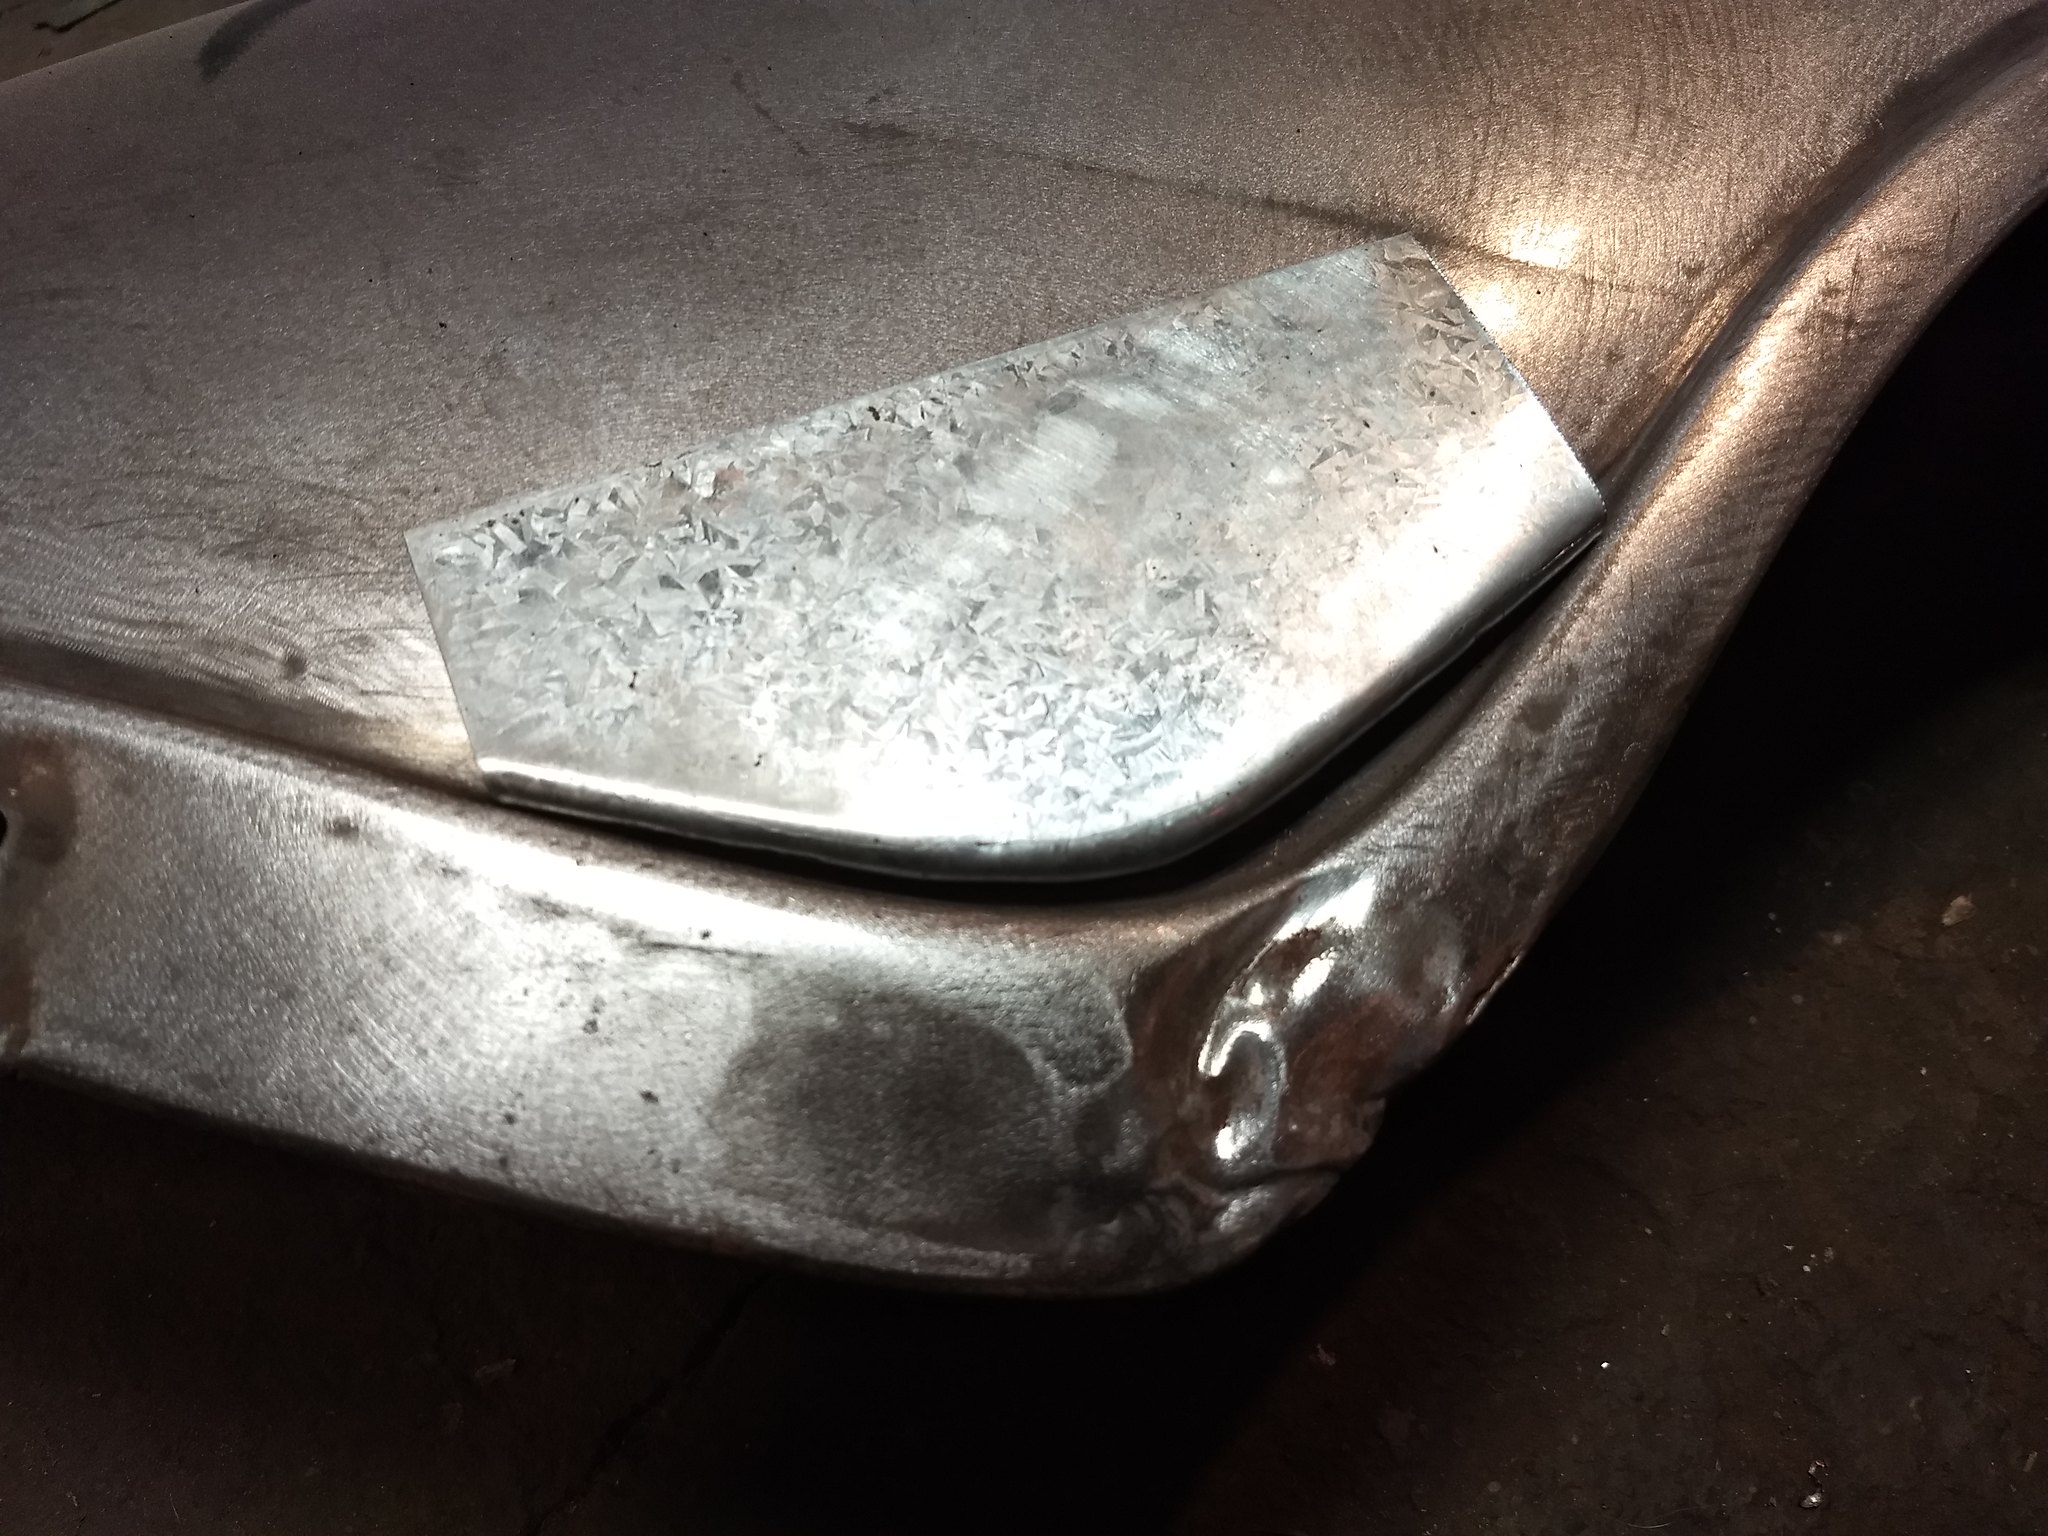
Started repairing some of the damage I found in the rear fenders. Patch panels are hard to come by for these old Mopars, and usually pretty expensive, so I decided to try my hand at making my own. I'm pretty proud of this one, as I've been dreading it since I discovered the lead that was piled up thick on top of it.
 IMG_20180113_154126594 by Ryan Mazingo, on Flickr
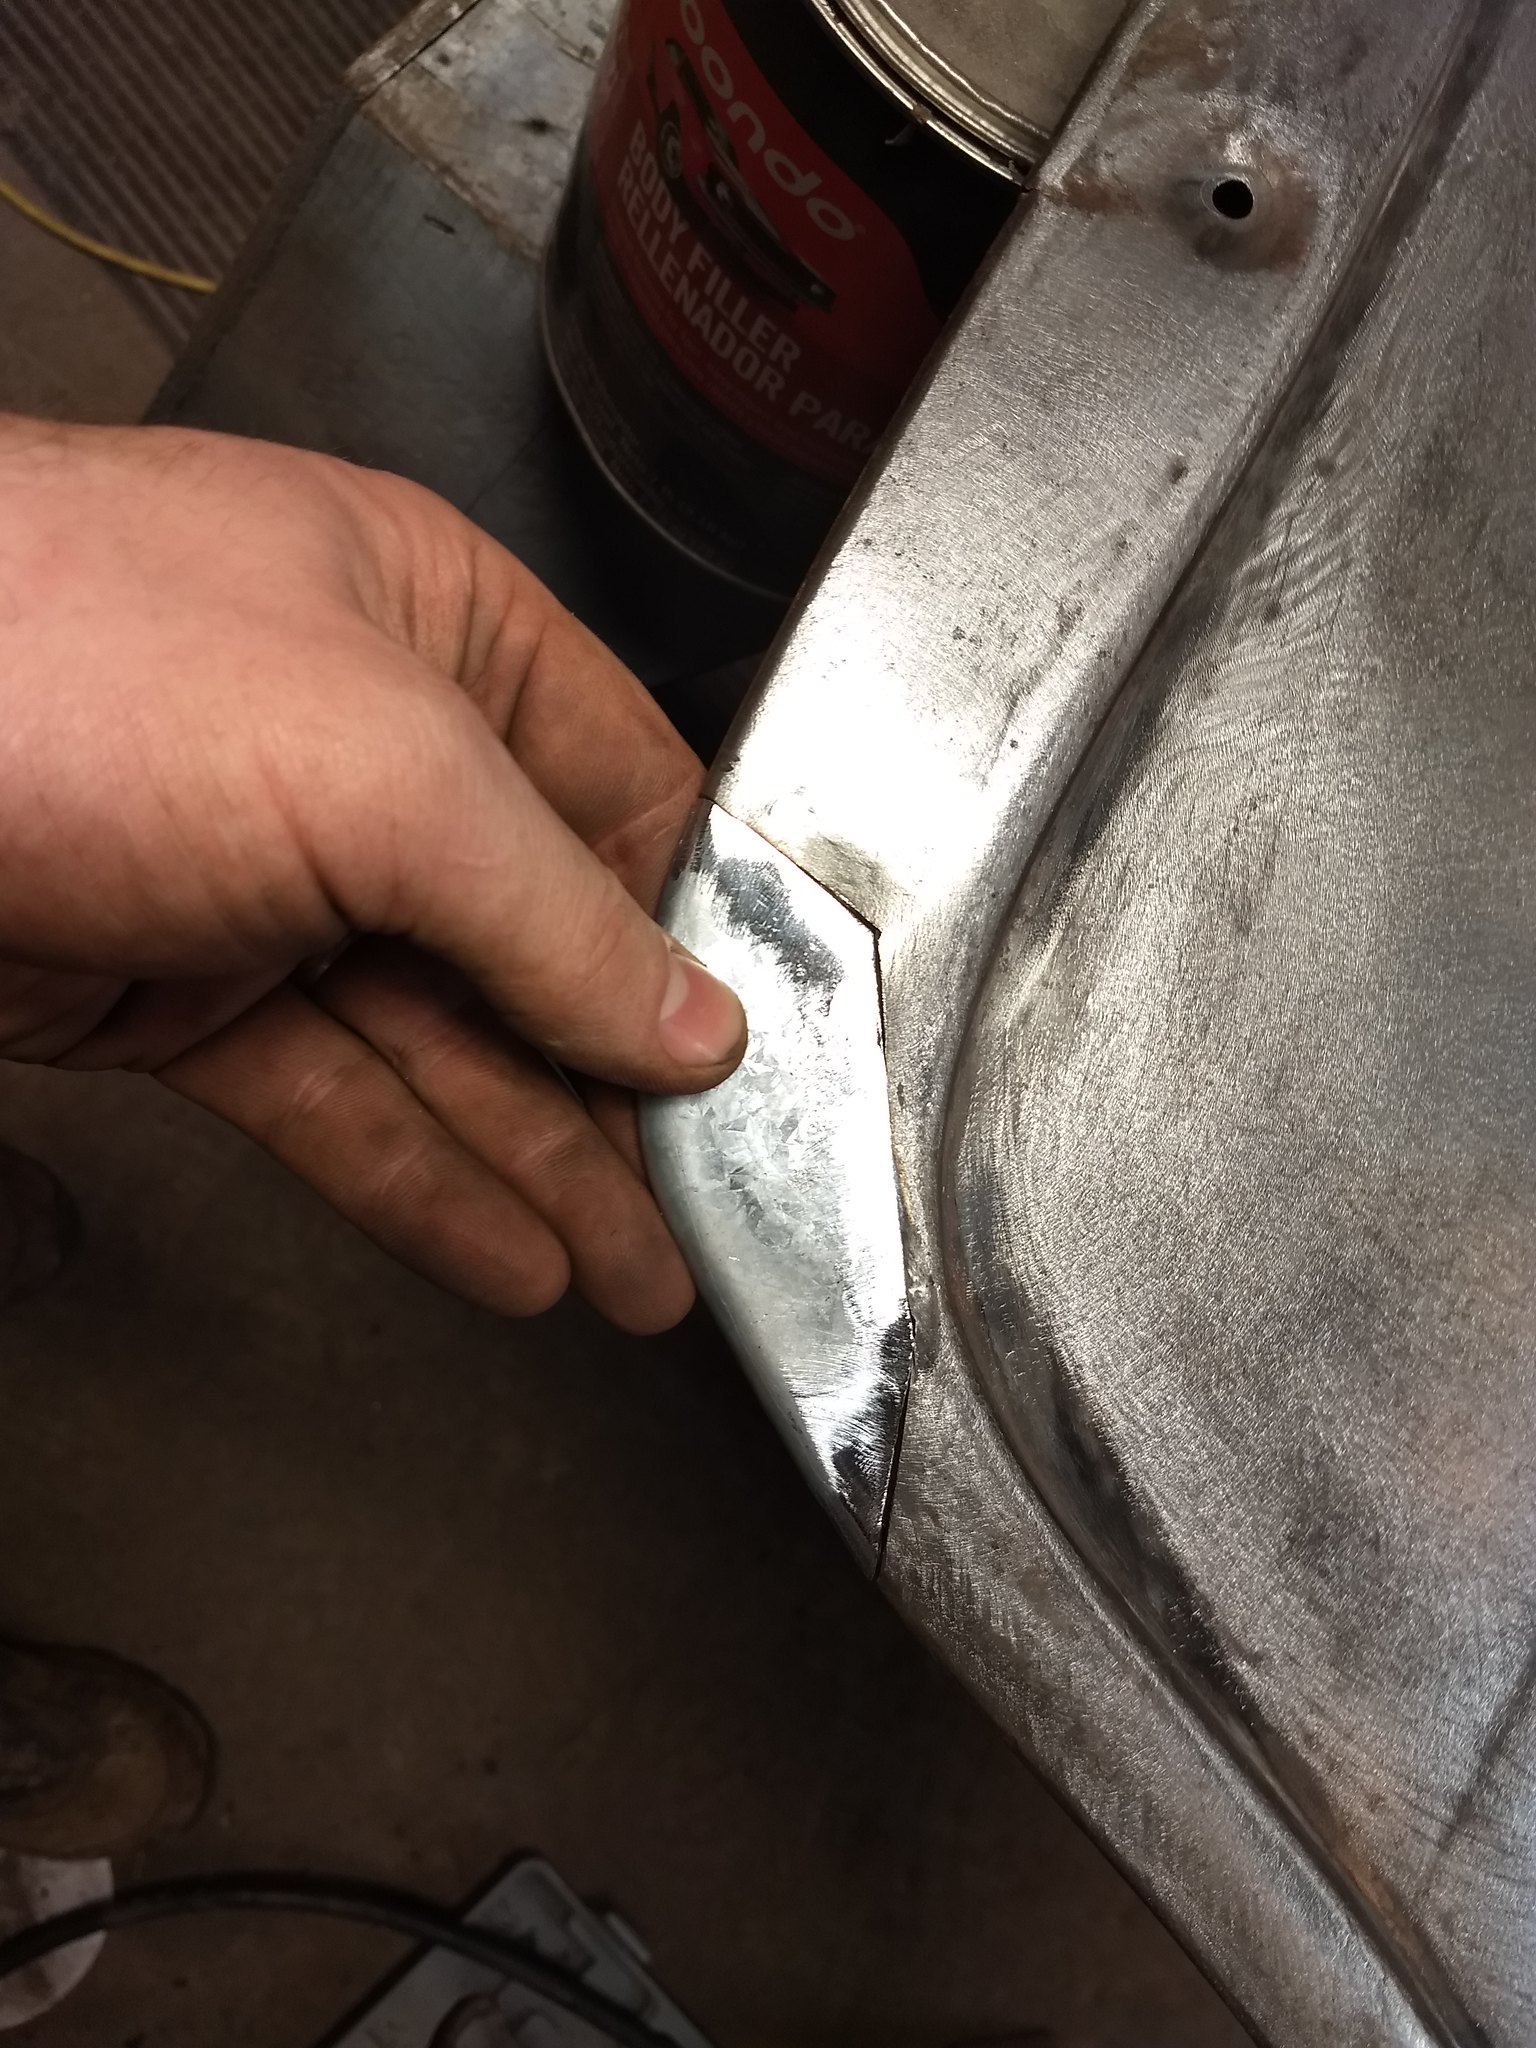
I had to make the patch 3 different times in order to get it right without damaging it beyond repair. I first held the flat sheet metal up to the opposite fender to trace the shape I needed. I then cut the patch about 3/4" oversized and went to work with various body hammers, dollies and my wooden work bench. This is the wheel arch of the fender, so the edge has to be rolled over itself. Once I got the basic curve hammered to about 30° or so I stuck it in my shrinker to take up some of the bend that was created in the flat portion forming the roll. I used the shank of a Phillips screwdriver to imitate the wire inside the roll and hammered the remaining metal down while keeping the rolled edge. The reason it took me 3 attempts to get it right is that I knew I had to shrink through the curve, because the panel naturally wants to curve where it has to end up flat, but I didn't know at what point I'd run out of room to fit it in the shrinker without dimpling the flat part of the patch. At some point I knew I'd reach a point where I couldn't access it inside the rolled edge, so the shrinking had to be done before then. With all that complete, I removed the offending portion of fender, scribed my patch to fit the hole and filed the edges for a perfect fit.
 IMG_20180113_162144303 by Ryan Mazingo, on Flickr
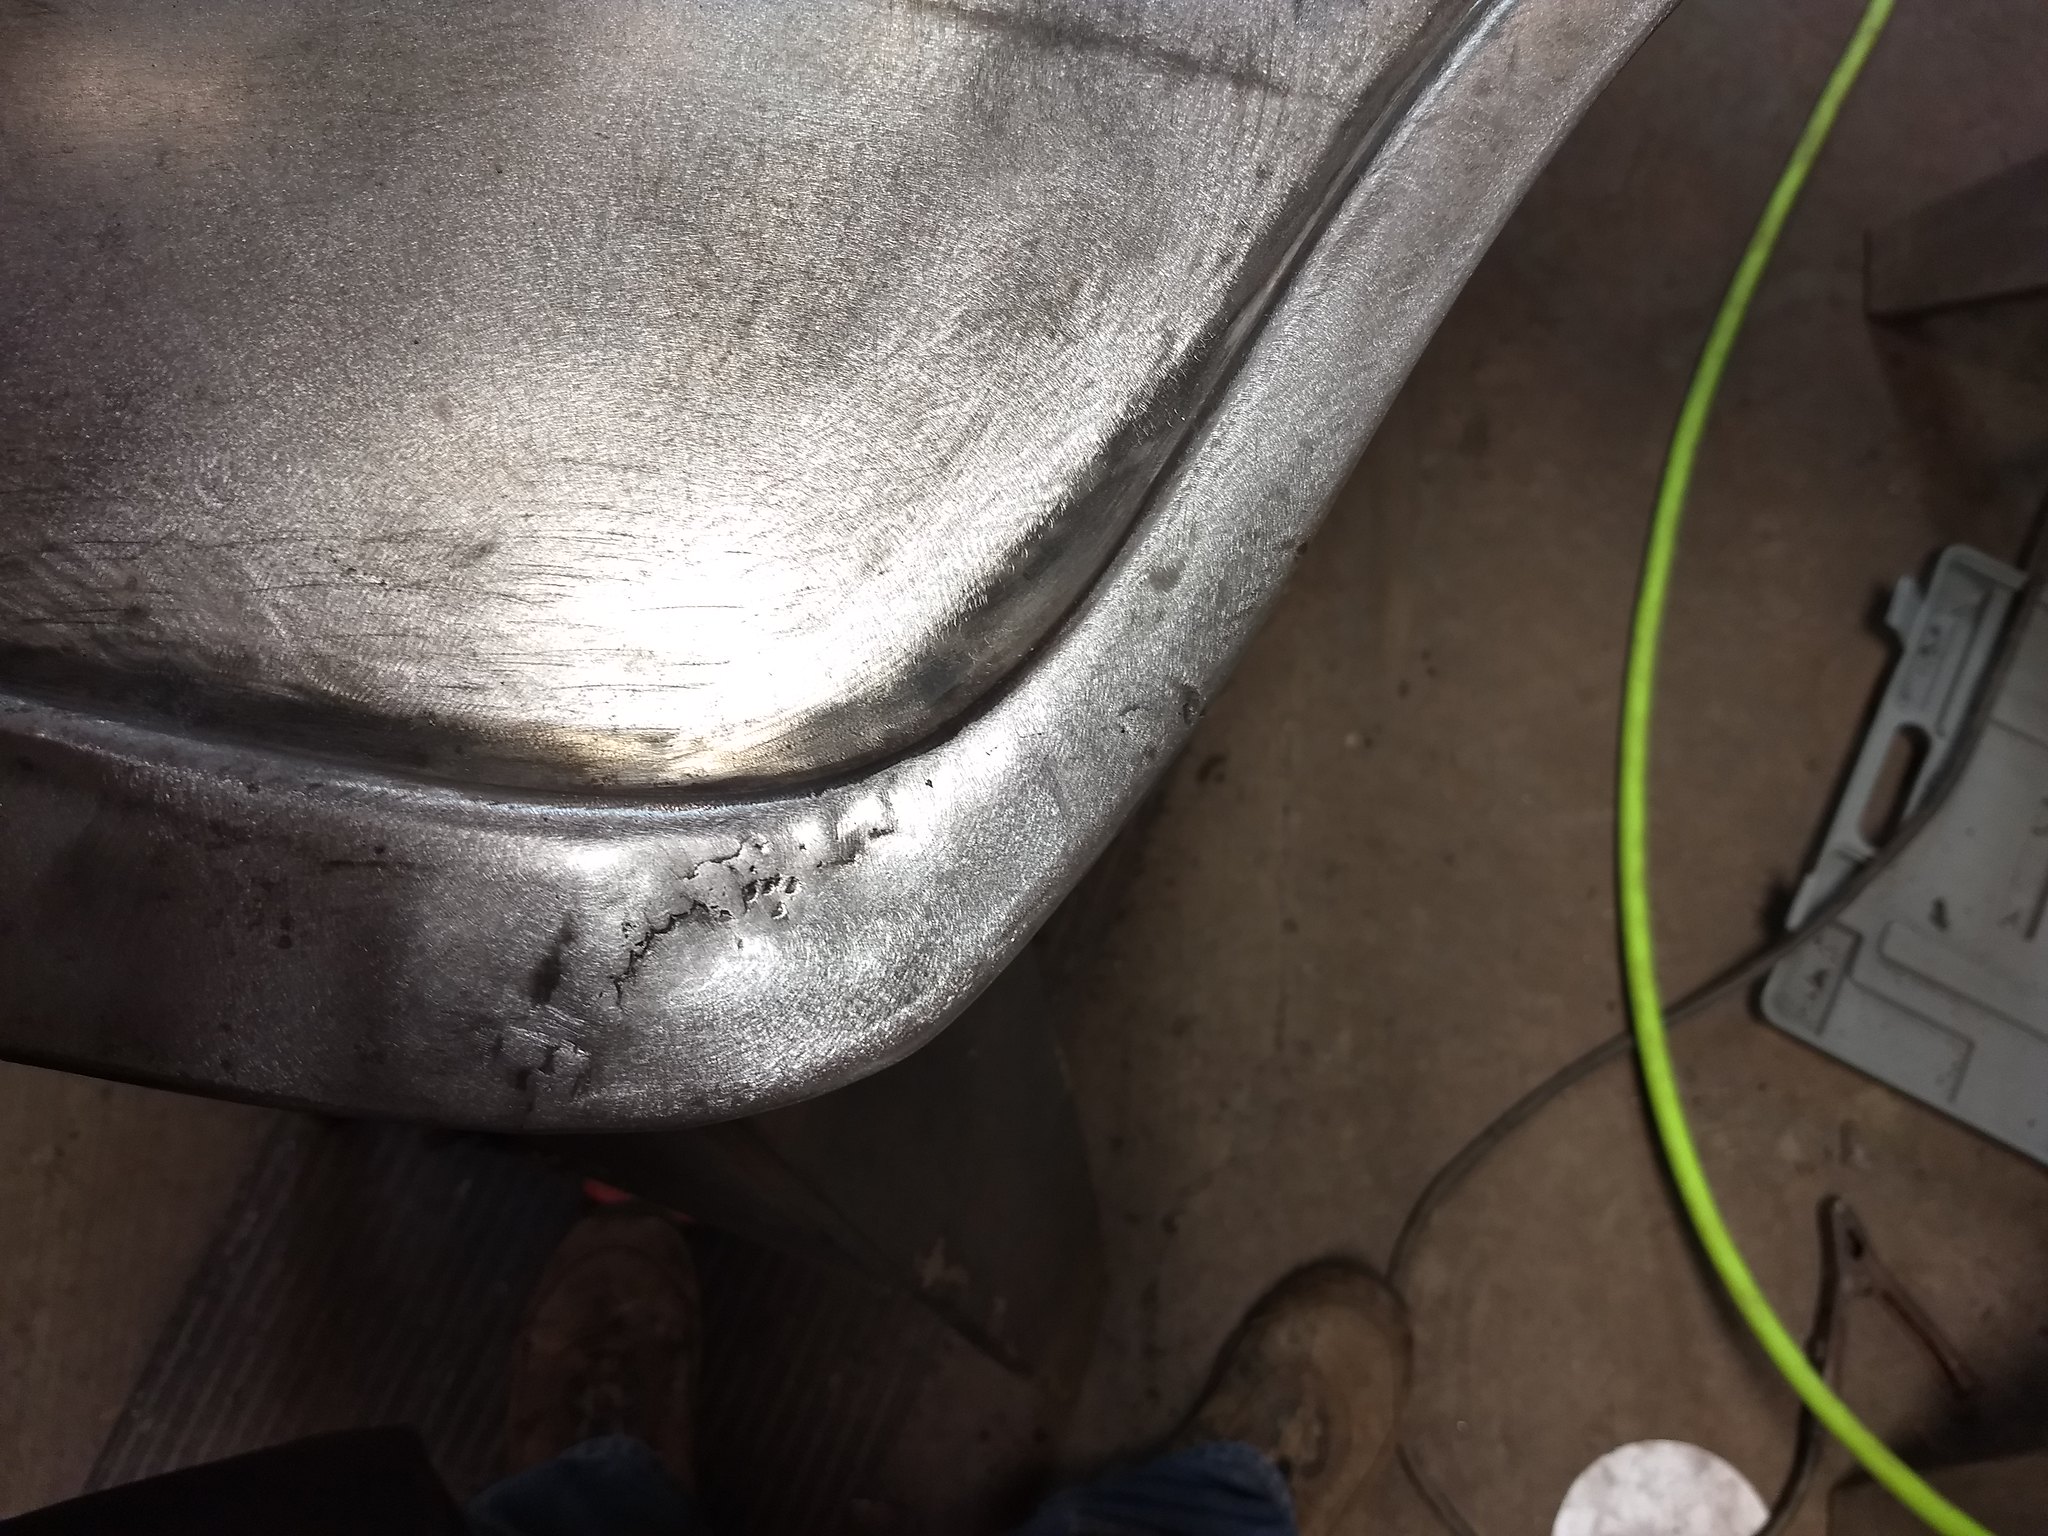
All that was left to do is weld it in and grind the welds flush. Unfortunately, the motor on my compressor is crapping out on me, so I wasn't able to finish grinding before the overload tripped it and I couldn't grind anymore. Decided a hot shower and a cold drink sounded better than cussing about a compressor, so I'll finish it up tomorrow.
 IMG_20180113_170012545 by Ryan Mazingo, on Flickr
Last edited by PNW Rodder; 01-14-2018 at 03:32 PM.


 322Likes

 LinkBack URL
 About LinkBacks
 Reply With Quote

The first model car I built was a 32 Ford roadster by Revell in the mid 50's.
How did you get hooked on cars?