


 1Likes
Thread: Aluminum Hood repair?


Results 1 to 7 of 7
 LinkBack URL
 About LinkBacks
-
08-20-2012 07:05 PM #1
 CHR Member

- Join Date
- Apr 2007
- Location
- Austin
- Car Year, Make, Model: 1966 Mustang Fastback
- Posts
- 396
Aluminum Hood repair?
My son purchased a wrecked 2005 Mustang, the aluminum hood is buckled and turned down in the front. Can it be repaired? New ones are $900.00 and used $700.00, though he found one on Craigslist for $100.00 but it was sold.
Tom
-
Advertising

- Google Adsense
- REGISTERED USERS DO NOT SEE THIS AD
-
08-21-2012 04:51 AM #2
CHR Member/Contributor
- Join Date
- Jul 2003
- Location
- Madison
- Car Year, Make, Model: '67 Ranchero, '57 Chevy, '82 Camaro,
- Posts
- 21,160
Hey Tom, how have you been?? Sure, it can be repaired, much the same process as a steel hood--just bear in mind that it's aluminum and softer, therefore will stretch much easier then steel. Usually works best to separate the skin from the inner structure, repair the inner structure, then knock out the dents and wrinkles on the skin, re glue the skin, then do the finish work. If you have any plastic mallets they will do a lot less damage then dingin' on the aluminum with a regular body hammer on the bigger dents... Takes a lot of light hits and patience/!!!!!Yesterday is history, tomorrow is a mystery, Live for Today!
Carroll Shelby
Learning must be difficult for those who already know it all!!!!
-
08-21-2012 05:26 AM #3
Global Moderator

- Join Date
- Apr 2001
- Location
- Greenville
- Car Year, Make, Model: 1970 GT 350 convertible, 289 FIA
- Posts
- 1,472
The front could have been repaired, but the buckle towards the back makes it scrap metal only.
Bill S.Instead of being part of the problem, be part of a successful solution.
-
08-21-2012 07:06 AM #4
CHR Member
- Join Date
- Feb 2006
- Location
- Bartlett
- Posts
- 6,831
search for a whole front end at salvage yards---maybe even in the color you want
-
08-21-2012 06:33 PM #5
CHR Member
- Join Date
- Jun 2008
- Location
- Leonardtown
- Car Year, Make, Model: Walking
- Posts
- 1,228
Not sure it is going to be worth the time involved, but I agree with Dave. It will be easier to repair by separating first and then straightening. Here are a couple of posts I did on dent repair, the theory may help out if you do decide to take the plunge in fixing it. The first shows the process on steel, the second on aluminum door skin.
One of the guys over on the metal shaping web sites has a neat tool he sells called a donut dolly. It works more proficiently in off-dolly shrinking a crowned panel because it supports the bottom side in more than one spot (around the perimeter) as the panel is bumped from the top in the center of the donut dolly. This would seem to be useful in body repair, especially to address high spots found after blocking primer where heat would not be as feasible.
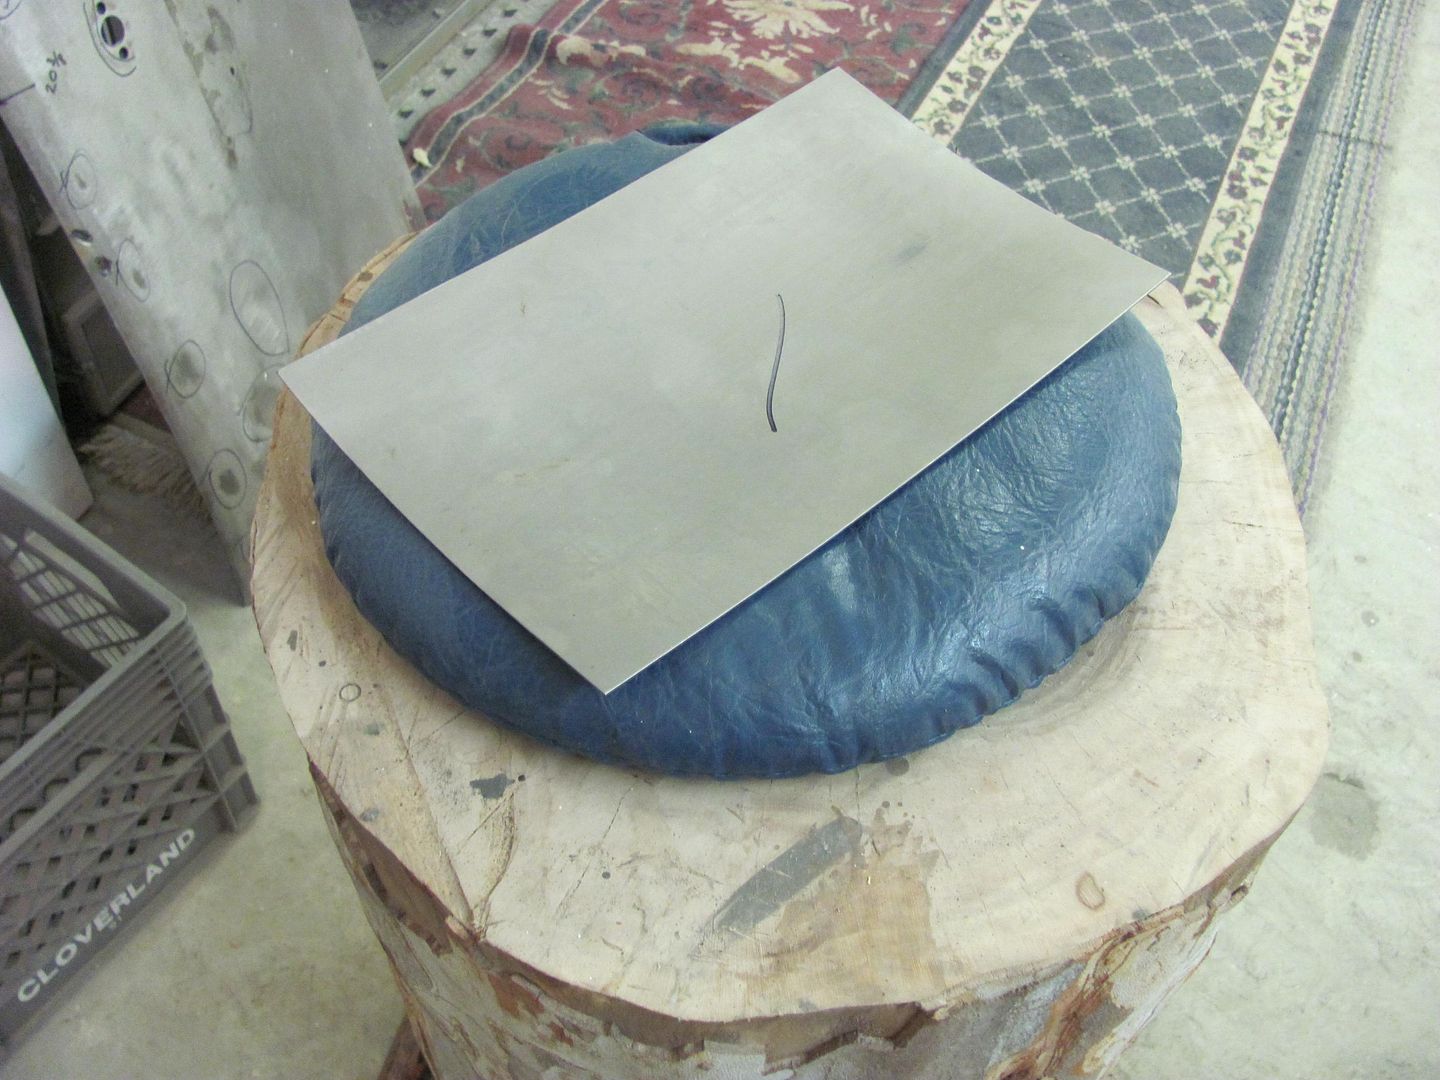
A few days ago, someone on another forum asked for advice in removing an outward roof dent. I suggested a low-buck alternative to the donut dolly, simply using a PVC pipe fitting. Where it may not work as aggressively as the donut dolly which has more mass, sometimes slower is better, especially when trying something new. I just today got around to trying this process in the shop, and rather than use the roof of something sitting here, we will use a piece of 18 ga CRS to simulate a roof.
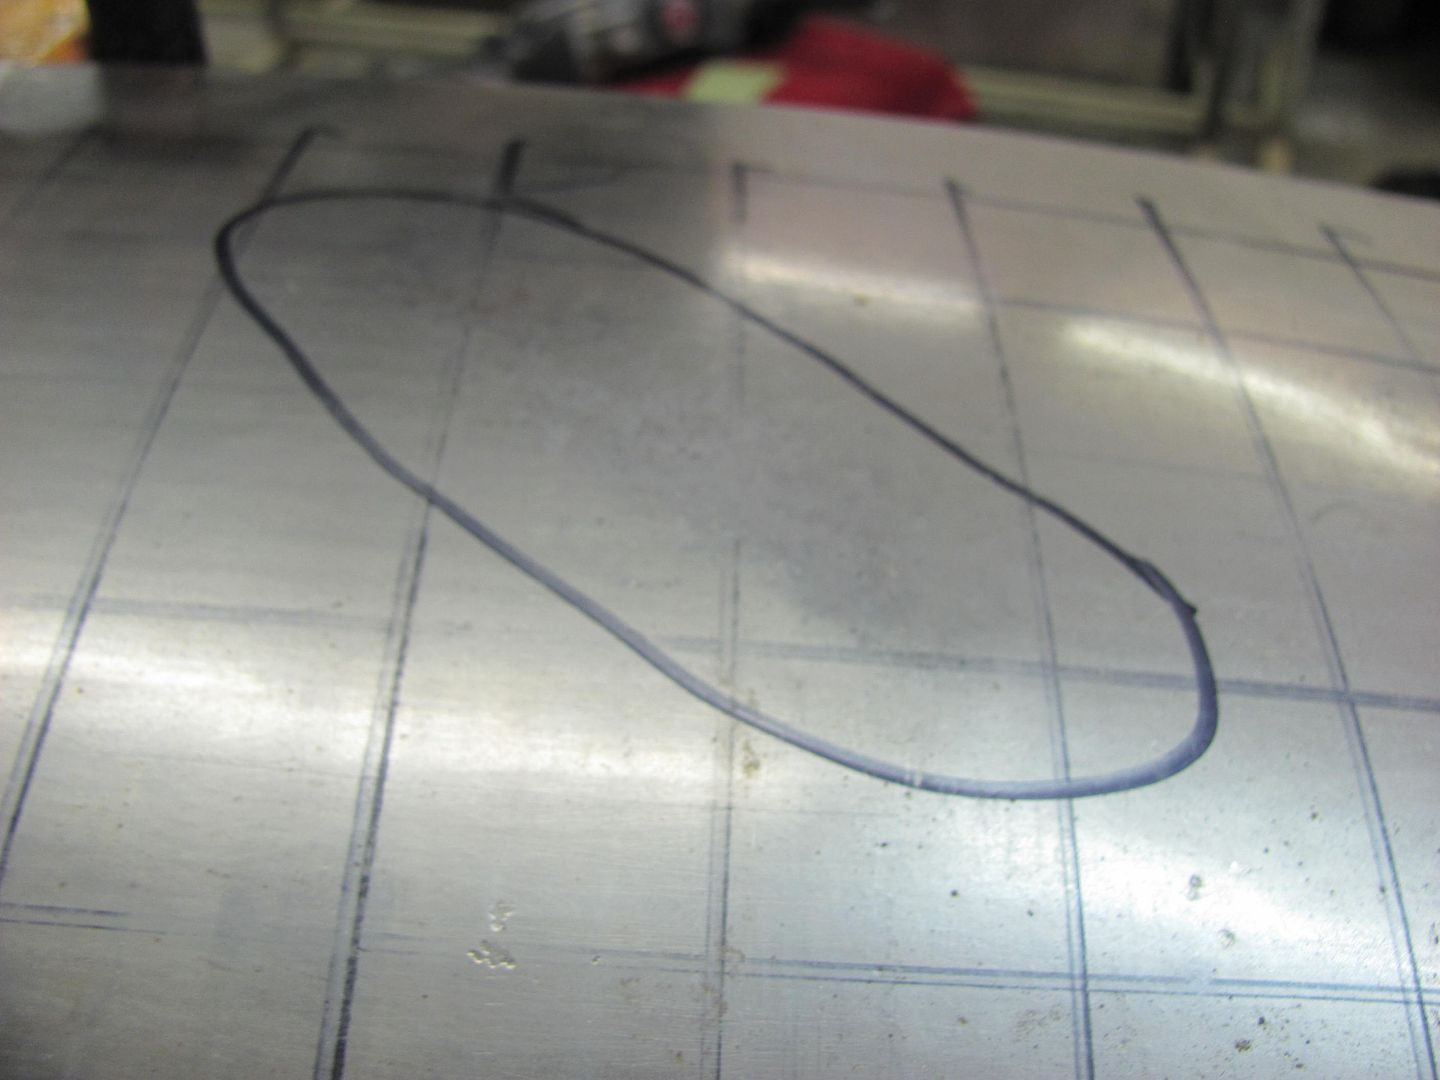
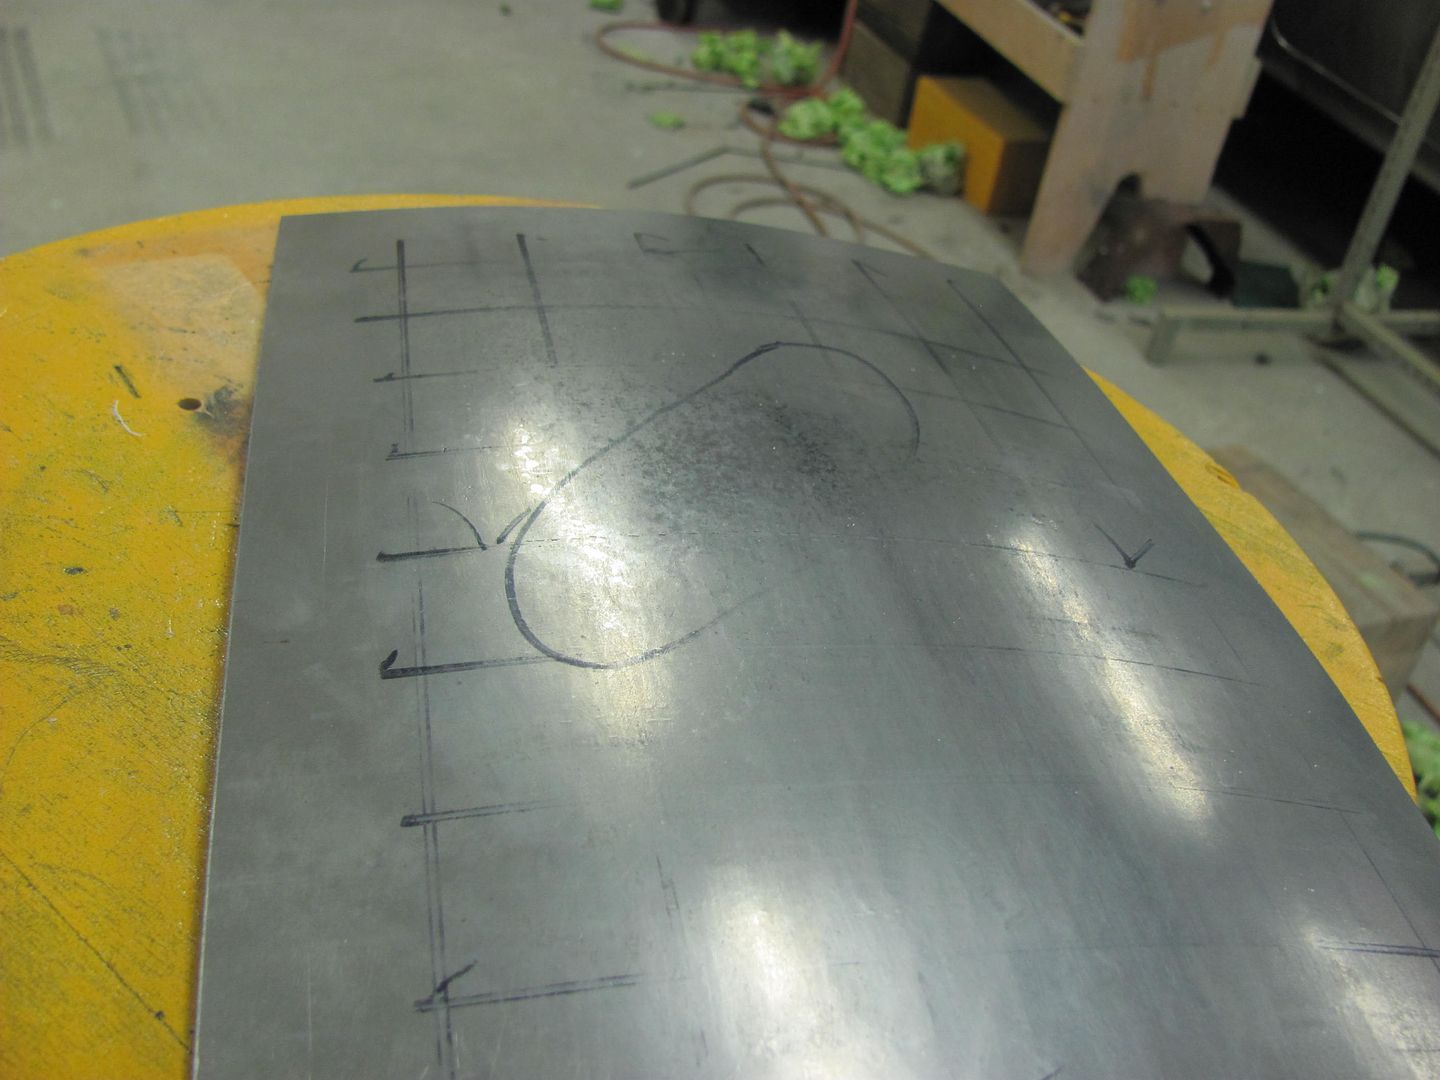
Grid layout for the Wheeling Machine, and completed "sample" roof...
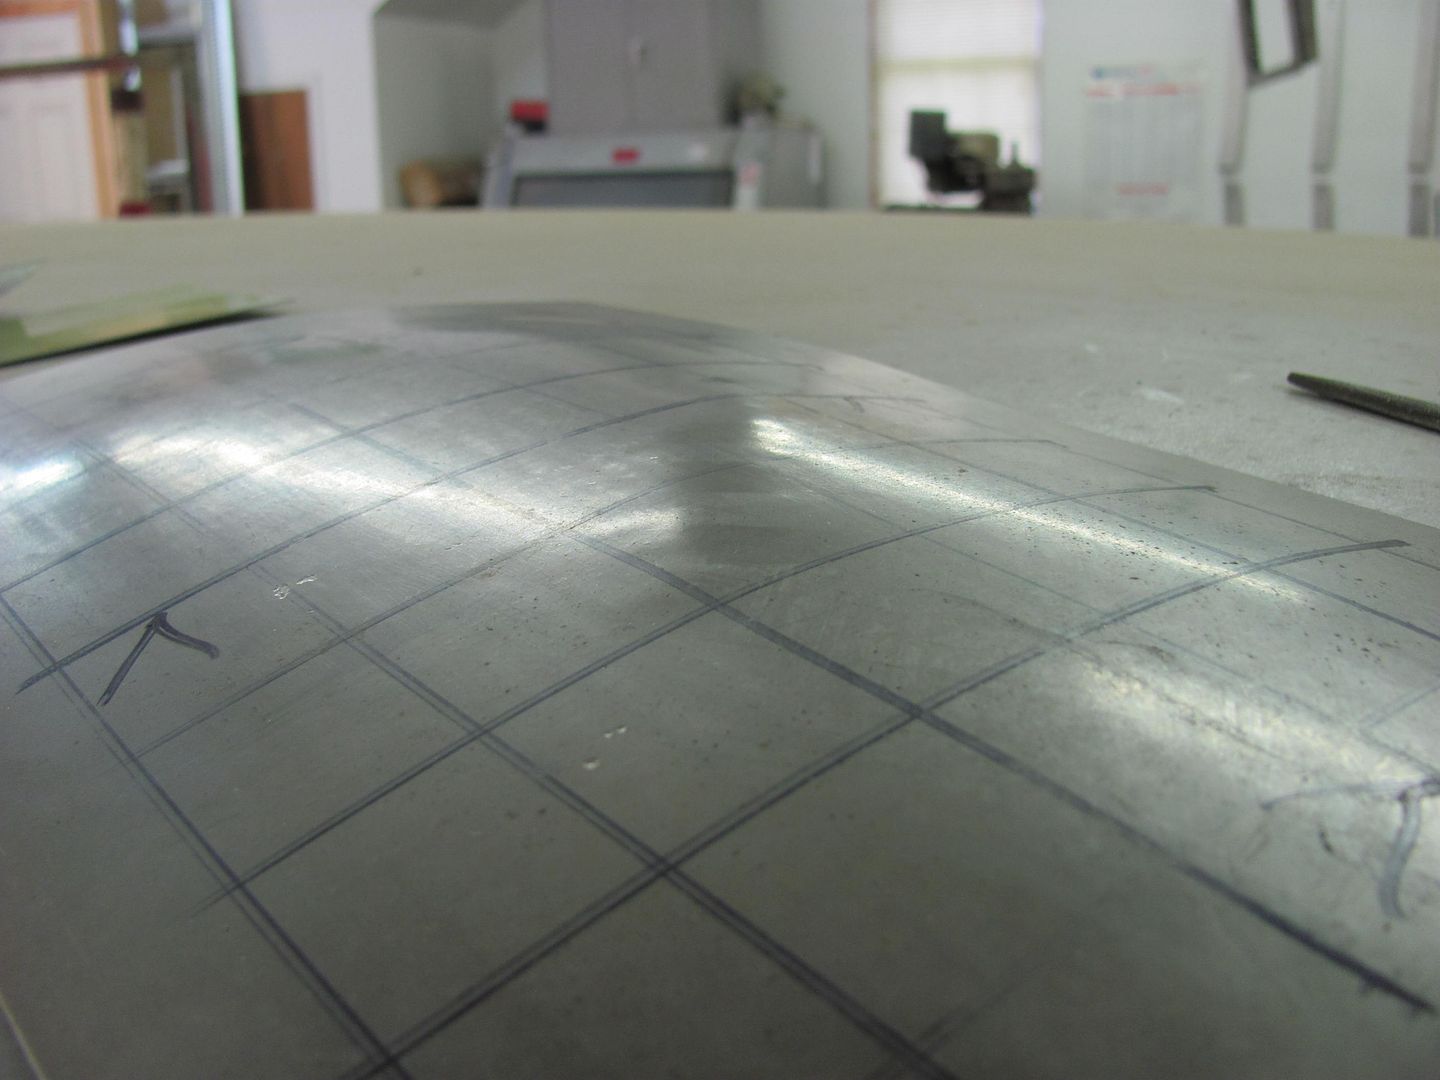
The first order of business should be to make some profile templates. In the case of an actual dented roof, use the opposite, undamaged side. This will allow you to check your progress as you go, and easily find the remaining high spots.
Using a crowned body hammer, a "dent" will be added from the back side, crossing both of our template areas.
With the dent added:
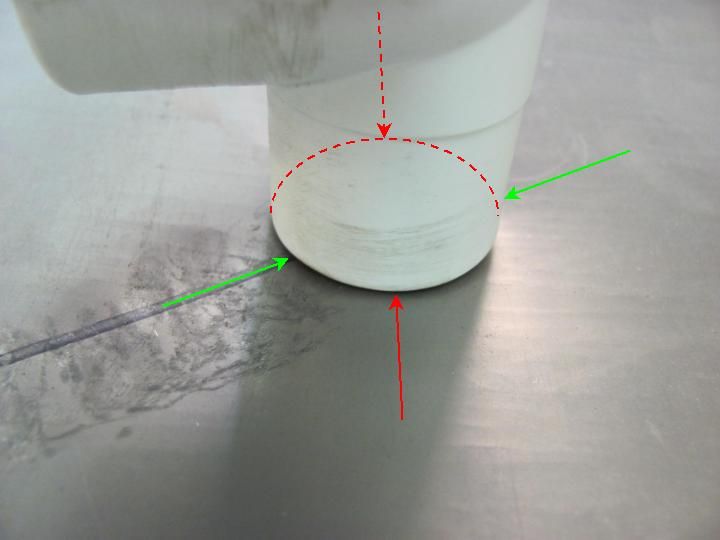
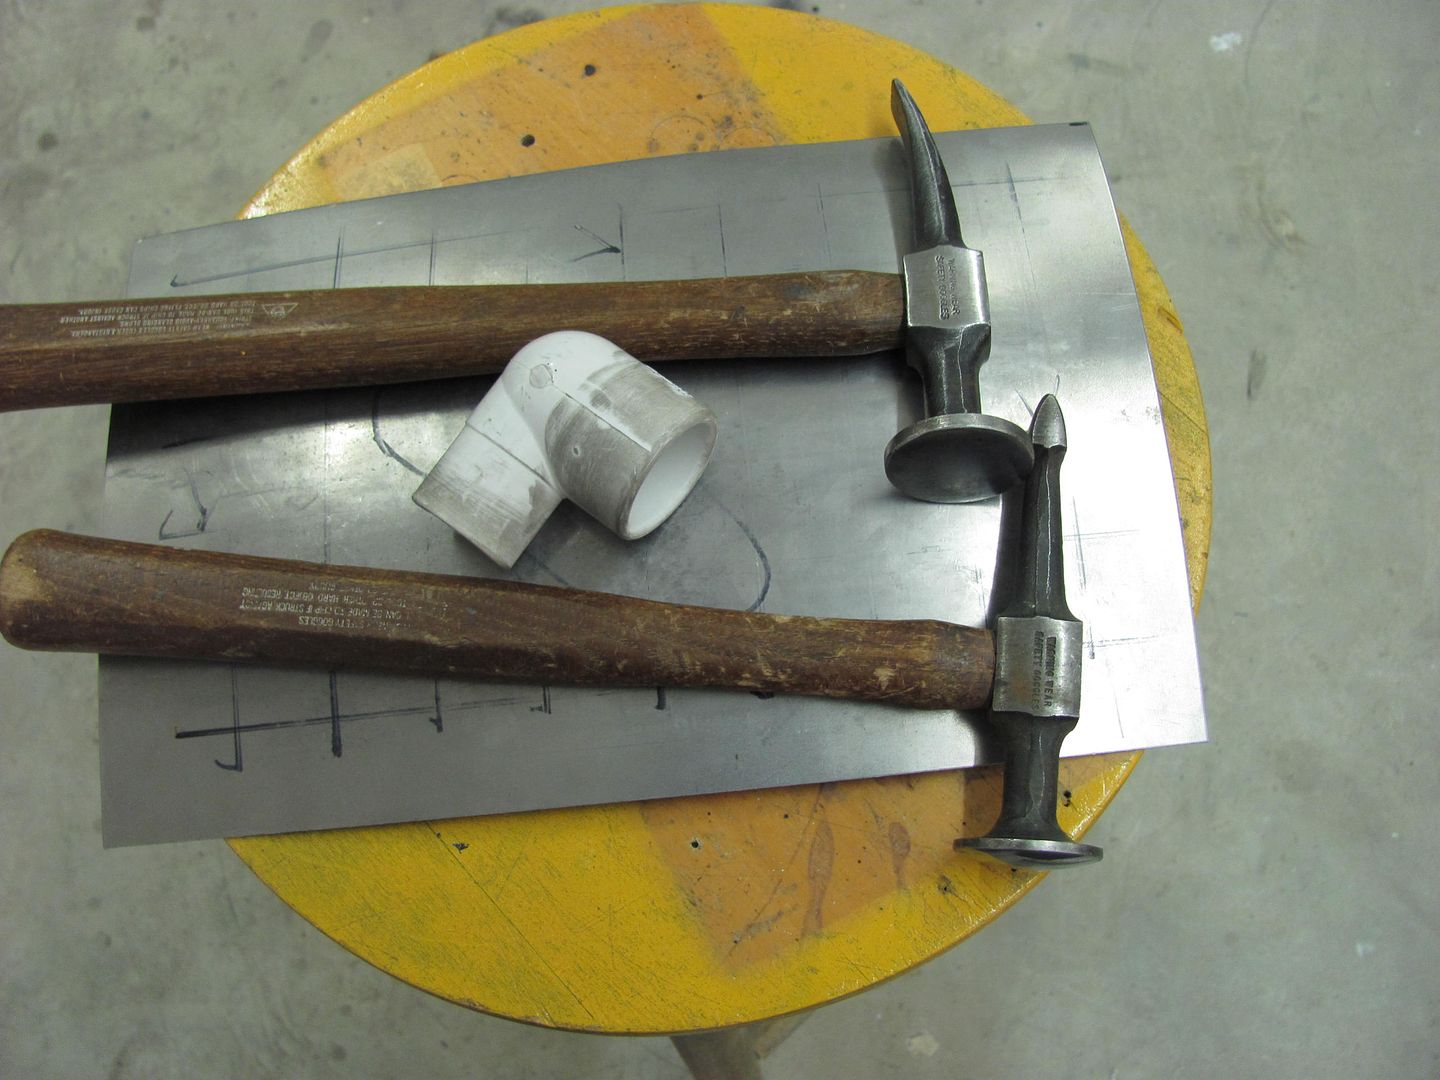
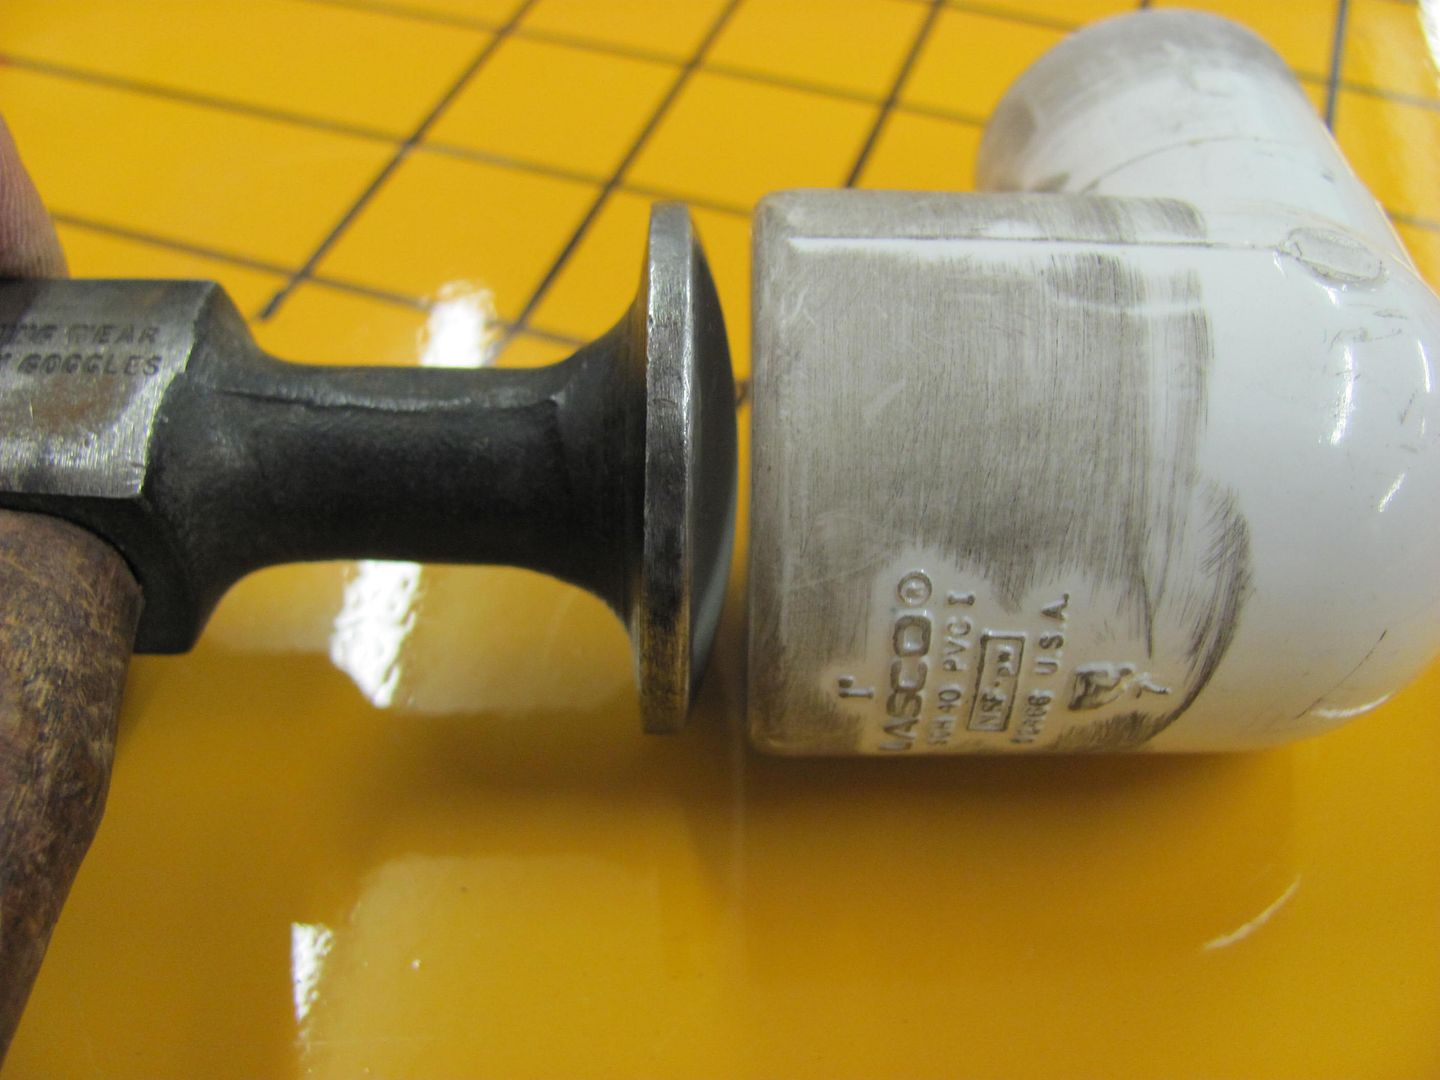
I chose to use a PVC elbow, it had two different sized ends for two tools in one. As with any body tool, they should be free of any burrs that may mar the metal surface. I also added a slight radius to the edges...

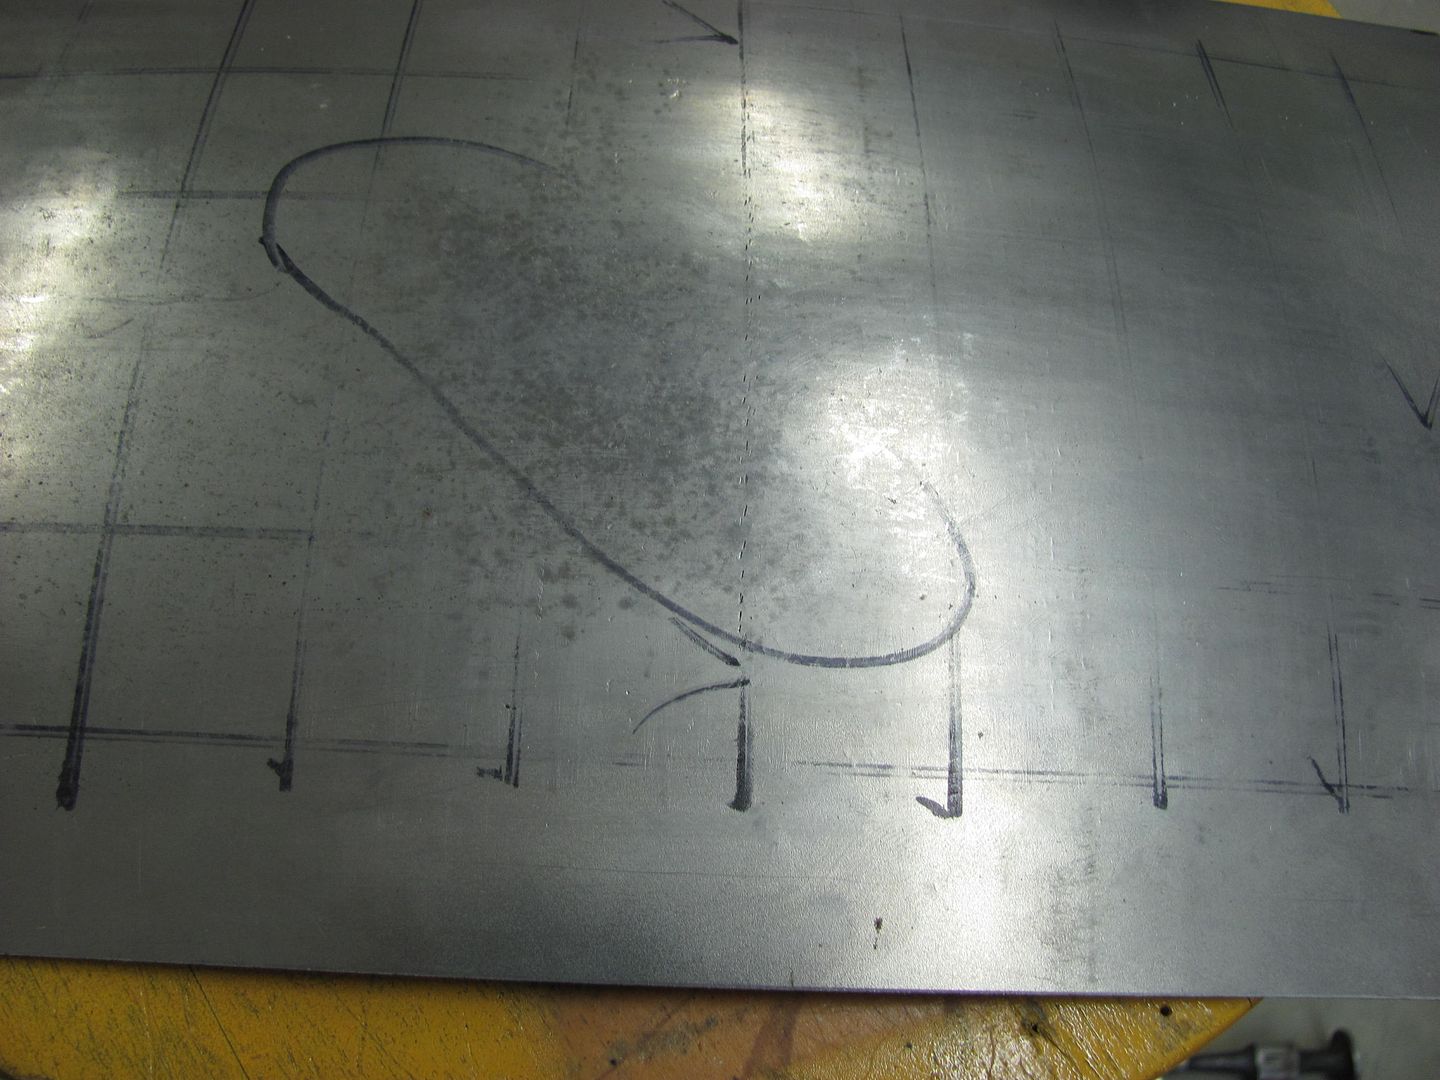
Holding the dolly against the bottom of the panel, you can see that due to the dents it only touches the panel at the red arrows. Based on off-dolly principle, the shrink would occur more prominently in the direction of the red arrows. However, since the panel stretched more in this direction during the dent "formation", this actually works in our favor.
Here are the tools we will use today:
After some off-dolly bumping:
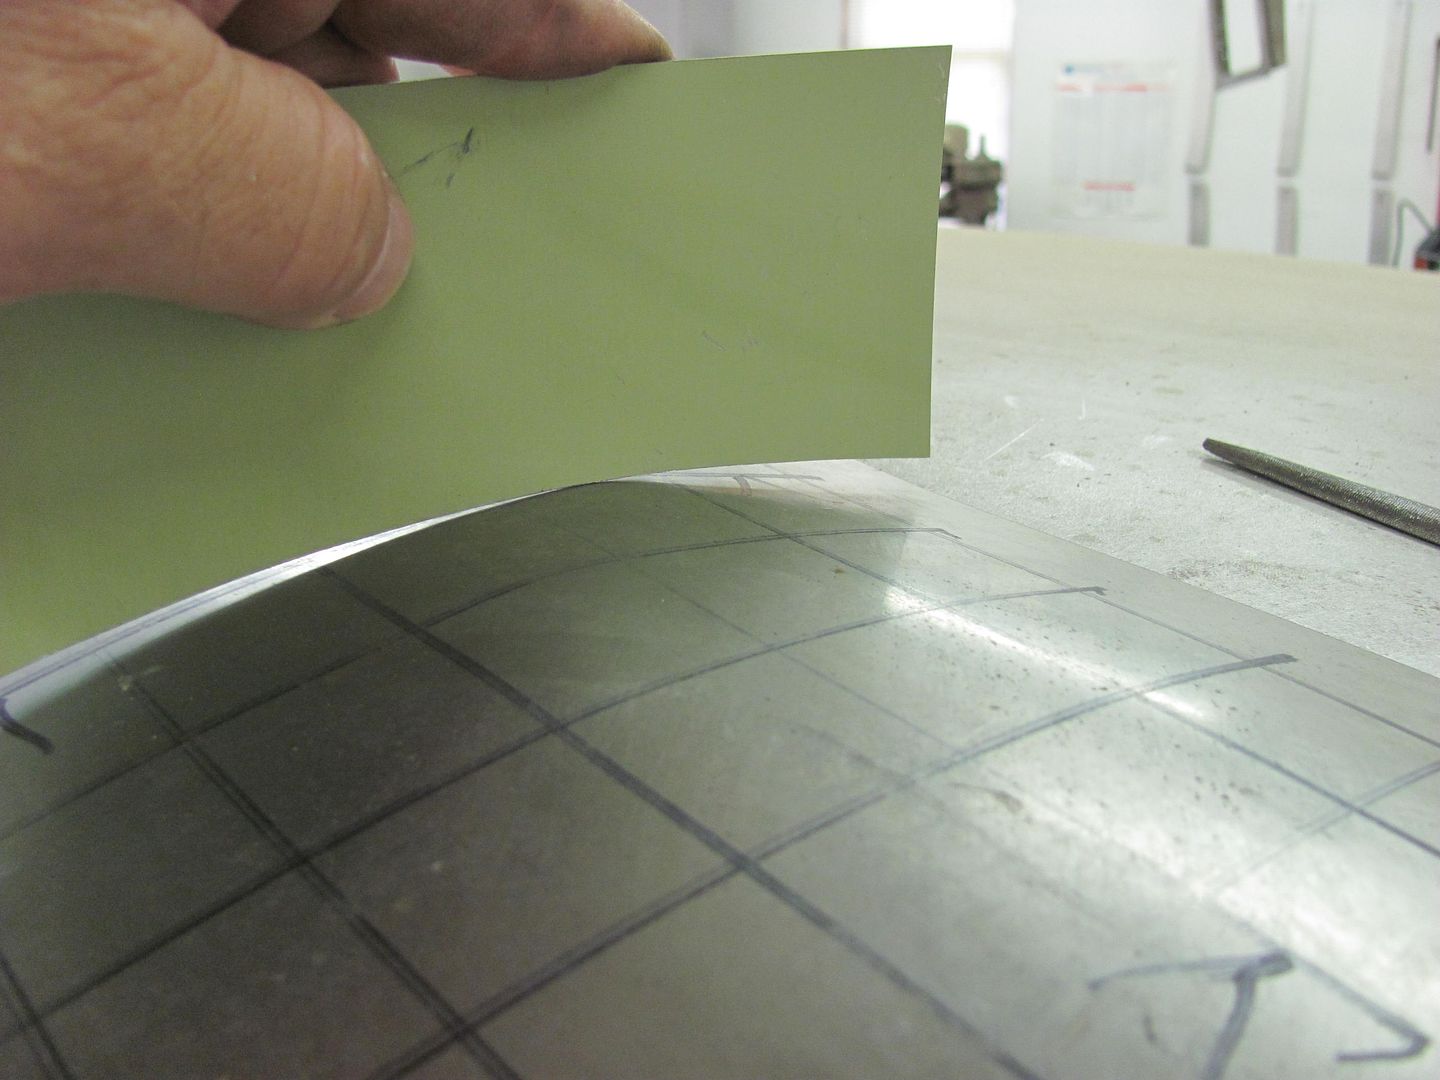
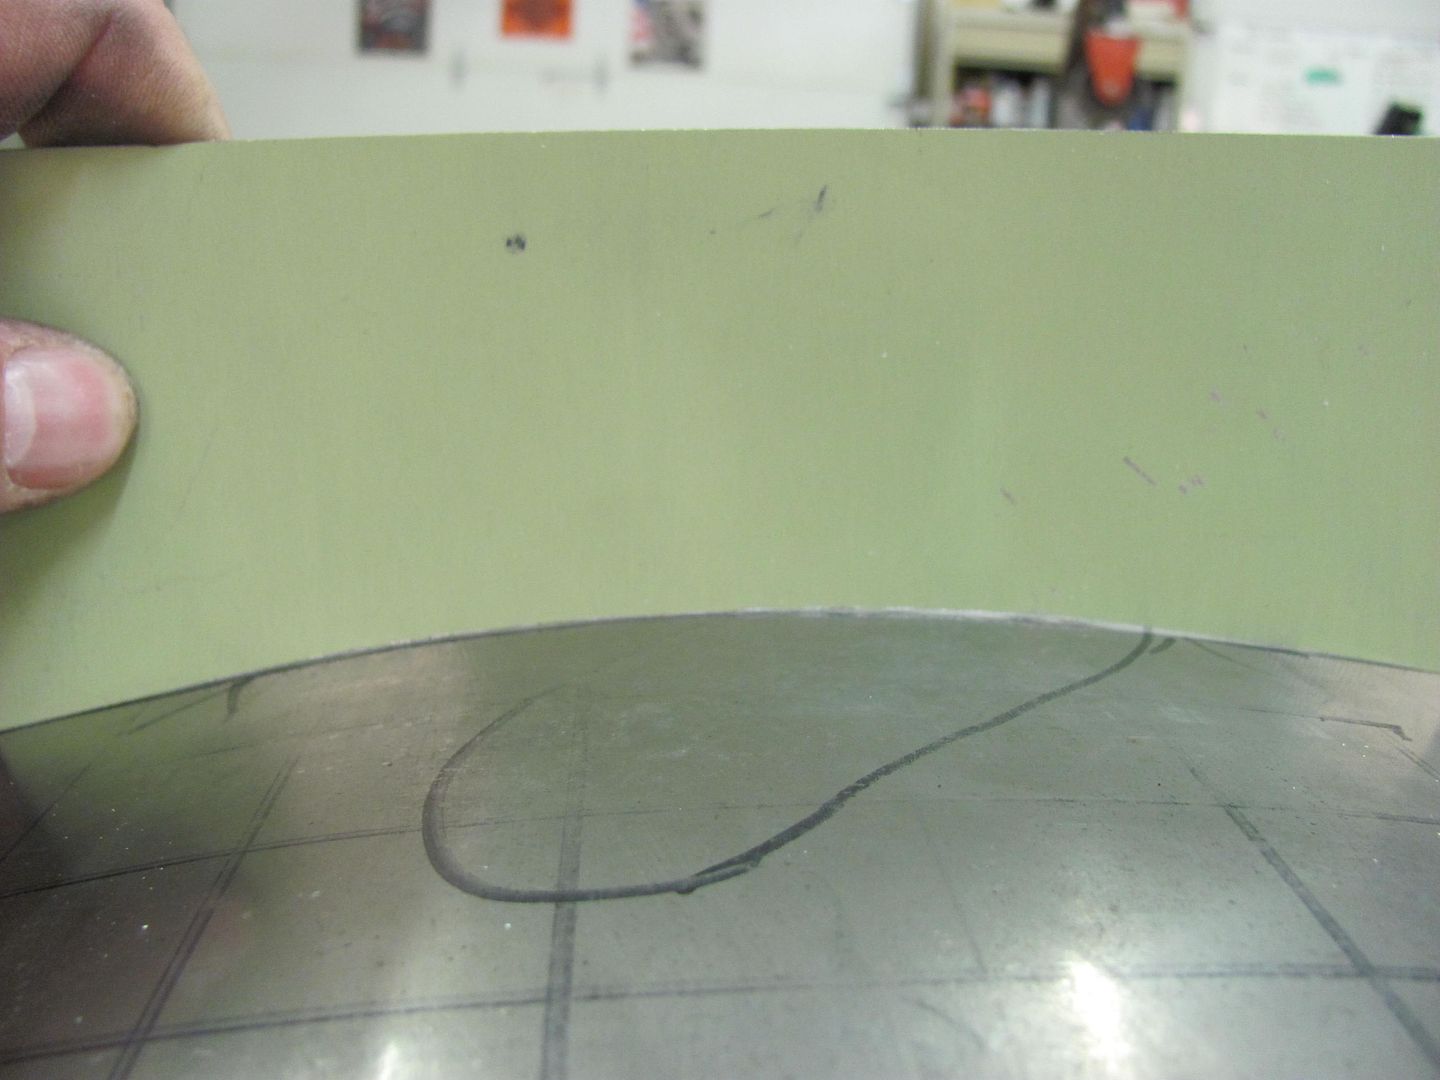
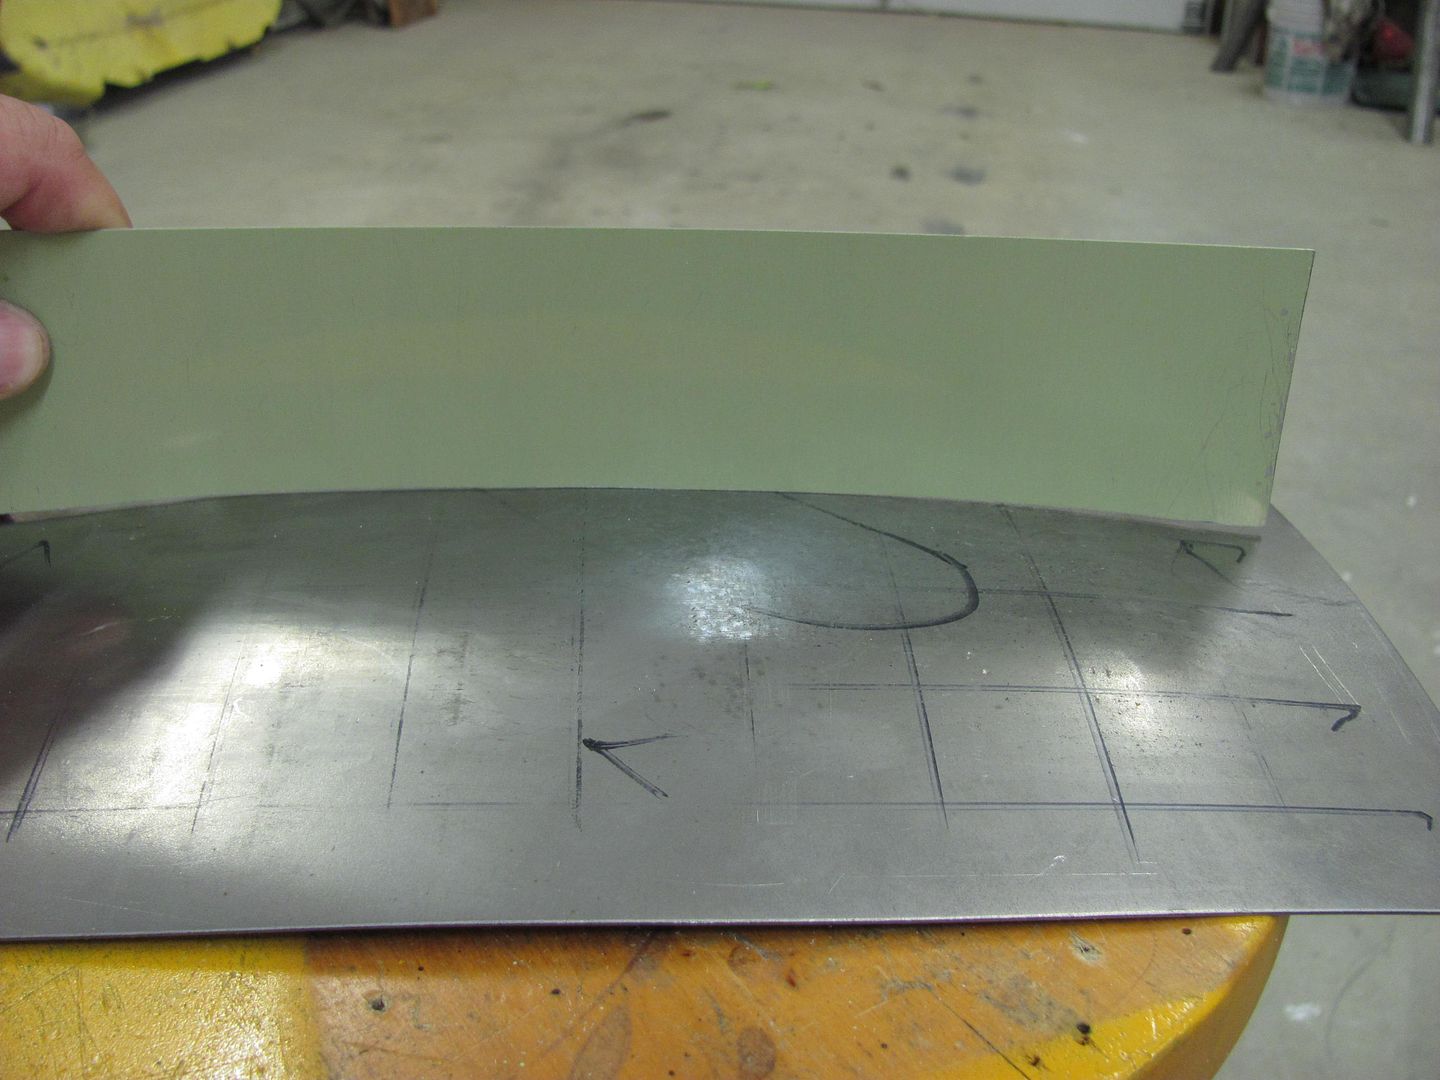
Check with the templates
Progress....these are light taps only with the hammer. We just want to bring down the high spots, not create craters.
Here's where I finished up...
I have a little over an hour in making the panel, denting, and removing the dent. Where I still could have gone a bit more, it was about to a point where high build primer should have masked any remaining imperfections. This dent removal could also have been accomplished with heat shrinking using an O/A torch, etc, but for those times where you may not wish to use heat and want another option, this seems to work well. I think with using the donut dolly and it's heftier mass, one could shave some additional time off the repair.
Well I guess it's about time for a sequel. I had a left over door from a bus repair earlier this year, and as it was damaged the least, we thought to keep it as a starting point. New ones in primer go for just under 1K, so I think we can save some money here....
The last time I used the "donut dolly" was with the low crown body hammer (the flat one) but when I tried it on this flat panel, progress seemed to be rather slow. I think the low crown hammer was better matched to a crowned panel, and with this panel being flat, I may have better luck with a crowned face body hammer. So as we're starting with bent metal anyhow, what's a little trial and error going to hurt? I'll just keep my fingers crossed that the hammering force would not be great enough to pound dents in the other direction. (we're looking for consistency and moderation)

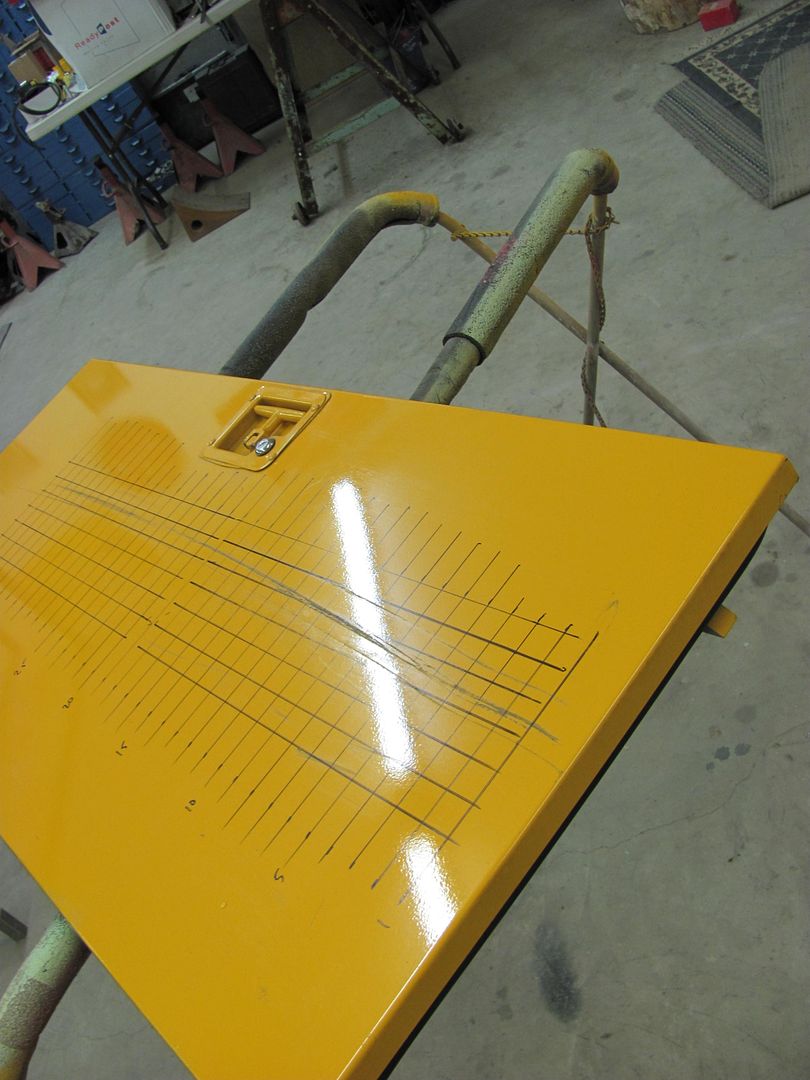
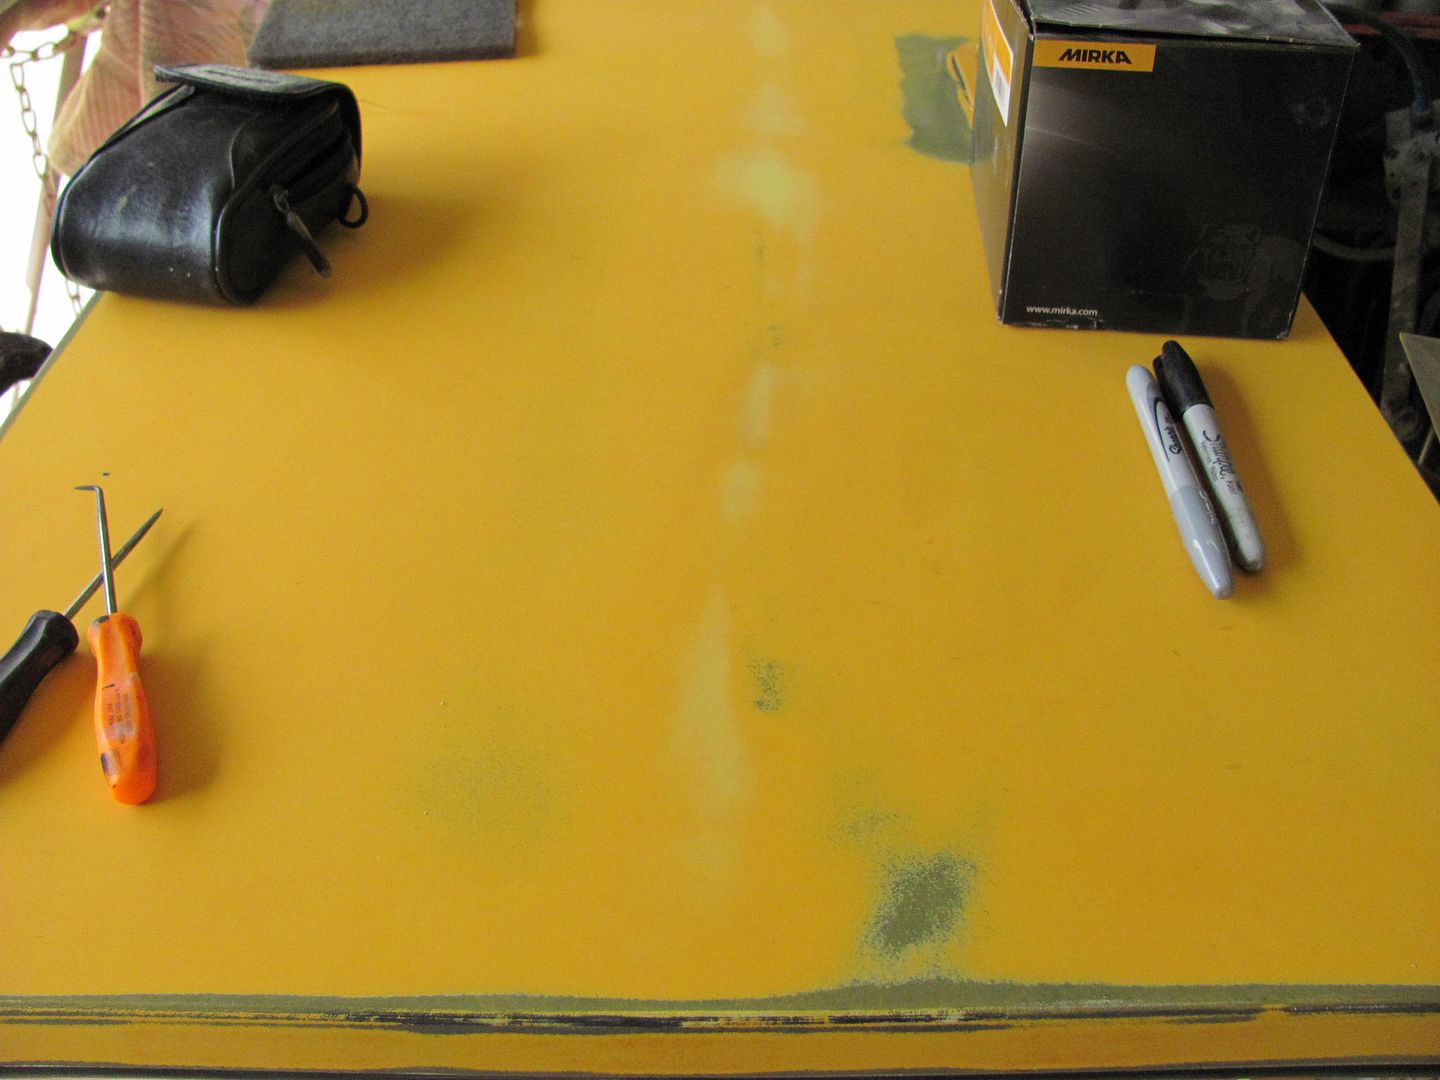
Here's our dented sample today, an aluminum door skin with a nice crease that travels just about the full length of the door.
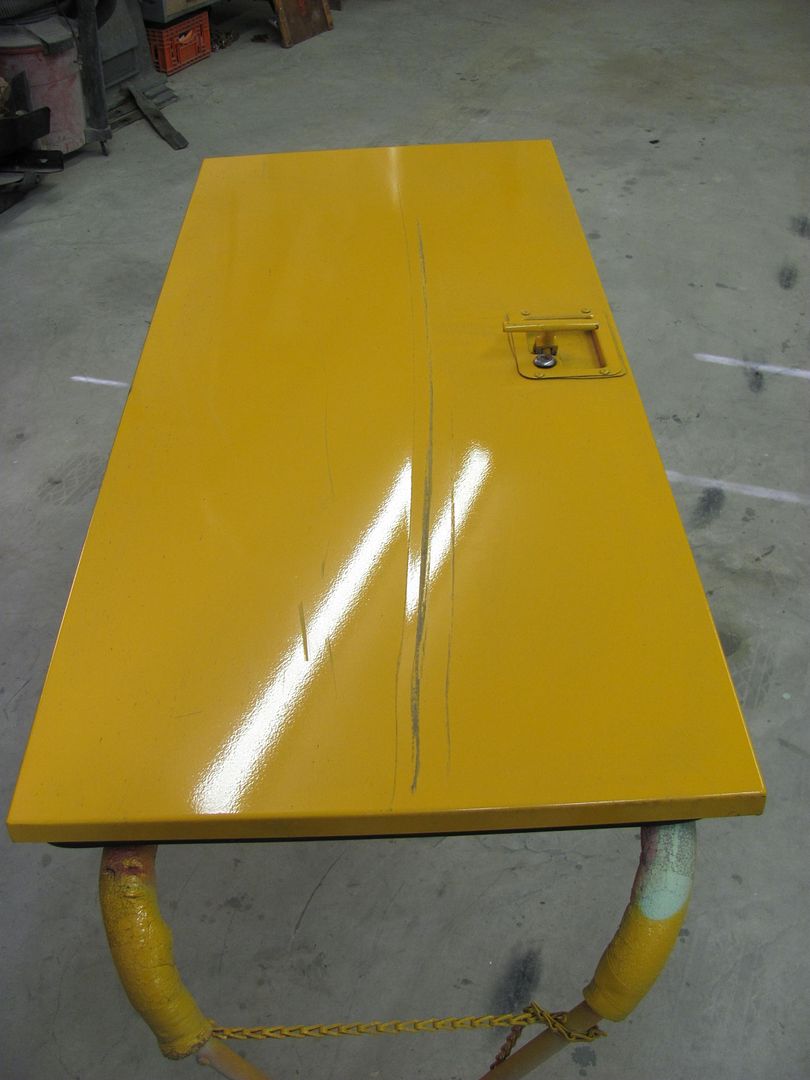

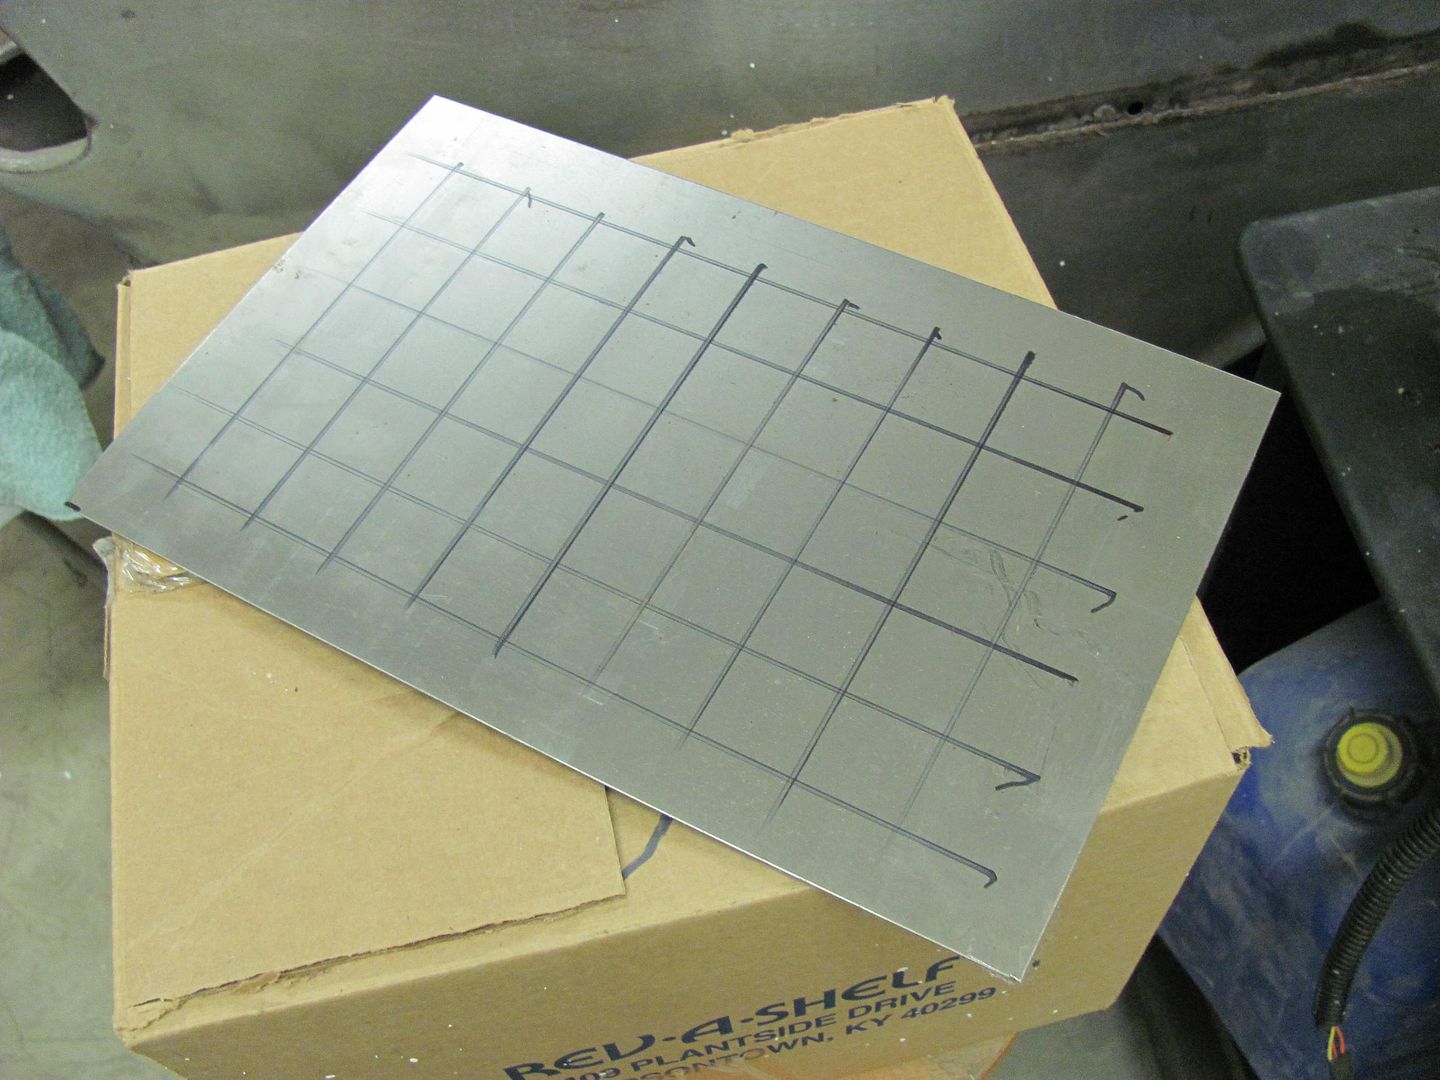
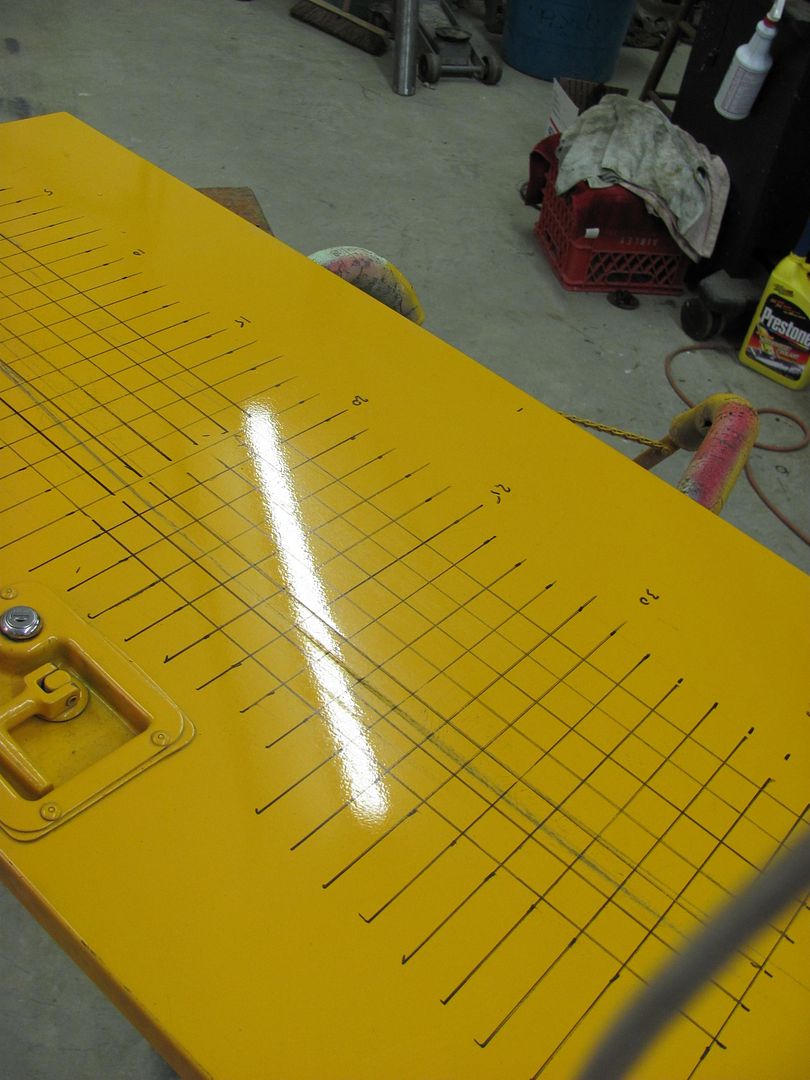
As the donut dolly is very closely matched in size to the hammer diameter, accuracy in locating the devices opposite each other is crucial. Depending on the panel you are repairing, this may be a challenge in itself. To keep the tools properly aligned and thus provide a more efficient shrink, I suggest a grid on either side, matched to identical starting points.
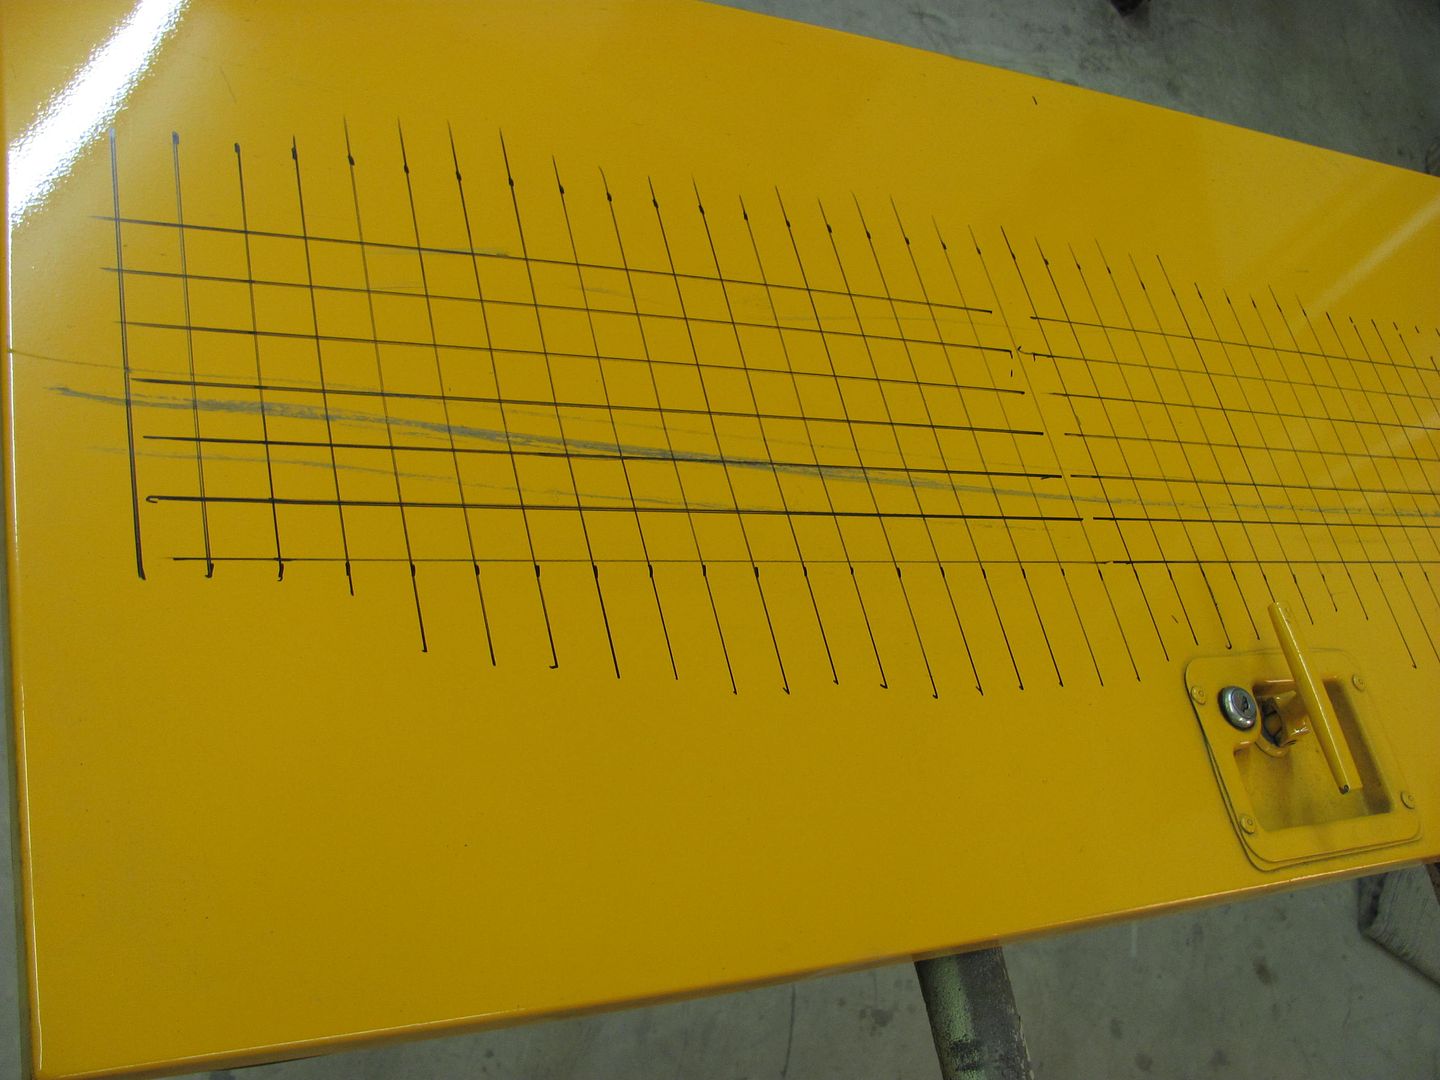
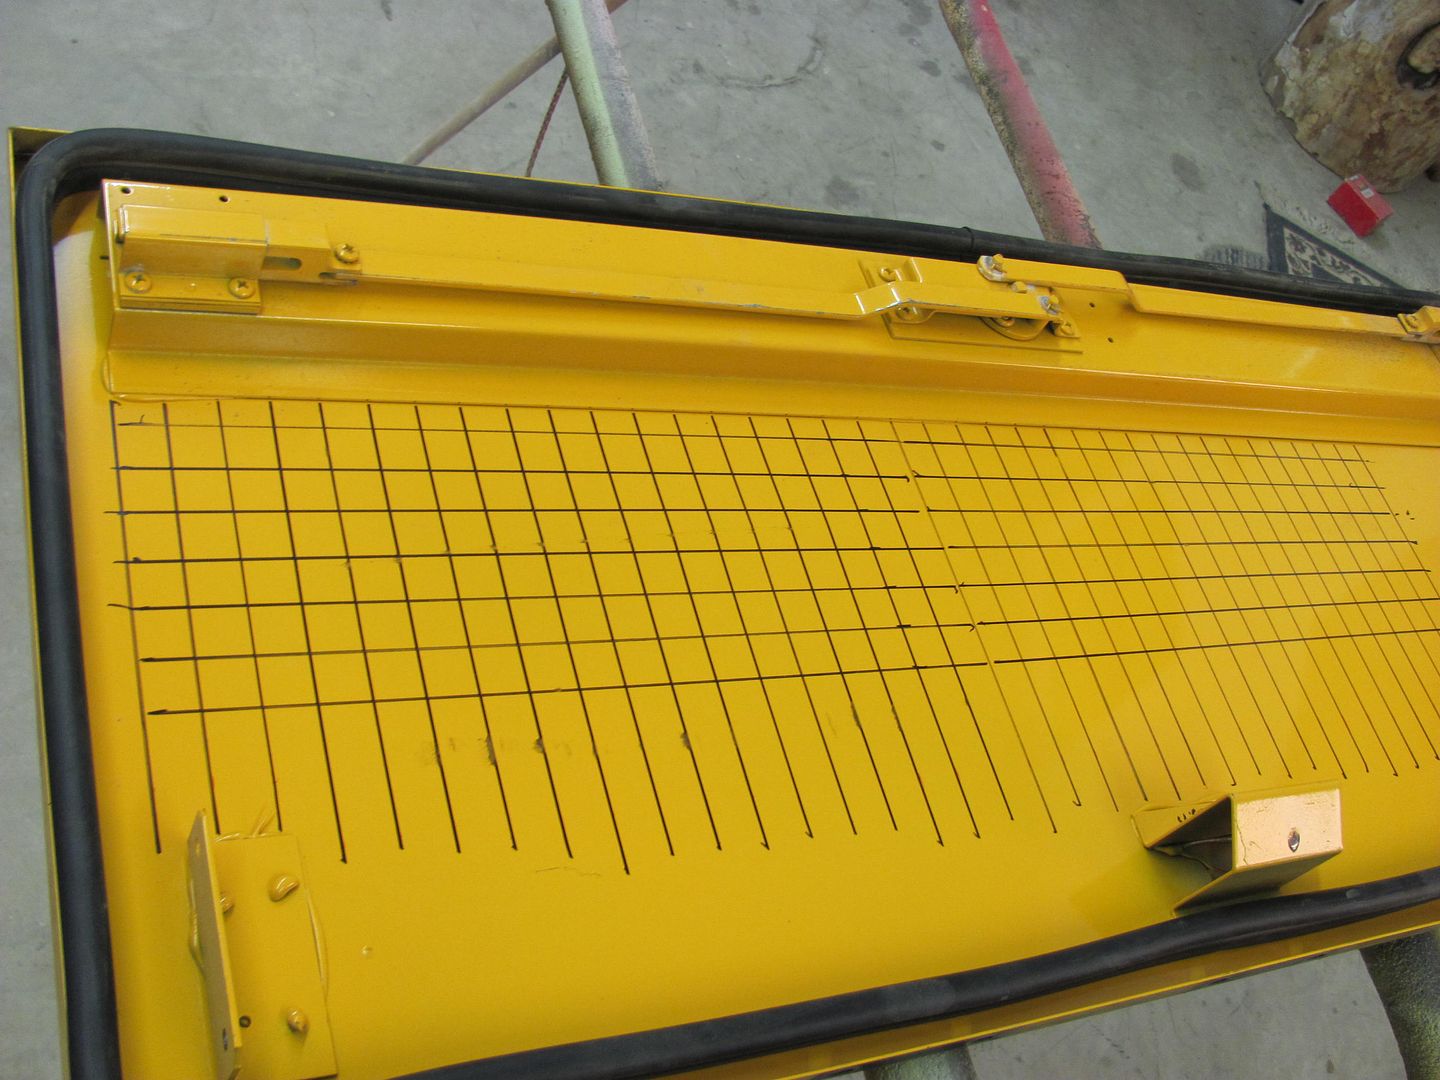
I numbered every fifth one just to keep better track of where I was. Some days you need all the help you can get. Also shown is the damage before starting, located at grid 5, 10, and 15, just for reference of our progress.
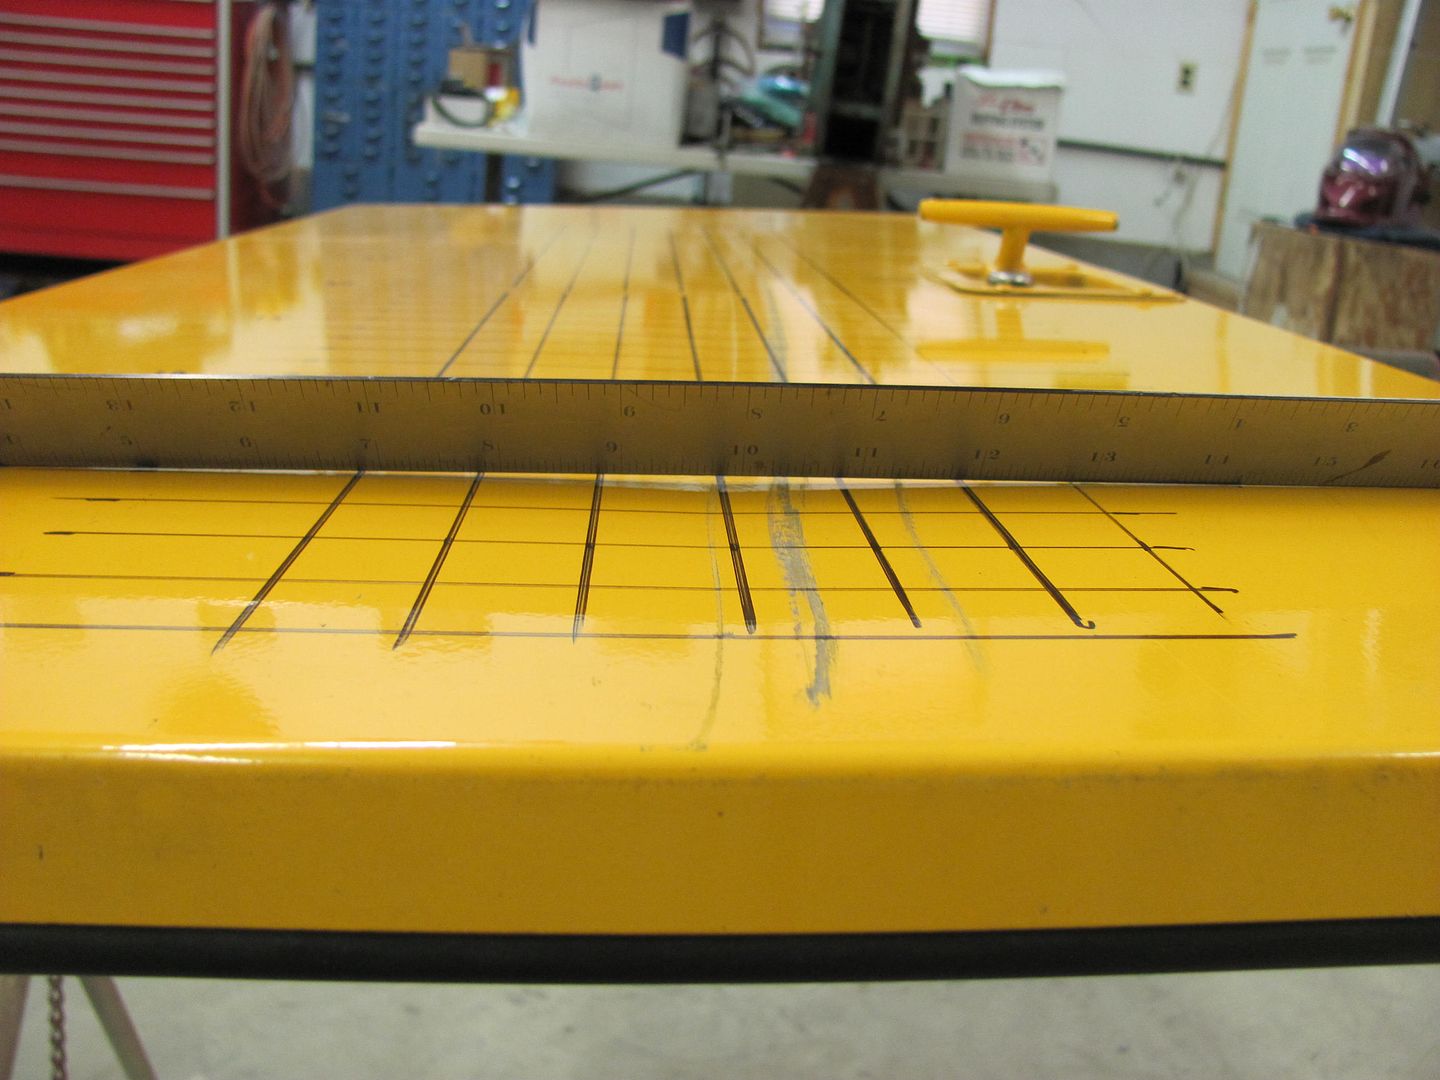
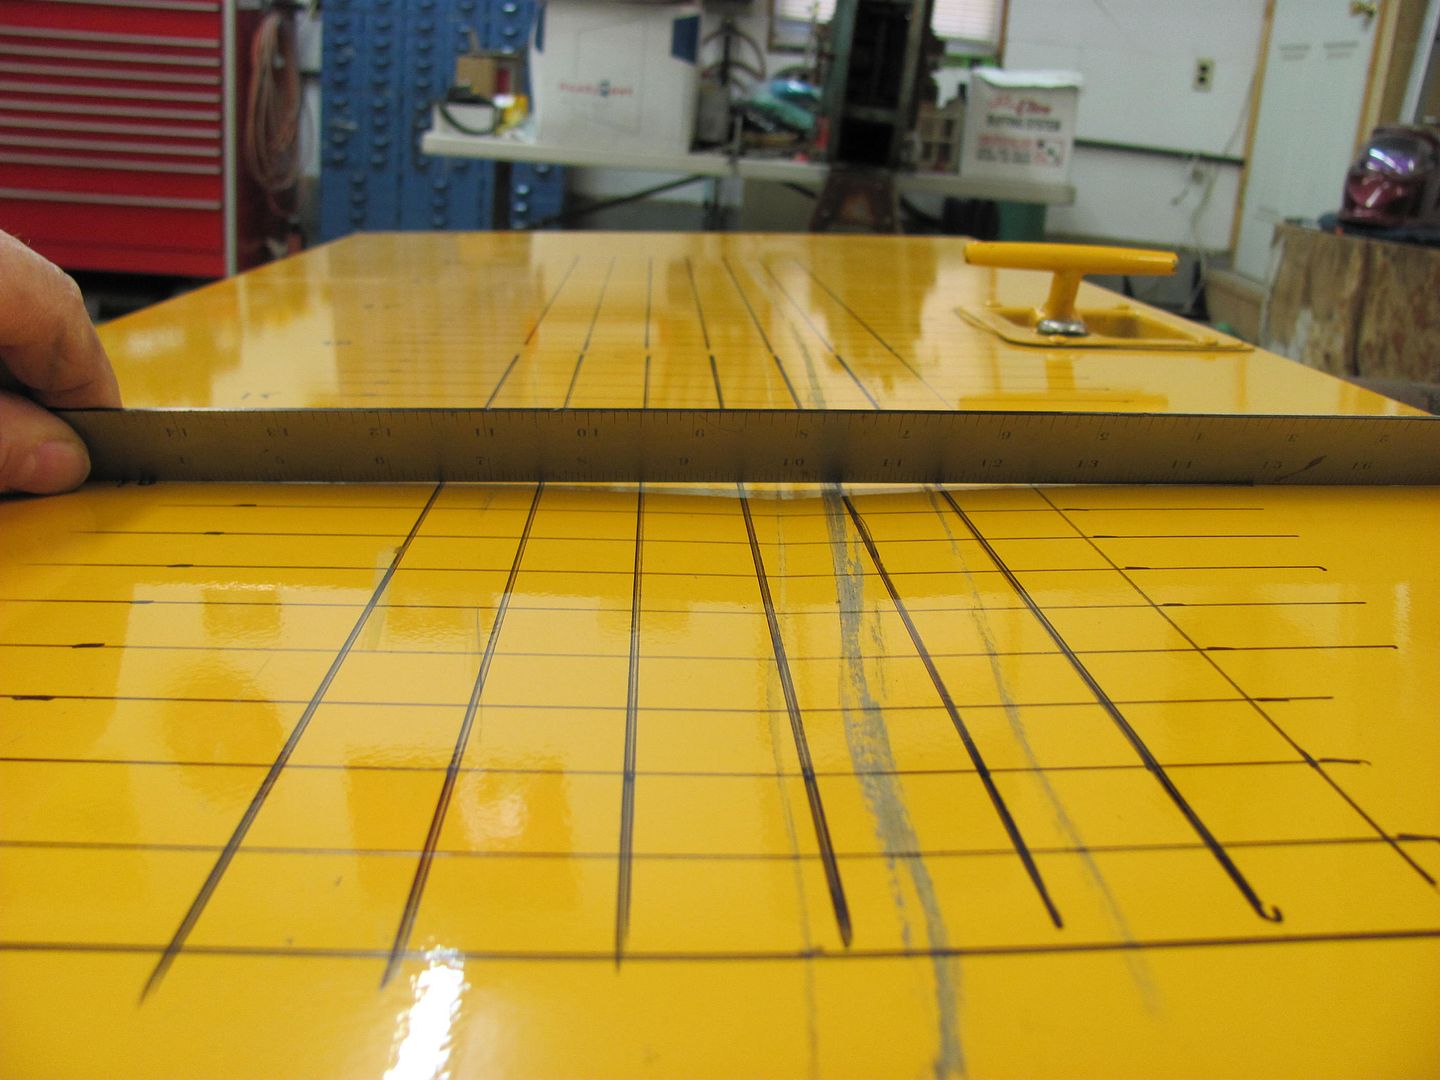

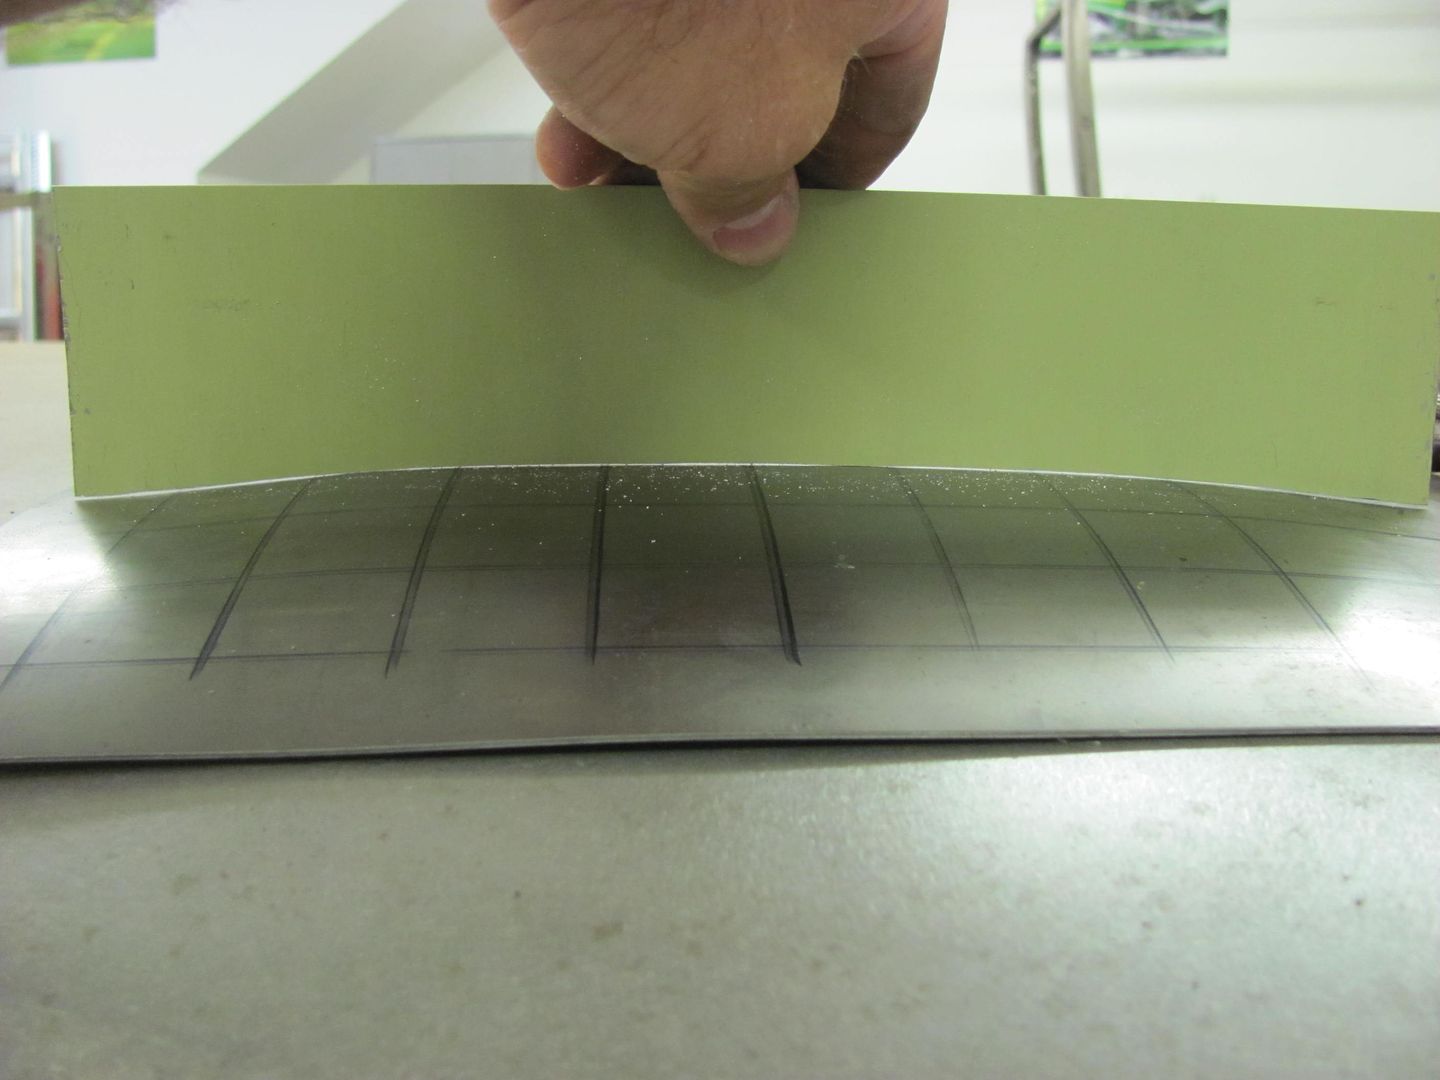
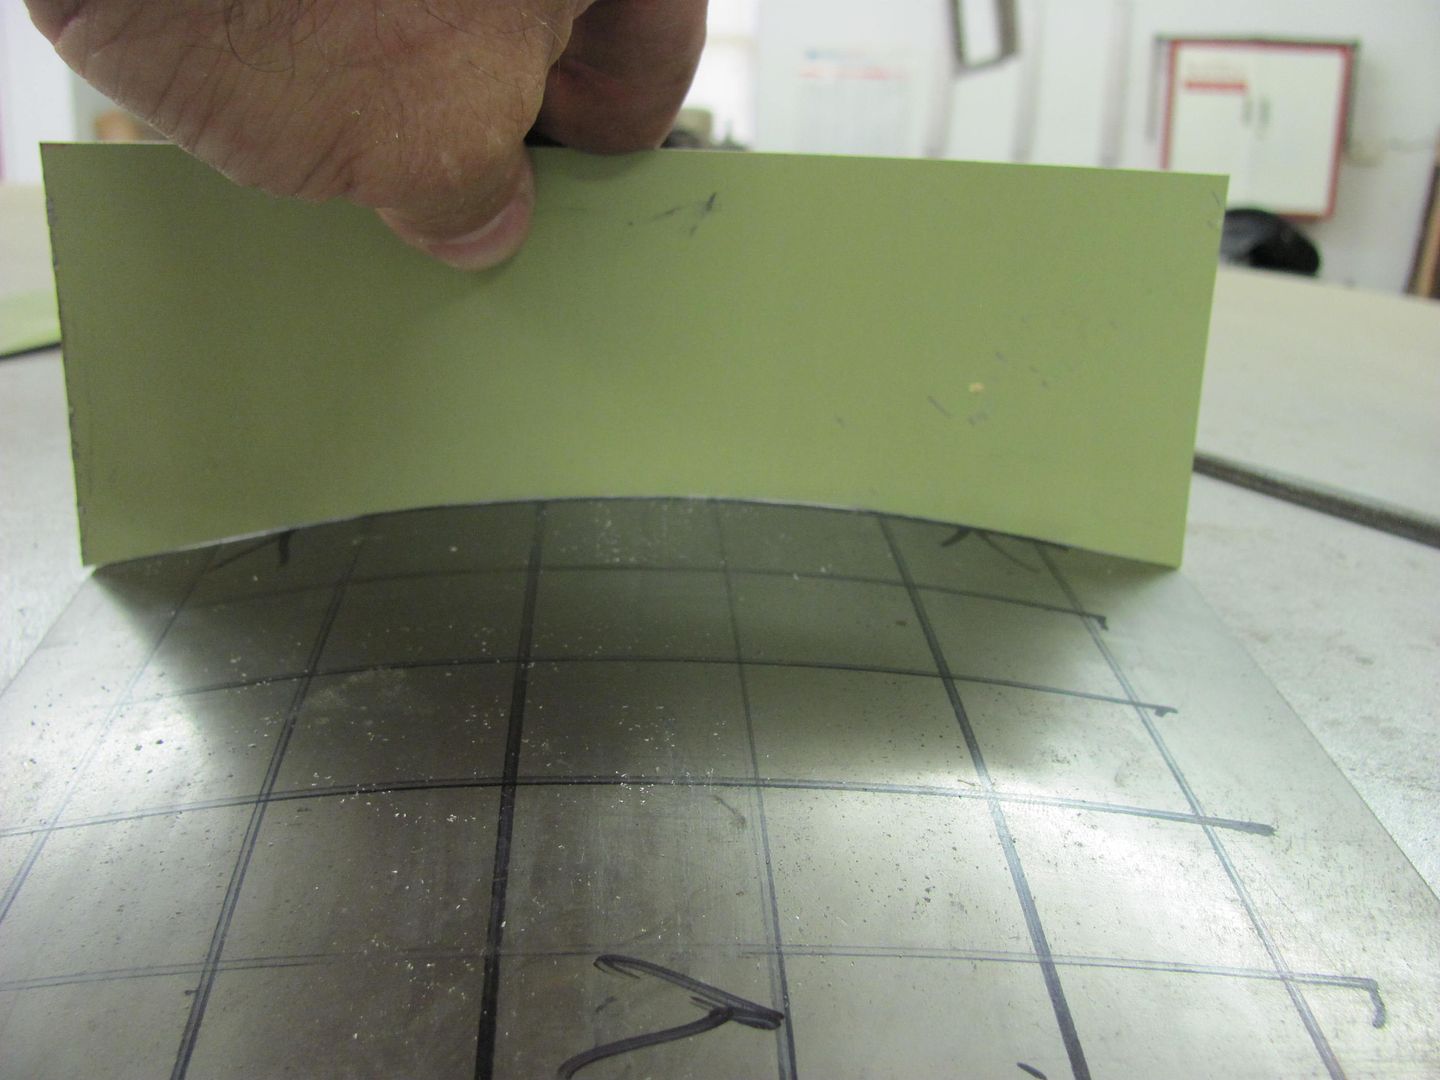
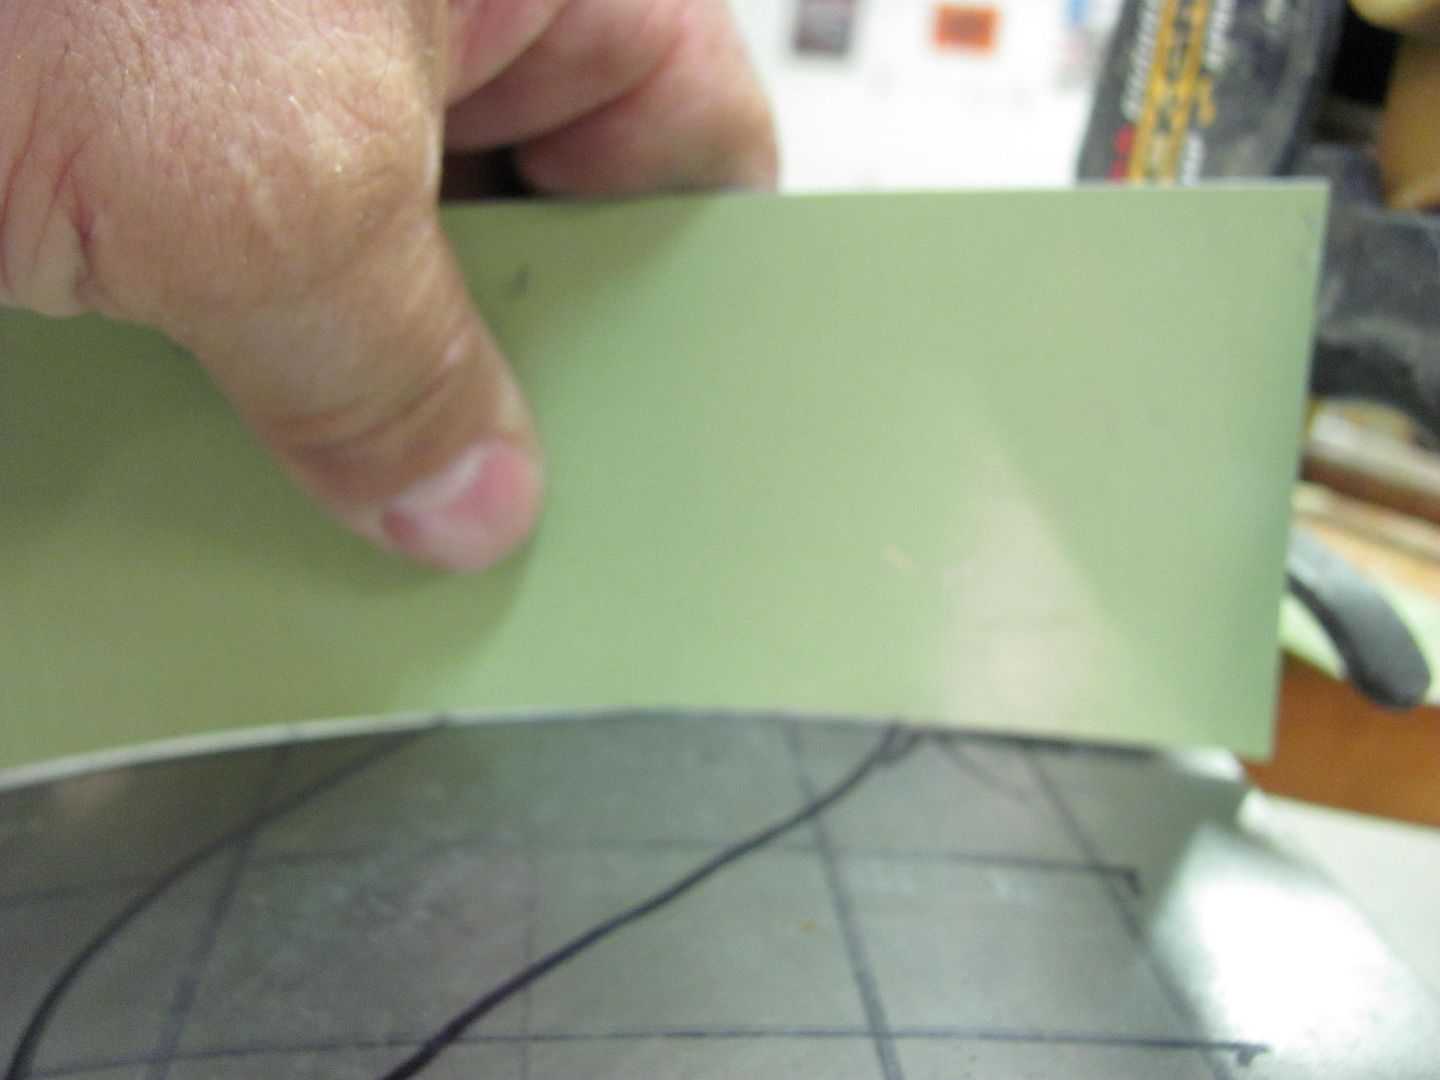
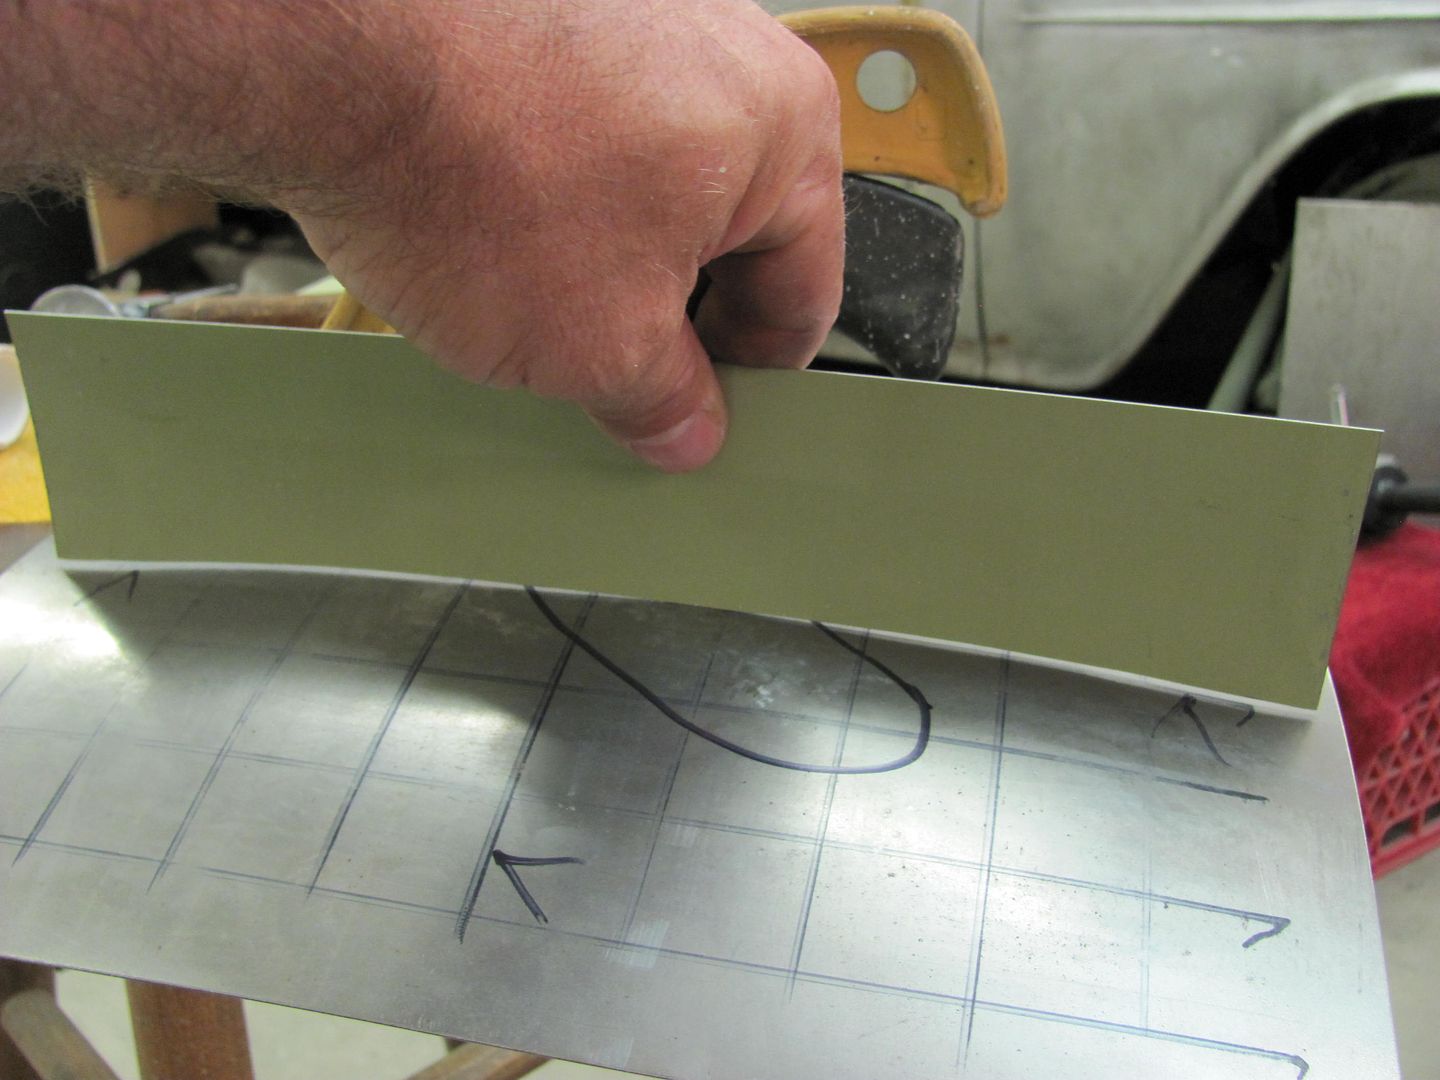
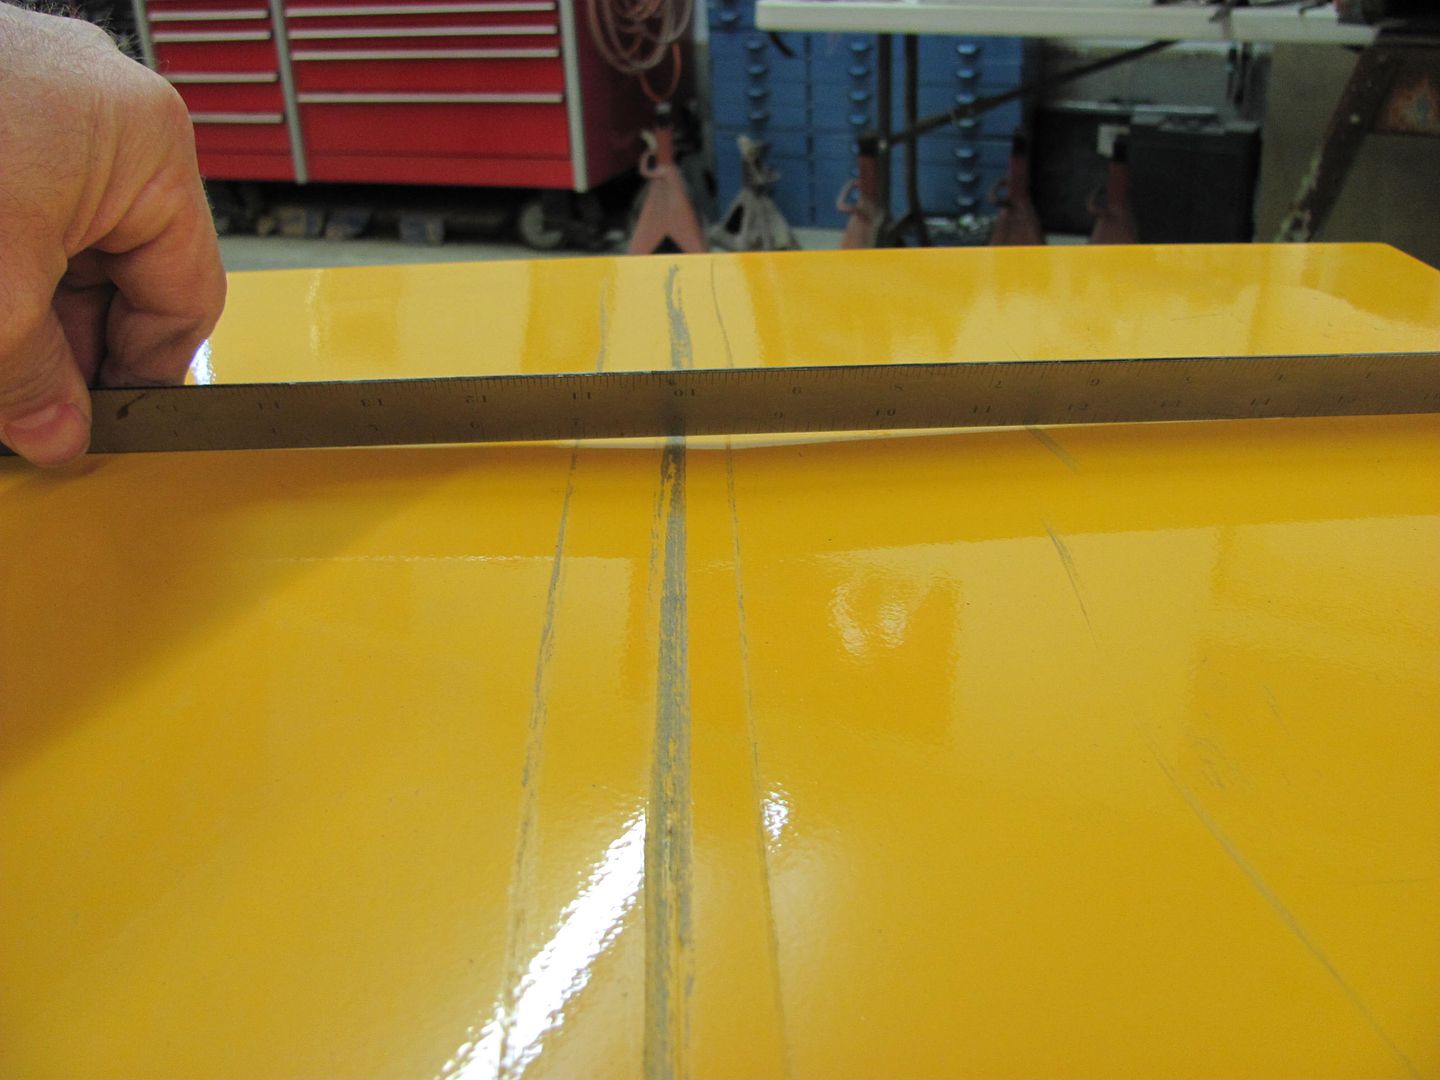
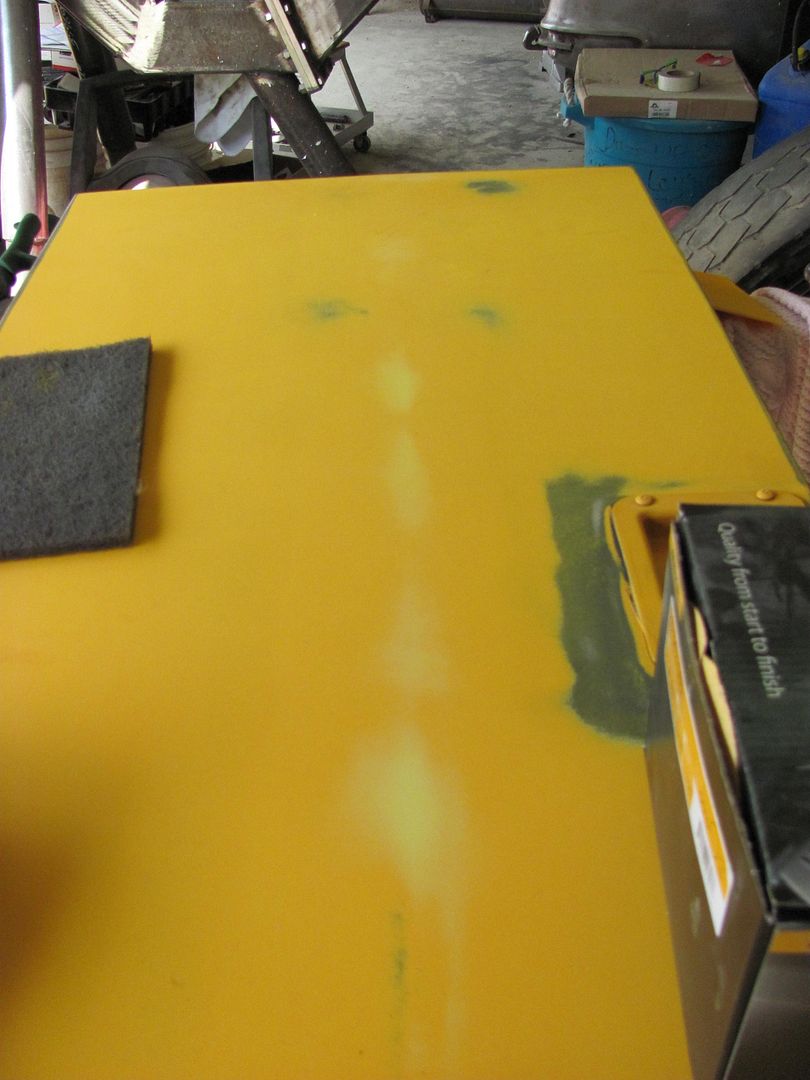
As I am working with a flat panel, I am able to use a straight edge to monitor the progress and see where additional shrinking may be needed. If you are using this process on a crowned panel, I would suggest making a profile template matched to the undamaged side of the car. Also, seldom does the crown on a panel remain consistent from one end of the panel to another, so it is very possible you may need different profile templates to accurately guage different sections along the panel.
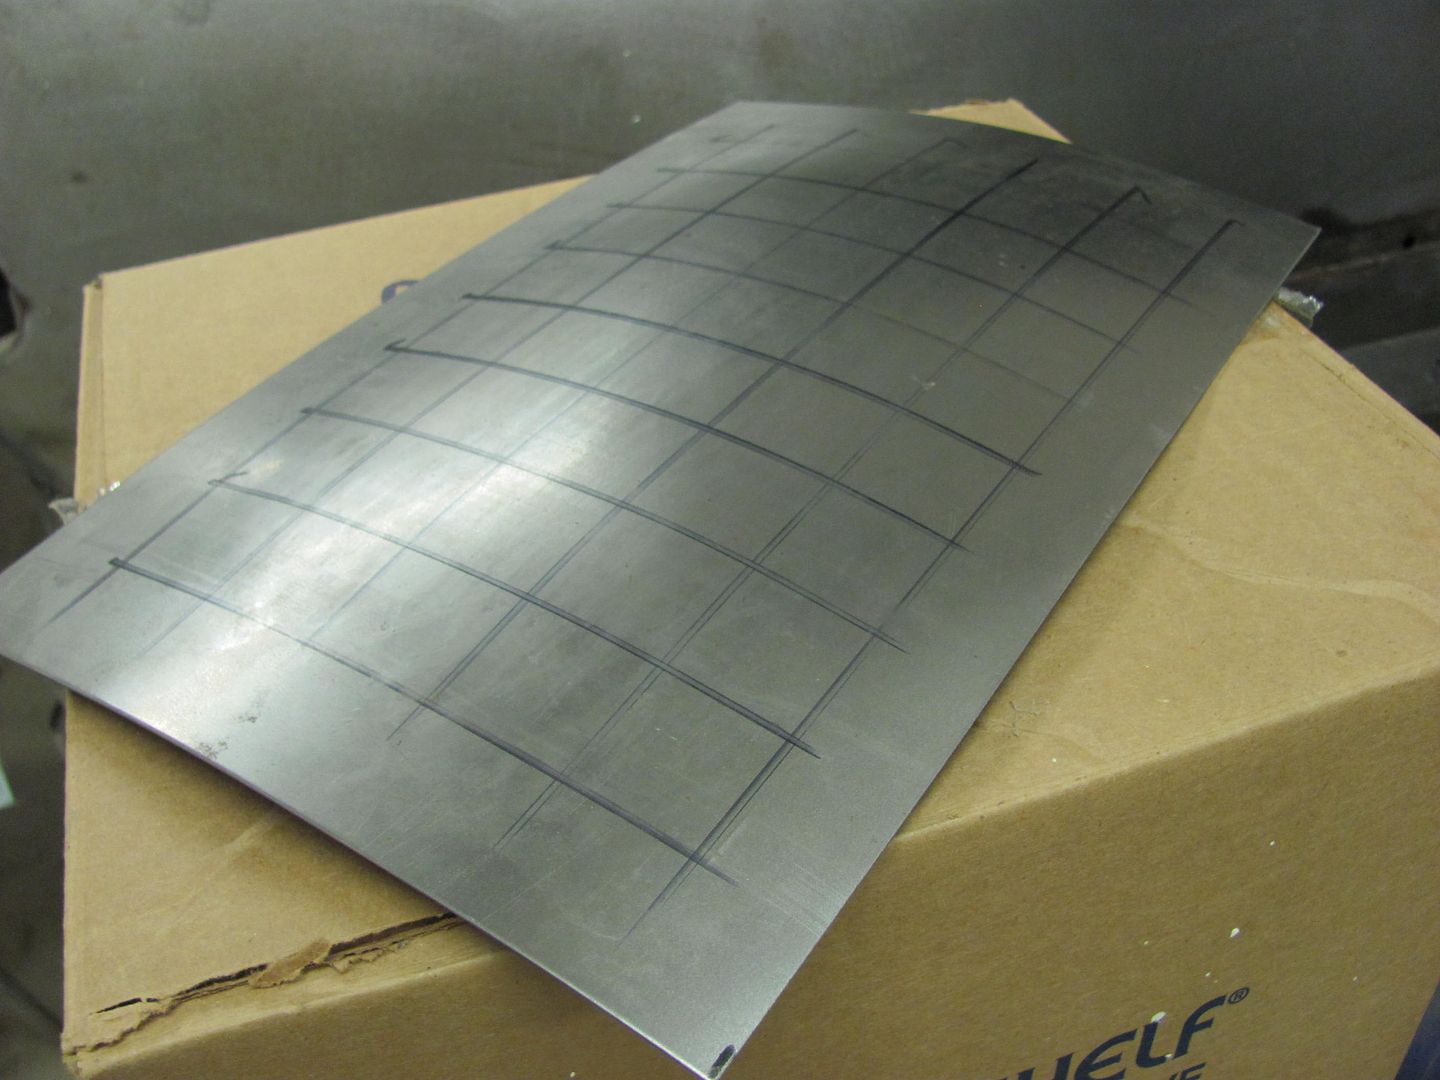
After about 30 minutes of work, here are the results, again located at grid 5, 10, and 15.
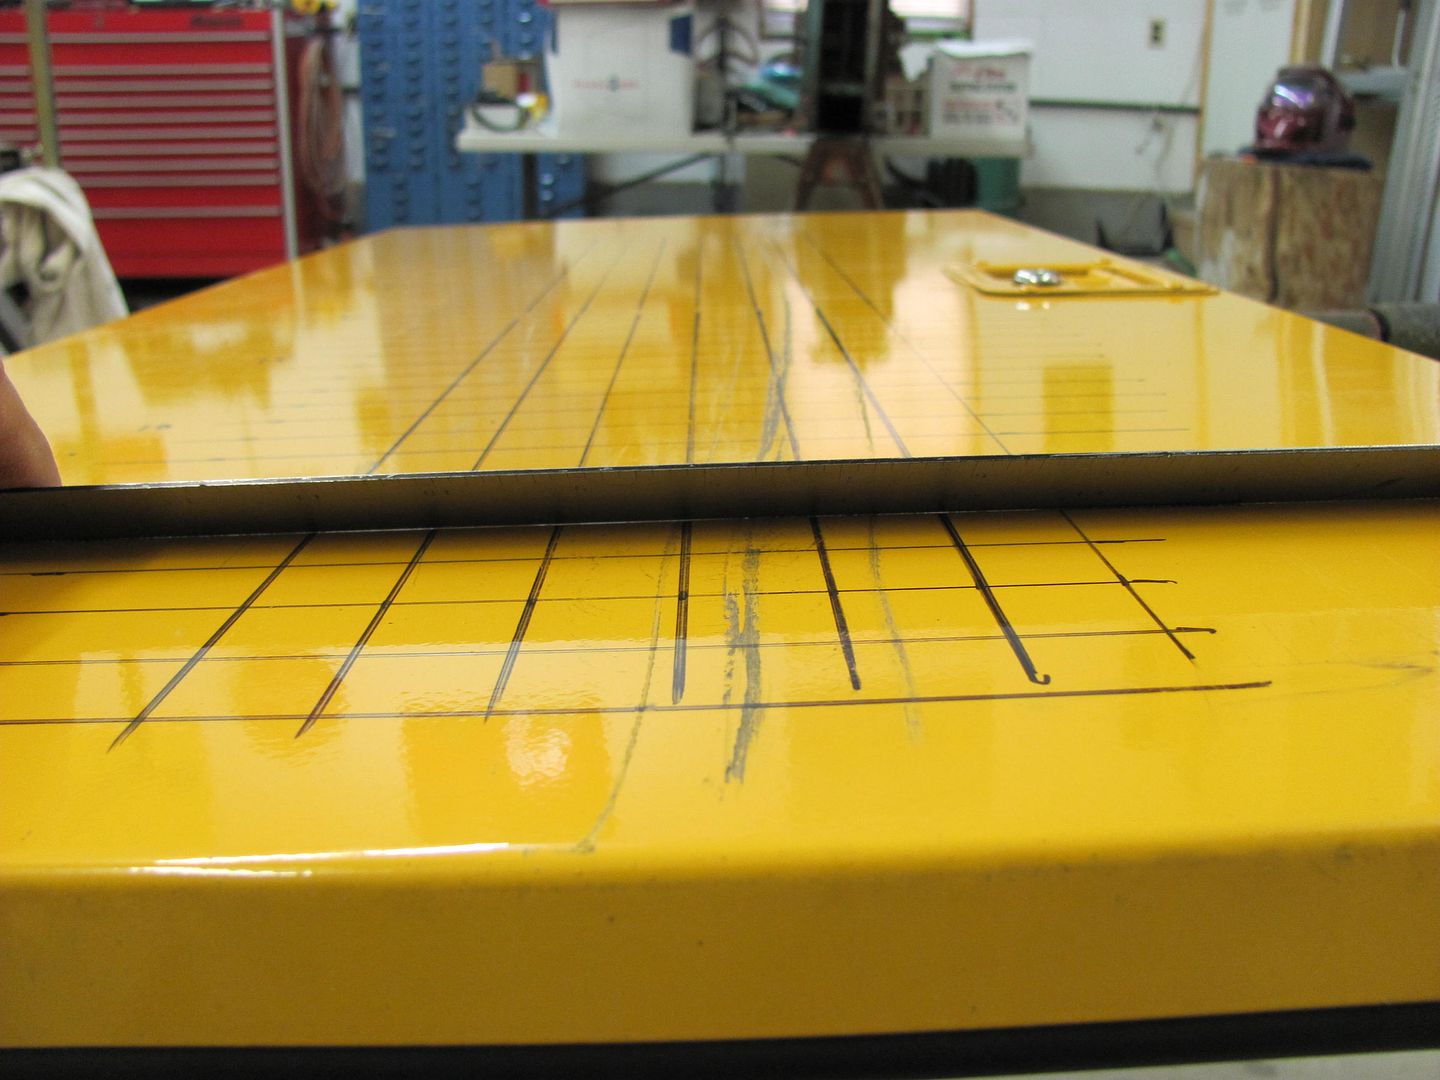
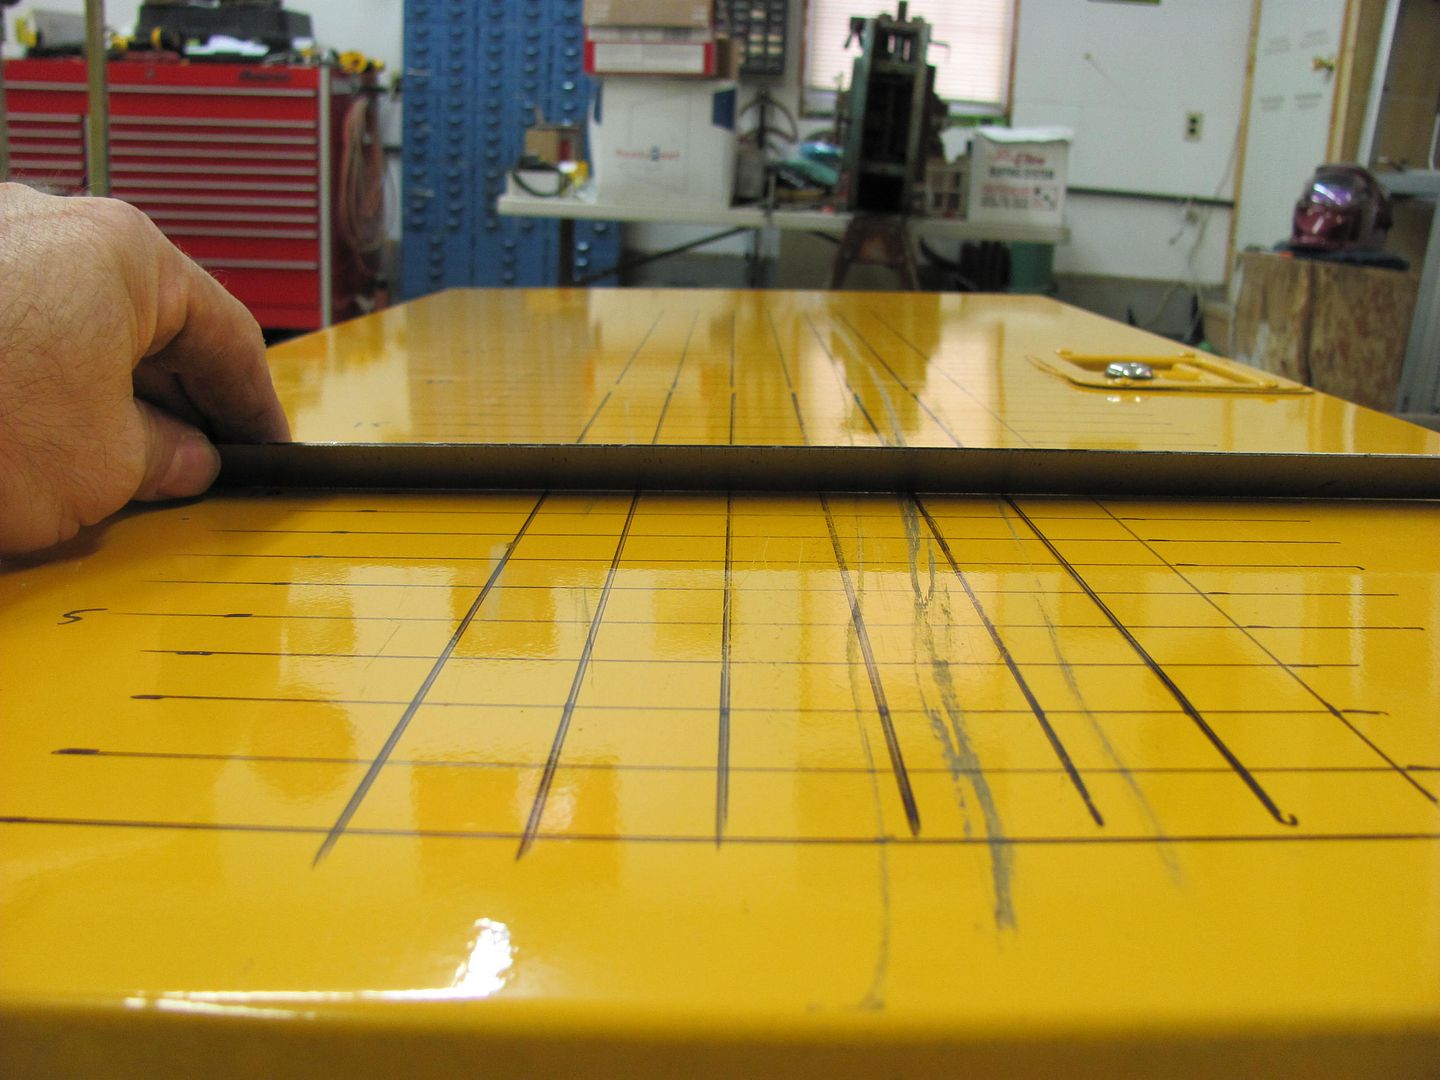
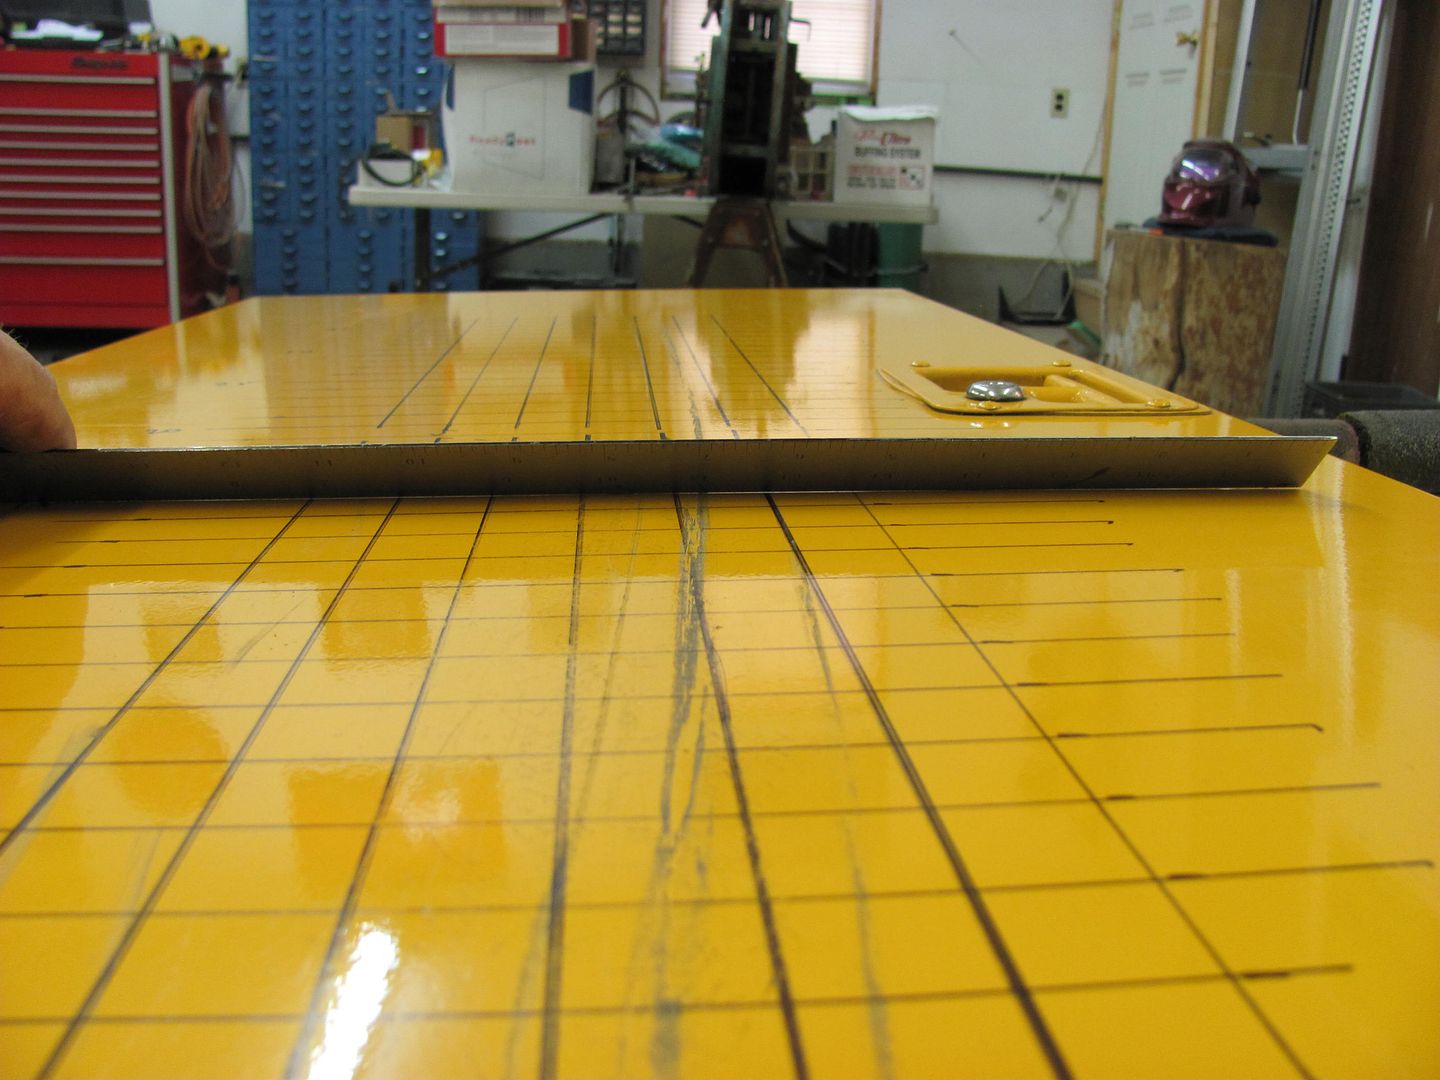
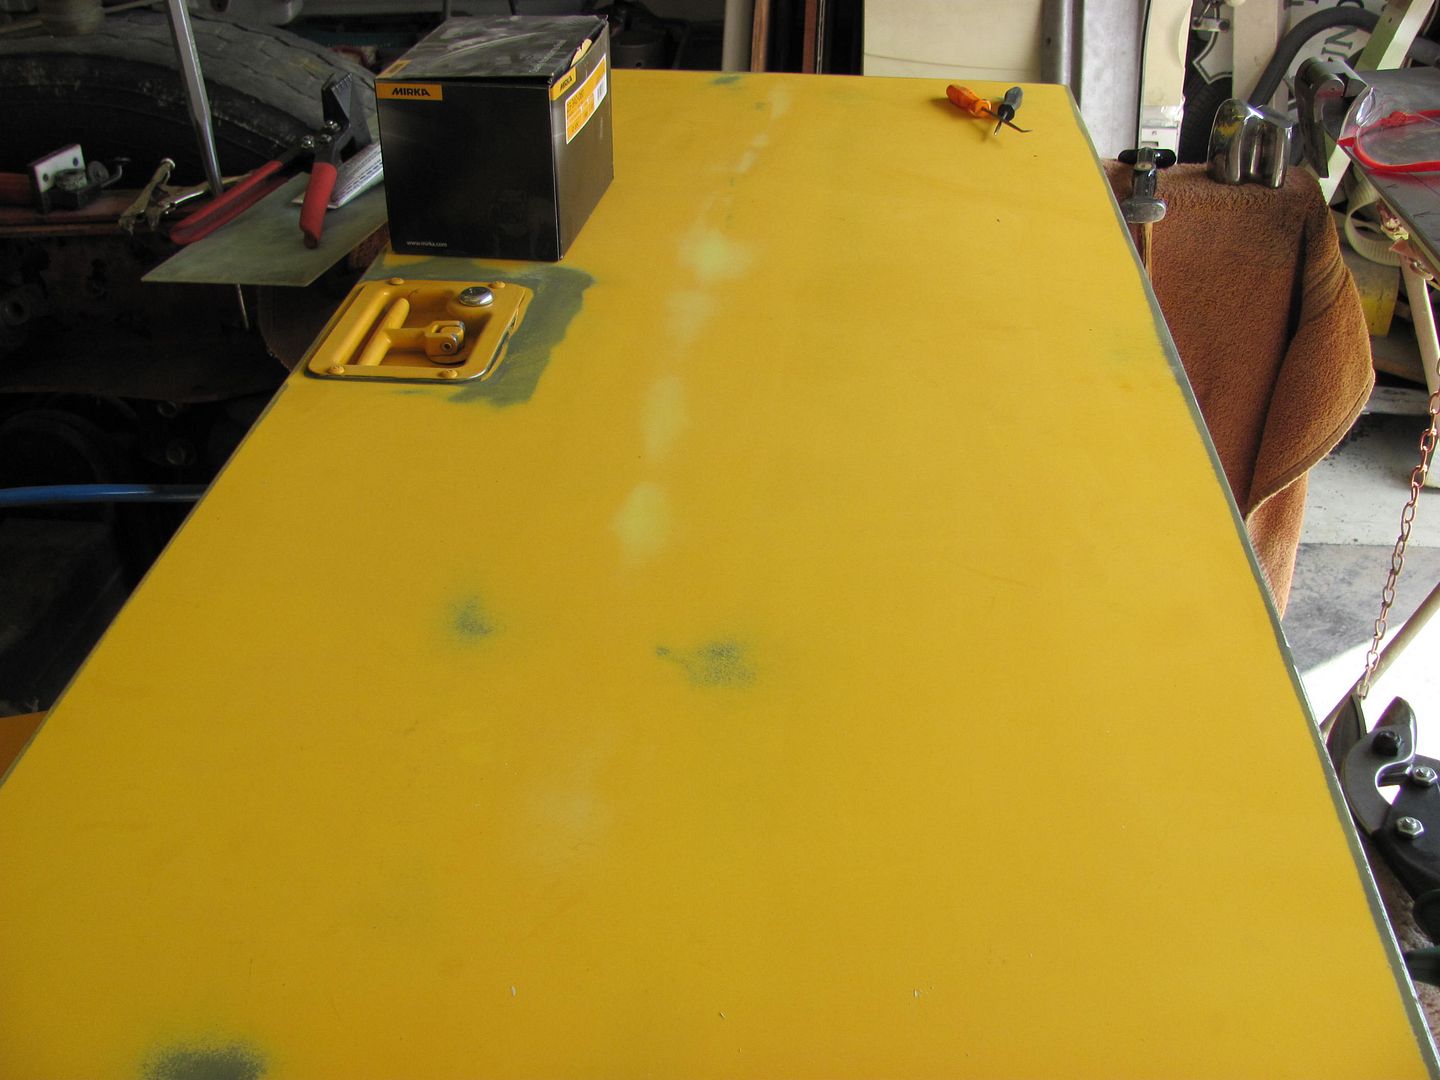
And the light reflection shows considerable improvement over the first pictures....
I scuffed the door and applied some Evercoat 416 glazing for the remaining minor defects. The minimal amount shown here indicates how well the aluminum skin responded to the donut dolly shrinking.
 .
.
Robert
-
08-21-2012 08:03 PM #6
CHR Member/Contributor
- Join Date
- Apr 2005
- Location
- bay city
- Posts
- 10,546
most of the time hood hinges get bent that not a big deal but the hood inner is bent up more then just the bow you see.grabbing the front of the hood with some mo clamps or home made clamps pulling it the way it was hit. it will unfold with some spoon work .but the inner is bent and will be a weak spot to bend again. so it it needs to be split from the outer skin then the inner would be worked out . so a new or used hood start looking good . for many years now cars have crumple zones in lower upper frame rails and hoods have fold spots so hood bends up. that hood was made to fold were it did. stopping the hood from fold up after all work was done just by closing the hood many be hardLast edited by pat mccarthy; 08-21-2012 at 08:33 PM.
Irish Diplomacy ..the ability to tell someone to go to Hell ,,So that they will look forward to to the trip
-
08-22-2012 09:56 PM #7
CHR Member
- Join Date
- Apr 2007
- Location
- Austin
- Car Year, Make, Model: 1966 Mustang Fastback
- Posts
- 396
Thanks guys, think we'll keep looking for a used hood.
Dave S. I might be heading your way on a motorcycle trip the next couple of weeks, I'll try to stop by.
Tom
 Reply With Quote

Posting Permissions
- You may not post new threads
- You may not post replies
- You may not post attachments
- You may not edit your posts

This site is up more often lately, but very little traffic.
Dead!