Hybrid View
-
11-05-2008 06:47 AM #1
I thought it was time for some more updates on my progress with the T. Between work,car shows, hurricanes and a few honey-do jobs, I haven't gotten as far as I had hoped, but I am moving forward. My car show and cruising season is pretty much over, so I won't be taking it to any shows this year, but that won't stop me from driving and enjoying it. I sure did want to take it to Cruisin' the Coast, though. The weather was fantastic and a roadster would have been a blast. Oh well, maybe next year.
I hope to post several updates over the next few days. My camera died(they do that when you drop 'em on a concrete floor!). I have a replacement, so I have to take some pics and get them resized.
While at CTC, I did find to someone to do the upholstery.
I realised after my last update that there were still several things left to be finished. Mostly small "detail" type things, but still time consuming.
One problem area showed up after pulling the body off the frame and sitting it on the floor for a while. A crack developed in the door jamb where the interior section was glued in. This area didn't have enough material overlap to form a good glue joint and apparently had more stress than I first thought. This spot is where I installed the adjustable brace during the build. Stress isn't a problem when it's on the frame since the brace takes the load, but it still needs to support itself. So....I had to put the body back on the frame, realign the door and the reenforce the offending area. A couple layers of fiberglass cloth and some filler and everything was OK. Trouble was, it was in a terrible area to finish. No power tools, everything had to be sanded and shaped by hand. Getting this one small area smooth enough for paint took way longer than I would have thought! Sure makes you appreciate a DA sander! I finished the rest of the door opening while I was at it. Sorry no pics of this, wasn't very photo worthy.
Smoothing the glue joint on the top of the body went pretty good, except for a couple of places that didn't line up well. They had to be built up with fiberglass. At least I could use power tools. I had installed some threaded steel bars in the wood frame of the body to eventually hold down a top. The jig I made to relocate them after glueing everything together worked perfect
I'll try to get pics up ASAP.
Mike
-
11-05-2008 06:10 PM #2
I didn't want to wait to the last minute for the wiring. It really can't be completed until the car is finished, but it's never too early to figure out how it's going to be laid out.
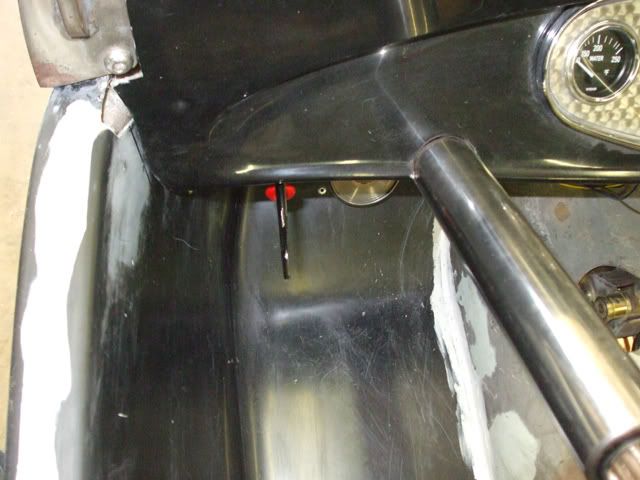
I had originally thought about putting the switches on the front of the seat frame, but came up with another idea. I made a small panel to mount behind the dash on the steering column drop. This puts the switches within easy reach and keeps them fairly well out of sight. Keeps them out of the weather too. I didn't like the look of the signal switch on the column so I made a mount that puts it under the dash with just a short section of the handle showing.


-
11-05-2008 06:11 PM #3
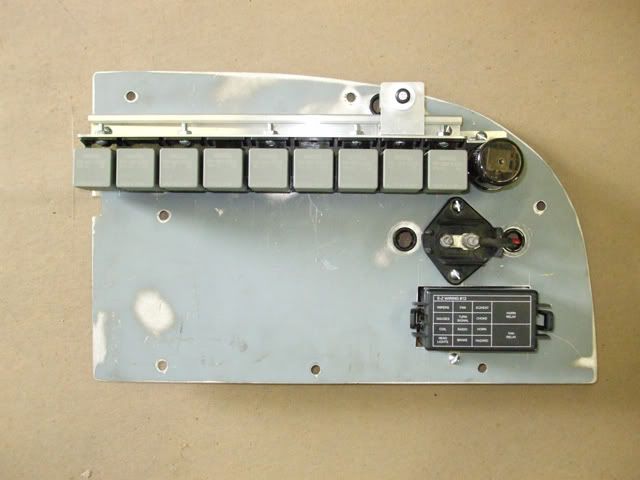
I fabbed an aluminum panel to put on the firewall to mount most of the other electrical stuff. The fuse panel is an EZ wire mini fuse 12 circuit unit. The junction block is off an S10 Chevy. I cut the flasher block off an old glass-type fuse panel I had in the junk box and made an aluminum bracket to mount it. The signal switch I'm using only needs one flasher for the main and hazard circuits.

Yea, I know that's a lot of relays! Four of them are for the air suspension alone. The large area under the relays is for an MSD box. If this car didn't have a door, putting this stuff behind the dash wouldn't be practical, since you would have a hard time just changing a fuse! Since the dash doesn't hold anything but the instruments I can put a simple plug on the wiring harness and pull the whole thing if needed for serious trouble shooting. It is only held in by 6 scews and can be removed in less than five minutes. With the switches mounted on the other panel, I don't even need the dash to drive the car(just won't have any gauges).
-
11-05-2008 06:19 PM #4
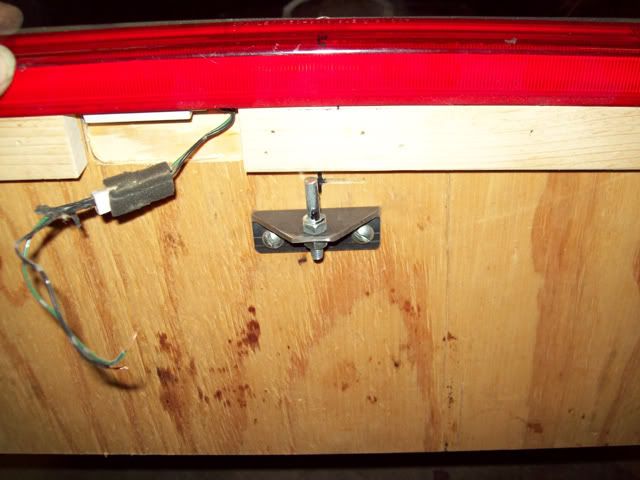
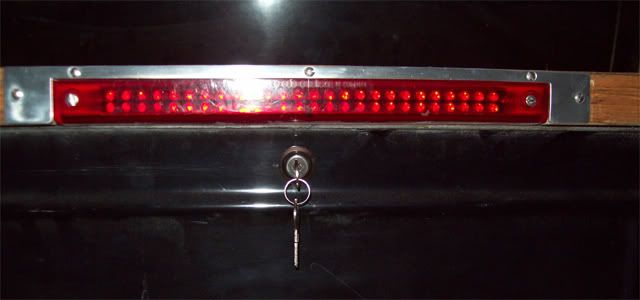
The bed cover needed a latch and after considering several ideas, I wound up using a simple lock from the hardware store. Works good and gives a little security for the fuel and electrical cutoffs. While I was working on the cover I decided the 3rd brake light looked a little plain, so I made a little trim piece out of aluminum to dress it up.


-
11-06-2008 12:33 AM #5
Looking good Hotrod! Like the trim detail, and the turn signal changes.
"  "No matter where you go, there you are!" Steve.
-
11-06-2008 01:43 AM #6
Wow,
Just spent the last couple of Hours reading and learning. Looks Brillant
Thanks
DC
-
11-06-2008 03:44 PM #7
Yeah, I like the way you did the switches. I learned a long time ago not to put the ignition switch under the seat, otherwise you fumble for it every time you insert the key. Don did his under the seat because he wanted a totally clean dash, but has learned to put the key in BEFORE you get into the car, otherwise it is pretty hard to hit the hole right.
I wish I had put my switches on my T on the dash, especially the turnsignal switch. I too wanted a clean dash, but the signal switch is so hard to find that I usually just use hand signals. Eventually I am going to make a panel like you did and relocate it and also add some indicator lights so I can see if I forgot to turn the signal off. As it is now, I am the stereotypical old man from Florida, I ride along for 30 miles in the left lane with my left signal on.

Don


 4Likes

 LinkBack URL
 About LinkBacks
 Reply With Quote

I didn't know him but followed his posts. True hotrodder, he will be missed. RIP 34_40 MIKE. Condolence to the Mrs. Nolan
We Lost a Good One