-
05-09-2013 05:38 PM #931
Oops! Sorry, double post...Last edited by J. Robinson; 05-09-2013 at 05:40 PM.
Jim
Racing! - Because football, basketball, baseball, and golf require only ONE BALL!
-
Advertising

- Google Adsense
- REGISTERED USERS DO NOT SEE THIS AD
-
05-09-2013 06:01 PM #932
One more thing to do... While I still have the dash out of the way it would be an opportune time to mount the accelerator pedal. I received this nice pedal as a gift; I just need to make a mount for it. I started with a piece of 1/8" x 2" flat stock, cut and bent to the contour of the side of the trans tunnel. Next, I cut a piece of old bedrail angle iron to form the upright. Since getting a wrench to the backside of the upright would be difficult, I welded nuts to the backside if the bolt holes.
Jim
Racing! - Because football, basketball, baseball, and golf require only ONE BALL!
-
05-09-2013 06:05 PM #933
Here is the finished mount with the pedal and the whole thing installed in the car.
Jim
Racing! - Because football, basketball, baseball, and golf require only ONE BALL!
-
05-17-2013 07:33 PM #934
Well, the wiring is done except for the horn and horn relay (I don't have them yet), but there's really nothing to show because the wiring is all out of sight under the dash. Now I just need to get the carburetor fixed or replaced so the engine will idle and install a new clutch hose. Then it will be test-drive time!

Jim
Racing! - Because football, basketball, baseball, and golf require only ONE BALL!
-
05-22-2013 08:02 PM #935
I DROVE IT!!
 The weather cooperated today and I finally got to take my much-anticipated first test drive. I fired it up, moved it out of the garage under its own power, and went down the street. I circled the same block and drove down the same side street that I did on my coupe's first test run back in 2005. My wife clicked a couple of pictures as I came back toward our house.
I need to adjust the brakelight switch (brakelights stayed on after the second stop) and set the toe-in, but it was a very smooth first ride. I wrestled with and swore at the cowl steering when I was building it, but it steers really nice. This thing is going to be loads of fun!

Jim
Racing! - Because football, basketball, baseball, and golf require only ONE BALL!
-
05-22-2013 08:32 PM #936
YEEHA!
Good one!
I'll wager that the grin still stretches from ear to ear!
Pleased for ya!


johnboy
Mountain man. (Retired.)
Some mistakes are too much fun to be made only once.
I don't know everything about anything, and I don't know anything about lots of things.
'47 Ford sedan. 350 -- 350, Jaguar irs + ifs.
'49 Morris Minor. Datsun 1500cc, 5sp manual, Marina front axle, Nissan rear axle.
'51 Ford school bus. Chev 400 ci Vortec 5 sp manual + Gearvendors 2sp, 2000 Chev lwb dually chassis and axles.
'64 A.C. Cobra replica. Ford 429, C6 auto, Torana ifs, Jaguar irs.
-
05-22-2013 09:12 PM #937
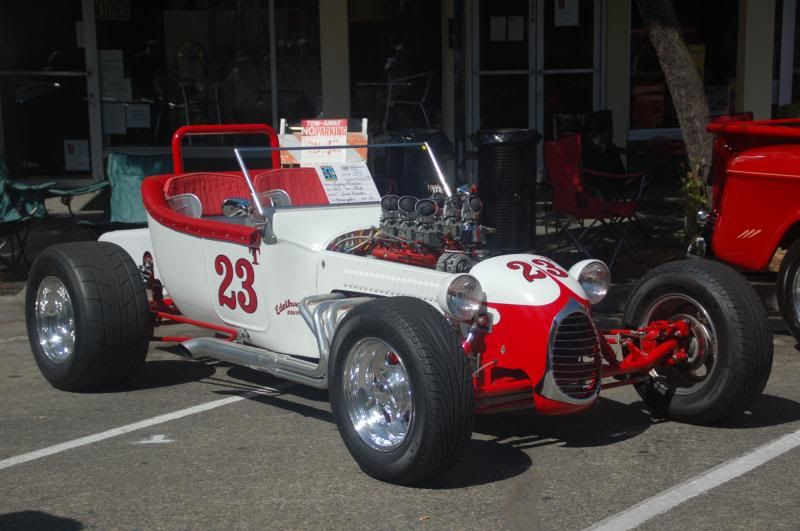
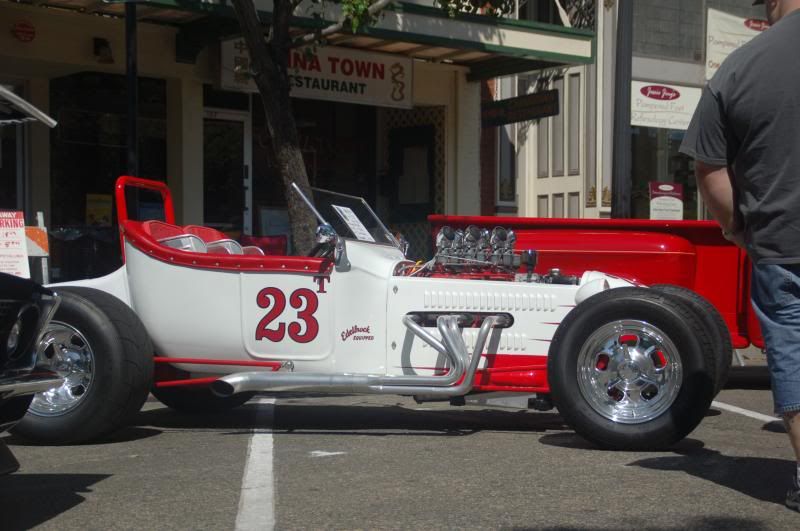
Congrats way to go Jim. I took a picture of a track style T this weekend that I'll post up for you. Similar color scheme to what your thinking about."  "No matter where you go, there you are!" Steve.
-
05-23-2013 03:15 AM #938
Looks great Jim!!!! That first ride makes all the grief and aggravation a guy encounters during a build just disappear!!!!!Yesterday is history, tomorrow is a mystery, Live for Today!
Carroll Shelby
Learning must be difficult for those who already know it all!!!!
-
05-23-2013 08:19 AM #939
Does my heart good to see you drive it!
Congratulations on a great quality build.Scott
31 Ford five window
-
05-23-2013 10:01 AM #940
-
05-23-2013 01:48 PM #941
Congratulations on the successful maiden voyage!Nick
Brookville '32 hi-boy roadster
TriStar Pro Star 427 CID
-
05-23-2013 06:08 PM #942
Thanks for the well-wishes, guys. Yes, the grin is still on my face when I look at the pics or the car.

Steve - The builder of that #23 car and I have similar tastes. We're using the same noses, grilles, and windshield frames and we both have two rows of louvers on the hood sides. He really captured the look of the "California style" track-Ts of the late '40s and early '50s. nice car!
I did another update on expenditures so far. I spent another $97.05 on switches, wire, connectors, zip-ties and materials to complete the wiring. I had to replace the turn signal unit in the steering column for $59.35. I spent $4.61 on nuts & bolts, $19.07 for a clutch slave cylinder, and $127.00 for a new battery. The grand total now comes to $4232.89.
I still need to have glass put in the windshield frame, buy some rear tires and the paint, and of course there are a few other small items (horn & relay, rear deck hinges, etc.) that I'll need. It appears that I will exceed my goal of $4500, but maybe not by too much.
Jim
Racing! - Because football, basketball, baseball, and golf require only ONE BALL!
-
05-24-2013 05:57 AM #943
Congrats Mr. Robinson! That first ride is always a special time and good to hear yours was a smooth one!
-
08-07-2013 01:13 PM #944
I have been a bit slow to report recently. I've had trouble downloading photos to my old computer; it seems that a while back the computer and my camera refused to "talk" to each other any more. No big deal, I just used my laptop then for picture transfers, but it suddenly died one night without warning. A few days later I bought a new laptop and... Have any of you experienced Windows 8? I'm having to re-learn everything!
I have the T licensed, insured, and have been driving it for a few weeks now. It's going to be a fun car when I get all the "bugs" worked out. To begin with, the pedals are too close together. It's drivable, but I don't like it, so I'm going to do some surgery on the tunnel so I can spread the pedals apart. The other thing is the gear ratio. The 8 inch Ford rear has a 2.79 gear and it's just too high for a 4-banger with 5-speed. I rarely get above 3rd gear, so a lower gear is definitely necessary.
I will post some pics shortly of the deck lid installation and exhaust pipe fabrication. I have finally figured out how to download and resize them. Now I just need to figure out how to get them to upload to this site.
Jim
Racing! - Because football, basketball, baseball, and golf require only ONE BALL!
-
08-07-2013 01:58 PM #945
Sounds kewl Jim! Waiting for the pics! Always fun to get the new toy out for some cruizin'!!!!!Yesterday is history, tomorrow is a mystery, Live for Today!
Carroll Shelby
Learning must be difficult for those who already know it all!!!!
Welcome to Club Hot Rod! The premier site for
everything to do with Hot Rod, Customs, Low Riders, Rat Rods, and more.
- » Members from all over the US and the world!
- » Help from all over the world for your questions
- » Build logs for you and all members
- » Blogs
- » Image Gallery
- » Many thousands of members and hundreds of thousands of posts!
YES! I want to register an account for free right now! p.s.: For registered members this ad will NOT show


 73Likes

 LinkBack URL
 About LinkBacks
 Reply With Quote


Friday and Saturday (4/11 & 12/25) Chris (my wife) and I made the journey to Homestead-Miami Speedway so I could participate in the Florida Power & Light sponsored Electrathon event.:cool: It was...
Electrathon - A Different Kind of...