


Thread: madmax nova


Results 1 to 15 of 41
 LinkBack URL
 About LinkBacks
Hybrid View
-
04-24-2009 12:52 PM #1
 CHR Member

- Join Date
- Apr 2007
- Location
- West Point, Virginia, United States
- Car Year, Make, Model: 1971 monte carlo
- Posts
- 2,772
keep the pictures coming. really enjoying this build.BARB
LET THE FUN BEGIN
-
04-24-2009 09:00 PM #2
CHR Member
- Join Date
- Jan 2006
- Location
- fort myers
- Car Year, Make, Model: '27 ford/'39 dodge/ '23 t
- Posts
- 11,033
Only thing that I wonder about is if your electrical system can handle the load of so many headlights. You might have to bump up the alternator to something like a 100 amp one, plus the relay and all would have to be on a separate circuit so it doesn't overload the present one. It is surprising how much juice a headlight draws.
Don
-
04-27-2009 09:08 PM #3
CHR Member
- Join Date
- Sep 2005
- Location
- Hamilton
- Car Year, Make, Model: 69 nomad, 73 charger, 74 vega
- Posts
- 3,900
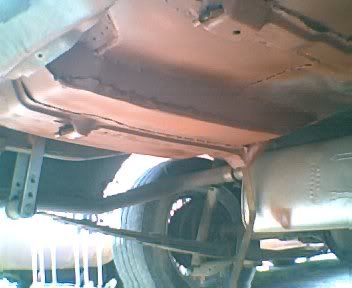
OK, got the last strip in. there are a couple more pieces I COULD put in.. but I think this is good for now. The pan is complete, and all the major rust is gone. Of course, the entire pan needs replaced, but this is a beater not a show car, and the wife will probably wreck it anyway.
Anyway.. today I pulled the can of zero rust off the shelf, and it was bunch of goo, with some liquid on top. Got to stirring, and it actually came back to life. Looked through my stash of projects past, and found some reducer and paper filters. Thinned it down, and got five buckets / filters going. Pulled out my old spray gun, and filled it up. Everything was going well, until the air compressor 'walked' around and cut the hose. Fixed the hose and finished painting. Now, I wanted to shoot till it was all gone, but the gun clogged up, and so I called it good for the day. Got about a half quart of reduced Zero rust for another day. Really should have caulked first, but got ahead of myself. I'll caulk it tomorrow. Picked up a couple tubes of white lightning, might paint back over it, dunno.
.
Education is expensive. Keep that in mind, and you'll never be terribly upset when a project goes awry.
EG
-
04-30-2009 02:14 PM #4
CHR Member
- Join Date
- Sep 2005
- Location
- Hamilton
- Car Year, Make, Model: 69 nomad, 73 charger, 74 vega
- Posts
- 3,900
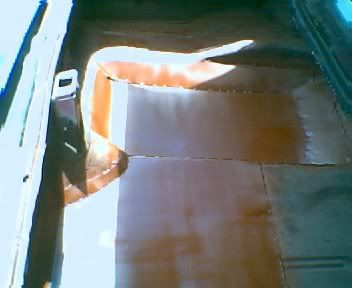
Ok, gas axe, cutoff wheel, and patch it back together. Tank should clear easily now.
Unfortunately, the top of the gas tank is worse than I had thought. Going to have to use one of the firebird gas tanks, but the filler neck is too short.
I hate welding on gas tanks. Gives me the heebie jeebies.
.
Education is expensive. Keep that in mind, and you'll never be terribly upset when a project goes awry.
EG
-
04-30-2009 06:15 PM #5
CHR Member
- Join Date
- Sep 2005
- Location
- Hamilton
- Car Year, Make, Model: 69 nomad, 73 charger, 74 vega
- Posts
- 3,900
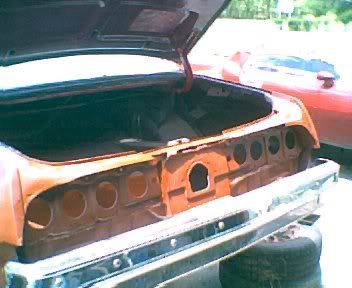
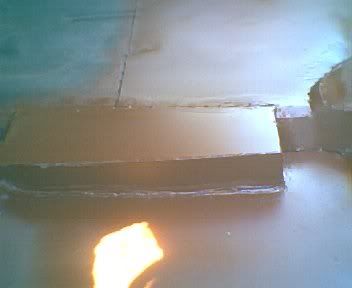
OK got the gas tank neck stretched.
Pulled the sending unit.
Drilled a 1/8 hole in the top corner, and drained out the last drop.
Set the tank in the hot sun for several hours.
Hooked up the shop vac to blow into the tank.
Welded it up.. and learned something. The neck is soldered in, not welded.
I melted out the solder, so I welded it in. Figured out why the factory doesn't do it that way.. the metal is real thin from the forming process. Stretched WAY thin. It was really tough to find the right heat to not burn through. ( acetylene ) But I got the job done.
Now the tank is mounted, tail lights are in and wired.
Time to get on with other things..
Education is expensive. Keep that in mind, and you'll never be terribly upset when a project goes awry.
EG
-
05-04-2009 10:59 AM #6
CHR Member
- Join Date
- Sep 2005
- Location
- Hamilton
- Car Year, Make, Model: 69 nomad, 73 charger, 74 vega
- Posts
- 3,900
hood ornaments have fallen out of vogue for some reason.
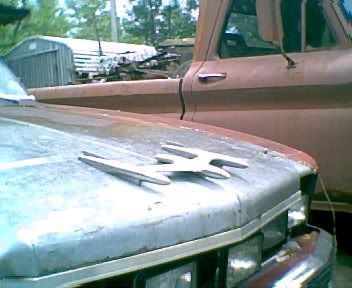
Can anyone tell me what this one is?.
Education is expensive. Keep that in mind, and you'll never be terribly upset when a project goes awry.
EG
-
05-04-2009 11:13 AM #7
CHR Member
- Join Date
- Oct 2007
- Location
- Petaluma
- Car Year, Make, Model: 48 Ford F1
- Posts
- 9,793
Looks similar to this one for sale on ebay off a 56 Oldsmobile.
http://cgi.ebay.com/Vintage-1956-OLD...QQcmdZViewItem
I bet it from a similar period Olds
here is a 52

Last edited by stovens; 05-04-2009 at 11:15 AM.
"  "No matter where you go, there you are!" Steve.
-
05-04-2009 11:17 AM #8
CHR Member
- Join Date
- Oct 2007
- Location
- Petaluma
- Car Year, Make, Model: 48 Ford F1
- Posts
- 9,793
This might be more help, just can't quite get yours from one photo angle

" "No matter where you go, there you are!" Steve.
 Reply With Quote

Posting Permissions
- You may not post new threads
- You may not post replies
- You may not post attachments
- You may not edit your posts

I wore a camouflage T-shirt once. The response in the pub was "Oooh, it's a floating head!" .
the Official CHR joke page duel