-
04-10-2009 09:28 AM #31
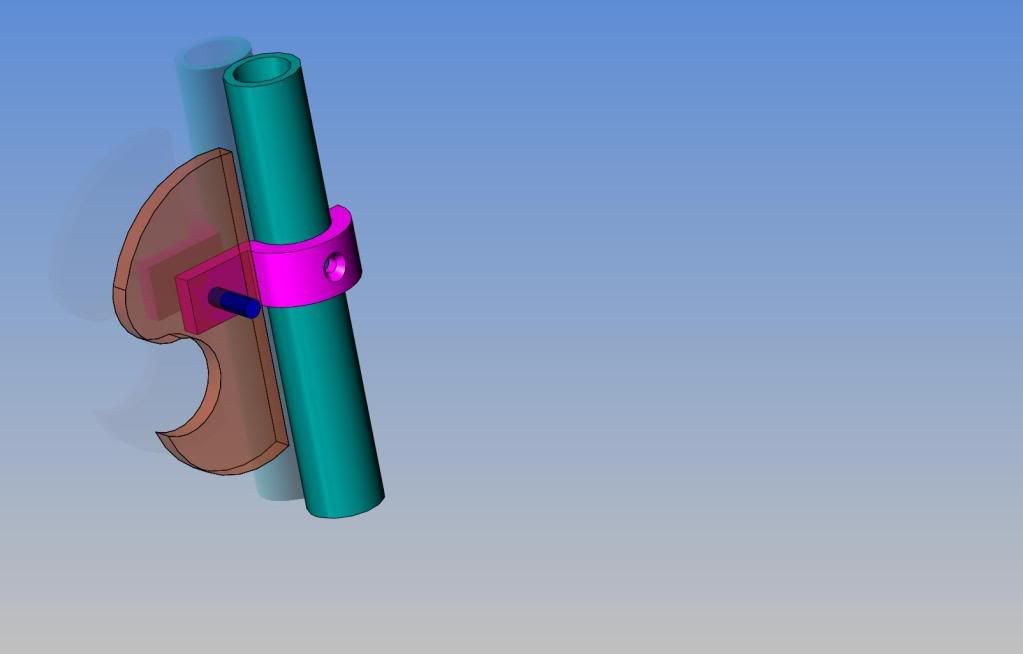
Jeez--Now that I have started this project, one idea keeps flooding in on top of another. I like the milled aluminum front mounts that I made yesterday. Now, as I think about the rear mounts----The cloth top is on the outside of the 1" diameter frame tubes. I could attach the Lexan to the inside of the frame tubes, but then from outside the car you can see the 1" gap between the lexan and the convertible top material. BUT---If I was able to mount the inside of the lexan flush with the centerline of the frame tube, then there would only be a 1/4" gap---much more visually appealing and marginally more room inside the car. I can make the purple brackets out of 3/4" aluminum, and attach them to the frame tube with one self tapping screw---and the shape of the bracket will keep it ftom rotating on the screw. Then drill and tap it for a 1/4"-20 x 1" stud and add a little Loctite 648 to the stud---
Old guy hot rodder
-
Advertising

- Google Adsense
- REGISTERED USERS DO NOT SEE THIS AD
-
04-10-2009 09:34 AM #32
Brian I had a similar thought that you could maybe cut a thin strip of lexan or whatever and piano hinge it to the full length window that way you could get it perfectly lined up.
"  "No matter where you go, there you are!" Steve.
-
04-10-2009 12:01 PM #33
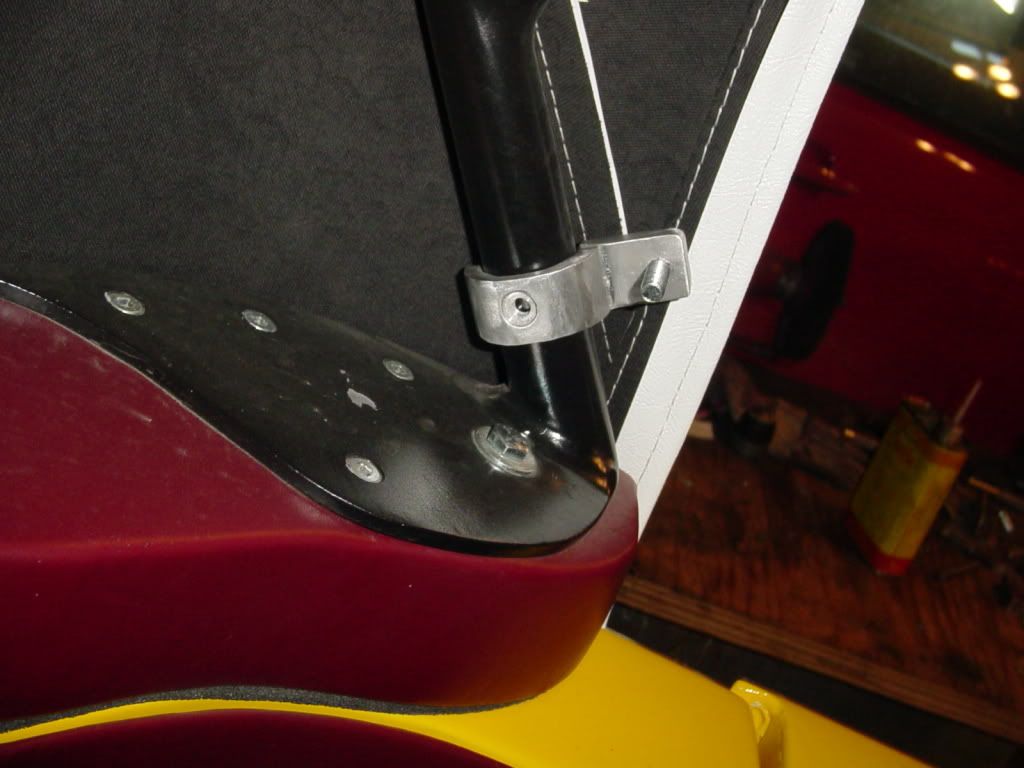
Wow!!! I think this is going to work out great. Now if I can just find enough peices of scrap 3/4" alum. plate to built 3 more of these. I don't know yet whether I will polish them or paint them the same colour as the frame tubes to make them "disappear".---Probably paint them black and polish only the front channel mounts.
Last edited by brianrupnow; 04-10-2009 at 02:57 PM.
Old guy hot rodder
-
04-10-2009 02:43 PM #34
And Voila'--An afternoons work yields 4 finished brackets.--I hate to admit it by my old butt is draggin'. I'm not used to standing at a machine all afternoon. (I'm ashamed to admit that.) tomorrow I will make patterns for the lexan. I might need one more bracket on each side, but I will wait and install the lexan and then see what I think.

Old guy hot rodder
-
04-10-2009 05:27 PM #35
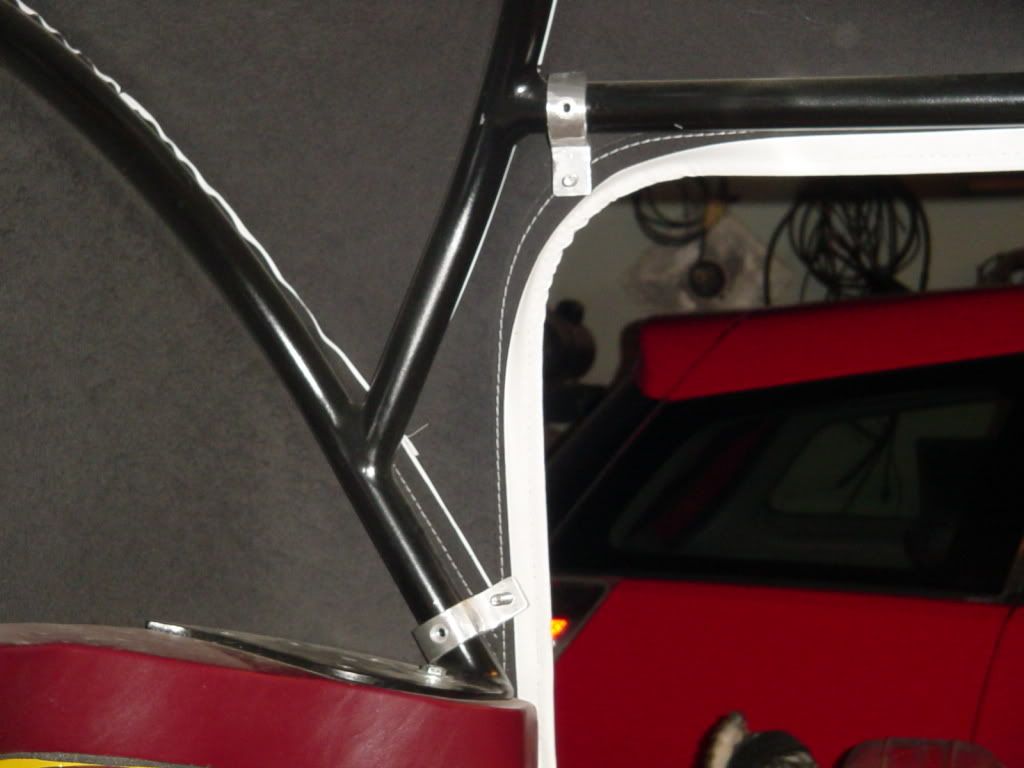
Looking real good in mock-up. The rear brackets are hidden by the top material when viewed from the outside, they don't interfere in any way with people getting in and out of the car, (I tried it), and they are wide enough apart vetically to give good support to the Lexan. The front support fits perfectly and will look great once polished.

Last edited by brianrupnow; 04-10-2009 at 05:31 PM.
Old guy hot rodder
-
04-10-2009 07:21 PM #36
I think your on to a million dollar idea!! Brians custom roaster windows, you could make a fortune!!
Looks great!!!
-
04-11-2009 08:36 AM #37
This morning I installed all the brackets on the car--this involved a total of four 1/8" holes drilled into my frame tubes at the rear, and two in each windshield post at the front. In the picture, that peice you see running between the upper and lower rear brackets is a temporary peice bolted tightly in place on the 1/4" studs to ensure that the upper and lower brackets are in perfect alignment when the frame tubes are drilled. It was removed after the holes were drilled and the anchor screws in place.

Old guy hot rodder
-
04-11-2009 03:08 PM #38
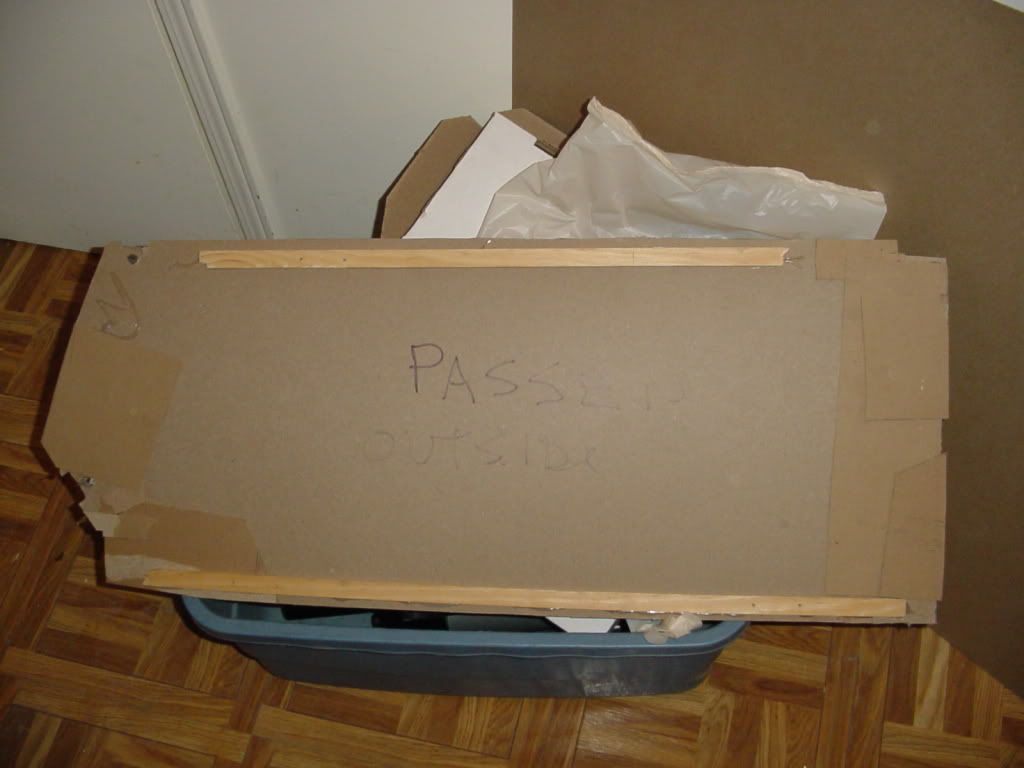
So--after a 2 hour interlude --vacuuming-(yes, even I get to help with the "Big Easter Housecleaning--relatives coming")--we move on to making templates for the side windows. I start with heavy layout cardboard, and my trusty glue gun. This means getting in and out of the car about 7000 times, gluing peices hereand there, untill the pattern is as perfect as I can get it. The wooden slats are glued in place to stiffen the carfddboard.
Old guy hot rodder
-
04-11-2009 03:20 PM #39
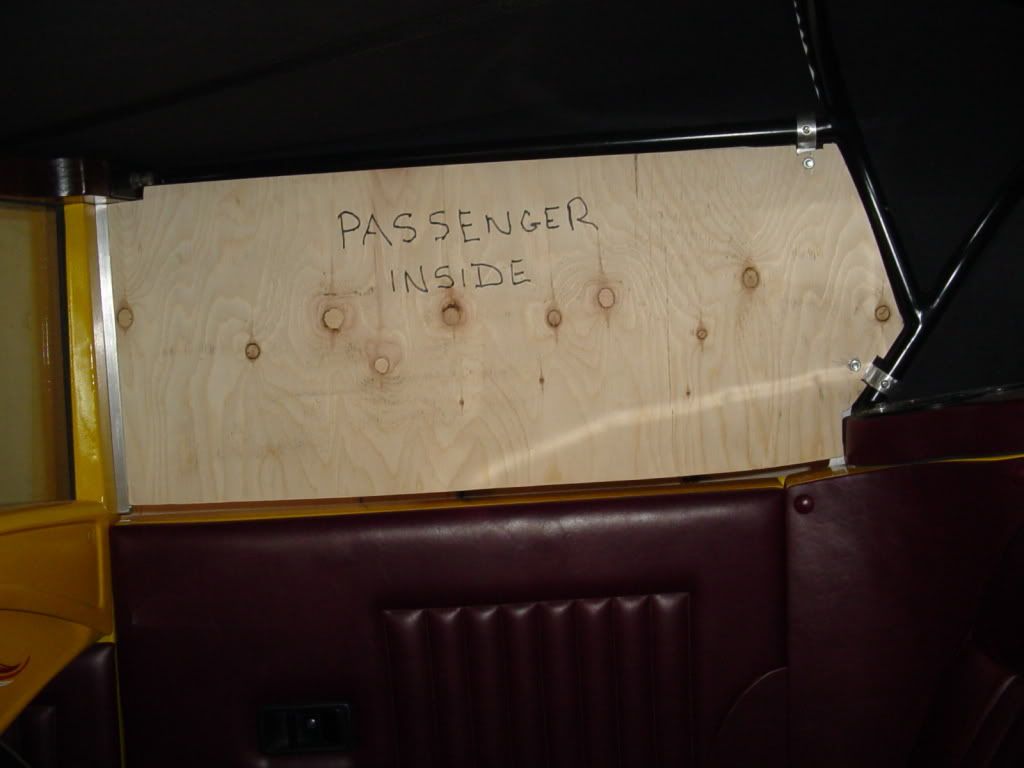
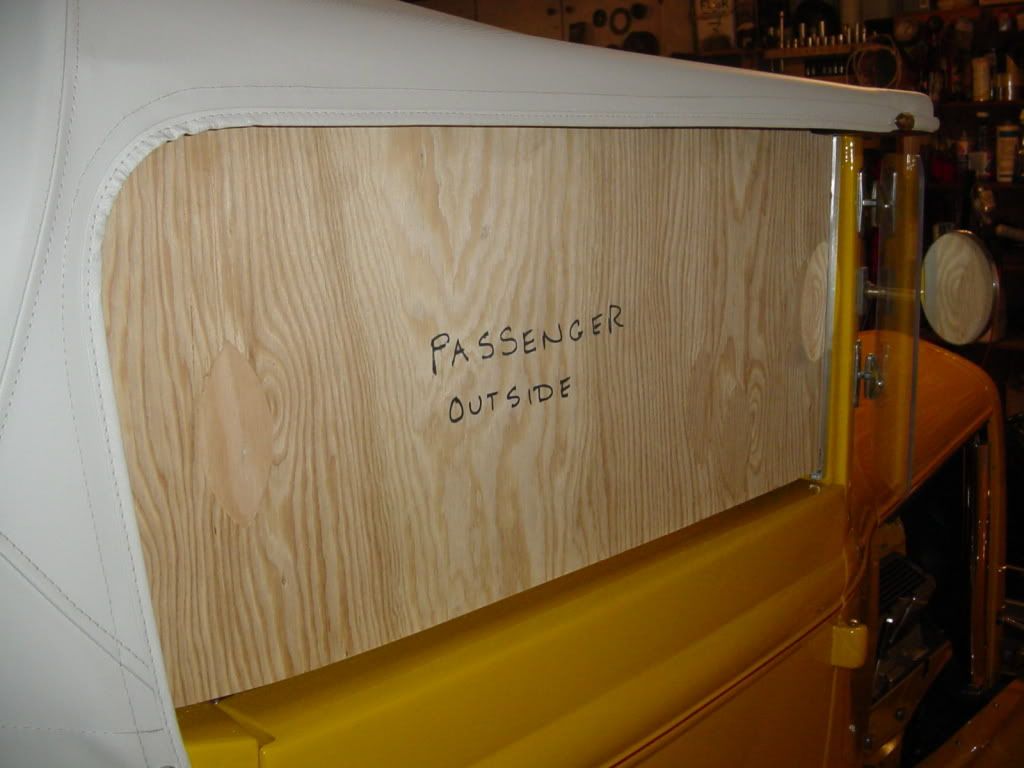
And then, just to be "Double damn sure" (Lexan is expensive), I transfer the cardboard pattern onto 1/4" plywood, and install it. I intentionally made the pattern to leave a 1/2" gap between the sidewindow and the top of the door, which I don't want marked up. I find that the plywood slips into place very easily---I have a couple of 1/4" hex nuts holding it onto the studs right now, but they will be swapped out for wing nuts in the final rendition. I still have to decide on how to seal the gap at the bottom. In a perfect world, I would glue some soft foam onto the bottom of the lexan and let it rest on the door top, but I don't think it would be very durable---I will think of something.
Old guy hot rodder
-
04-11-2009 09:51 PM #40
You might consider some window belt weather stripping. J.C. Whitney sells it in various designs and lengths. The rubber would not mar the paint and it would probably keep water out.Ken Thomas
NoT FaDe AwaY and the music didn't die
The simplest road is usually the last one sought
Wild Willie & AA/FA's The greatest show in drag racing
-
04-12-2009 09:55 AM #41
Well, I'm up to $19 in cost so far on my project. $3 for aluminum square bar and $8 each for two peices of 1/4" plywood. The patterns are made for both sides, and seem to fit quite well. I am going to try and find a source for Mar-Guard polycarbonate, because these side windows may spend most of their lives in a cloth bag in the back of the pickup with my lawn chairs. I don't want them all messed up from rubbing inside the cloth bag. I reduced the gap between the bottom of the sidewindow and the top of the doors to 1/4".--that way, in a "worst case" scenario. if I can't find a good premade seal material, I can glue a 1/4" square soft rubber strip to the bottom of the polycarbonate to close the gap and protect my paint. So far, this has been an easy project. I will post a couple of pics when I'm finished.Old guy hot rodder
-
04-13-2009 02:17 PM #42
So---Today I found a glass shop right here in good old Barrie that will cut Marguard lexan to my templates, and they have 1/4" in stock. Spendy stuff though---$180 for what I need. This is about $60 more than I had initially thought of spending, but---I'm worth it!!! (especially if this stuff is as good as everyone says.) Now, in terms of the rubber seal that I require along the bottom of it, next to my door top.---I have looked at a number of auto glass shops, glass shops, and on-line, and can't find exactly what I want. Have a look at the attached drawing. It shows what I need. I can buy the rigid vinyl U profile, but not with the foam rubber strip on the bottom of it. I can probably buy some foam rubber or low durometer solid rubber and glue it onto the vinyl with rubber cement.---But---If anybody knows where I can buy a 6 or 10 foot length of material that is close to what I show in the drawing and is all in one contiguous peice, please let me know.---Brian

Old guy hot rodder
-
04-14-2009 02:02 PM #43
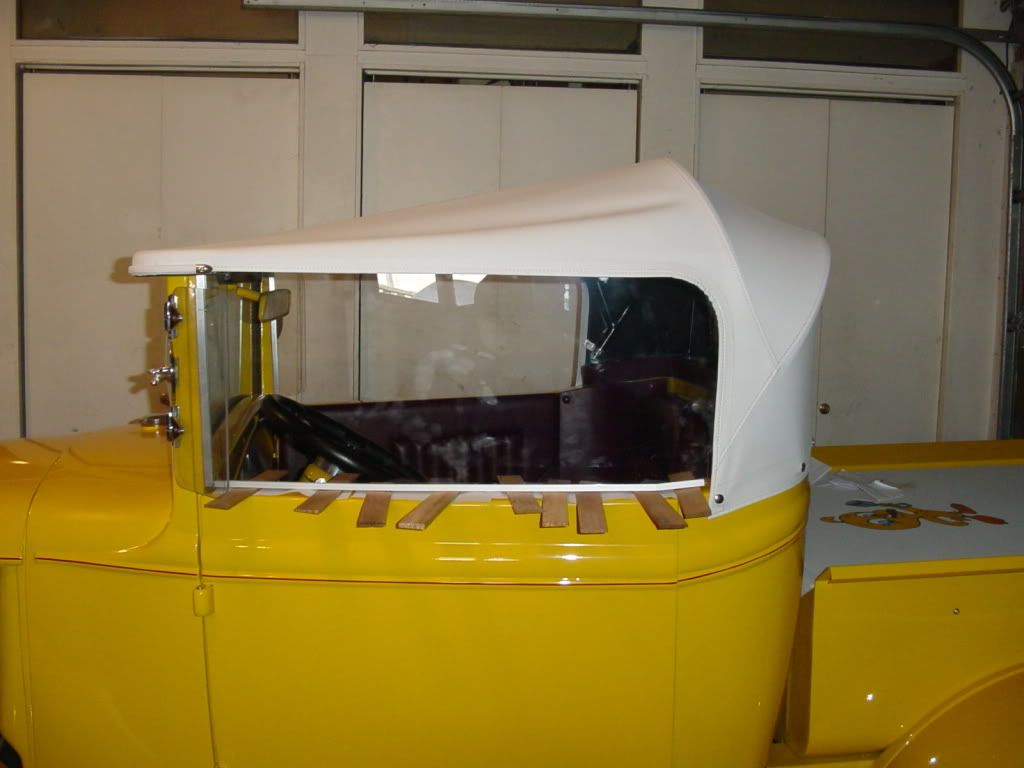
So---Here we are--Greasy fingerprints and all!!! I picked up the Marguard windows today and picked up enough light aluminum channel to cover the bottom edge of each window. I put a bead of clear silicone in place in the bottom of the channel, stuck it on the Marguard, installed the marguard into my car, and then after protecting the top of the door with heavy paper, I wedged shim shingles between the door top and the aluminum to push it up tight against the bottom of the Marguard. After it sets up for 24 hours, I will glue 1/4" closed cell foam weatherstripping to the underside of the aluminum. That should get rid of 90% of the wind which would blow in through the crack.


Old guy hot rodder
-
04-14-2009 06:17 PM #44
Hey Brian, what about that round split foam insulation for 1/2 copper hot water pipe for your bottom seals ??? Available at just about any hardware store and it's cheap.
-
04-14-2009 06:28 PM #45
Welcome to Club Hot Rod! The premier site for
everything to do with Hot Rod, Customs, Low Riders, Rat Rods, and more.
- » Members from all over the US and the world!
- » Help from all over the world for your questions
- » Build logs for you and all members
- » Blogs
- » Image Gallery
- » Many thousands of members and hundreds of thousands of posts!
YES! I want to register an account for free right now! p.s.: For registered members this ad will NOT show


 LinkBack URL
 About LinkBacks
 Reply With Quote


To the top
Where is everybody?