-
05-21-2011 08:58 PM #5596
Looking forward to seeing some pics DaveMark Smith
Who better to do it then yourself?
-
Advertising

- Google Adsense
- REGISTERED USERS DO NOT SEE THIS AD
-
05-21-2011 09:07 PM #5597
I'll try to remember to take the camera out there tomorrow, gonna put the battery in the charger right now!Yesterday is history, tomorrow is a mystery, Live for Today!
Carroll Shelby
Learning must be difficult for those who already know it all!!!!
-
05-23-2011 06:11 PM #5598
Having fun with the Plymouth now, putting things together for the last time! I finished up the grille, built it out of .125" round stainless rod, and got it and the cooling fans installed. Also got the wiring harness almost all connected on the engine, just a few odds and ends to finish up there. Got an order coming in tomorrow with electrical goodies to finish up the wiring, then some more plumbing coming in on another order Wednesday! I'm not at the end of the project at all, but occasionally I can catch a glimpse of "the end" of the build!!!!Yesterday is history, tomorrow is a mystery, Live for Today!
Carroll Shelby
Learning must be difficult for those who already know it all!!!!
-
05-27-2011 03:44 PM #5599
I'm new to this and I have a question about my 350 small block. What do I torque my head bolts to? In case you were wondering I have a 1976 Chevy Stepside. Don't really know if that really makes a difference.
-
05-28-2011 07:09 PM #5600
At least 2 (or maybe 3) years ago (how time flies when you are having fun) I asked for suggestions on how to hold just the two top hood halves on without the sides - and be half way decent looking. I posted this on another forum yesterday first simply because I another guy had the same situation - so if you have seen it, don't "yell" at me:
I have decided that I'm not going to run the hood sides for my car at this time - and even didn't paint them so I wouldn't get lazy. Using a two piece hood top makes it a bit difficult to hold down, and to come up with something that isn't clunky gives you a mind execise.
There are quite a few that I've seen that have the leather straps and zig zag springs - and I really like that arrangement except there are getting to be too many and I try to occasionally think outside of the normal box.
What I did was to kinda use that leather strap theme a little bit, but modify to something different. I ordered up some 3/4" wide heavy duty nylon webbing, some 3/4" 'D' rings, a couple of turnbuckles and a couple of eye bolts along with some SS 10-32 machine screws.
First, I welded some 'D' rings to some short pieces of .25 round rod to fit in the loops for the sides. These pull against those loops and wont fall out but will come out easily when I want to open it up:


Then I measured things up and cut plus punched some holes:

These pieces were then bolted together rather then riveted - by choice as I like the look - and attached to a 1.25 ring and then the turnbuckle:

The eye bolt replaces the fender hold down bolt - the galvanized eye bolt needs to be changed to a SS version in the next McMaster -Carr order.
This is what I ended up with:

The webbing has a 2000 pound break strength, so is way strong enough, the eye bolt would pick up the car and with the smaller width webbing, my engine is visible without the usual two 1-1/2 leather straps and some hardware detracting the eye.

Right now, to open, I have to loosen the turnbuckle as there is an open hook at the eye bolt. I have a lock nut there now, but it will get a wingnut (SS of course) arrangement eventually - next McMaster order along with the eye bolt and maybe a SS turnbuckle instead of the aluminum body version I have there now. Like everything else on a home built car, it's a WIP item which I didn't want to spend a fortune for parts without knowing it would work.Last edited by IC2; 05-28-2011 at 07:13 PM.
Dave W
I am now gone from this forum for now - finally have pulled the plug
-
05-28-2011 07:23 PM #5601
I like it Dave, simple and clean always works best.....and is usually the toughest design to ome up with!!!! Nice work!Yesterday is history, tomorrow is a mystery, Live for Today!
Carroll Shelby
Learning must be difficult for those who already know it all!!!!
-
05-28-2011 11:44 PM #5602
Ditto what Dave Said!"  "No matter where you go, there you are!" Steve.
-
05-29-2011 03:42 AM #5603
Great idea Dave! Man oh man, that is a pretty car! Great Job!
-
05-29-2011 03:46 AM #5604
Nice strap system Dave.
I like the screws holding the straps together as well. Gives it a nice look.
-
05-29-2011 07:40 AM #5605
Not only did you save yourself a few bucks, and have a fun project, you didn't punch any extra holes in the hood: Hot Rod Leather "Why?" Hood Straps - Exterior Parts
Rather than the turn buckle thing, how about attaching a stainless Model A hood latch for a spring loaded mechanism that coincidentally goes with the car. It could go either way; fastened to the fender rail would hook a D ring at the bottom of the strap down leg, or, rig it with a D ring to the down leg and hook into the eye bolt arrangement.Your Uncle Bob, Senior Geezer Curmudgeon
It's much easier to promise someone a "free" ride on the wagon than to urge them to pull it.
Luck occurs when preparation and opportunity converge.
-
05-29-2011 09:20 AM #5606
Bob - I guess I almost copied Hot Rod Leather without knowing - those must be new as I do recall going to their site, but at least a year ago.
The hood latches (you picture '28-'29's) are a part of a look that I was trying to get away from as well, even had them mounted at one time in their normal location before paint, then sold the entire arrangement, plugged the 8 holes and plan eventually when (IF??) I install the hood sides to use Dzus quarter turn fasteners. I just don't like those latches even on a restoration.
My total cost, excluding shipping - is about $35 with the turnbuckles and SS lock nuts already on hand. The SS eye bolts that I want are about $13 each - but may have to wait until next fall.
The shouldered eye bolt - that has to stay. It replaces a fender to frame bolt so about all I can do is try to find something to replace the turnbuckle which works, but there is probably a better choice - eventuallyDave W
I am now gone from this forum for now - finally have pulled the plug
-
05-30-2011 10:56 AM #5607
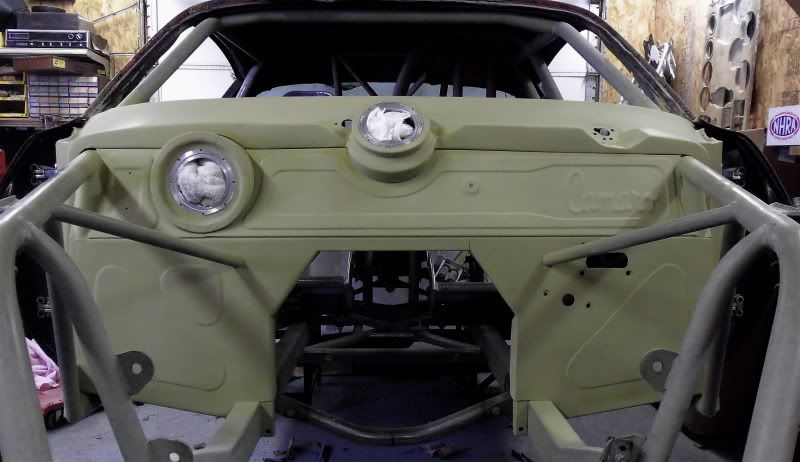
Well it took about a year, off & on, mostly off, but I finally have the firewall in primer. There's still body work to do, but I wanted to get it covered so it doesn't rust again. Hot & humid today, so I have the A/C running to dry it out, yea, that's it, I have it running for the primer. lol.
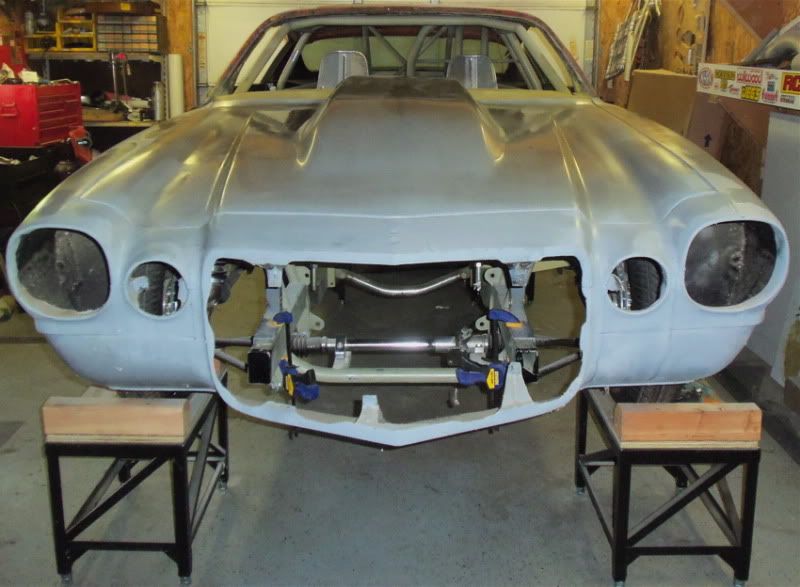
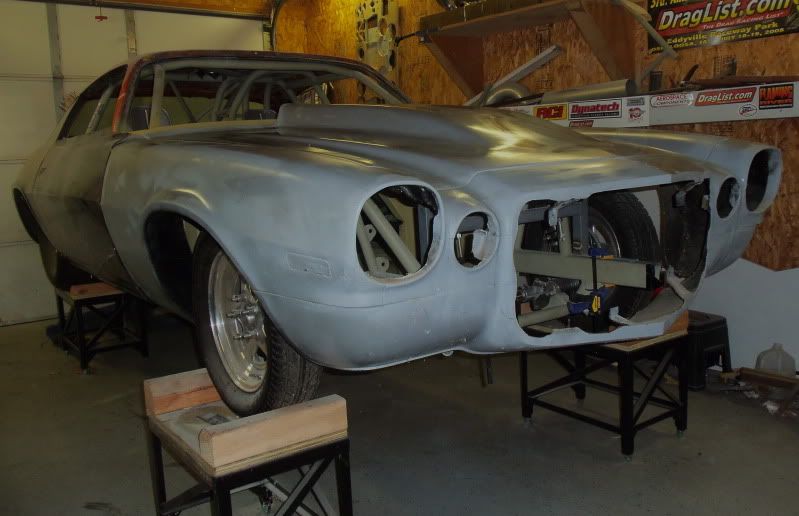
I'll be setting the front end on this afternoon. It's going to be a job, the front end needs a LOT of tweaking I'm afraid.

"PLAN" your life like you will live to 120.
"LIVE" your life like you could die tomorrow.
John 3:16
>>>>>>
-
05-30-2011 12:35 PM #5608
Firewall cover set in place, roughly.


"PLAN" your life like you will live to 120.
"LIVE" your life like you could die tomorrow.
John 3:16
>>>>>>
-
05-30-2011 07:07 PM #5609
Not too bad for the initial set-in-place, Pro! Haven't seen any 'glass front ends that didn't need a bunch of work to make it fit correctly, certainly not on of those "Take it out of the box and bolt it on" deals.....but then few parts are when building a car! I'm sure you'll get it dialed in!Yesterday is history, tomorrow is a mystery, Live for Today!
Carroll Shelby
Learning must be difficult for those who already know it all!!!!
-
05-30-2011 07:50 PM #5610
That's quite the job on the firewall Pro.
I love the letters.
Welcome to Club Hot Rod! The premier site for
everything to do with Hot Rod, Customs, Low Riders, Rat Rods, and more.
- » Members from all over the US and the world!
- » Help from all over the world for your questions
- » Build logs for you and all members
- » Blogs
- » Image Gallery
- » Many thousands of members and hundreds of thousands of posts!
YES! I want to register an account for free right now! p.s.: For registered members this ad will NOT show


 188Likes

 LinkBack URL
 About LinkBacks
 Reply With Quote


Thanks guys! One more trip around the sun completed. Lots of blessings and things to be thankful for (like still being able to type this message!!) Here's to us "over 70 guys.." Glenn
HBD Glenn!!