Thread: Project Special K
-
09-03-2008 11:56 AM #166
Ken not a bad idea!
Ted
the stove came out of the old part of the house. It never worked well, pilot lights blowing out, and the oven had a pilot you lit when you turned it on! My wife refused to part with it after we built our new addition which includes a brand new kitchen with double ovens. We actually fought over this stove more than the cost of the addition. In the end I just figured it was cheaper to keep the old thing, than pay for marraige counseling! Makes a nice storage space for some of my tools that I don't use too often, and the stove top is great for the Makita recharger, and power cables!
 \
\
On a great note, I woke up to find a box from no limit engineering with the parts I needed to put the rear axle onto the springs. One side is in, the other needs a little finess to get the pin on the axle to pop in the hole on the leaf springs. I figure tomorrow on my day off, I'll pull out the "intimidator"(2lb sledge) and give it a light tap. I think the "Terminator"(10lb sledge) might be too much!
"  "No matter where you go, there you are!" Steve.
-
Advertising

- Google Adsense
- REGISTERED USERS DO NOT SEE THIS AD
-
09-03-2008 12:15 PM #167
See some great progress Steve you have been at it on them days off . I have one off today buy just woke from a 2 hr nap. Do those truck cabs get bigger as your working on them sure see alot of panel there .
-
09-03-2008 12:20 PM #168
It seems that way! The back is taking forever. Every time I think I can move on, I find more dents, scratched paint and rust!"  "No matter where you go, there you are!" Steve.
-
09-03-2008 12:53 PM #169
Same looking at back panel on A its as big as a full hood and showing just as much . Looks like you hitting it though so keep it up got me waiting to see it rolling . Been watching this since the beginning
-
09-04-2008 06:39 PM #170
Mounted in the 9inch today. One of my bottom leaf springs was broken, but doesn't seem to effect the mounting. The pumkin housing seems to be rotated slightly up, but it must just be that way, as everything is mounted the same as the old one, and the welded seats on the new axle are stock. The only thing that didn't line directly up was the shock mounts on the axle. I think I will have to cut them off and have them rewelded in a straight line with the top mounts vs. the way they are angled against the frame as they drop down to the new mounts. Here's a few photos. I also degreased, scrubed and rebuilt the brakes putting in new wheel cylinders and will put the brake lines on tomorrow. I was also able to use the old emergency brake cables with the new brakes drums, so no worries about changing that whole set up.
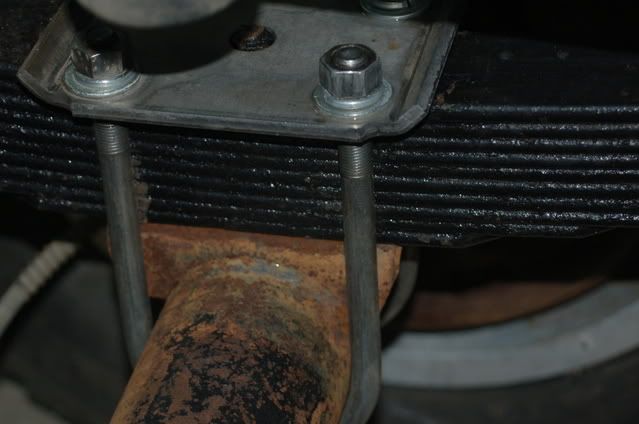
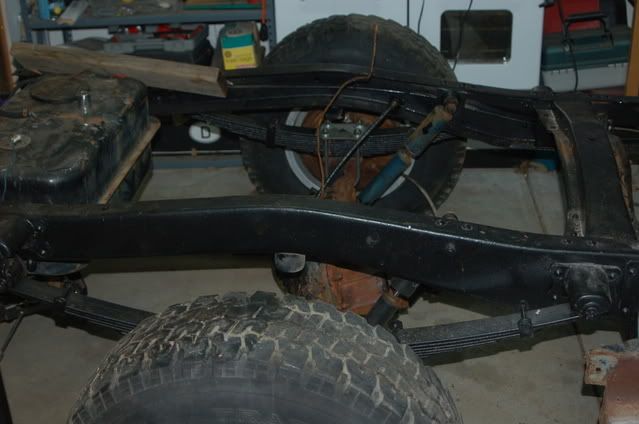
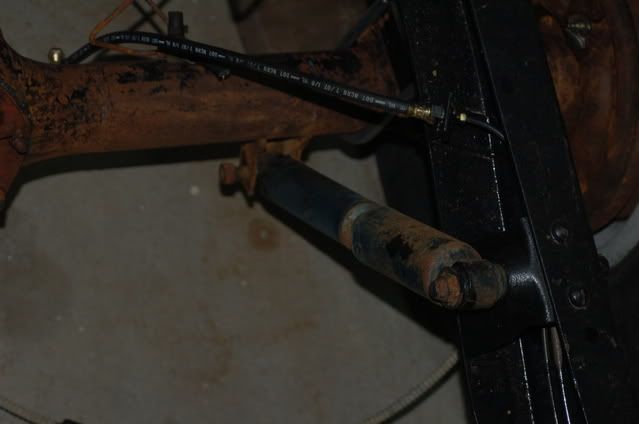
"  "No matter where you go, there you are!" Steve.
-
09-04-2008 06:58 PM #171
Built in angle guess if its correct to mfg you all set . Cool another milestone in your build .
-
09-04-2008 08:14 PM #172
Looks like you got done before I did today . I love putting on big parts like that, it makes you feel like you've done a lot more than something like brake lines. Nice break from the rear panel I bet too.
Sean
-
09-05-2008 07:17 PM #173
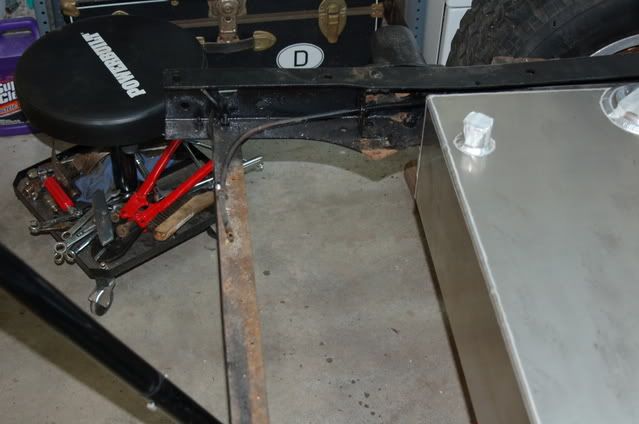
Well it was 101 F today. Youch! Major headache to match the heat, but some more goodies arrived by mail. My new gas tank came in, so I spent the better part of the morning figuring out how to plumb it, using both solid aluminum fuel lines and braided stainess hose with anodized fittings. There should be a class in the use of and understanding thereof of the fittings(i.e. size -6, -8, and all the wierd little gizmos you need to connect to different things like Edelbrock carbs, stock fuel pumps, inline fuel filters, 37 degree flring tools... but the summit boys and fellow members came to the rescue again. Here is a photo of the gas tank in a mock up of where it will mount under the bed!
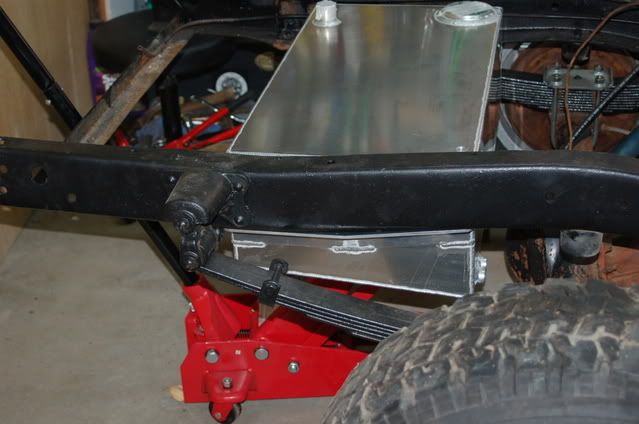
I also found out what's missing from my hood latch. A fellow 48 F1'er sent of photo of the hood latch retaining spring, which I am missing. Now just to find one!
"  "No matter where you go, there you are!" Steve.
-
09-05-2008 07:27 PM #174
101 and you're complaining . It's been about 50 here lately, feels like winter is coming early-now help me out and go put on some aerosol hairspray, we gotta warm this planet up!! (just kiddin').
Sean
-
09-06-2008 07:05 AM #175
that tank looks good...where is it from?'35 Ford coupe- LT1/T56, '32 Ford pickup, 70 GTO convertible, 06 GTO
Robert
-
09-06-2008 10:07 AM #176
The tank is from Classic Performance Products in Southern California. They are pretty helpfull, especially with new folks to hot rodding, like myself. The guys on their help line know me by name now. The front disc brake conversion kit also came from them and the brake booster, engine and transmission cross member/mounts. Mario on the help line stands out the most. I find emailing him pictures of where I'm stuck, works best.
Every once in a while they sell parts on Ebay to clear out surplus stock. The tank was miss listed there. They meant to write side fill, not bed fill, but made a mistake. It worked out in my favor to the tune of a 150.00 dollar discount, but I did have to wait almost a month, as they had no bedfill tanks in stock, so this one had to be manufactured. It's very heavy duty. My one complaint(a small one) is that they provide little or no directions, or the directions are general application for something that can be used in many different applications, so they can be confusing to follow.
I also took Kens advice to use a solid fuel line the length of the frame, and braded stainless in the engine bay. At the tank end I'll use regular fuel line and clamps as all of that will be hidden under the truck bed."  "No matter where you go, there you are!" Steve.
-
09-08-2008 09:12 PM #177
Well I spent 5 hours on the truck, but nothing jumps out as any progress! I removed the front and rear windows, and sanded down the window channels, got a new set of replacement glass for the front and back, side vents and door windows( 6 pieces all together, tinted grey except the front) for 157.00 on Ebay, not too shabby. I also worked on more dent / bondo work for the back of the cab, it actually is almost ready for a top coat and then primer, and lastly I removed the rusted lower valence piece that conects the fenders on the bottom of the front grill. I scored a surface rusted one from ebay for a few dollars, that I keep tripping over in the garage, so I figured I might as well get it off the floor! So tomorrow, I am determined to get up early and crank it out, as Fall is truely now here. 101 Saturday, 71 today! My goal was to finish the body work this summer, and then get to the engine and tranny during the Fall/winter. So if I get a move on it, I just might make it.
"  "No matter where you go, there you are!" Steve.
-
09-09-2008 06:00 AM #178
do you happen to know if they build custom tanks? i don't even really need a custom tank...i just need a stock style '35 tank with a rear filler instead of the left side stock location, but I'm not having a lot of luck. Thanks Originally Posted by stovens
'35 Ford coupe- LT1/T56, '32 Ford pickup, 70 GTO convertible, 06 GTO
Robert
-
09-09-2008 11:26 AM #179
Not sure but here is their web site if you want to call them the number is there. http://www.classicperform.com/"  "No matter where you go, there you are!" Steve.
-
09-09-2008 06:53 PM #180
I used a top coat glase on the patches today, sanded for a couple of hours, and decided to primer the body to help fing those spots that you can't see without paint! Here are a few shots
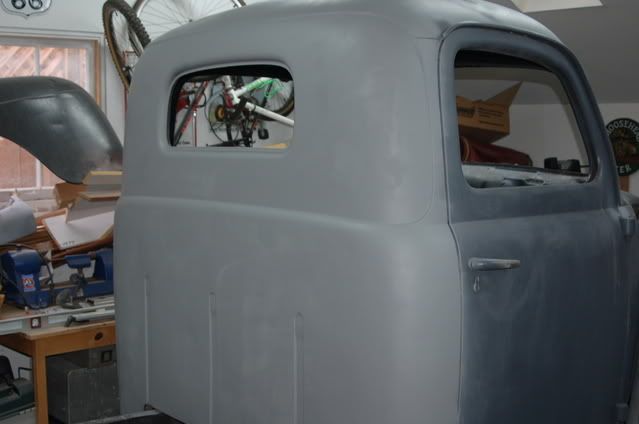
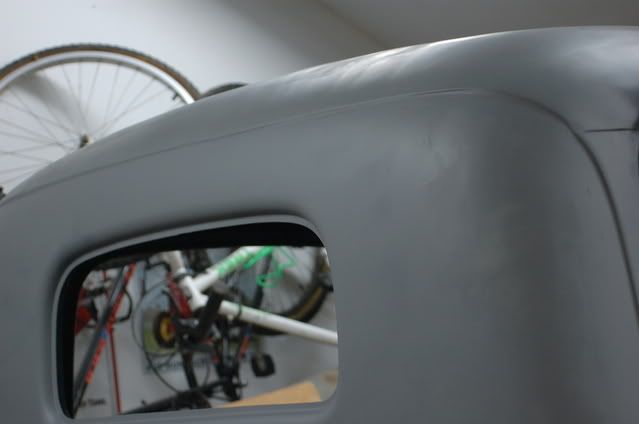
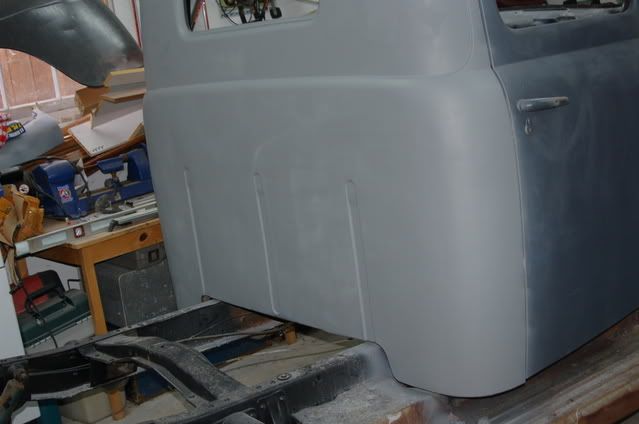
It was amazing at what jumped out with just a coat of primer."  "No matter where you go, there you are!" Steve.


 379Likes

 LinkBack URL
 About LinkBacks
 Reply With Quote

This website will not be worth anything until if becones SECURE!
Not Secure