Thread: Project Special K
-
05-14-2009 12:40 AM #301
Thanks Don
I got one of those cable grabbers today, will give it a go tomorrow after the return from Dentist. Root Canal. Harley battery bad after only 1 year and connected to battery tender! Not my week. Main PC taken out by virus, everything gone, lap top infected with bug, took two hours to fix, bolt down the hole......On a positive note I'm off the next two days! My next engine thing is to find a way to hide the blue snot(RTV sealant on water pump, and tap gooseneck to get temp assending unit in. Then Friday modify transmission crossmember and bolt in place! It is exciting to be able to move foward. Expect lots of stupid questions in the near future!

Last edited by stovens; 05-14-2009 at 12:43 AM.
"  "No matter where you go, there you are!" Steve.
-
Advertising

- Google Adsense
- REGISTERED USERS DO NOT SEE THIS AD
-
05-19-2009 06:28 PM #302
Waded through the honey do's this week and got to the truck today. The distributor hold down bolt in the pan remained evasive despite many little retrieval devices, my favorite was a spring cable with retractable magnet which keeps magnet from grabbing everything every time you put it near metal.
So alas the old tried and true method of pulling of the pan worked. I got a new oil drain pan, so I could reuse the oil, since it's new and has a very expensive SFR oil additive in it to save the cam shaft lobes on start up!. I want to thank Techinspector for two things, one advice to the SFR, two for the one piece reusable rubber oil pan gasget. Made it much easier to do the reseal from under the truck!
Next I fitted the transmission cross member and jacked the tail of the transmission up level. It turns out it needs to be modified 3 1/2" back to easily attach to the frame, which I decided welding an extension plate to the cross member will do the trick. I went to Van Berbers steel and got a free peice of scrap 1/4" plate, 4" by 12". Then I hustled it to a local welder but missed him by one hour. So tomorrow, I'll take it to hem and hopefully be able to get it in this weekend! All in all not a bad day. I dreaded the pan and put it off, but it wasn't bad at all. The hotrod show last week was inspirational to get off my butt and get to work.


"  "No matter where you go, there you are!" Steve.
-
05-19-2009 06:51 PM #303
Steve that engine does look great quote on the exacto knife and some tedious work to trim it up .
-
05-20-2009 01:00 PM #304
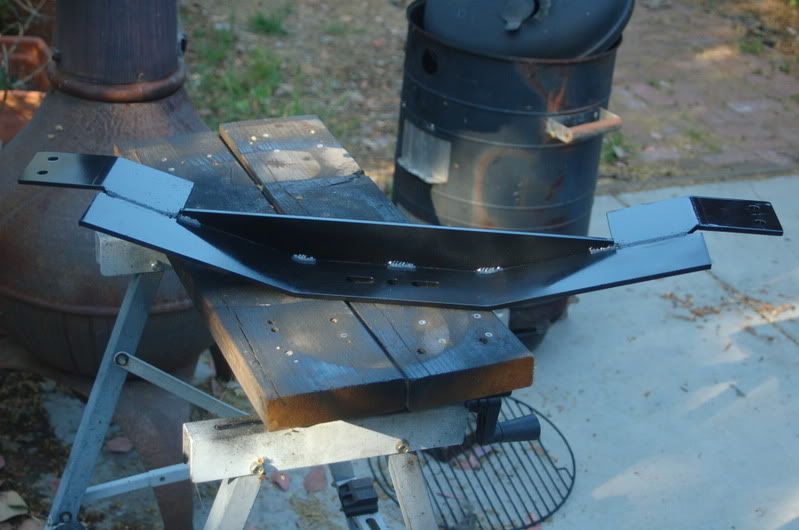
I went to the local welder today. Nice guy, has a 56 ford hotrod. He's going to modify the transmission cross member. At first I thought I'd just extend the mounting tang to the bottom of the tranny, to make the cross members fall 3 1/2" to 4" back from where it is now. Then I started to think this will extend it back to where it would get in the way with the drive shaft potentially. So after talking to Shotwell today , decided to angle the side bars back instead, keeping everything away from the drive train. Should be a lot stronger when he's done."  "No matter where you go, there you are!" Steve.
-
05-28-2009 09:02 PM #305
Got my modified transmission mount back this afternoon. The welder/steel worker mounted tabs offset back 3 1/2" to avoid frame mounting issues with the brake booster and old crossmember. Came out pretty good. Will try to get it in in the morning. I also took him some templates for my floor pan patches which he said he could cut, and bend to shape. I guess if the drive line cooperates and goes in, without mods, I'll plumb the gas tank in too. Figure I'll wait on the floor pans before starting the initial wiring. Here's a shot of the modified member and the original.


"  "No matter where you go, there you are!" Steve.
-
05-29-2009 04:20 PM #306
Well back to the drawing board. The bad thing about someones better idea, is sometimes you need to think a little longer on it!
The driver's side of the mount now hits the bell of the brake booster. Back to Trevor for some mods! Cool thing is he was excited about my project and decided to dust the dirt off his 56 f1 today, and got an engine for it. So in a way I did him a big favor. He said having his metal shop right there at home makes it really easy to work on it during down times or after work. Good guys!
Also discussed the floor pans he's going to fab out. Good news is the dogs finally got a real walk, the yard got spruced up, and the truck is slowly getting there!
"  "No matter where you go, there you are!" Steve.
-
06-02-2009 01:02 PM #307
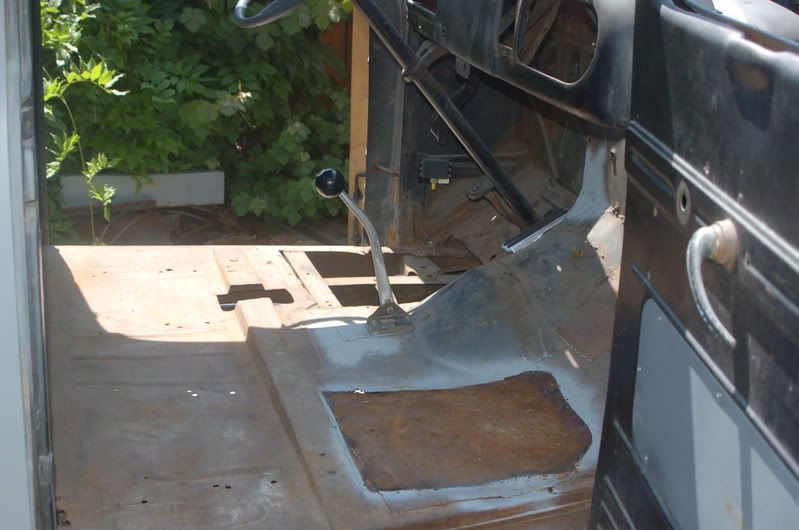
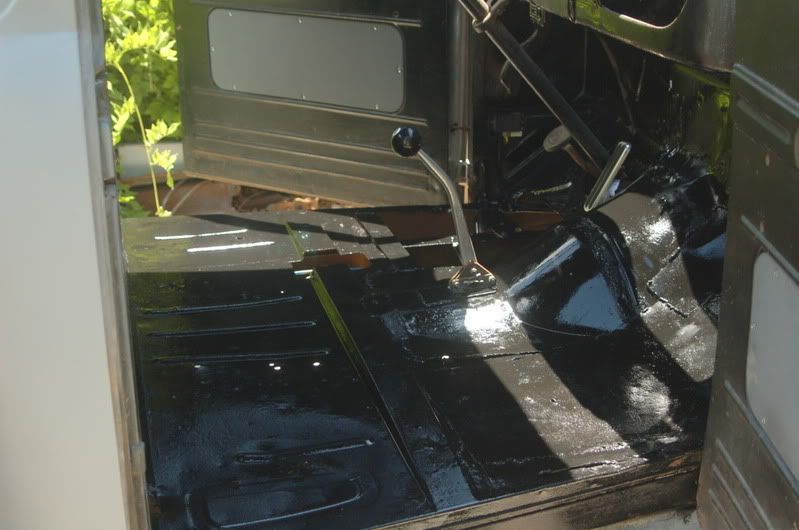
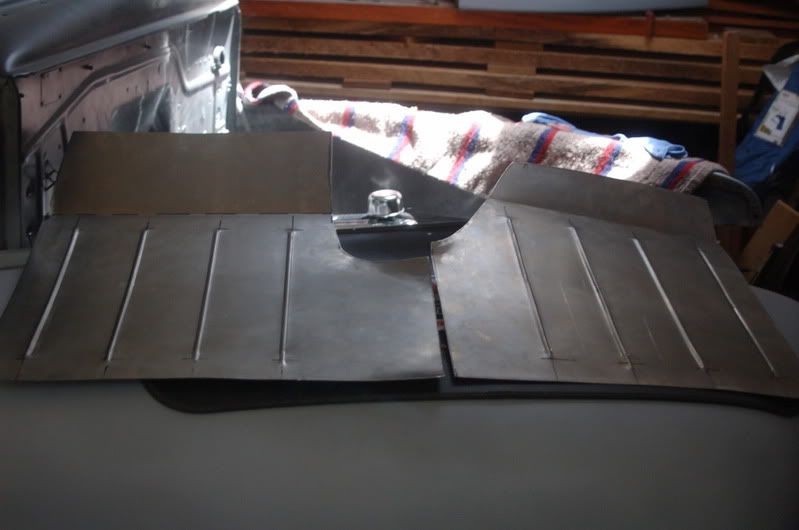
Got my floor patch panels today. Decided to por 15 the bottom layer first before attaching the new panels. The new panels basically cover the weak spots and the gross holes in the floor boards by driver and passenger feet. I still have open bolt holes for the stock seat, in hopes to find one some day. I'll probably just bolt and washer them for now to keep the dirt out! I also got some seam sealer from napa to fill all the small cracks and holes as well as run around the edges of the new panels.


"  "No matter where you go, there you are!" Steve.
-
06-02-2009 01:07 PM #308
Here are the new panels that will go over the old areas .

"  "No matter where you go, there you are!" Steve.
-
06-02-2009 05:14 PM #309
Decided to go ahead and bolt passenger panel in, even though paint is still tachy. Will remove clean, seal and rebolt on tomorrow before work. Came out ok!

"  "No matter where you go, there you are!" Steve.
-
06-02-2009 09:01 PM #310
Thanks. The driver side being removable is necessary to adjust the brake linkage and get to the master cylinder! I'm thinking about putting a remote canister setup, so it would be easier to get fluid in there."  "No matter where you go, there you are!" Steve.
-
06-04-2009 06:50 AM #311
Looks good Steve, I'm checking on a stock seat for you. I was telling a friend of mine about your project and he said he has a friend that is parting one out.
Ken
-
06-04-2009 10:07 AM #312
Thanks Ken. Always good knowing a source for old parts!"  "No matter where you go, there you are!" Steve.
-
06-08-2009 05:58 PM #313
Picked up the tranny mount today. It worked like a charm, I guess three is my lucky number. Then I bolted in my driver's side floor pan. I was doing all of this with a horrible headache. But it is done and that's a good feeling.Last edited by stovens; 06-08-2009 at 09:24 PM.
"  "No matter where you go, there you are!" Steve.
-
06-08-2009 07:53 PM #314
Steve, those headaches are terrible. It's always a good feeling when something goes right.
Your doing a good job, I wish I could say the same here but too many other things come first. I was set to work on the cooling system but my wife gave me another job, so here I sit tired, and the car has to wait for another day. I hope the headache goes away so you can continue.
Richard
-
06-08-2009 09:43 PM #315
Thanks Richard. I hope the radiator problem gets fixed soon. By the way, I've seen some good buys on new aluminum radiators on ebay. Most will make a custom one for you if you ask. One I called who said thier price is cheaper, because they are the manufacturer selling direct not through a retail outlet. I probably will go thru ebay for mine.
On a different note I had to loosen my shift linkage when jacking the tranny up for the new mount. The bottom of the cable linkage was holding the transmission too low for the mount to bolt up flush to the frame, interesting enough, I got the mount drilled and bolted in, and thendropped the jack(motorcycle jack which works great for this). To my suprise the tranny seated itself to the right engine angle, and now clears the bottom of the shifter linkage. I might shim the base of the shifter inside the cab to keep it from rubbing against the tranny, but it worked out pretty good.
Now I just need to remove my floor panels and paint them on both side and caulk and bolt them back in.Last edited by stovens; 06-08-2009 at 09:45 PM.
"  "No matter where you go, there you are!" Steve.


 379Likes

 LinkBack URL
 About LinkBacks
 Reply With Quote

Friday and Saturday (4/11 & 12/25) Chris (my wife) and I made the journey to Homestead-Miami Speedway so I could participate in the Florida Power & Light sponsored Electrathon event.:cool: It was...
Electrathon - A Different Kind of...