Thread: Project Special K
Hybrid View
-
10-25-2013 09:23 PM #1
got some more time in on truck, pulled the gas tank and filter, and started cutting off old shock mounts, got drivers side off the transaxle, and half of the passengers side off before I had to call it quits for the day. I picked up a stick welder from Tractor supply that will work on my 110 volt power supply(will weld up to 3/8" thick steel), and hopefully do a better job on welding in frame plates and some lateral supports. Slowly getting there."  "No matter where you go, there you are!" Steve.
-
10-25-2013 10:34 PM #2
Micah 6:8
If we aren't supposed to have midnight snacks,,,WHY is there a light in the refrigerator???
Robin.
-
10-26-2013 03:30 AM #3
Same here.. been busy these past few weeks with the harvest and then work has been sending me all over creation. It'll calm down soon I hope and I will make some time over the winter.
You know Steve... they say without pictures... it didn't happen!


-
10-26-2013 09:29 AM #4
Still waiting to get my camera back from my wife. She was in Germany and then the Czech Republic on a business trip, and still needs to download all of her photos off the camera before I can use it. She's been home for a week, but is still fighting Jet lag. Hopefully she get to it today, and then I'll post some shots as boring as they are for you guys tomorrow!"  "No matter where you go, there you are!" Steve.
-
10-29-2013 06:48 PM #5
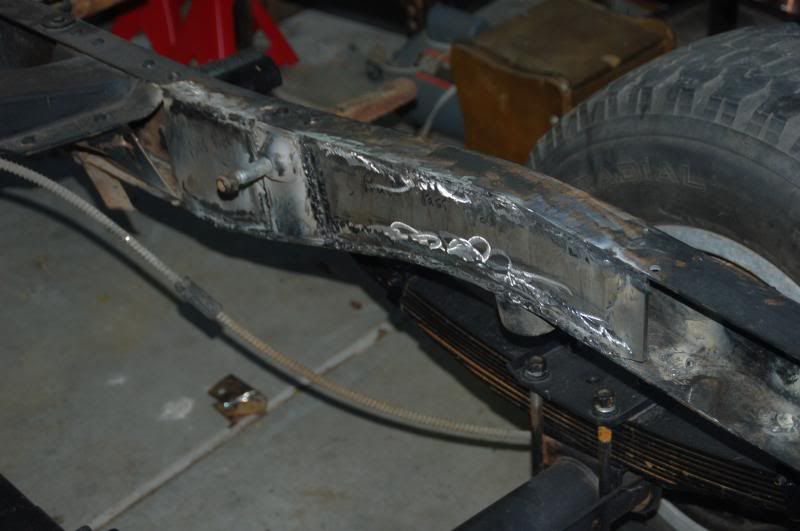
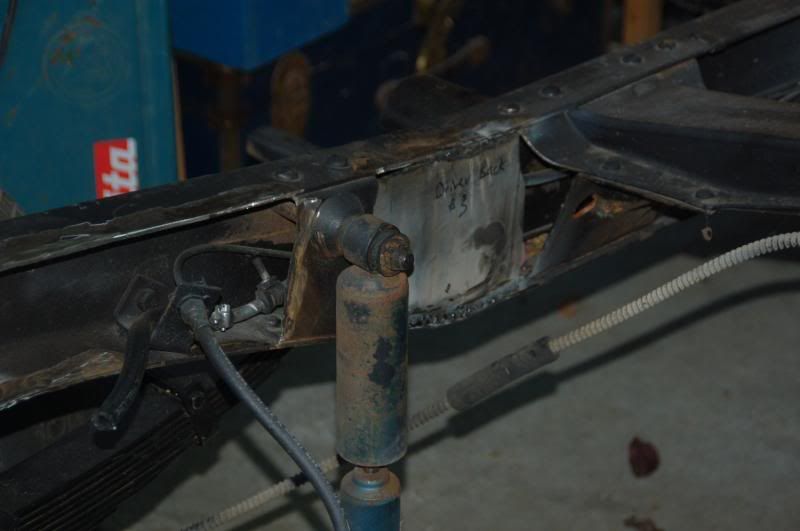
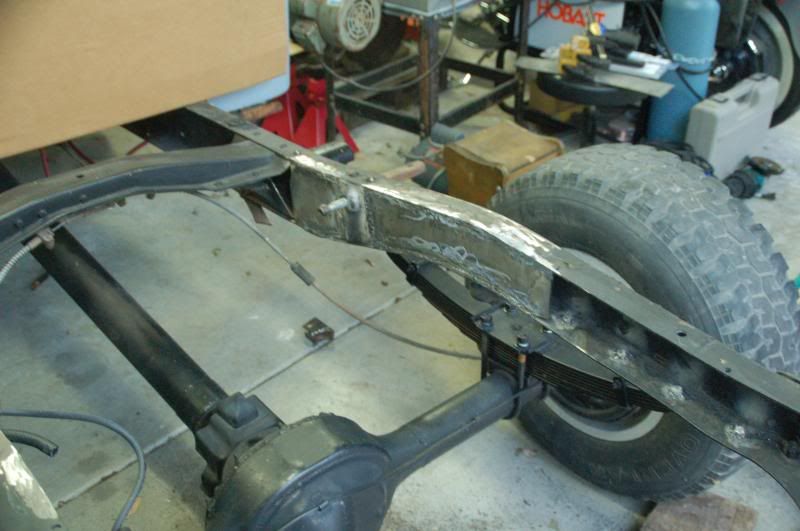
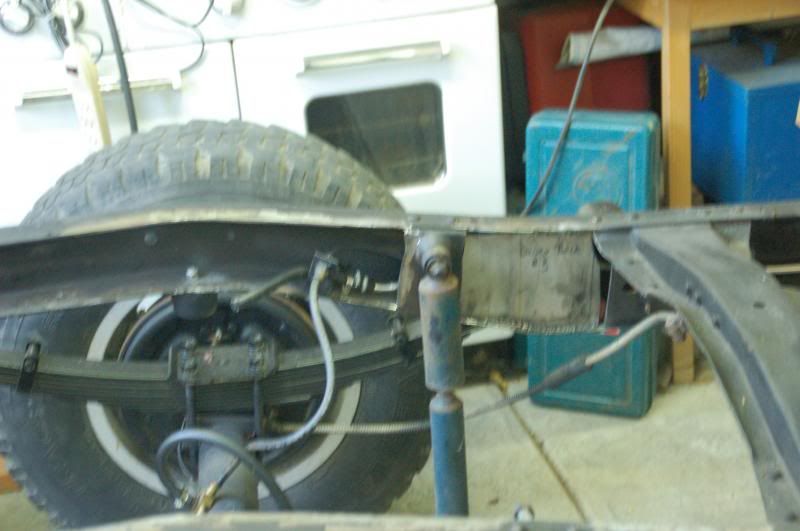
Well today was more progress on the truck. I managed to get the other shock mount off after some extensive cutting and beating with a hammer! . I then welded one of the rear plates on, using both mig and Campbell Hausfeld® 115V Stick Welder. The first welder(Campbell Hausfeld® 115V Stick Welder) lasted 5 minutes before it wouldn't work, so back to tractor supply it went and the second performed much better, though it has a very low 10% duty cycle, but it lays down nice filler beads compared to the mig, so even though it's slow, it got the job done.
I posted a few pictures of my progress, many will remember the ill suited position of the fuel filter, that is gone now, the first photo shows everything before I removed tank, the next shows the passenger side plate welded in the back along the frame, the third shows the obsticles to cut around on the drivers side, and the last shows the pumkin minus the shock mounts on the axle as well as the new angle with the shims now on the leaf spring mounts.
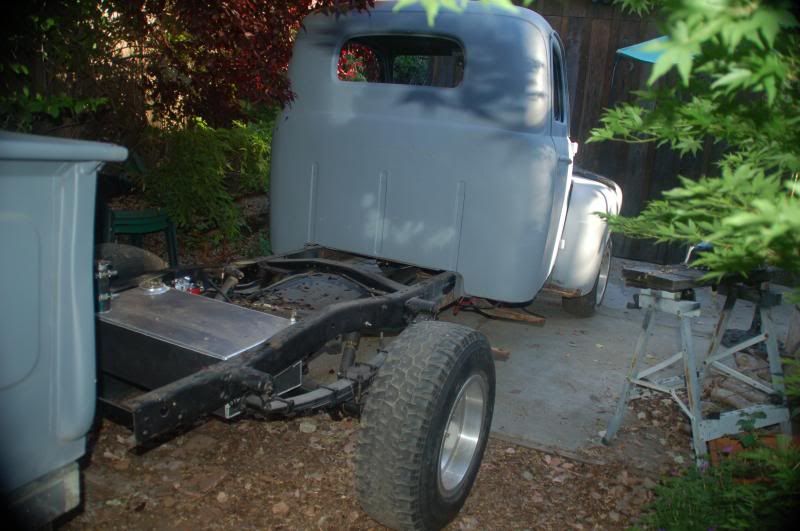
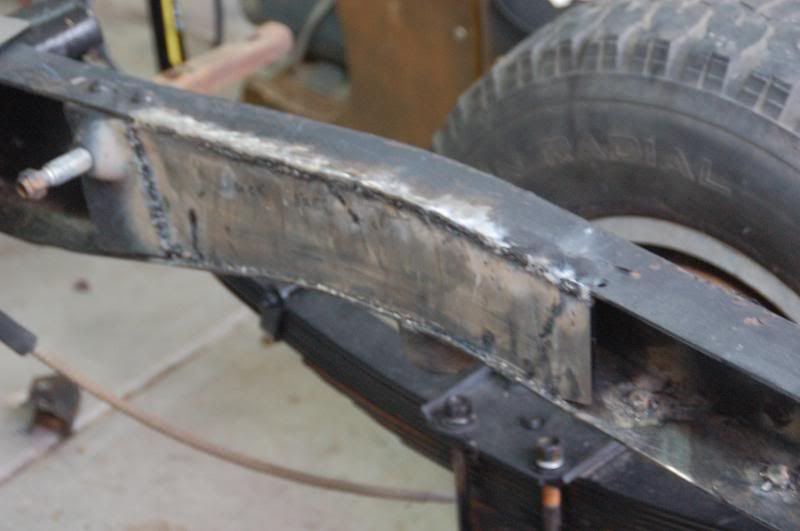
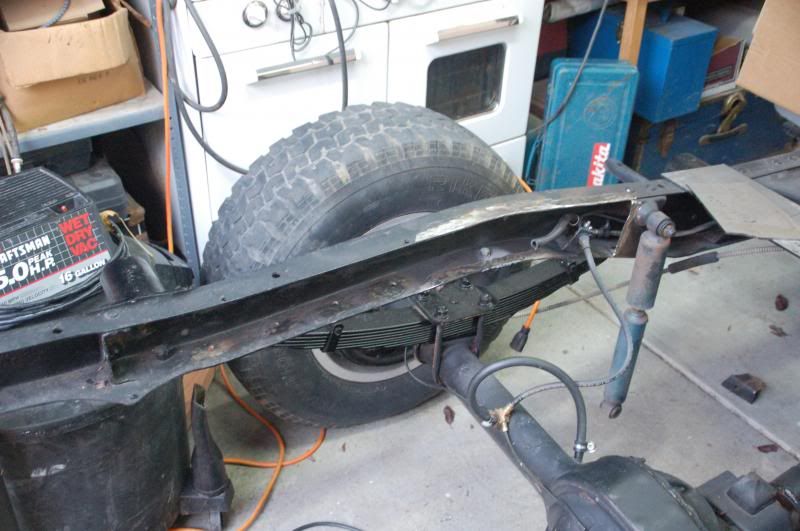
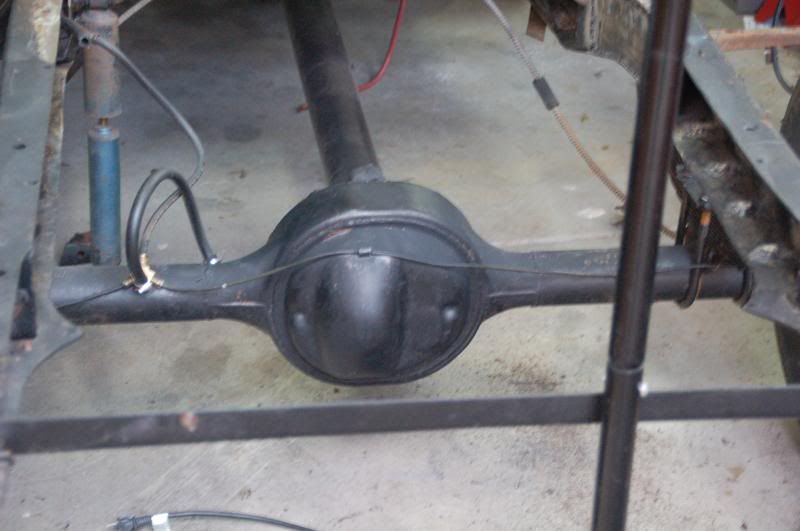
"  "No matter where you go, there you are!" Steve.
-
10-29-2013 07:16 PM #6
Good progress Steve! Shame about the welder but at least they stood behind it!
-
10-29-2013 07:58 PM #7
Yep. I also found out the welding sticks they provided are crap for creating arcs so I bought some us forge 5/64" Eazy Strike Rod-7014, and some 1/16" 6013's for better contact. I'm actually pretty happy with it and will fix some of the gaps on the front end once the new rods get here.I also jumped on the 2yr extended service plan for 14.99 considering the first welder. They refund or replace it in the first 2 years, no questions asked."  "No matter where you go, there you are!" Steve.
-
11-02-2013 06:04 PM #8
More progress today, and amazing enough new hobart welding rods work 3000% better than the ones that came with the welder. I messed around with a few different thickness and type and quickly found the 5/64 6013's put down the best beads of the bunch for the little 110 welder! Here are some progress shots, note I added more to the passenger side, and went over the old welds with a grinder, the re-welded with some of the new rods.
"  "No matter where you go, there you are!" Steve.
-
11-03-2013 04:37 AM #9
Keep 'em dry, Steve. You need a tight topped container for storage, and a desiccant can in there doesn't hurt, either! Old school was to keep them in an old refrigerator (unplugged) with a light bulb on inside for heat, but construction job sites all use rod ovens - http://www.rodovens.com/?gclid=CLTK5...FYhcMgodFkQA-ALast edited by rspears; 11-03-2013 at 04:44 AM.
Roger
Enjoy the little things in life, and you may look back one day and realize that they were really the BIG things.
-
11-03-2013 01:06 AM #10
Good work Steve! I find welding fun when you hit the combination just right, then it all flows together.
Thanks for the update & pics!
-
11-03-2013 10:13 AM #11
#4_40 and Roger thanks, it's working a lot better using the new rods, and getting a little practice. Good info to know about moisture Roger-Thanks! I watched a few You Tube how to videos that helped a lot. now, I'm working on keeping a steady hand to lay down a better bead. I can only imagine how much better this would be with 220 volts you must get a much easier arch when approaching the joint your welding, in my case I end up sticking the rod to the metal and having to break it free though I'm getting better at that too. The biggest issue seems to be surface prep between the metal and cleanliness. The cleaner the better contact and arch. Wish I would of taken welding in High School instead of wood shop. I took all the automotive classes from Auto Chassis, Electrics and Engine rebuilding along with Basic Auto, so that has helped tremendously. Maybe when the mortgage drops down a bit we'll add 220 to the shop! I'd love to find a welding class that worked with my work schedule, but my shifts are leaving here at 2;00 p.m. and getting home at mid night with a rotating weekly schedule that makes it impossible to take a weekend or weekday class since every other week I'm working at least one day of any scheduled class. I do have a friend who I hunt with who is a welder, I might hit him up for some impromptu classes next time I'm up his way!
Anyway back to the truck, I'm feeling much better reinforcing the frame, I think when I'm done I'll grind down most of the slop, snad and paint it with a nice shinny black finish. I'm also thinking of pulling the transmission hump sheet metal, out of my floor in the cab. and welding in a under support frame for the floor and at the same tome giving my self more room for th gas petal, plus it will make it much easier to mount the new Lokar Nostalia shift kit which mounts directly to the tranny. It seems all the half A$$ things I've avoided are worth fixing while the engine is out. I owe alot of thanks to all of you for specific advice along the way(you all know who you are because you post on my thread!), as well as some former Members which include Don( Itoldyouso) and Ken Thurm who still sends me emails of encouragement.So thank you all.Last edited by stovens; 11-03-2013 at 10:18 AM.
"  "No matter where you go, there you are!" Steve.
-
11-03-2013 02:20 PM #12
Welding is like so many other things we do.. experience and practice, practice, practice.. striking the arc is a prime example of that. I still much prefer my stick welder with 7018 or 6013 to using the mig.. I just need to run more wire and experiment with some different techniques and it'll come. You're in the same boat, sticking the rod is common, even the pros do it at least once a day!
Keep at it, you're getting better every day!
My shop teacher told us the secret to a nice clean bead is to get comfortable and relax!
-
11-03-2013 08:28 PM #13
Totally agree!
Another good tip is to wrap the hand-piece lead around your forearm/wrist.
That way your hand is not carrying the weight, and you can use your fingers to weave the hand-piece itself; which gives you far greater control.
Just my 2c.
I'm enjoying your thread!
Good stuff!johnboy
Mountain man. (Retired.)
Some mistakes are too much fun to be made only once.
I don't know everything about anything, and I don't know anything about lots of things.
'47 Ford sedan. 350 -- 350, Jaguar irs + ifs.
'49 Morris Minor. Datsun 1500cc, 5sp manual, Marina front axle, Nissan rear axle.
'51 Ford school bus. Chev 400 ci Vortec 5 sp manual + Gearvendors 2sp, 2000 Chev lwb dually chassis and axles.
'64 A.C. Cobra replica. Ford 429, C6 auto, Torana ifs, Jaguar irs.
-
11-03-2013 09:03 PM #14
Thanks guys. Good tips and advice!
"  "No matter where you go, there you are!" Steve.
-
11-13-2013 08:50 PM #15


 379Likes

 LinkBack URL
 About LinkBacks
 Reply With Quote


Visited a family member at Dockery Ford from the time I was 1 year old through their ownership and then ownership change to Morristown Ford. Dockery was a major player in the Hi Performance...
How did you get hooked on cars?