Thread: Project Special K
-
01-07-2014 01:23 PM #721
Thanks Roger. Still no idea how to staple thru sheet metal!"  "No matter where you go, there you are!" Steve.
-
Advertising

- Google Adsense
- REGISTERED USERS DO NOT SEE THIS AD
-
01-07-2014 01:27 PM #722
Well I got this answer on a posting at ford truck enthusiasts, seems to explain it! I want a stapler like that!
"The staples shouldn't be welded. That is the stock configuration. I'm sure there was a guy down the production line that stapled the welting on with a pneumatic/hydraulic stapler. You can glue on the welting after paint. No one will know except you and everyone that comes across this thread.""  "No matter where you go, there you are!" Steve.
-
01-07-2014 01:45 PM #723
Steve, if you do a little more research you'll find a bunch of guys who took nominal 0.040" SS safety wire, bent it into a tight staple form with needle nose pliers on 7/16 centers, drilled nominal 0.040" holes through the weatherstrip & fender/cowl, inserted the new SS staple and bent the back side over with pliers. To finish a little hammer & dolly work on each one has them just like OEM.Roger
Enjoy the little things in life, and you may look back one day and realize that they were really the BIG things.
-
01-07-2014 04:32 PM #724
Wow that's a bit intensive, but then again, when I get there it may be just the ticket! Thanks Roger!
Here are a few shots of the Lokar shifter in place. It's much taller than I thought it would be, but kinda cool! I still have to align the linkage on the c6 with the shift linkage for this kit, but all the grunt work is pretty much done(LOL who knows how hard the next part will be!). I called the Lokar tech line around 1:45 PST and caught a nice fellow right before the end of his work day. He apologized for the instructions which were first done in 2003. He said they were so poor that they are in the process of rewriting them all and adding lots more pictures. On my instructions step 3 is really step 11! Kind of gets confusing until you lay everything out, then it's not so bad. Still trying to figure out park on the transmission is it clockwise all they way foward or counter clockwise. Manged to figure out neutral though!


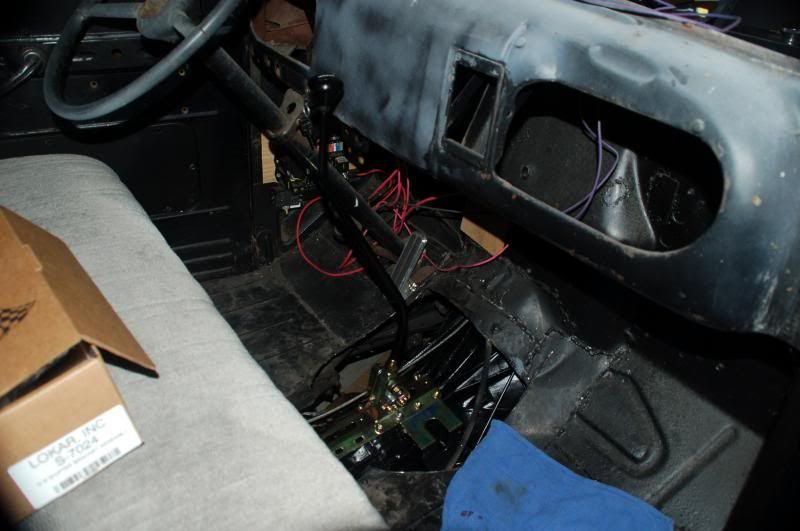
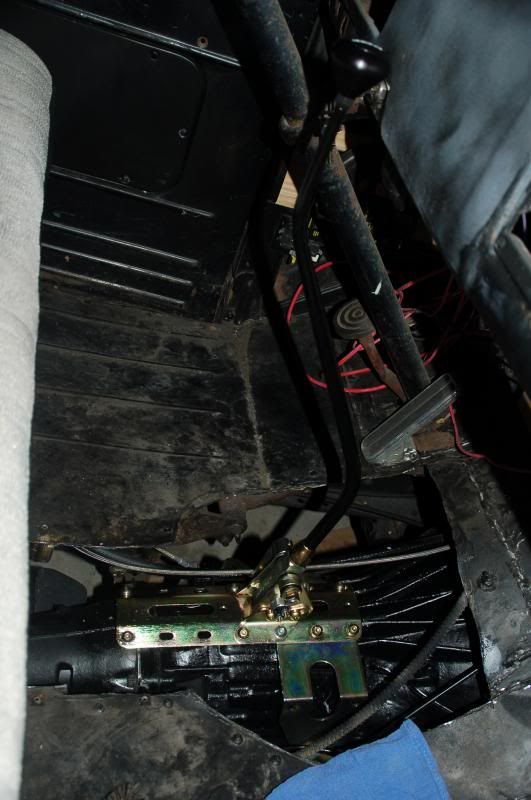
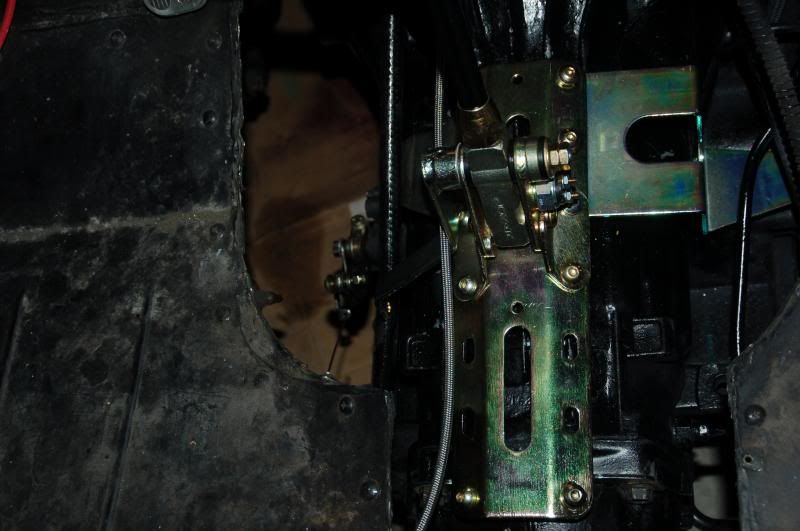
"  "No matter where you go, there you are!" Steve.
-
01-07-2014 06:13 PM #725
If you know where neutral is, park is 2 positions away, in the other direction - Lo is 3 positions to the end. If you have the driveshaft in, test your suspected park by trying to move the shaft or the whole vehicle. If your tranny was originally a column shift then the arm "USUALLY" would point down, Floor shift is the opposite. But this is not guaranteed or written in stone, there were quite a few combinations I think, but this might provide a way to test / prove the position.
You also had / have it running right? Driveshaft is in? Warm it up, let it idle and shift it with your foot on the brake. That'll tell you!
-
01-07-2014 08:49 PM #726
I was just joking about the positions and park. It all came from my Tech conversation this afternoon. The guy was telling me left and right vs. passenger/driverside, which deteriorated as we started talking about how to connect the new shift linkage and what direction the rotation of the linkage from 12 o'clock would be. In the end I was so spun around I couldn't remember where park was. But as you stated, it rolls in neutral, and by counting clicks you can find park. Sorry for my sarcasm, I was just frustrated with the instructions in this kit. Fortunately it's fairly straight forward once you delved in."  "No matter where you go, there you are!" Steve.
-
01-08-2014 03:02 AM #727
I was thinking later that you had this rig moving under it's own power.. so you must've known already! But then I couldn't remember if that was true or my other brain cell was misfiring due to the cold temps...
-
01-17-2014 03:56 PM #728
I had the day off today, and went and got a piece of scrap 16 gauge sheet metal to mock up a new tunnel around the shifter. Haven't decided whether to weld it all in, rivet, or just use sheet metal screws and caulking so I can remove it all in the future if need arises. I'm leaning towards welding all the plates above the shift linkage together, and caulking and bolting in to existing pan with sheet metal screws, then, screwing in the lower panel below the linkage and caulking it at the seems so I can access whatever. I like the idea of having it all welded together for strength, and bolted to the floor, and caulked. There is enough access through the cut out around the shift linkage to remove the shifter, if I wanted to pull the transmission.
Here are some mocked up pics
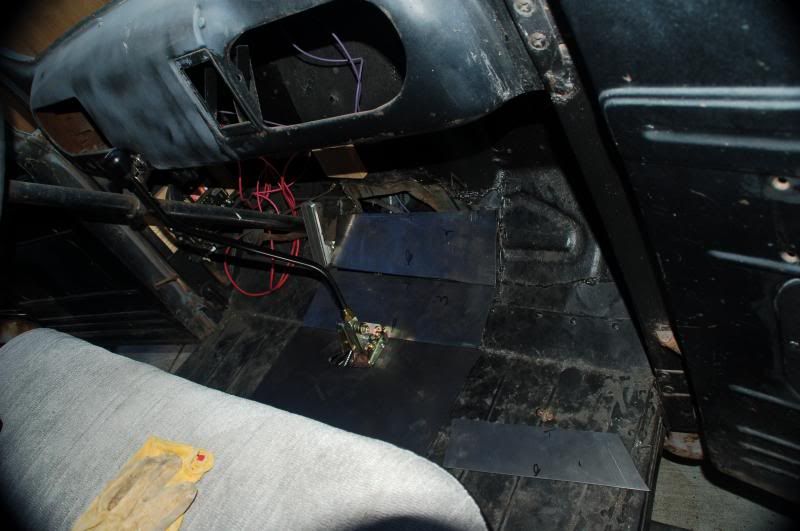
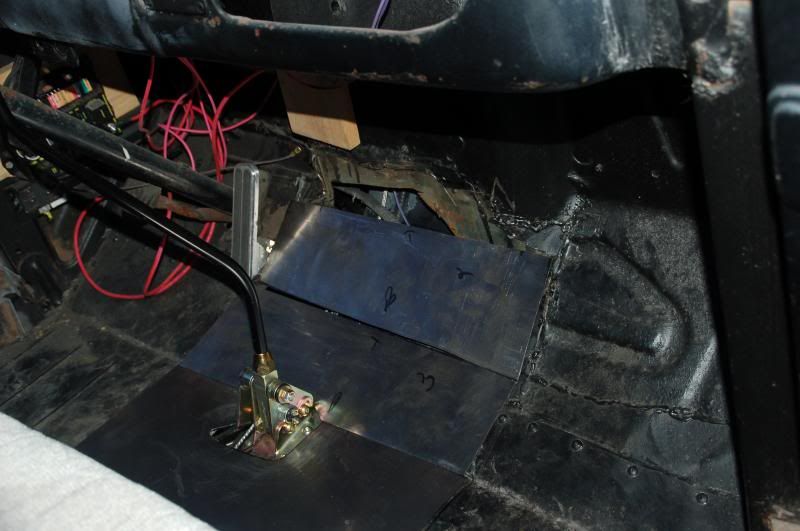
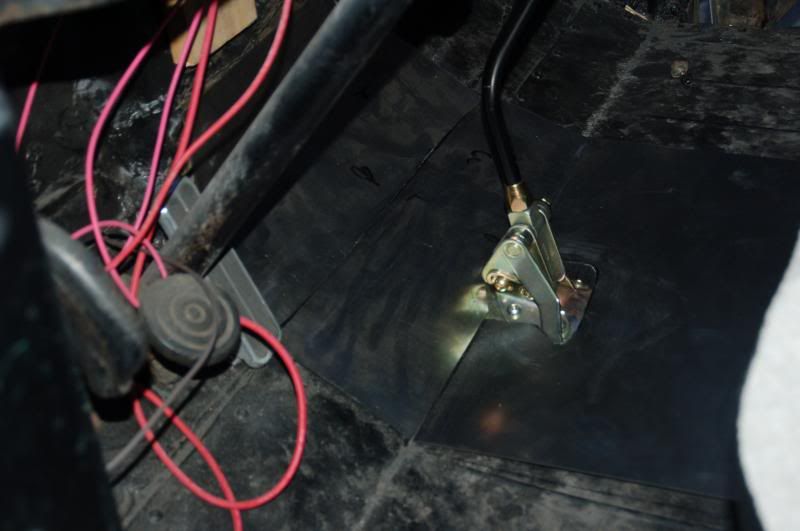
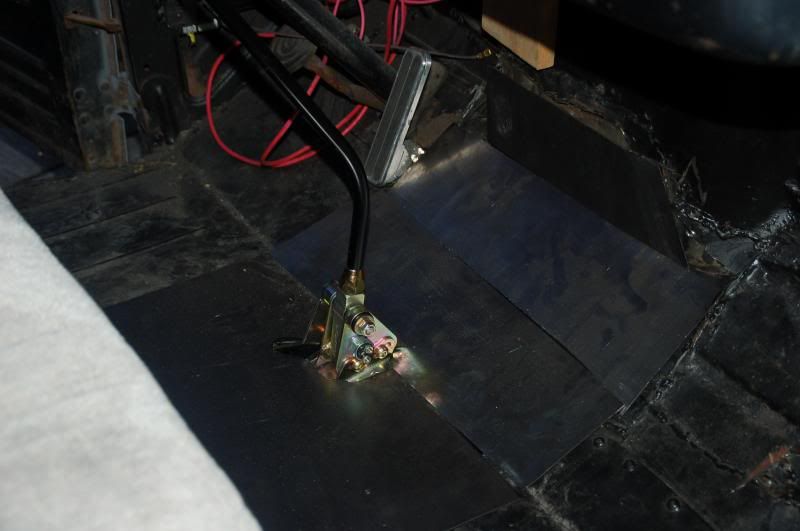
"  "No matter where you go, there you are!" Steve.
-
01-25-2014 03:50 PM #729
Great work, Steve! That shifter is really spiffy looking.1 Corinthians 1:27
-
01-26-2014 03:35 AM #730
This is strange Steve 51 pages and i've never seen your thread before
Looking good.Its aweful lonesome in the saddle since my horse died.
-
01-26-2014 10:00 AM #731
Yeah it's been a learning experience with lots of mistakes, but I'm plugging away now! Don (Florida)was pretty inspiring when I first started here, got me interested in hot rods. I find two tools that have been most useful are online hot rod/ ford truck forums, and the welder! Should get some work done today. I'll post this afternoon any progress. The drought were having has made it easy to get time to work on the truck!"  "No matter where you go, there you are!" Steve.
-
01-26-2014 01:23 PM #732
Steve you have done darn well considering that you are working in a single car garage or out side in the sun shine. I heard you guys haven't had any rainfall for sometime and your water reservoirs are real low which could be a problem heading into your next summer. I like that shifter too and it certainly gives you more floor space.
I maybe a little crazy but it stops me going insane.
Isaiah 48: 17,18.
Mark.
-
01-26-2014 03:42 PM #733
Thanks Whip. I just got finished doing a few little things that needed attending to. I cut a piece of rubber hose and wrapped it around the fuel line where it passes through a narrow opening between a cross member and the frame to keep the metal from potentially rubbing there. I then clamped the fuel line down in a few places. to keep it protected inside the frame rail. I was able to adjust the idle on the engine to keep it running without the need to keep my foot on the gas petal. I think I may have to pull the distributor down the line and move it back a few teeth, but it runs ok for now, I then found the original brake return spring and reattached it to the brake petal and drilled a small hole in the frame for the other end so now my brake petal comes back up when I need it. I spent perhaps 20 minutes under the cab section assessing the sheet metal situation and came up with a few ideas on shoring it up and fixing a few other issues related to the cab floor. I also decided to weld up the huge fuel hole in the floor panel vs. trying to plug it up with an after market rubber plug if they even make those! Lastly I worked on the two Toyotas that were left here. The 1993 4x4 with 196K on it needed a new reverse light bulb, and the 2003 Highlander had the driverside brake light out, so I got some replacement bulbs and worked on that. The truck was easy, the highlander may have a short somewhere or a bad connector but I need a second person to press the petal while I figure that one out. So now it's beer thirty, and dinner prep!"  "No matter where you go, there you are!" Steve.
-
01-26-2014 03:49 PM #734
A piece of 1X2, 2X4 or whatever you have laying around, cut to length so it wedges between the pedal and the seat back, or the pedal and back of the cab if the seats are out, is a good substitute for a second person, and the stick is much preferred over enlisting your wife into that duty..... Old guys have learned some lessons along the way.....Roger
Enjoy the little things in life, and you may look back one day and realize that they were really the BIG things.
-
01-26-2014 04:12 PM #735
That's for sure Roger, it's her car that has the problem, she left to visit a sick friend for a few hours that turned into the whole day!"  "No matter where you go, there you are!" Steve.


 379Likes

 LinkBack URL
 About LinkBacks
 Reply With Quote


Friday and Saturday (4/11 & 12/25) Chris (my wife) and I made the journey to Homestead-Miami Speedway so I could participate in the Florida Power & Light sponsored Electrathon event.:cool: It was...
Electrathon - A Different Kind of...