


Thread: do your own interior


Results 1 to 15 of 33
 LinkBack URL
 About LinkBacks
Hybrid View
-
10-28-2008 06:18 AM #1
 CHR Member

- Join Date
- Dec 2004
- Location
- Coralville
- Car Year, Make, Model: 41 willys coupe
- Posts
- 282
 Originally Posted by falconvan
ONLY use CLOSED CELL foam. It is especially made for this use. Open cell is way to soft. I get my foam from ebay. It is used on pool tables and poker tables. Look up "poker table foam". Or you can buy it from your local upholsterer but it will be more expensive there.
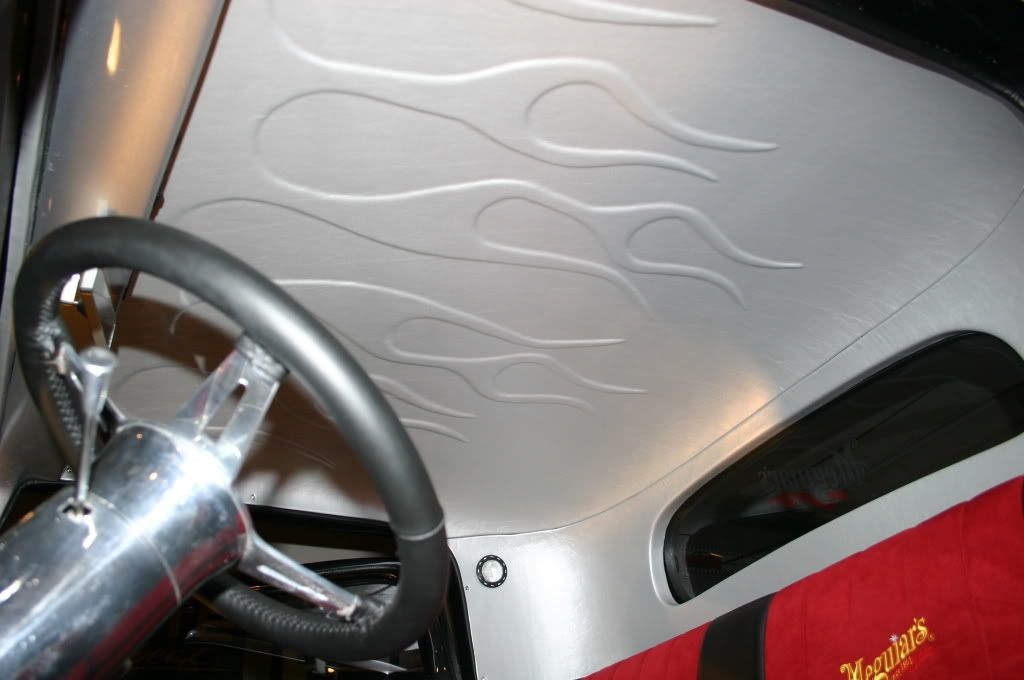
#1 pic is 1/8"
#2 pic is 1/4"
-
10-28-2008 08:30 AM #2
CHR Member
- Join Date
- Apr 2005
- Location
- new bloomfield
- Posts
- 356
if you take your time anyone can do it. The examples you show are great. Done the last few of mine as well using the foam but also have used PVC and CPC plastic sheeting. Easy to use with a little heat it will take any shape you want and stay when colled. There is a plastic company across the street and I can get a 4x8 sheet for about $35
For the headliner of the '32 I used tracing paper and traced the flames off the hood
-
10-28-2008 08:39 AM #3
CHR Member
- Join Date
- Apr 2005
- Location
- new bloomfield
- Posts
- 356
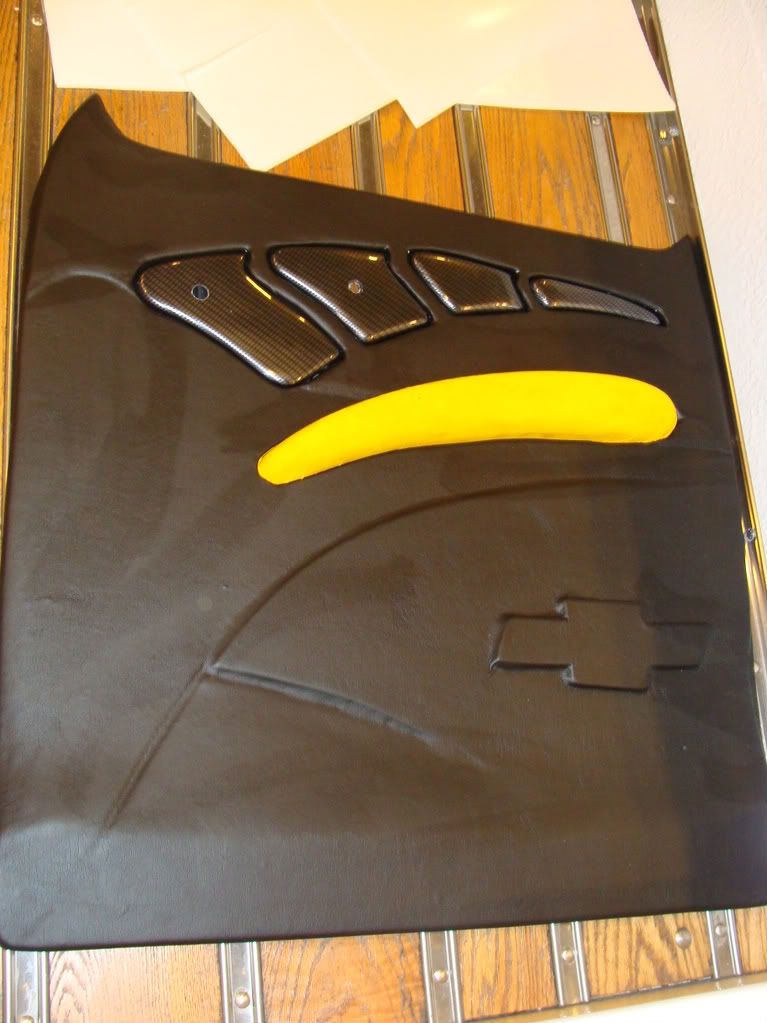
a few shots from the truck I just finished. Started with what vintage air send for under the dash and added on from there and moved the controls. added the center console door panels and everything else.
You can oder plastic from a place like rod doors and also used a headliner from rod doors and covered. In the long run the headliner is formed and is cheaper to do this from RD


-
10-28-2008 08:45 AM #4
CHR Member
- Join Date
- Dec 2004
- Location
- Coralville
- Car Year, Make, Model: 41 willys coupe
- Posts
- 282
[QUOTE=iceburgh]a few shots from the truck I just finished. Started with what vintage air send for under the dash and added on from there and moved the controls. added the center console door panels and everything else.
You can oder plastic from a place like rod doors and also used a headliner from rod doors and covered. In the long run the headliner is formed and is cheaper to do this from RD
Very nice work. It is really much easier to do than one would think. I like the idea of the plastic. I have used the Rod Doors pvc molded panels in the past but they are so expensive for what you get when it is posible to duplicate it with your own materials.
Again VERY NICE WORK
-
10-28-2008 10:17 AM #5
CHR Member
- Join Date
- Oct 2007
- Location
- Petaluma
- Car Year, Make, Model: 48 Ford F1
- Posts
- 9,793
Thanks 41 willys. This thread will be a keeper. One question when you cut your flames out of the foam, does your edge on the foam need to be perfect, or do little blemishes hide once you cover it with the leatherette fabric?"  "No matter where you go, there you are!" Steve.
-
10-28-2008 11:50 AM #6
CHR Member
- Join Date
- Dec 2004
- Location
- Coralville
- Car Year, Make, Model: 41 willys coupe
- Posts
- 282
You need to try to be as neat as you can as you can see more than you would think. Use a VERY sharp razor blade and cut at an angle to have a smoother transition. Originally Posted by stovens
I go through a dozen blades on each panel because I have found one cut will dull the blade so it will snag.
John
-
10-28-2008 08:38 AM #7
CHR Member
- Join Date
- Dec 2004
- Location
- Coralville
- Car Year, Make, Model: 41 willys coupe
- Posts
- 282
Here's a rear window molding for the willys.
It is impossible to find rear window moldings for a 41 willys and if you do they are usually a rusty POS that cost several hundred $. I made my own by taking a pice of 1/4" plywood and rough cutting it 3" bigger than the opening. I held it up to the opening and had Shirley mark the inside of the glass lip with a felt marker. I then added 1 1/2 " to that line and cut it out. After sanding and smoothing the curves I cut a strip of 1/8" masonite 1" wide and glued and staple it to the inside edge of the pattern. Fill in the back inside corner with fiberglass putty and then grind the glued corner so it has a nice round edge. . Now here's is a neat trick. cut your 1/8" foam 5" wide by the inside radius length + 1/2" overlap. Start by glueing the foam to the INSIDE of the moulding first. After it has set up stretch to foam around the outside of the frame being careful not to tear it. Keep moving around the piece pushing the foam out as you go. this will give you a very tight wrinkle free surface. If you start on the outside you will have all of the excess foam to deal with as you push it inward which will leave wrinkles that you will have to slice to get rid of. Bring your foam all the way around the 1/4" edge and cut with your razor blade so it is flush with the BACKSIDE of the plywood.
Lay your moulding on your vinyl and trace around the insde and the outside edges add 1" onto each line. Glue your vinyl to the insde surface first and let it dry completely. Now begin to work the vinyl up and around heat and stretch it going around the frame and you will have a nice tight seemless covering. Sorry I don't have a good picture of the finished molding right now.
 Reply With Quote

Posting Permissions
- You may not post new threads
- You may not post replies
- You may not post attachments
- You may not edit your posts

Hated to see that news, he was a good online friend.
We Lost a Good One