Thread: Bead Roller
-
12-14-2011 07:49 PM #1
-
Advertising

- Google Adsense
- REGISTERED USERS DO NOT SEE THIS AD
-
12-14-2011 08:34 PM #2
I'd buy the one from Woodward Fab vs Horrible Freight, but that's just me. Not sure either one of them is a quality tool:
FREE SHIPPING — Woodward-Fab Bead Roller Kit, Model# WFBR6 | Benders | Northern Tool + EquipmentRoger
Enjoy the little things in life, and you may look back one day and realize that they were really the BIG things.
-
12-14-2011 08:47 PM #3
What a lot of people who have bought the HF one have done is weld some reinforcing tubing onto the top and bottom to keep the jaws from deflecting. There have been numerous threads on the HAMB about doing that. Some have replaced the crank handle with a large wheel that makes it easier to turn and control.
With the above mentioned modifications they say it will work ok.
Don
Here is some reading on the subject:
http://www.jalopyjournal.com/forum/s...ht+bead+roller
and one more.............
http://www.jalopyjournal.com/forum/s...d.php?t=100759Last edited by Itoldyouso; 12-14-2011 at 08:52 PM.
-
12-14-2011 08:52 PM #4
It does look beef'er.Doesn't say gauge limit,but I would guess it's 18 gauge.Good Bye
-
12-14-2011 10:09 PM #5
I would agree 18 or 20 gauge is about the limit, even our electric one from ProTools stops about there too. They say the reason they put the bracing on them is because the jaws twist slightly under load, but as you can see from the threads I posted, once the extra support is on there it works pretty well.
Don
-
12-15-2011 04:28 AM #6
I've got the Woodward version, does great on 20ga steel. Might do ok on 18ga but I've never tried it, no reason to! If you place the beads in the right place and flange the edges for a flush fit or just a stepped look for panels the 20ga. THINKS it's become 18ga. Does a good job on aluminum too, used it for aluminum panels up to .040 and no complaints. It will probably be replaced with a Mitler electric bead roller eventually, but for now and for what I paid for it I have no complaints!Yesterday is history, tomorrow is a mystery, Live for Today!
Carroll Shelby
Learning must be difficult for those who already know it all!!!!
-
12-15-2011 06:00 AM #7
Thanks guys.I'll get a thread with pictures going on the only rust repair I need to do on Ole Yellar.Good Bye
-
12-15-2011 06:18 AM #8
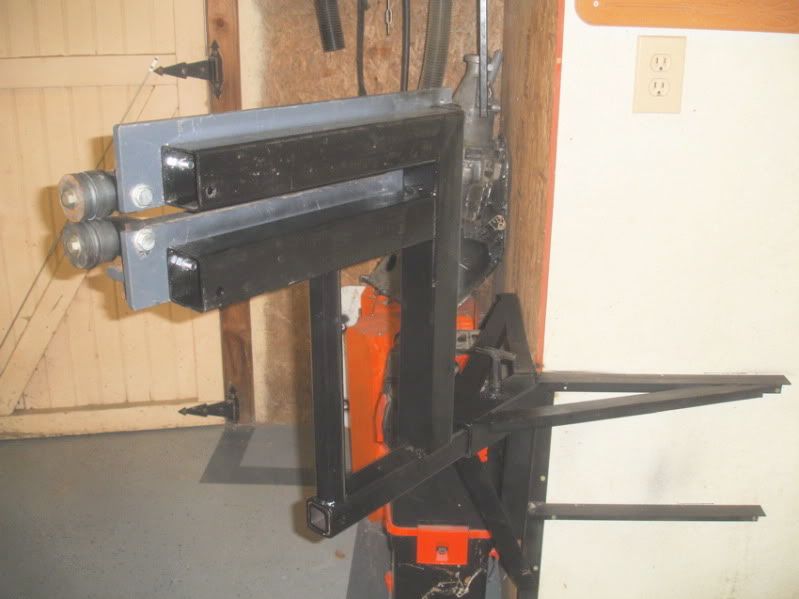
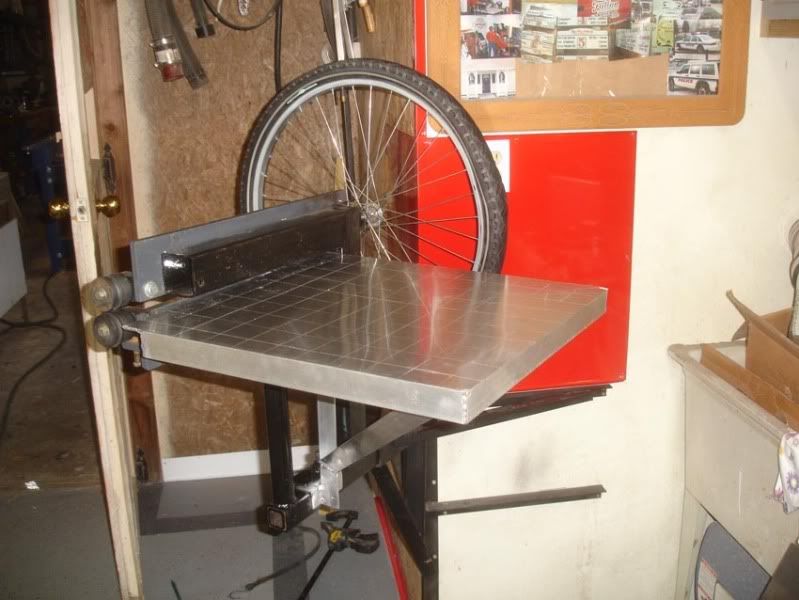
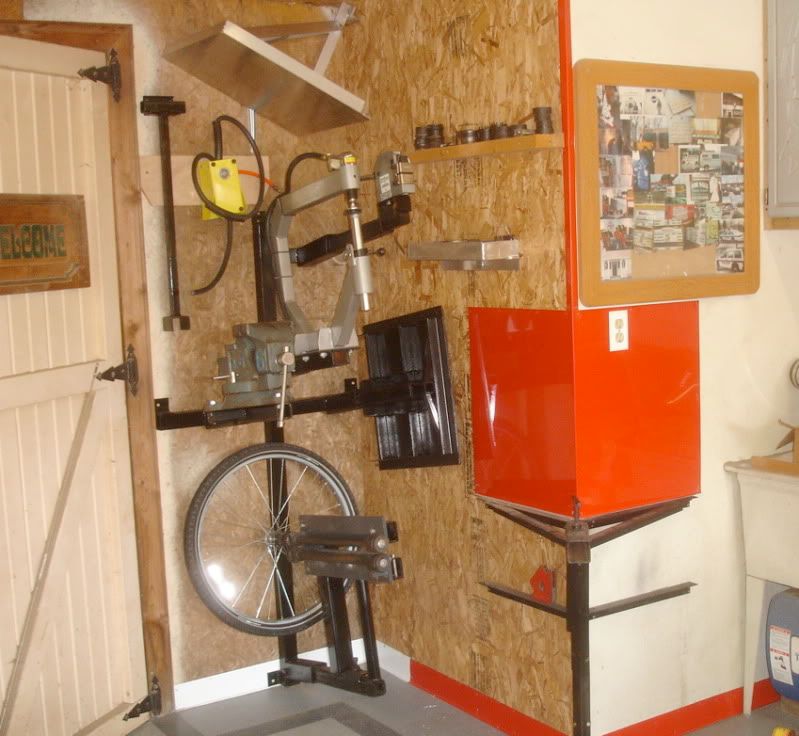
I welded up & bolted a reinforcement frame to mine that serves as a mount to a receiver on the wall.

I replaced the crank with a bicycle wheel for better control. Yes, the rim is bent a little, but that's why I got it free, works fine for this app. Also made a clip on aluminum table to catch larger panels.

Tucks away behind the door when not in use. Good thing when floor space is in short supply.

"PLAN" your life like you will live to 120.
"LIVE" your life like you could die tomorrow.
John 3:16
>>>>>>
-
12-15-2011 06:18 AM #9
I have a real early one from pro tools and do 16ga with it often, i spoke to them about it and the only problem i have had to deal with is the pinch shaft - it is a 3/8 course thread that cannot take the abuse of forcing the die into 16ga and i have replaced it with 7/16 fine thread and have had no problems for a couple years.
I'd pass on that harbor freight, it could make a good special purpose machine if you wanted to roll pretty stuff into aluminum etc and mount it on a table with a steering wheel to drive it with. But if that is the machine you need to make a floor pan today and an inner fender tomorrow you will be having a time of it.
1gary, check into the protools beadroller, they used to offer an unwelded version at avery good price. It is a great tool, i have used mine for 15-20 years now.
-
12-15-2011 07:57 AM #10
The Harbor Freight and the Woodard Fab are one in the same. as far as the Pro Tool its nice but $599 is a little steep. I've had the Harbor freight goin on 10 years ( it has been and yours will need to be reinforced) about 3 years ago I got tired of trying to wrangle someone to spin the crank for me. So hit Ebay and snagged a 24 volt gear reduction motor for $35 a china 24 volt speed controller $10 a foot switch $18 and a H.D. toggle switch $6 (forward/reverse) and spent a weekend putting power to it. Since then I've bought a Hoosier pattern tipping set for it and had a buddy make me several sets of dies (that reminds me I need to call him about a couple more sets I need) I think the harbor freight unit will serve any home shop just fine (mine has) just remember it will have to be reinforced and all of the dies will need to be polished and the sharp edges taken off. Also I have rolled 1 inch wide 1/2 inch tall beads in 18 gauge with good results although that did make the motor struggle (LOL)
-
12-15-2011 08:33 AM #11
While we are on the subject of bead rolling, we all know how hard it is to make perfectly straight lines. Here is a way to do that and it insures they will be straight every time. I can't take credit for this one, my Son Dan came up with it.
The idea is to clamp two pieces of flat stock to the piece you are rolling the beads into, spaced apart the width of the dies, so that they act as rails for the dies to travel along. He cut a couple small pieces of steel to fit inside the guides that act as stops so that you can not go beyond that point, which makes the beads all the same length.
Here are some pictures that will explain it better than I can. I have more than 5 so I will do it in two posts.
Don
-
12-15-2011 08:35 AM #12
The forum arranged the pictures in the wrong sequence but you will get the picture. To insure that each bead was as deep as the others, we brought the die down until it just touched the piece then turned the crank that puts the pressure on the work exactly the same number of rotations each time so that the die was set at the same depth each pass. Hope this helps someone else out.
DonLast edited by Itoldyouso; 12-15-2011 at 08:40 AM.
-
12-15-2011 08:37 AM #13
I bought mine from Eastwood some 20 years ago it works great and is just like the H.F. one.Charlie
Lovin' what I do and doing what I love
Some guys can fix broken NO ONE can fix STUPID
W8AMR
http://fishertrains94.webs.com/
Christian in training
-
12-15-2011 08:39 AM #14
Good easy tip Don, I was going to build a guide for mine but have'nt got around to it yet. As long as we are on tips,weld a T handle on your adjuster bolt as trying to remember where you laid the wrench gets to be a pain.
-
12-15-2011 09:24 PM #15
Great tips n real world experience as id been looking at that same machine for my shop.R.I.P. Kustoms LLCSpeed Shop & Fabrication"Race Inspired Products"
Current Projects in Progress
1936 Buick Coupe
1966 C-10


 1Likes

 LinkBack URL
 About LinkBacks
 Reply With Quote


Friday and Saturday (4/11 & 12/25) Chris (my wife) and I made the journey to Homestead-Miami Speedway so I could participate in the Florida Power & Light sponsored Electrathon event.:cool: It was...
Electrathon - A Different Kind of...