


 13Likes
Thread: Lets see your tin work...


Results 16 to 30 of 47
 LinkBack URL
 About LinkBacks
-
05-01-2013 04:15 AM #16
 CHR Member

- Join Date
- Sep 2007
- Location
- New Bedford
- Car Year, Make, Model: 34 Ford 3W Coupe Replica
- Posts
- 14,754
Nice touch MT1, gives a finished look, almost mirrored effect... cool
-
Advertising

- Google Adsense
- REGISTERED USERS DO NOT SEE THIS AD
-
05-01-2013 06:16 AM #17
CHR Member
- Join Date
- Aug 2010
- Location
- Berryville
- Posts
- 486
This isn't 'shaping' but i felt like doing some rivets
-
05-01-2013 07:22 AM #18
Club Hot Rod Member
- Join Date
- Apr 2013
- Location
- SoCal Diego
- Car Year, Make, Model: Several, in fact too many!
- Posts
- 89
Different and in good taste.... Nicely Done!duplicate account
-
05-01-2013 01:56 PM #19
CHR Member
- Join Date
- Mar 2009
- Location
- miami,coconut grove
- Car Year, Make, Model: 28rodster 292Y-block and HenryJ Olds V8
- Posts
- 262
Some very sharp work,love those well done and sealed floors.
I had to make a new rear panel for my 28 "A" roadster bobtail from scratch,old one was screendoor see through rusty,this how John and I started out with beadroller , E-wheel and brack. The better side of my two is behind,it only needs a little. The bottom is after a few days play.Last edited by The Bat; 05-01-2013 at 02:05 PM.
-
05-01-2013 02:15 PM #20
CHR Member
- Join Date
- Jan 2006
- Location
- Constantine
- Car Year, Make, Model: 57 chevy 2 dr wagon
- Posts
- 9,476
fun with my 73 Nova do you notice the differanceCharlie
Lovin' what I do and doing what I love
Some guys can fix broken NO ONE can fix STUPID
W8AMR
http://fishertrains94.webs.com/
Christian in training
-
05-01-2013 04:36 PM #21
Club Hot Rod Member
- Join Date
- Apr 2013
- Location
- SoCal Diego
- Car Year, Make, Model: Several, in fact too many!
- Posts
- 89
Good stuff guys, keep um coming!duplicate account
-
05-01-2013 06:08 PM #22
CHR Member
- Join Date
- Jan 2006
- Location
- Constantine
- Car Year, Make, Model: 57 chevy 2 dr wagon
- Posts
- 9,476
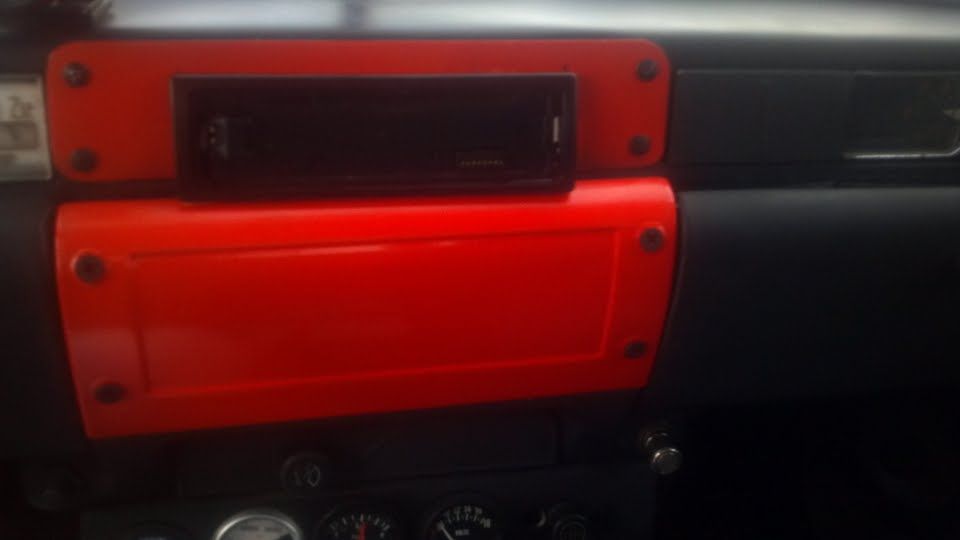
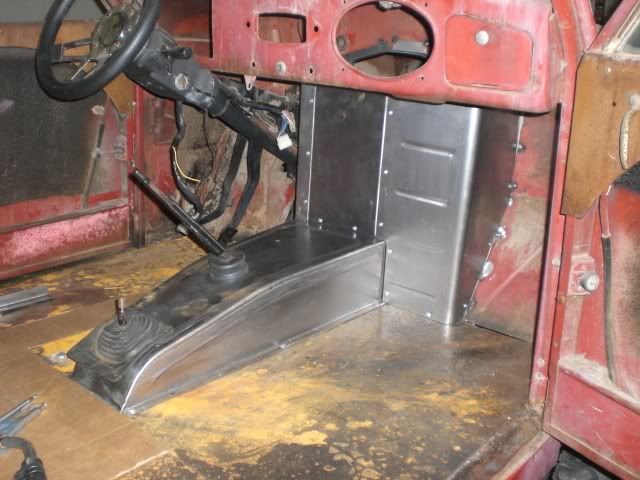
150 modifications. The body work on the drivers side rear quarter was after the suicide door opened at 40 MPH they were remotes I had the pins in on the pass. door but not the driver as I was just going to the store . You know nothing will happen. I heard the pass dr. click then the dr door open. not nice. 78 mustang ll dash
Charlie
Lovin' what I do and doing what I love
Some guys can fix broken NO ONE can fix STUPID
W8AMR
http://fishertrains94.webs.com/
Christian in training
-
05-01-2013 07:43 PM #23
CHR Member
- Join Date
- Jun 2008
- Location
- Leonardtown
- Car Year, Make, Model: Walking
- Posts
- 1,228
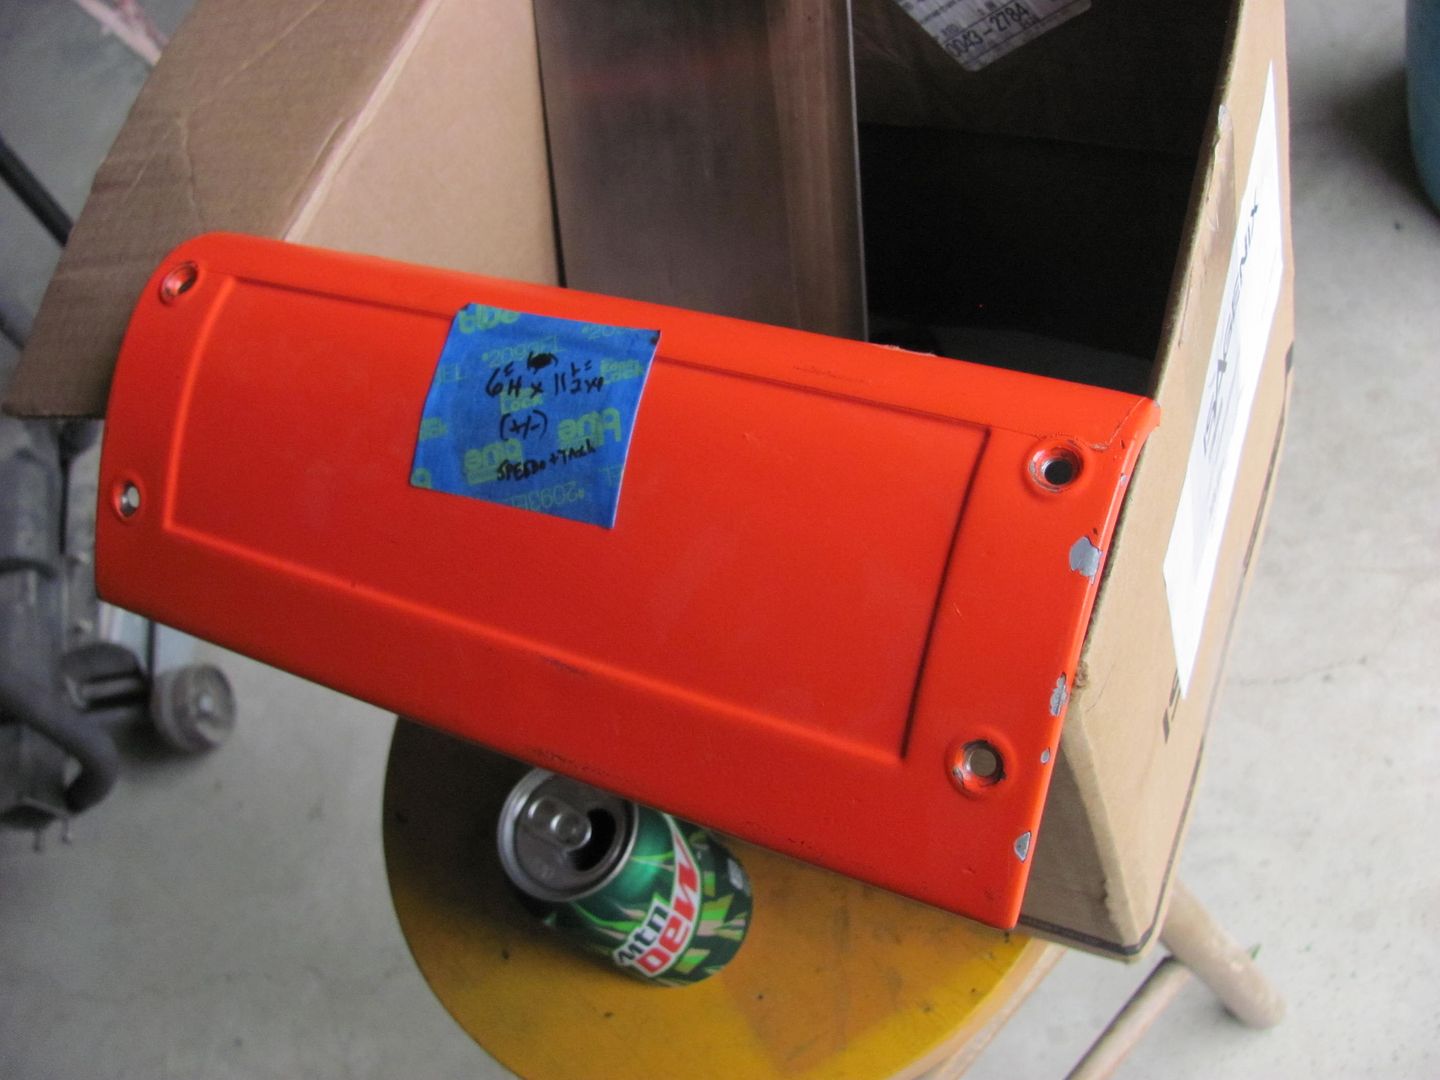
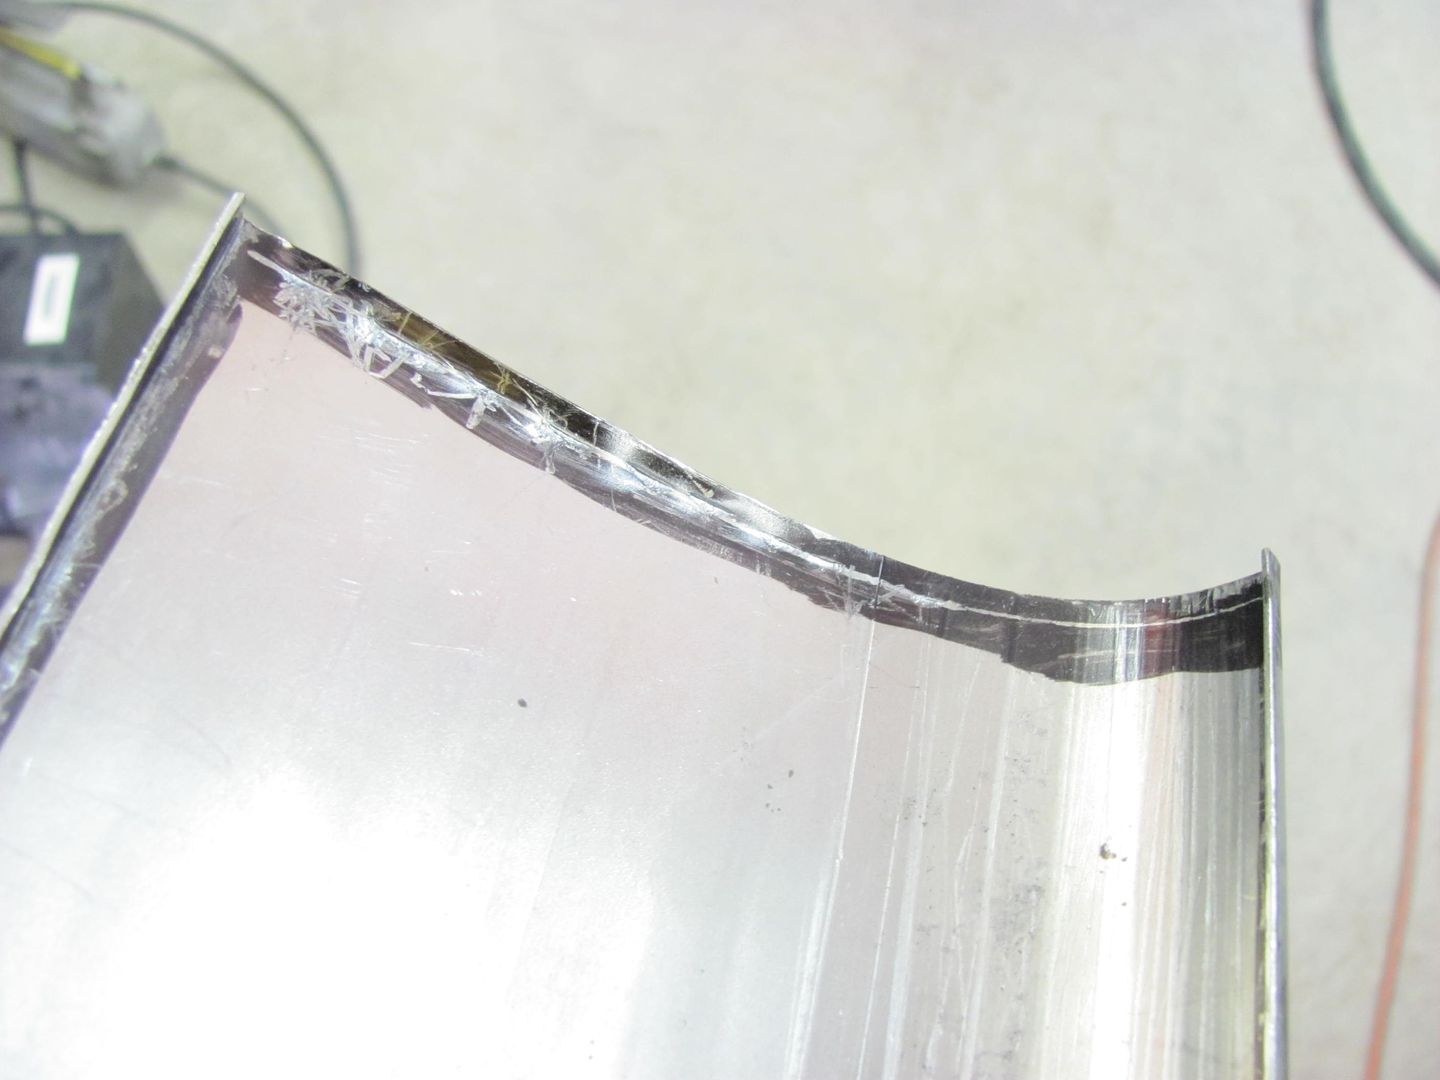
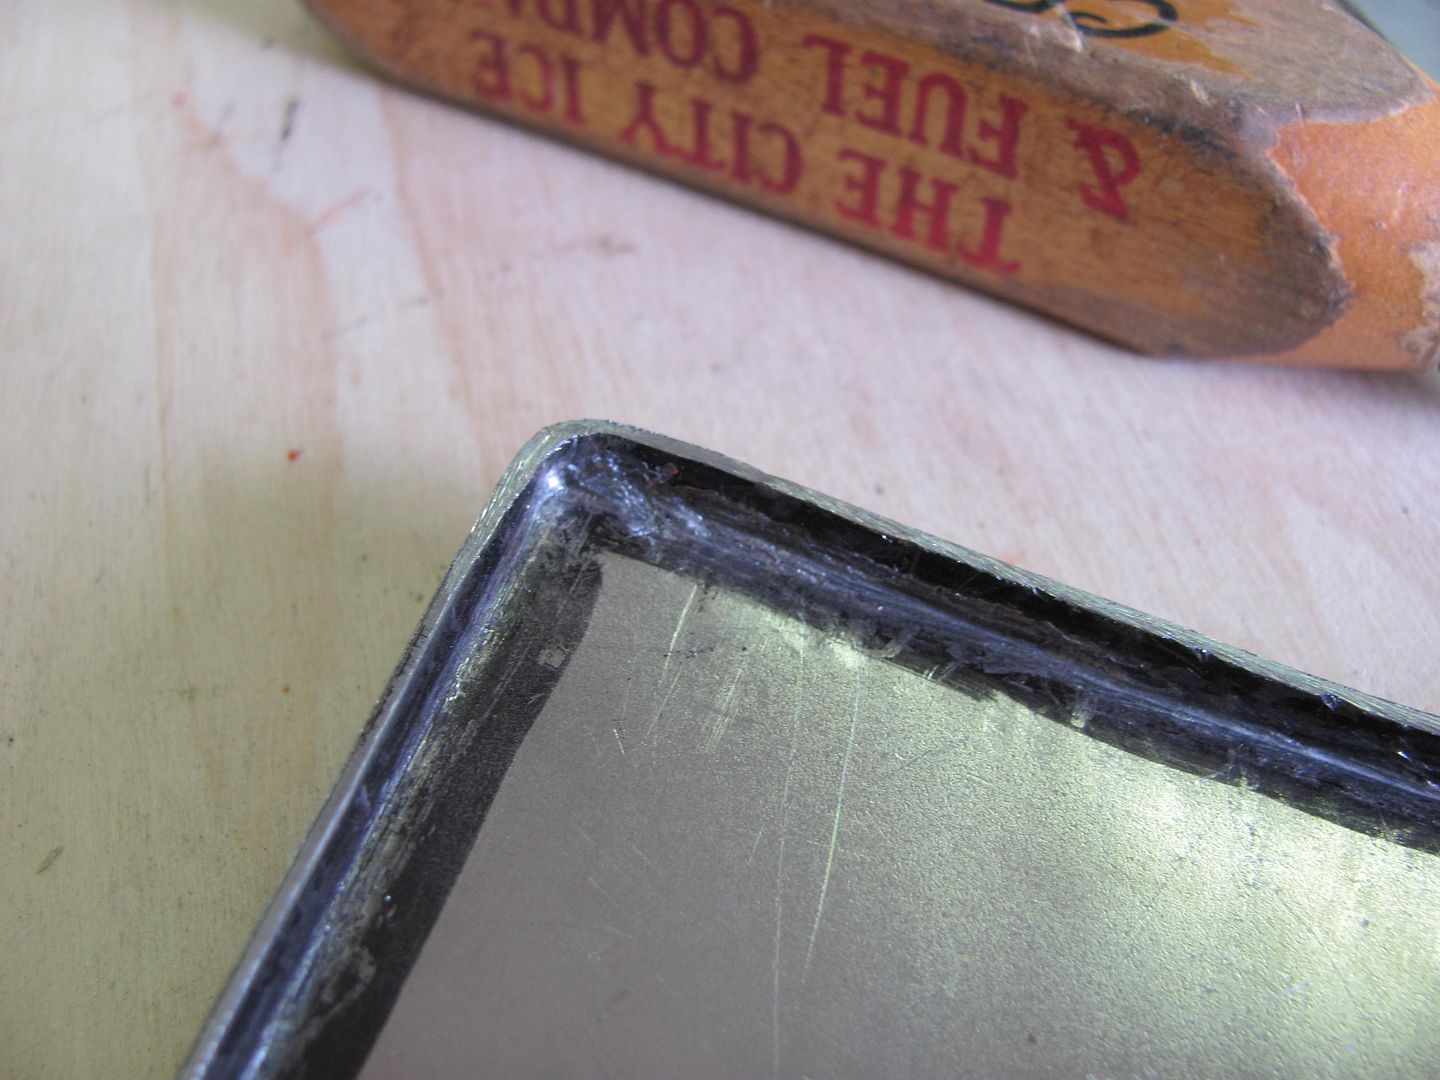
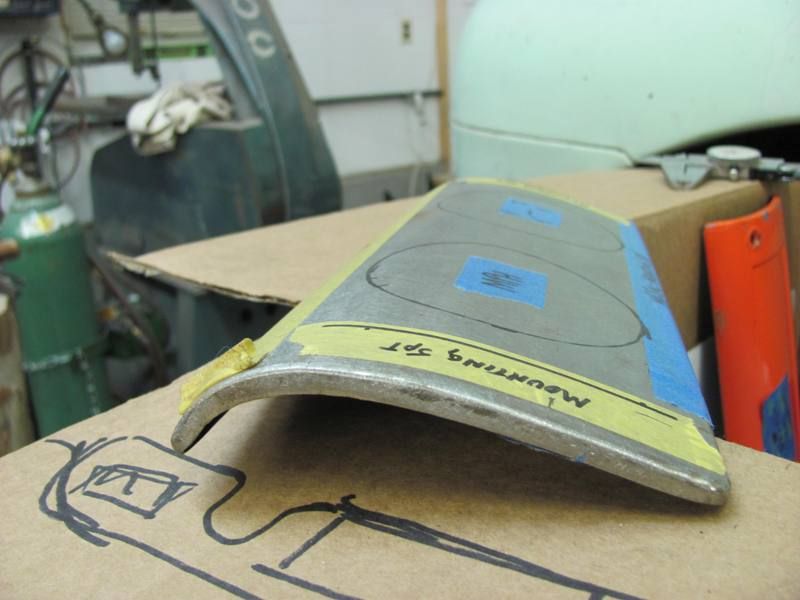
One of the local Studebaker owners needed some panels made for the dash of his truck (1947 M5), he's revamping the dash gauge/radio arrangement and needed some fresh metal to work with. Here's the existing:
Where the factory panel has a recess, and since he has plans for installing a couple gauges in that panel, the new will be made without the recess. The flat panel above for the DIN radio will be replaced as well, with the sides tipped for uniformity.
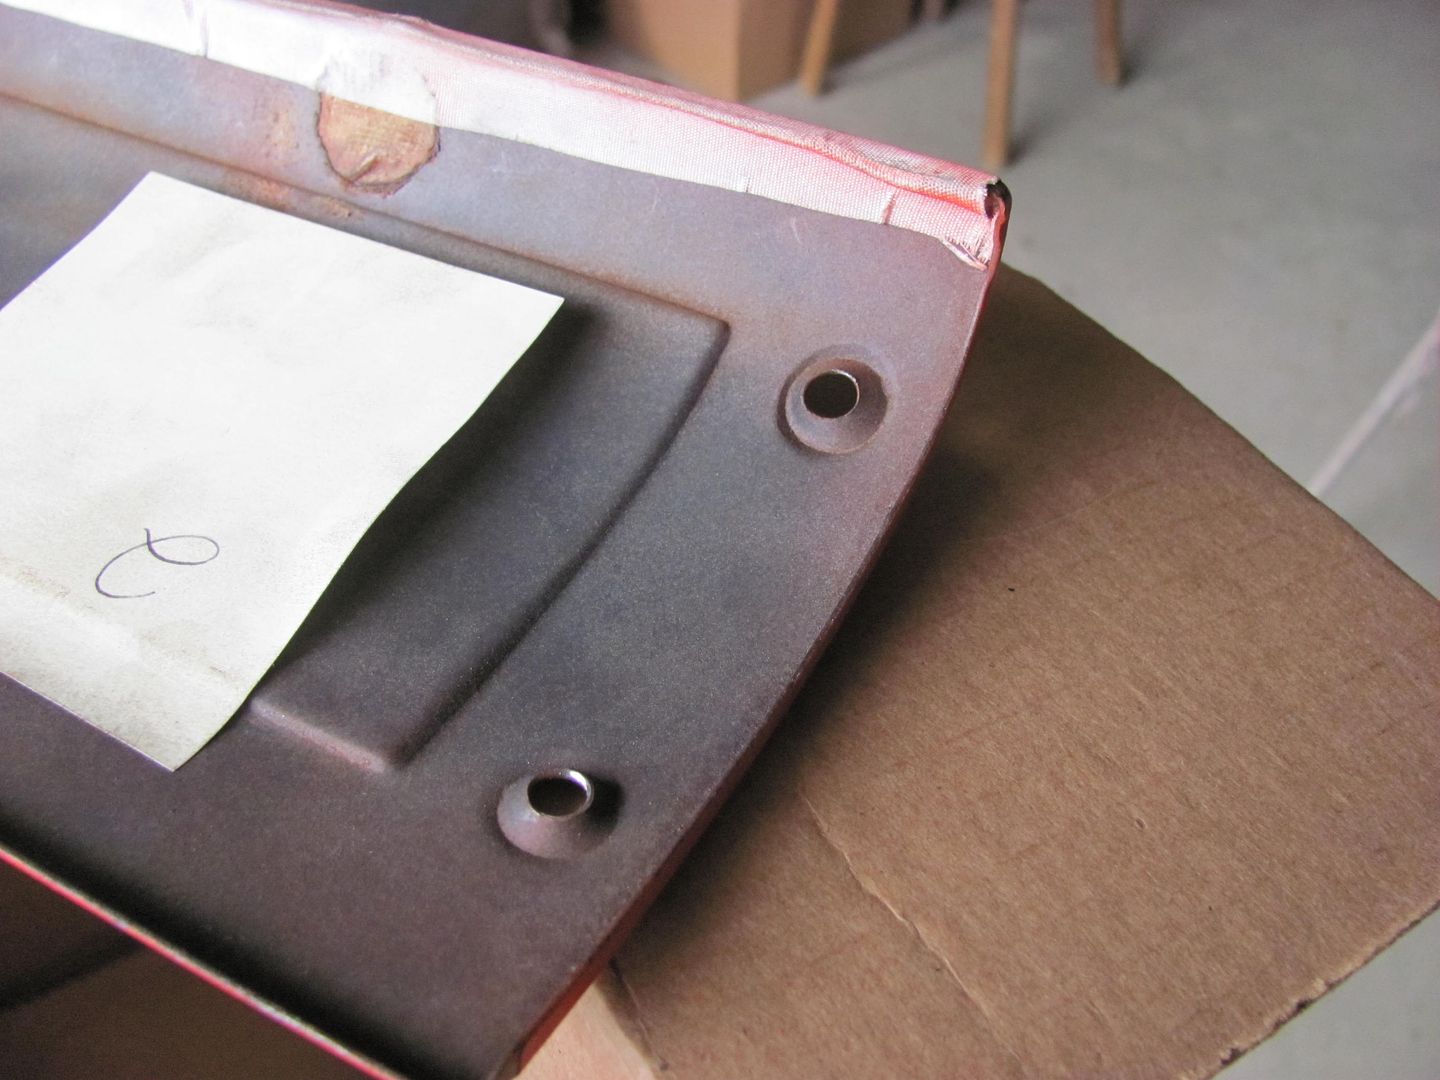
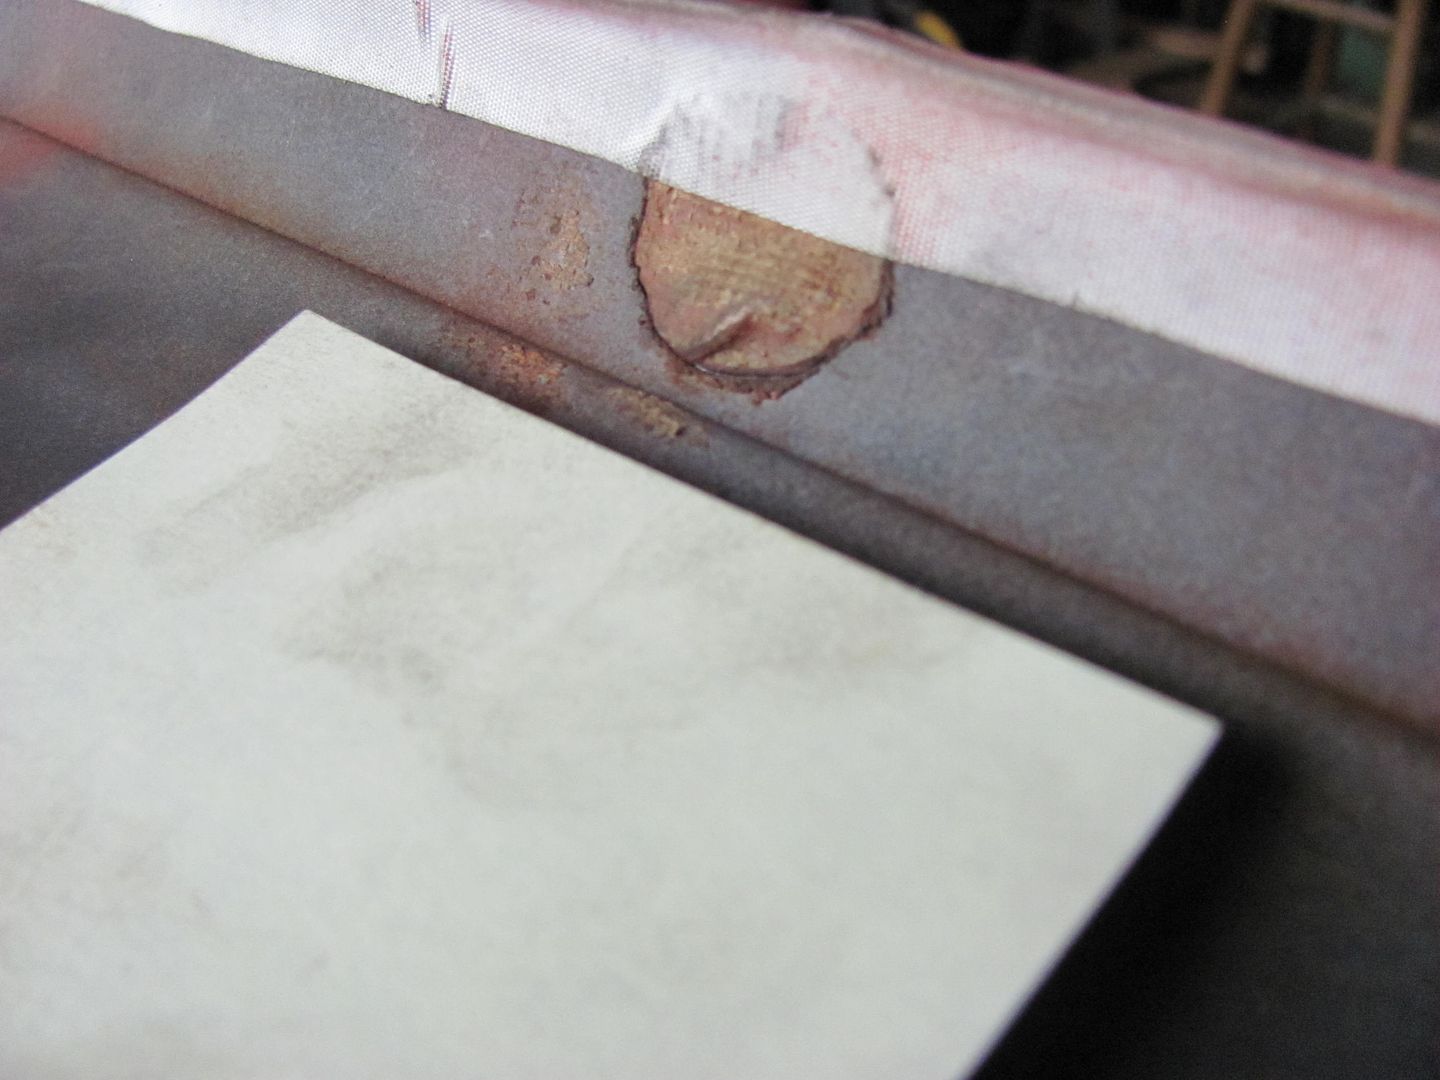
The old panel has seen some previous holes, for whatever reason.
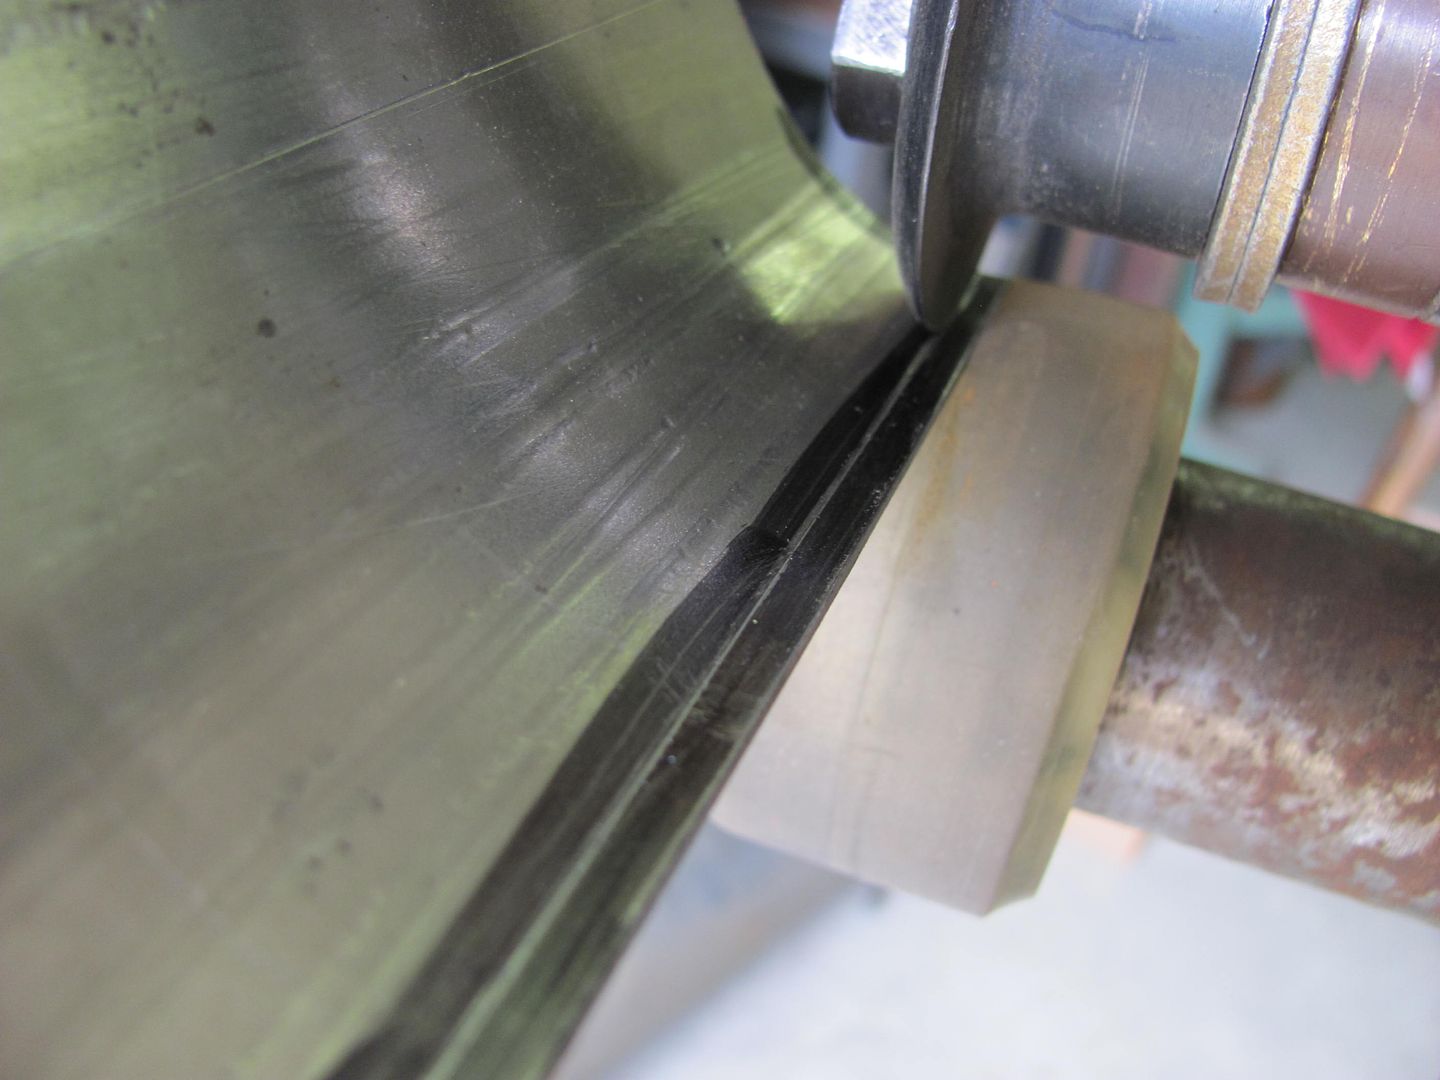
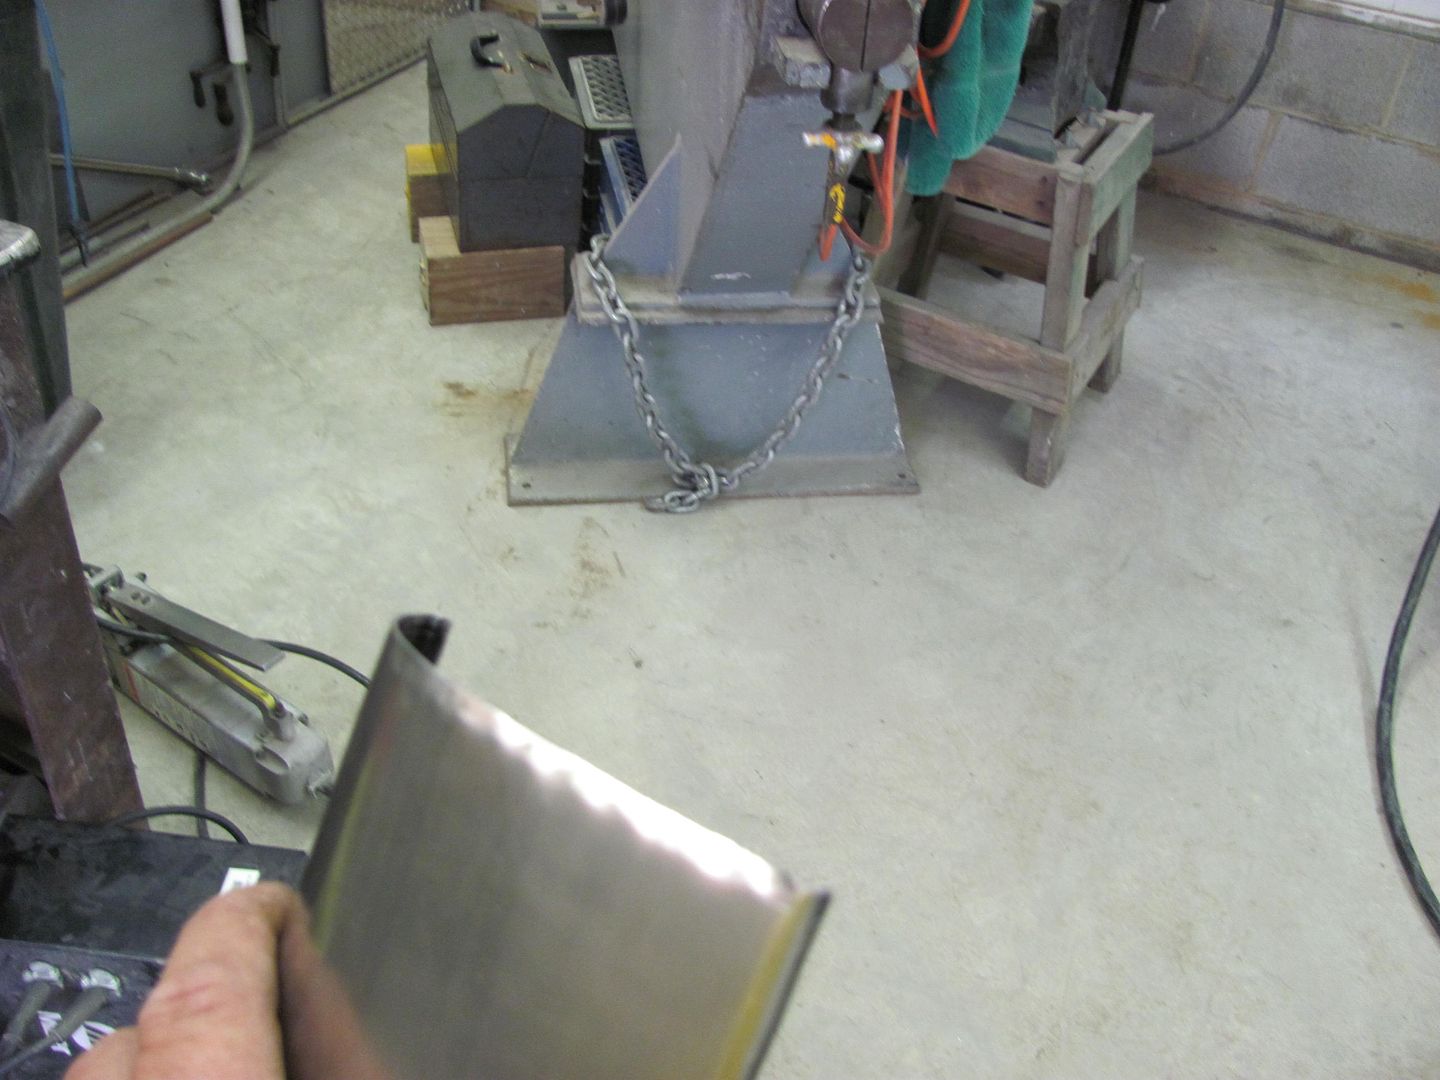
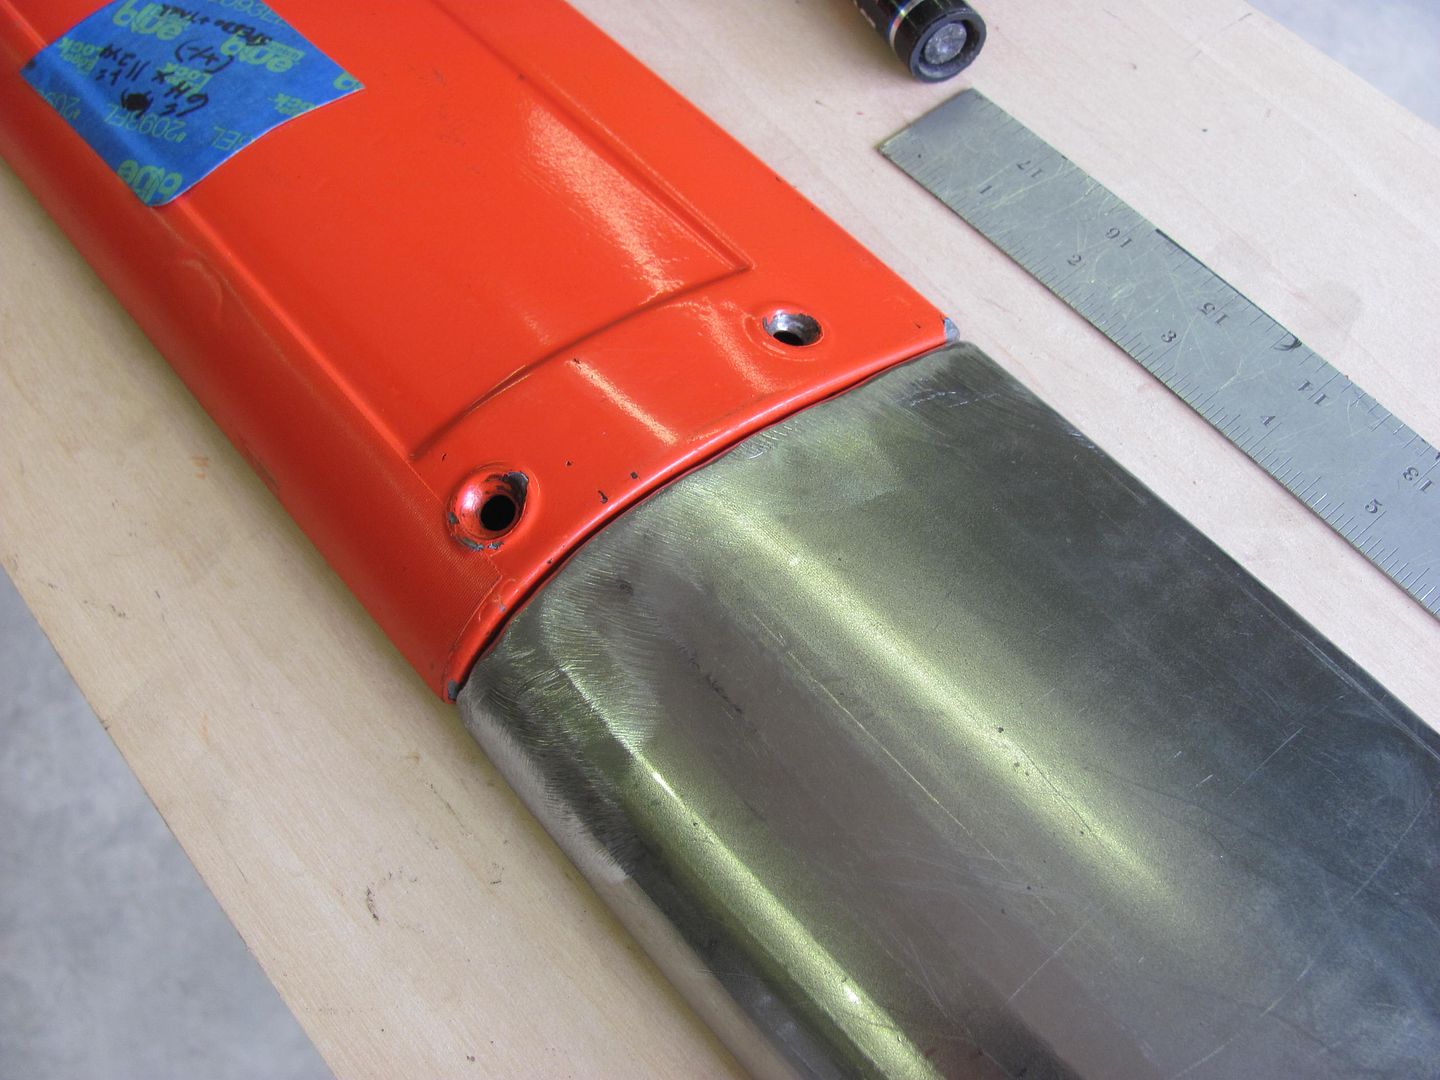
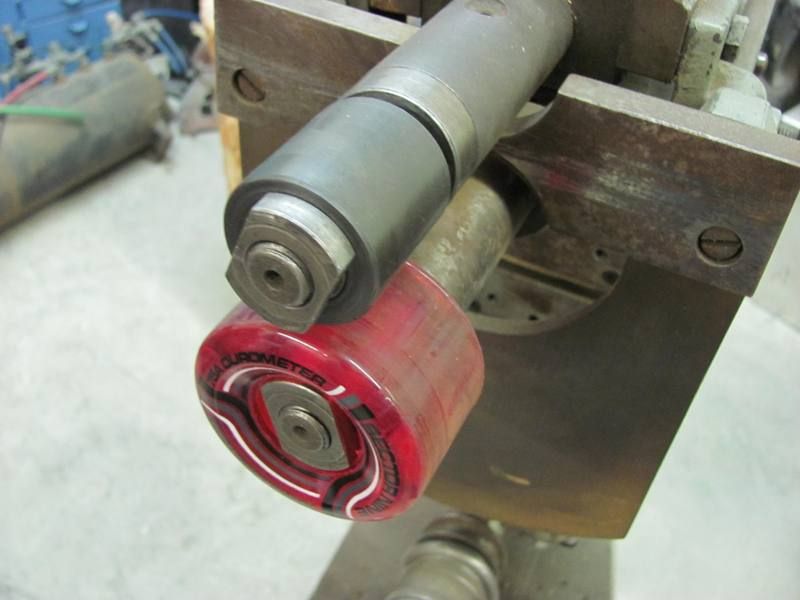
Where the rubber tire on top of the e-wheel does a nice job of forming a radius across a panel, the upper portion of the panel was a bit tighter than the 3" radius anvil will provide.
Having just set up my bead roller with the skateboard wheel for tipping, I thought to use this with a beading die to form the tighter radius.
Here's the results of "rolling" the panel
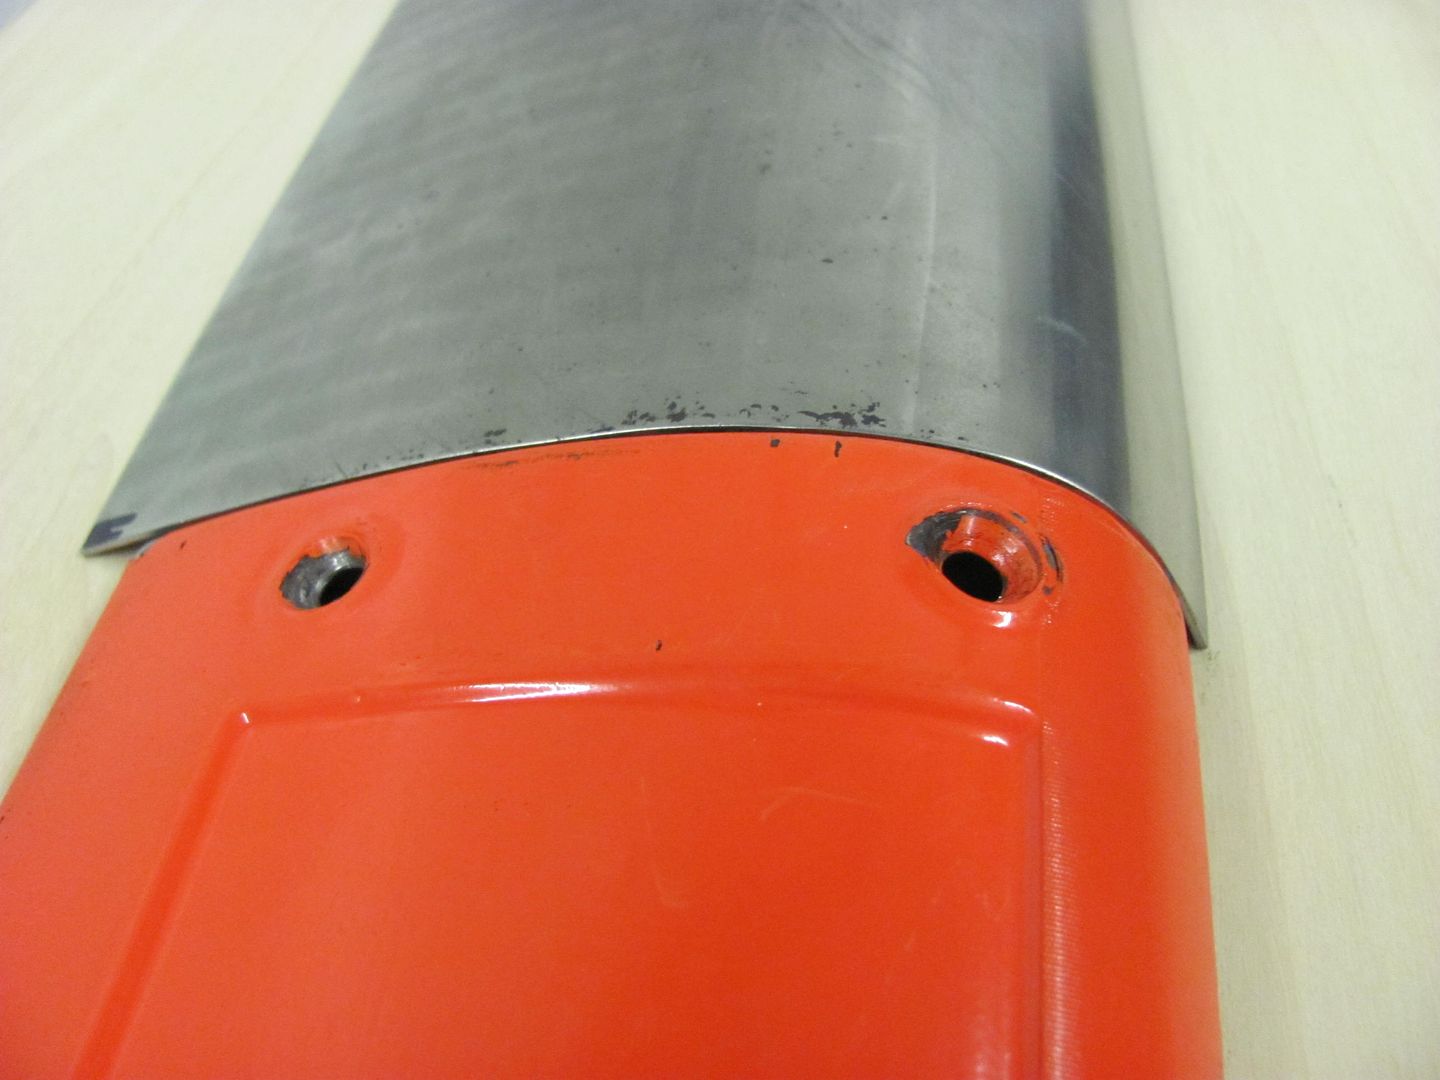

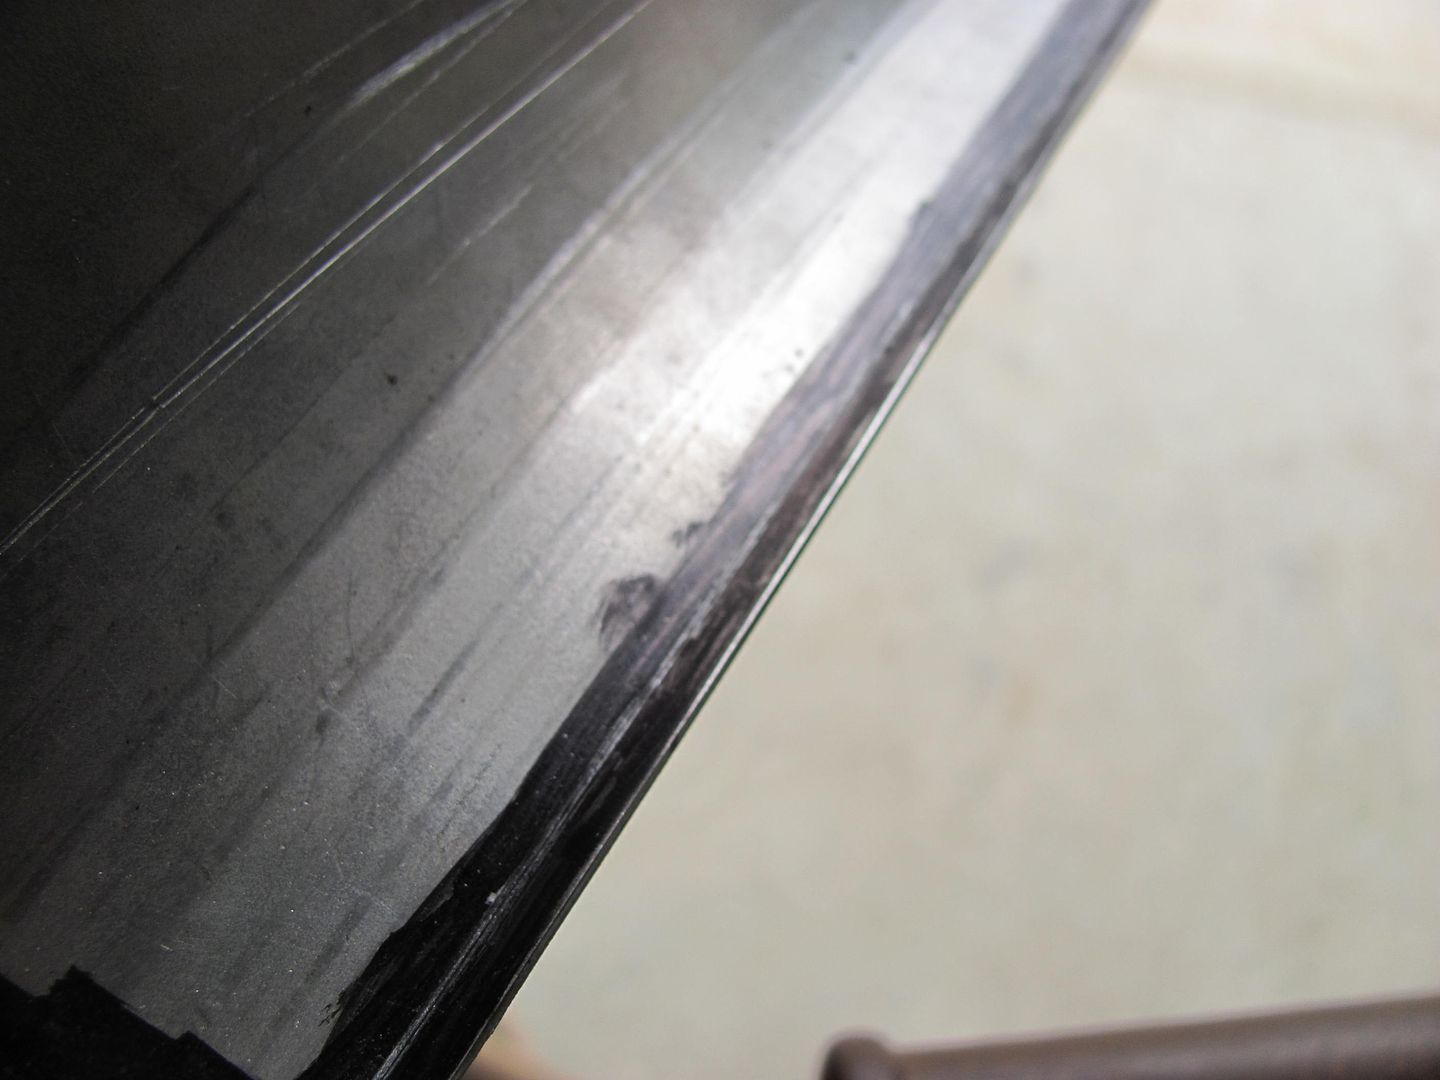
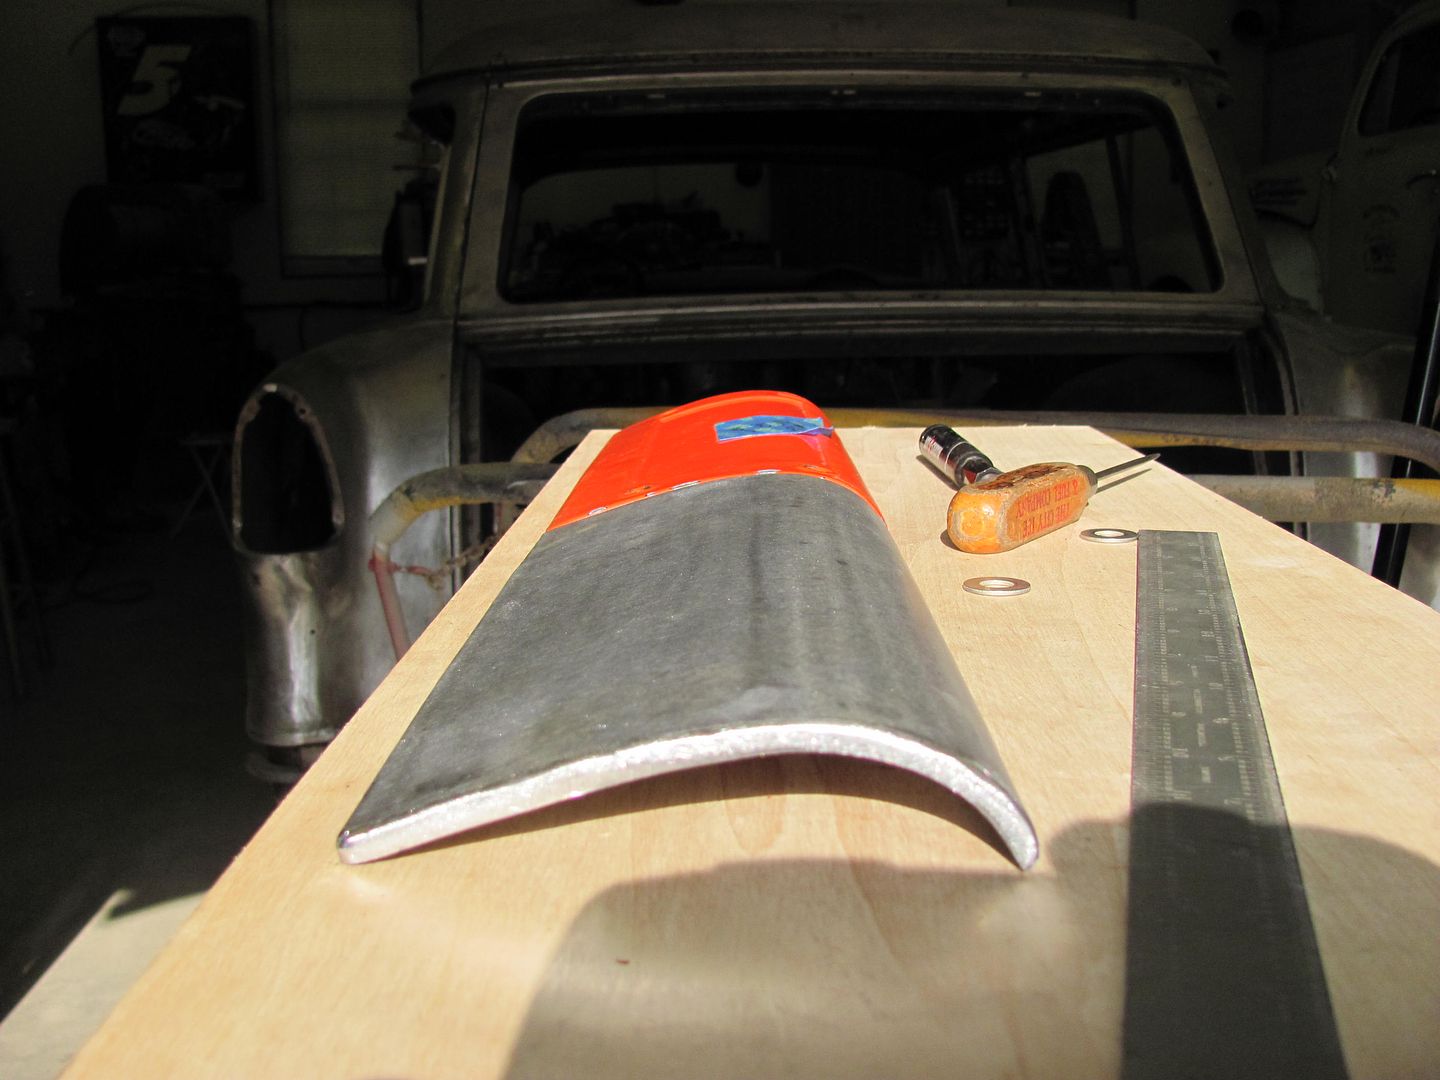
The panel has about an 1/8" lip around the perimeter, so the radius die was changed out to one for tipping.

With only just over 1/8 of extra to tip the flange, this process was not that effective. Hindsight, about 1/4 left over and trimmed afterwards would have been more effective. But since the panel matched so well, lets try other persuasive devices.

The tipping wheel did do an adequate job of marking the crease location....
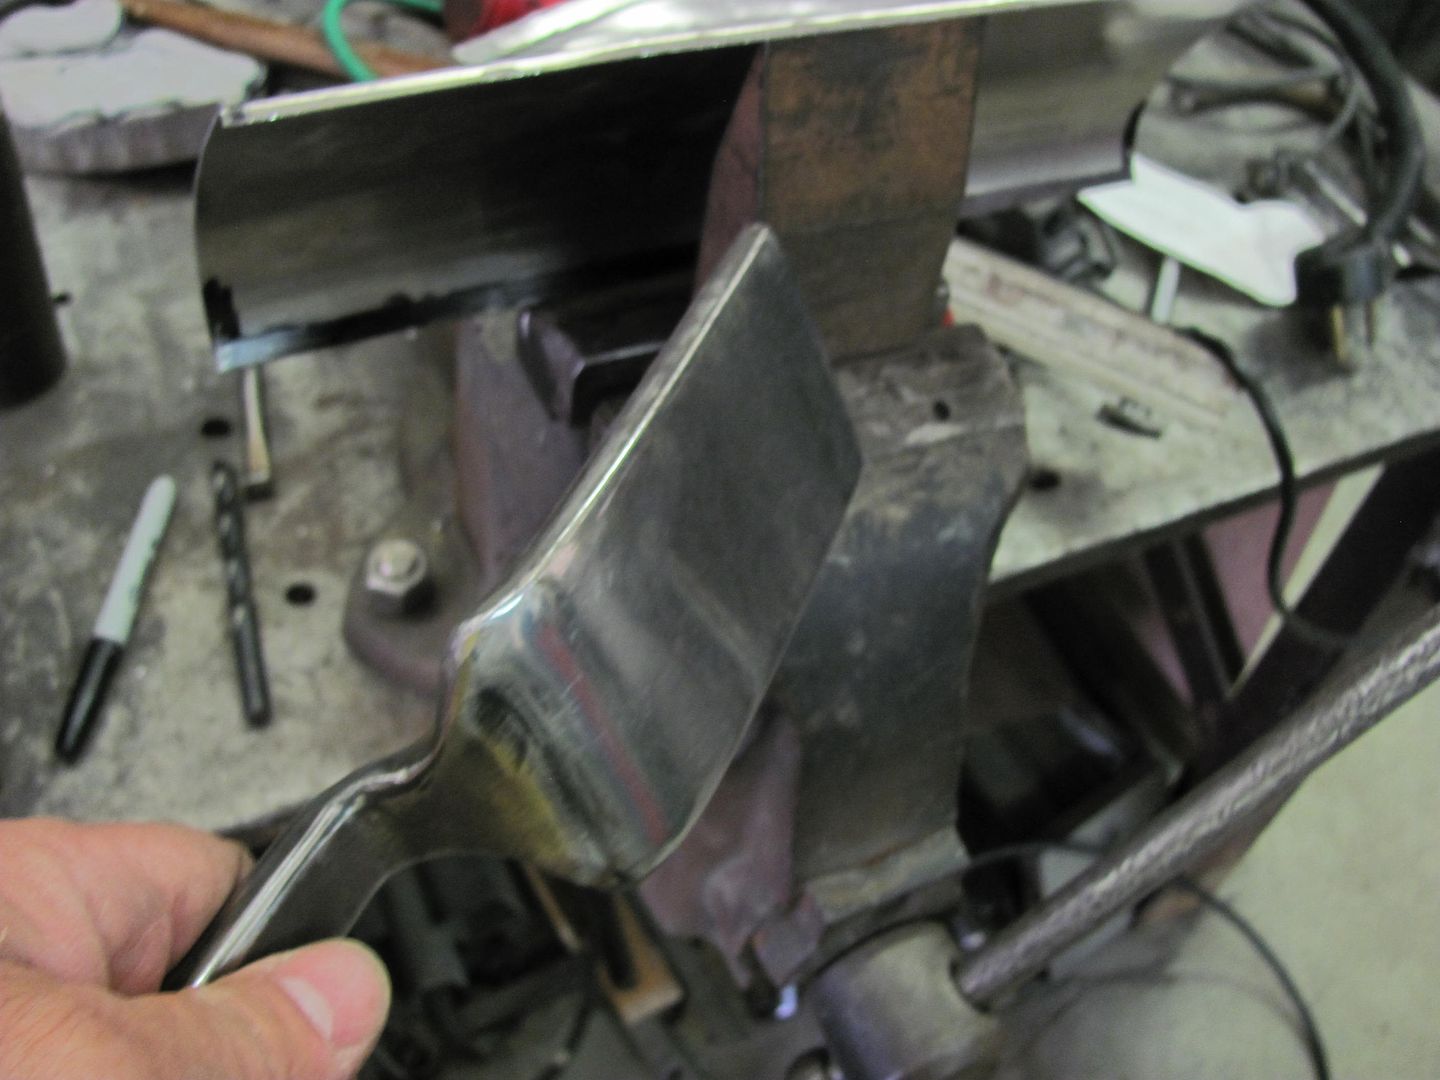
And the "vice anvil" and a slapper was used to fold the straight lip over to a 90....
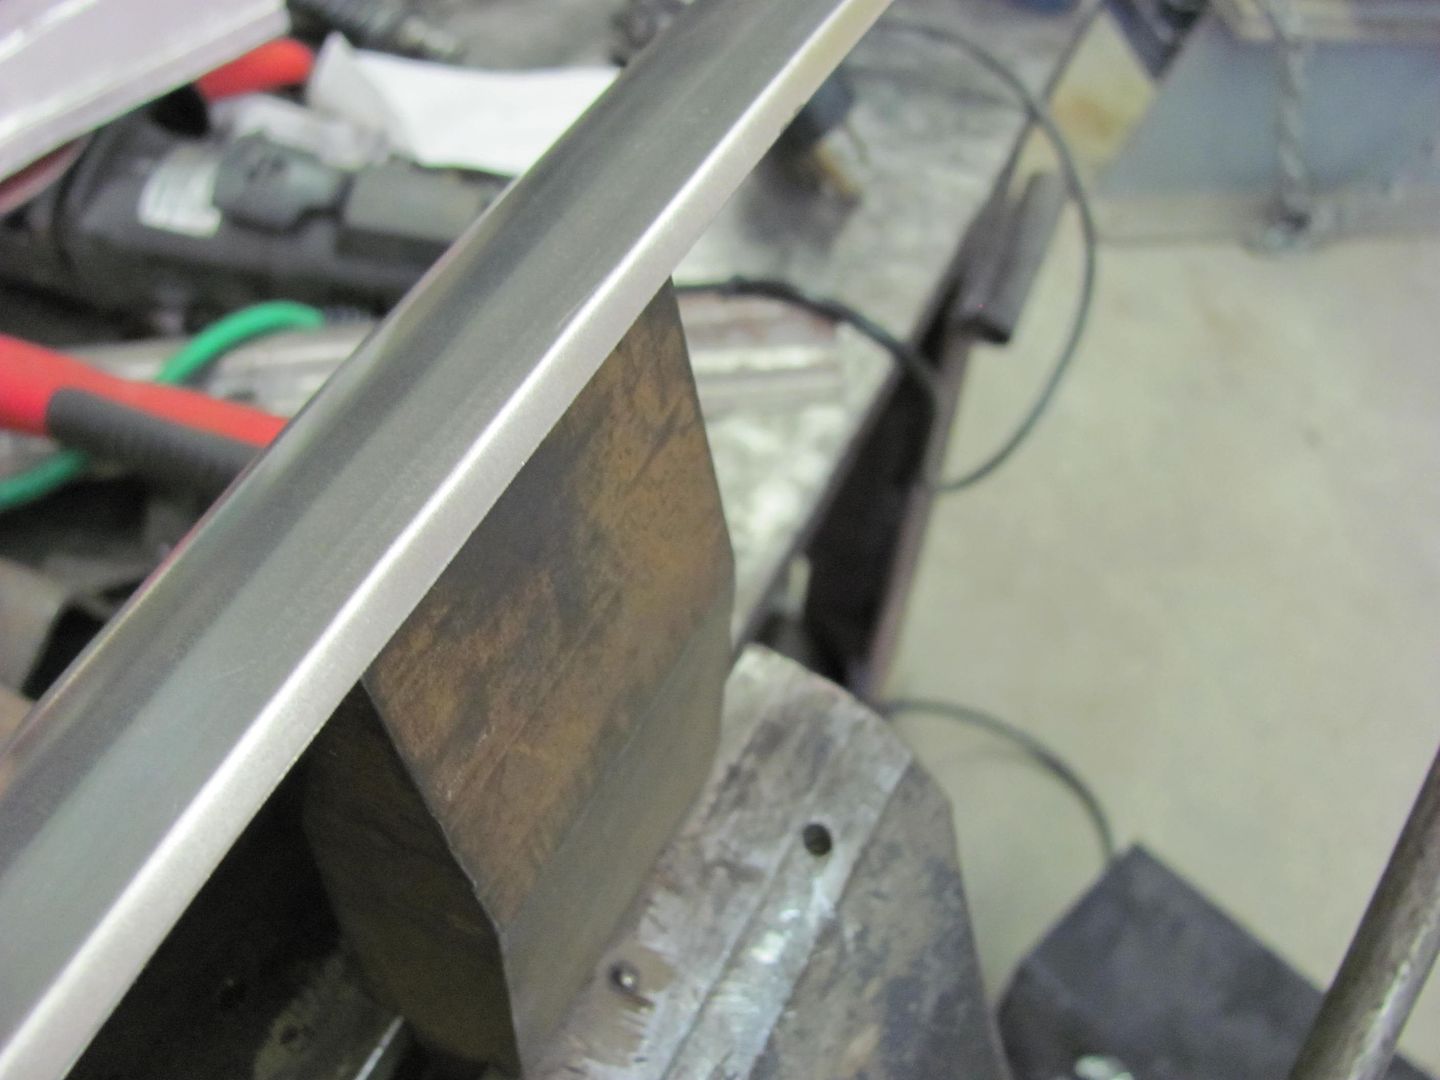
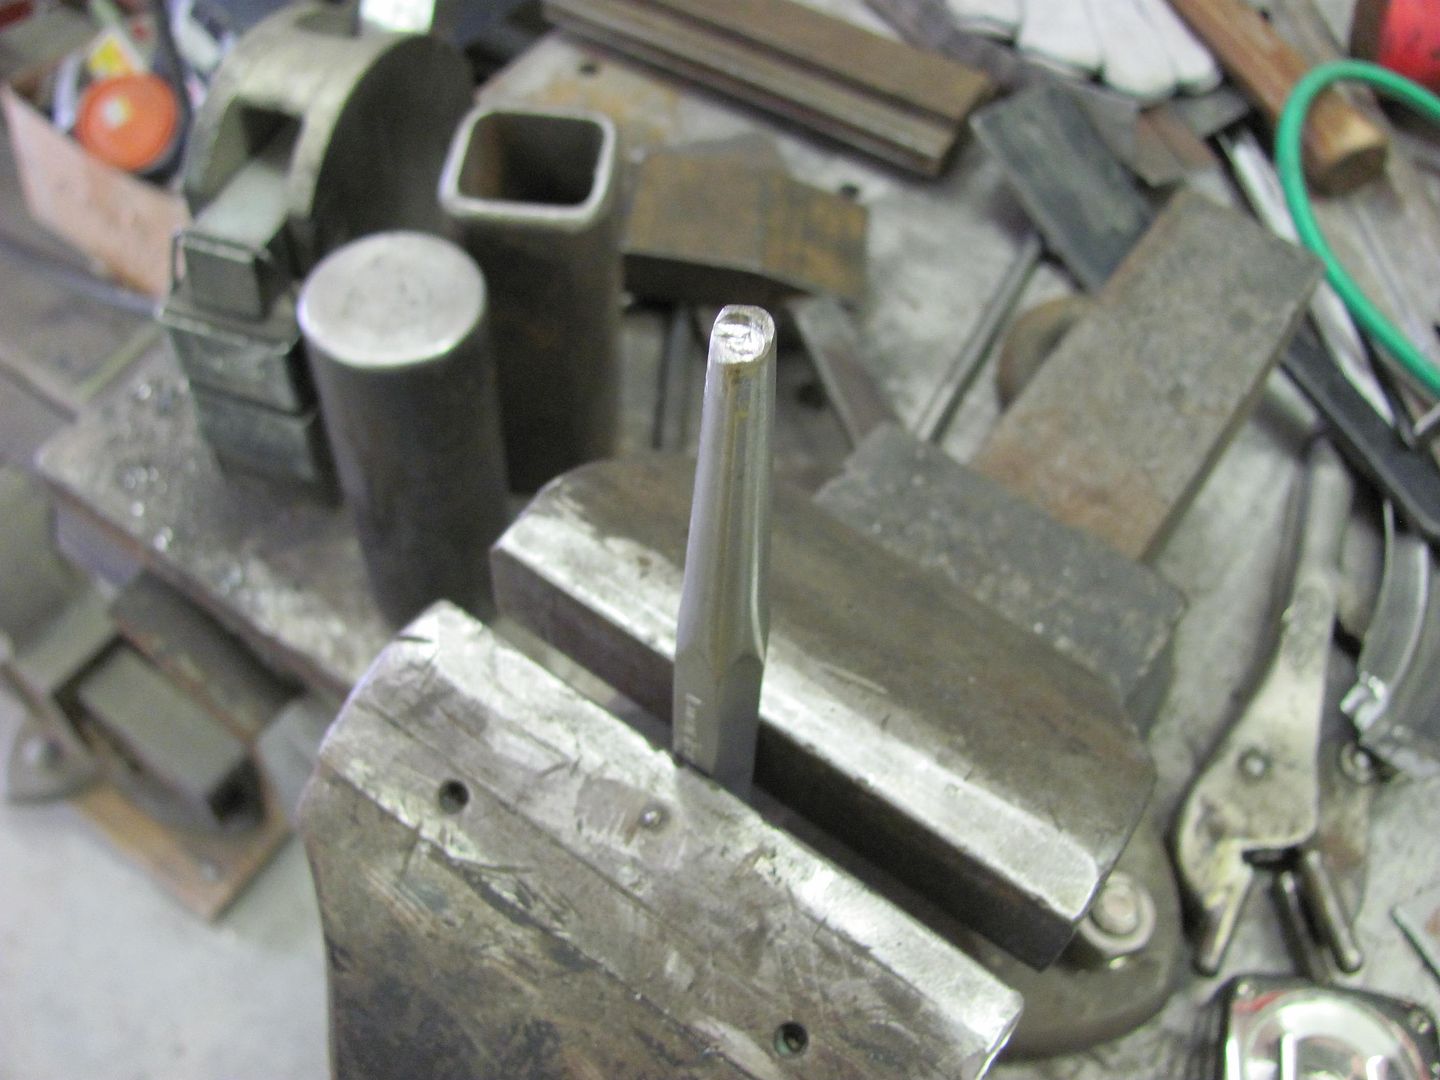
A different anvil was chosen for the radiused edges...
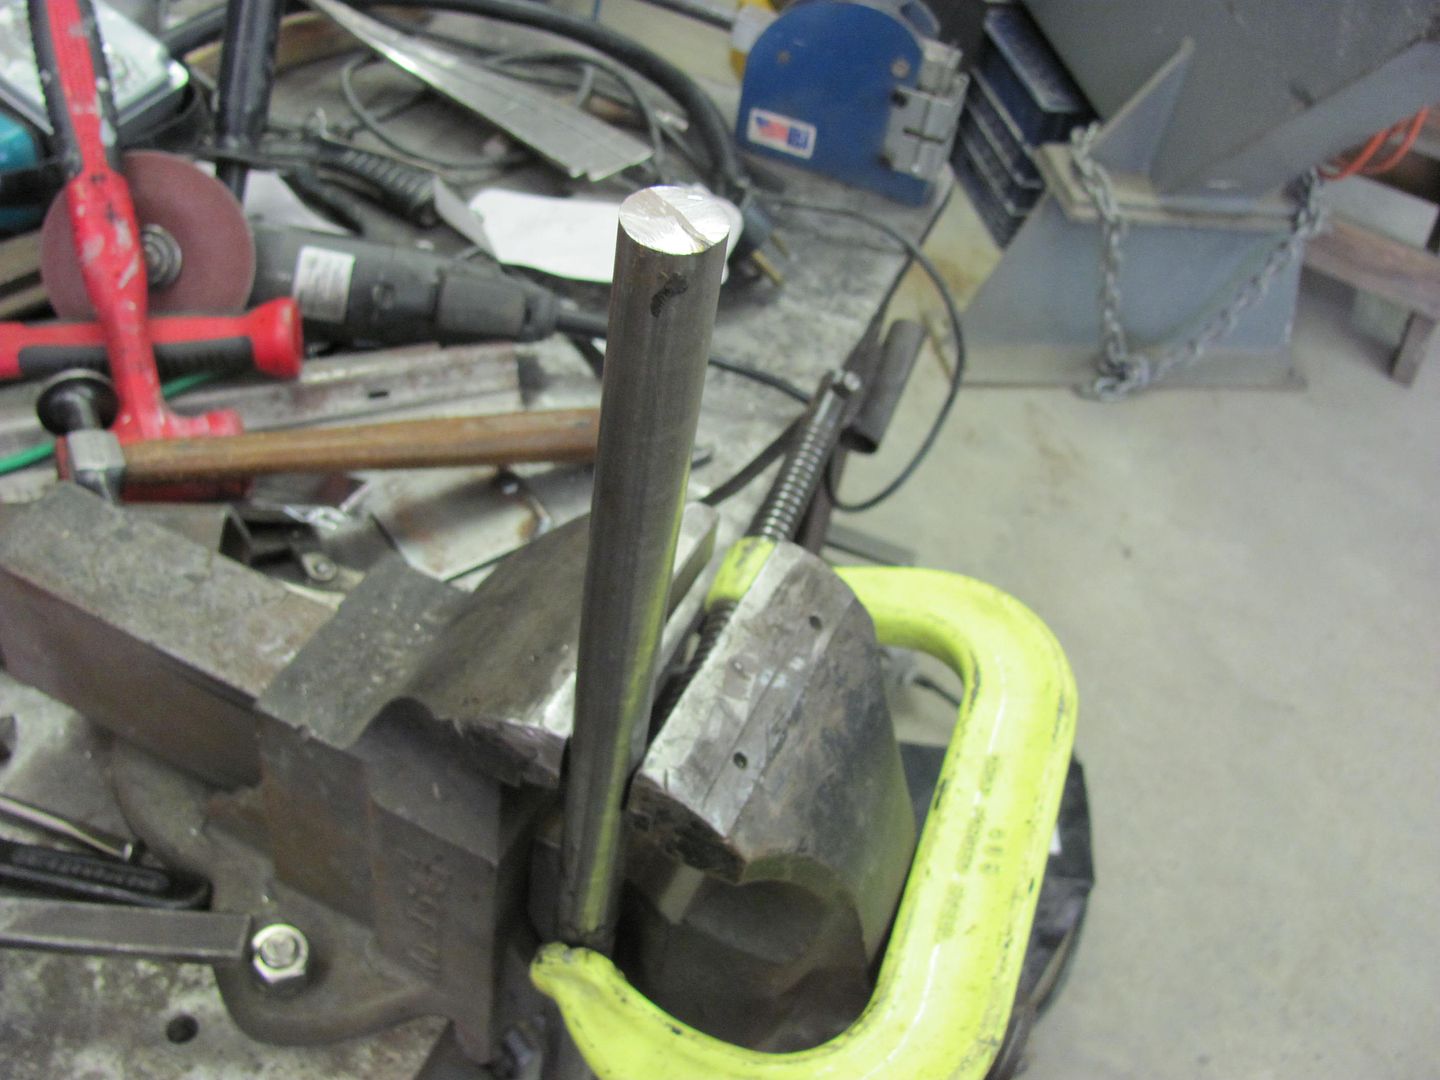
And a punch used to form the 4 corner radiuses...
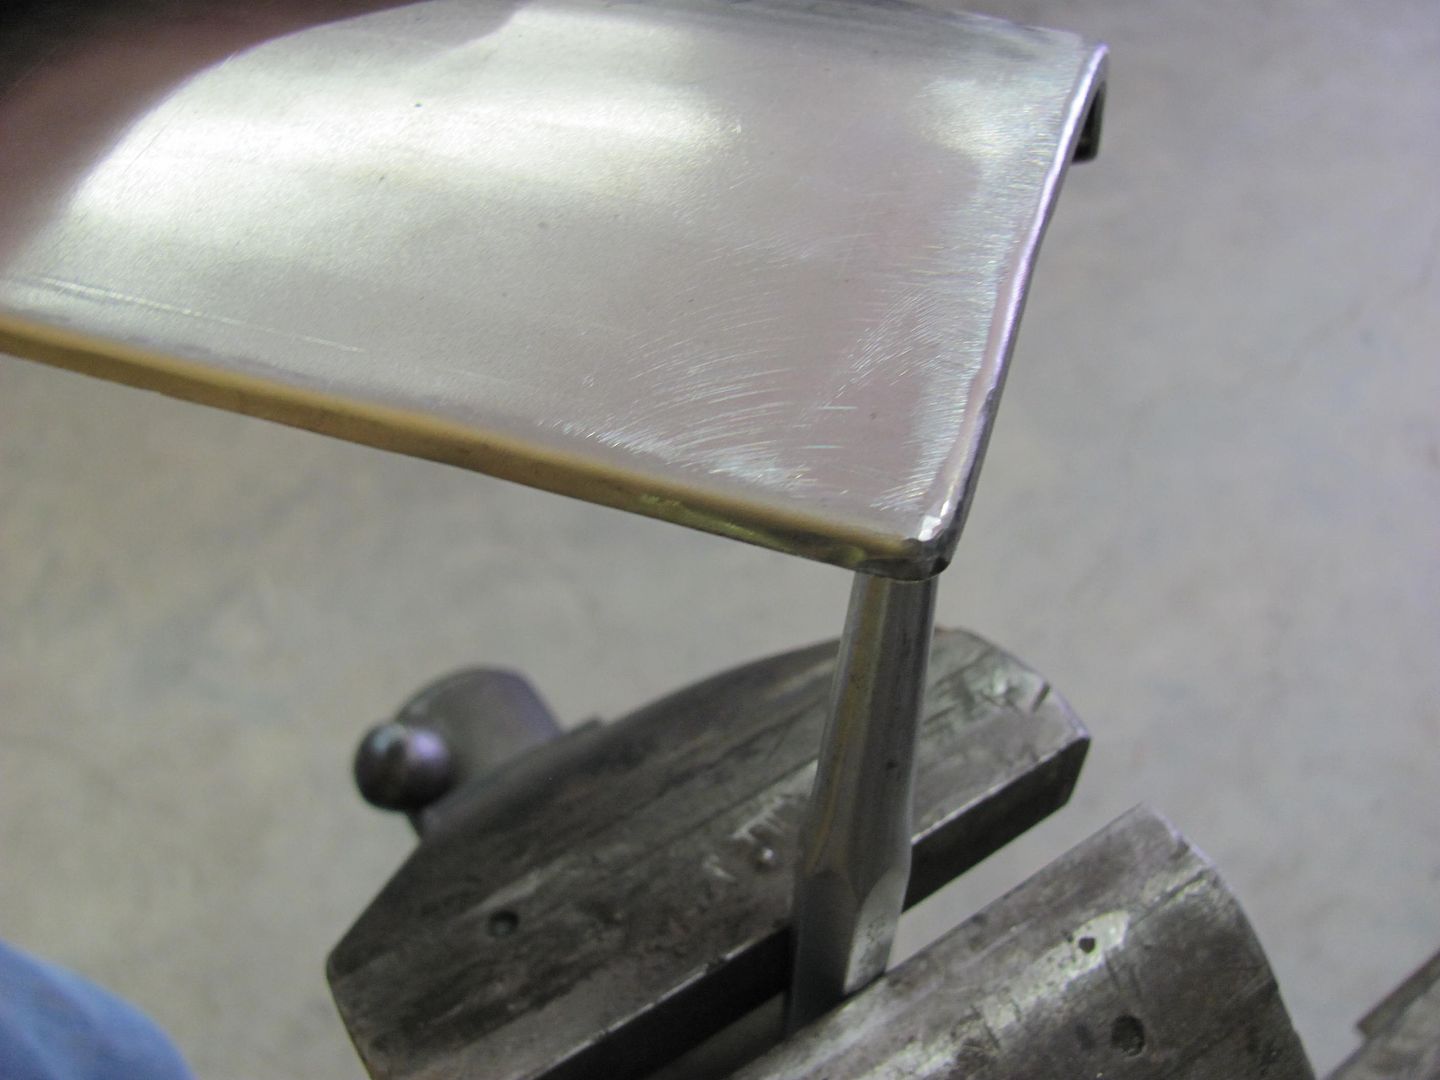
And once complete, the comparison.........
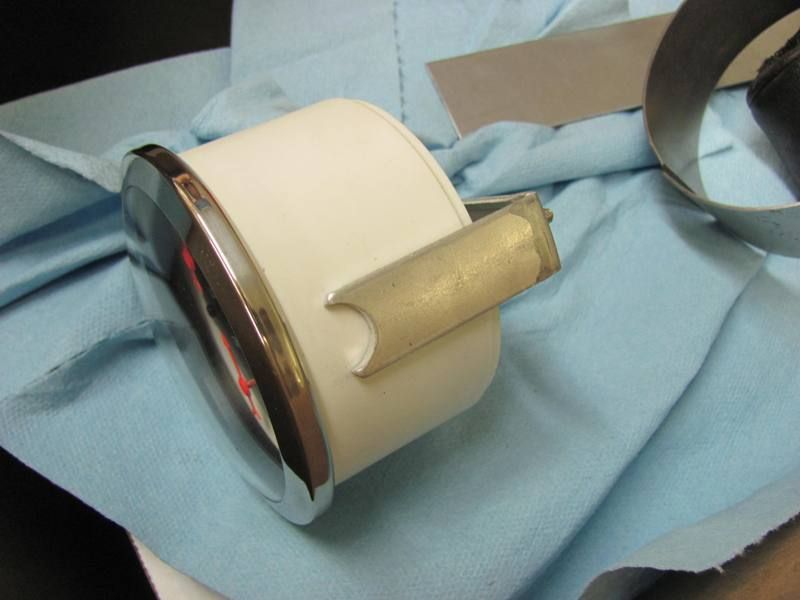
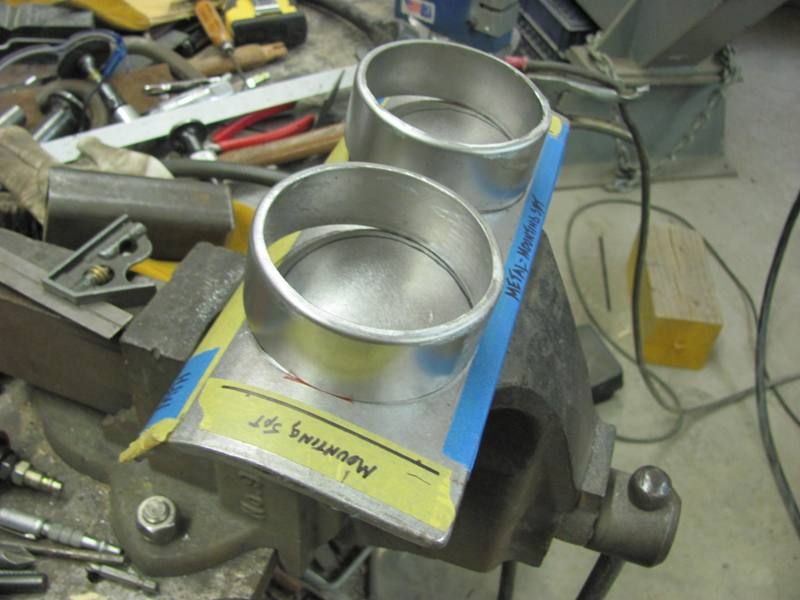
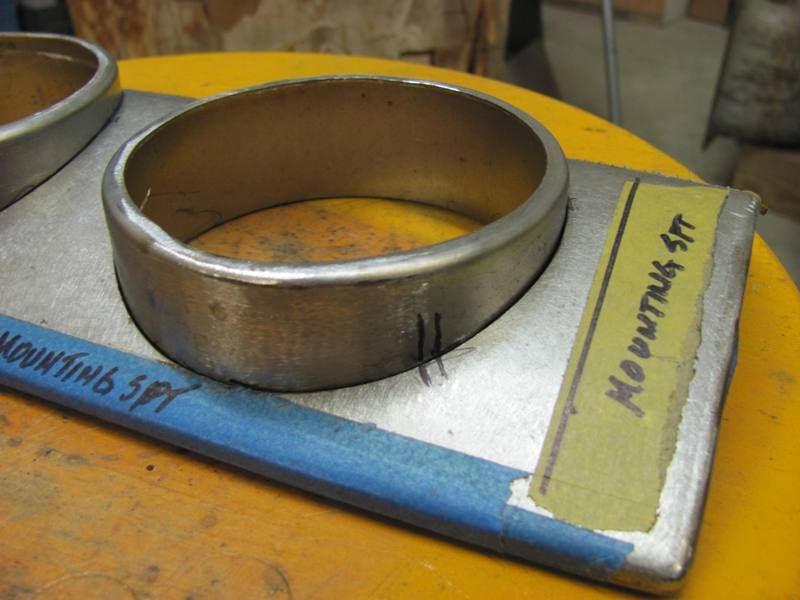
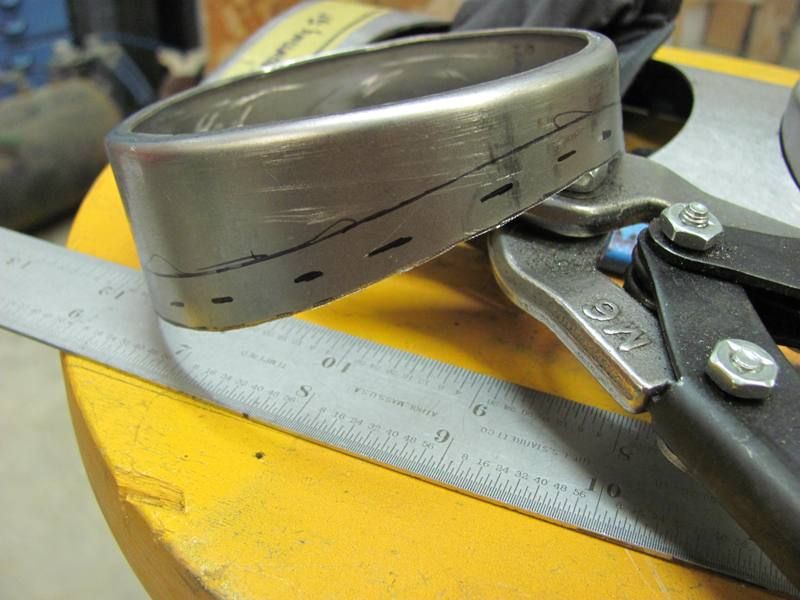
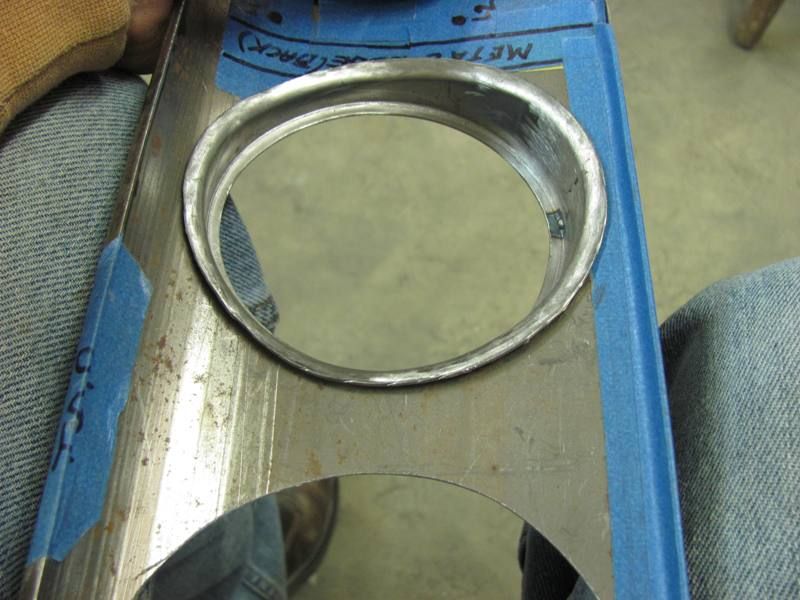
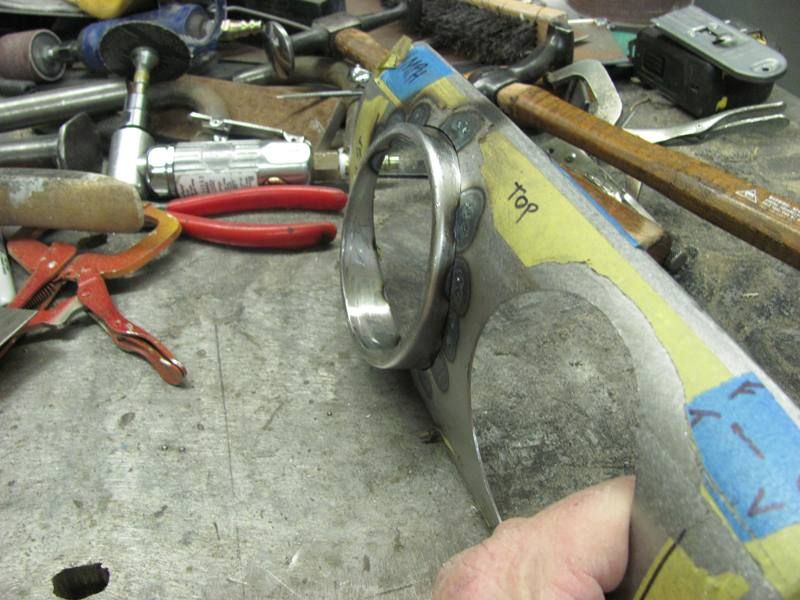
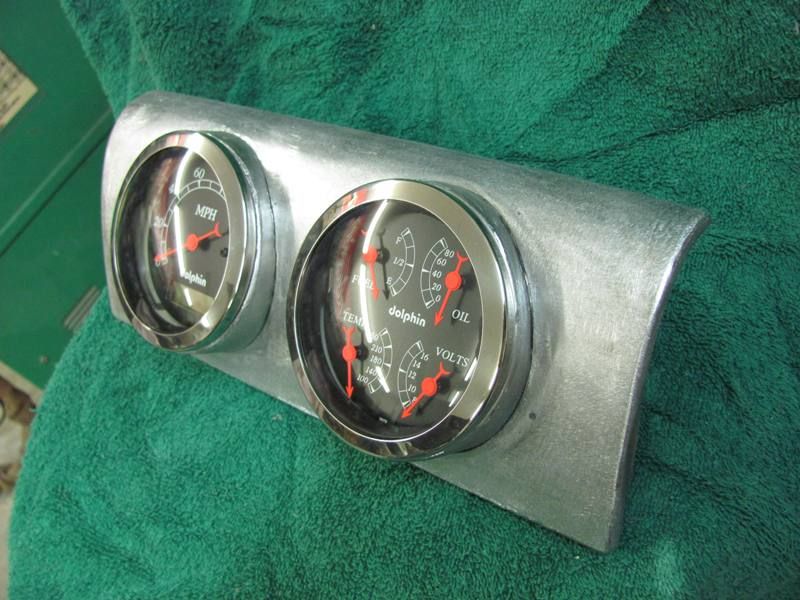
He recently stopped by with a better idea of his plans for the dash, and a box full of gauges. As the panel for the center of the dash has a crown, we will need some adapter rings...
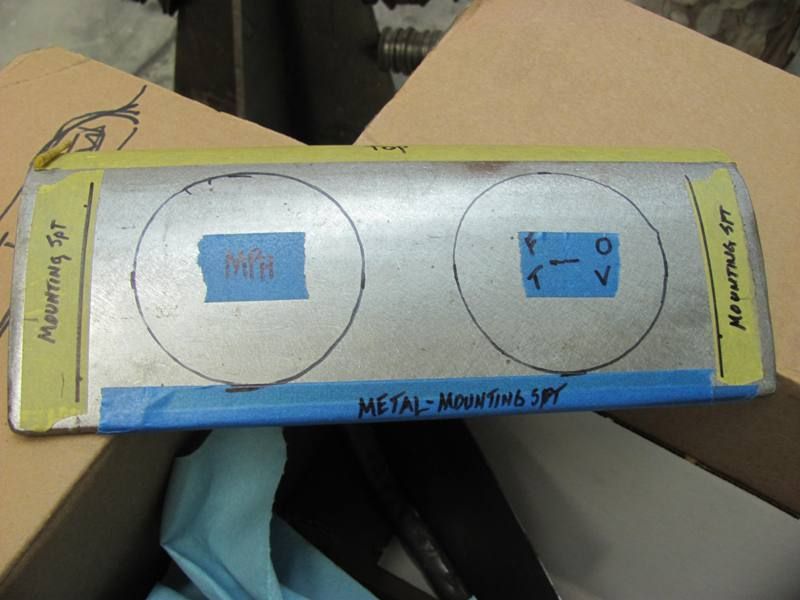
Here's the new gauge with the clamping bracket....
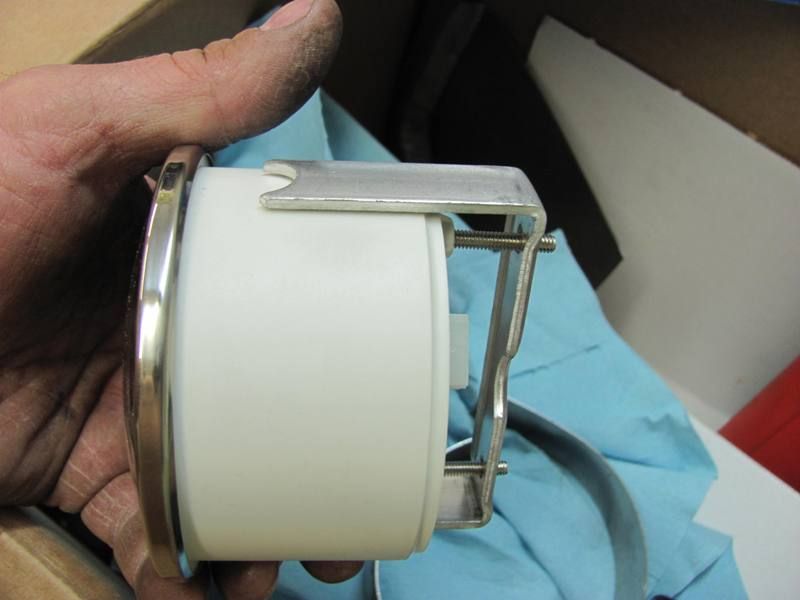
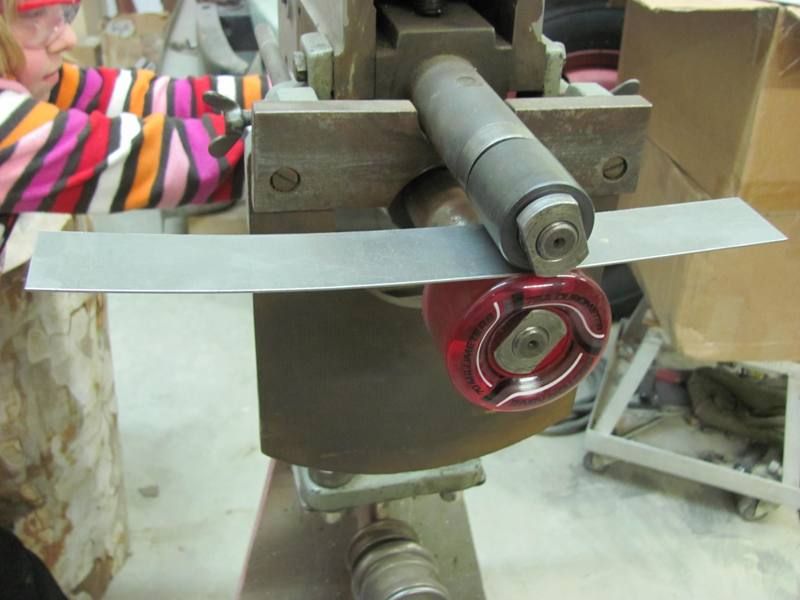
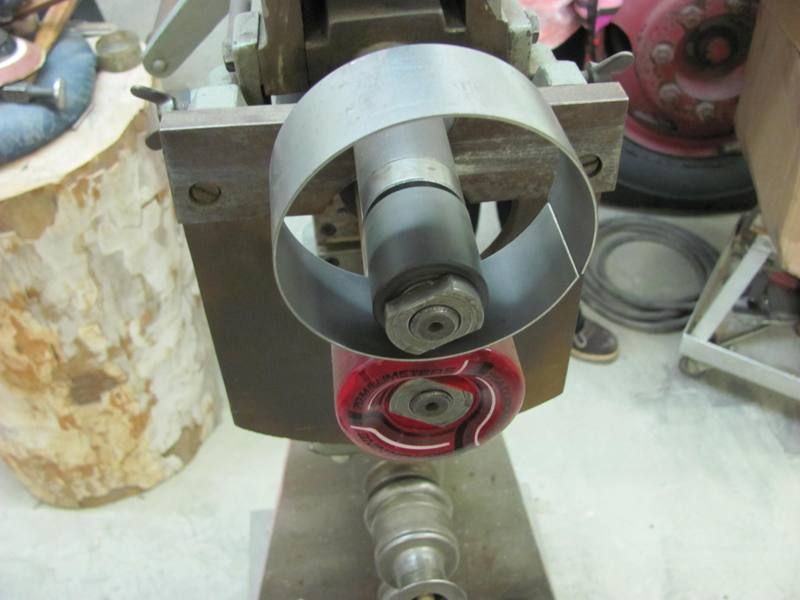
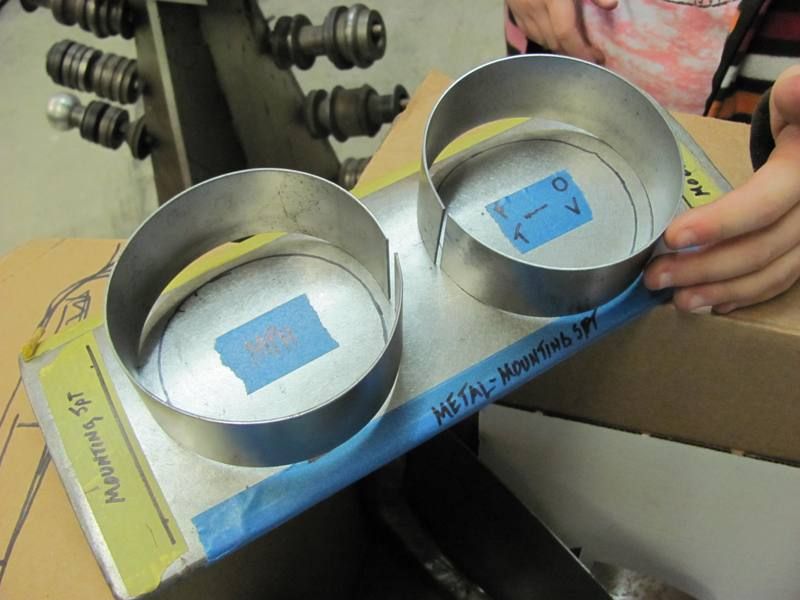
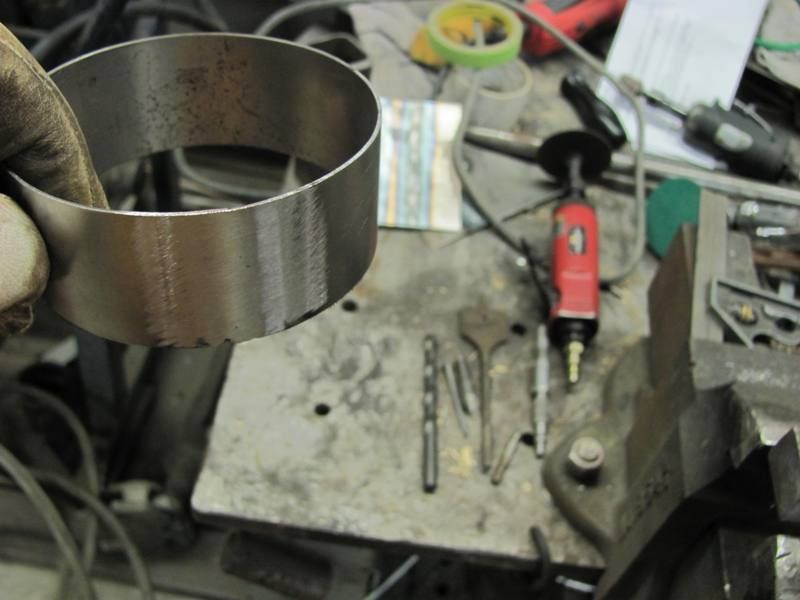
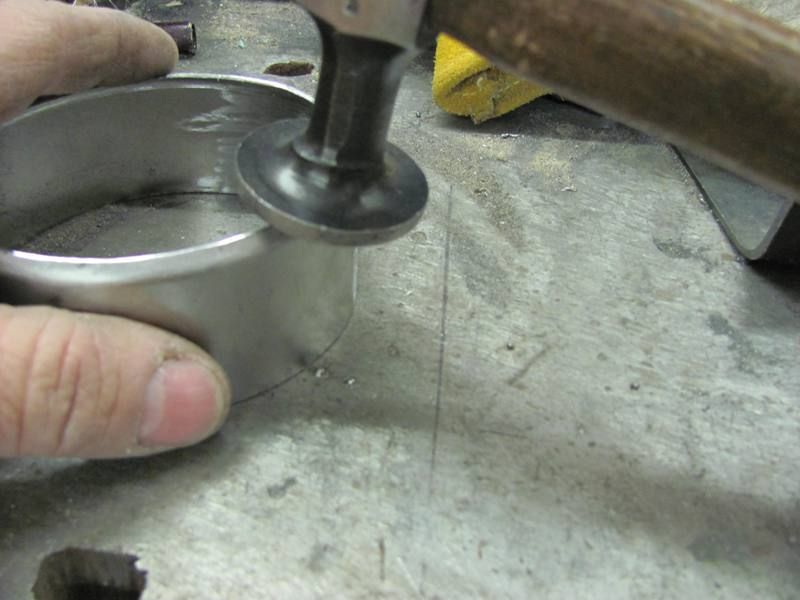
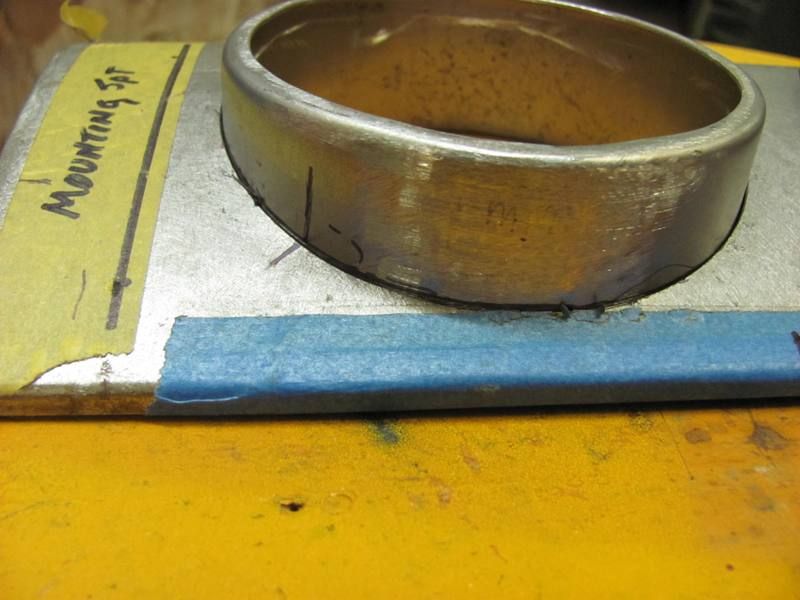
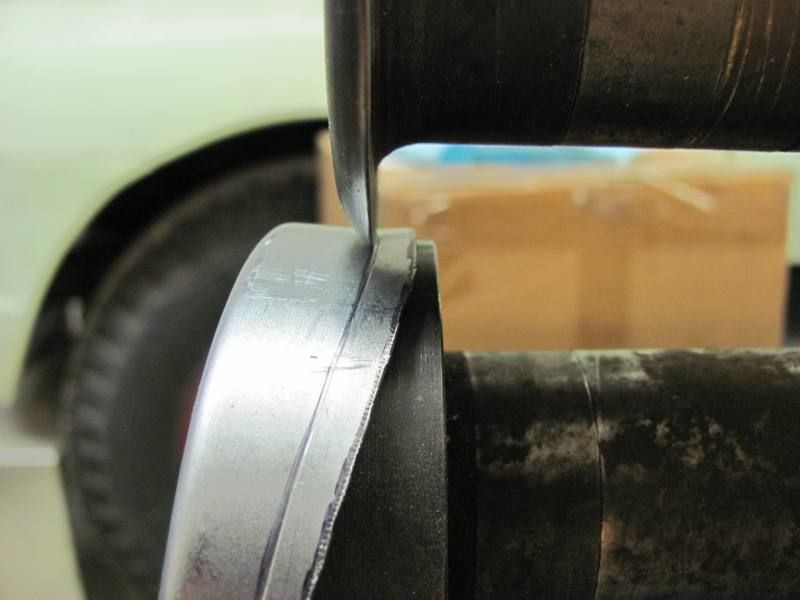
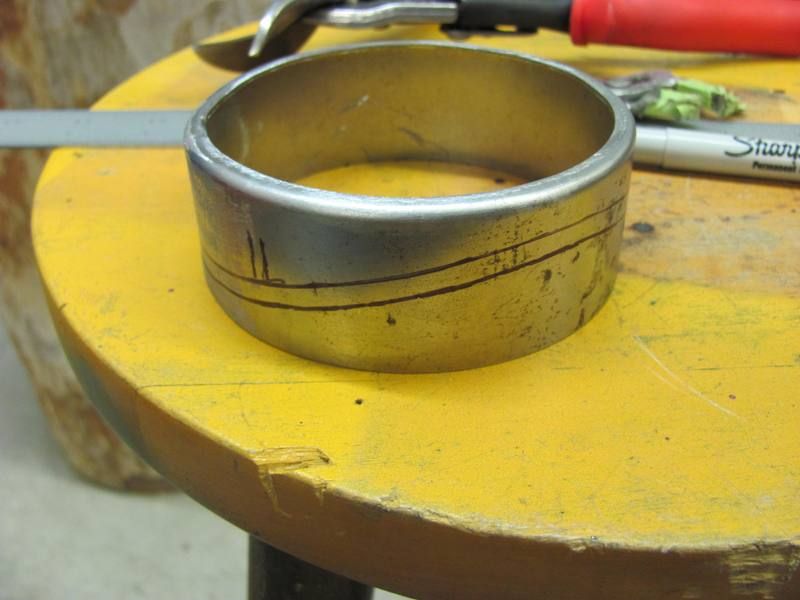
Not having a slip roll, I decided to try these in the bead roller:
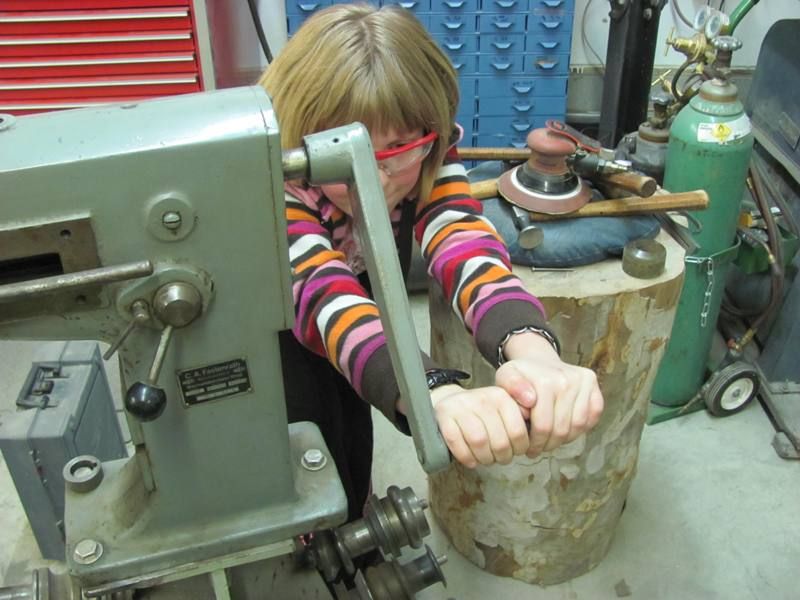
I had some help in the shop this evening, so in addition to having the powered option on the bead roller this evening, given the diameter of the gauge bezel, I was able to show her real world application of Pi X D....
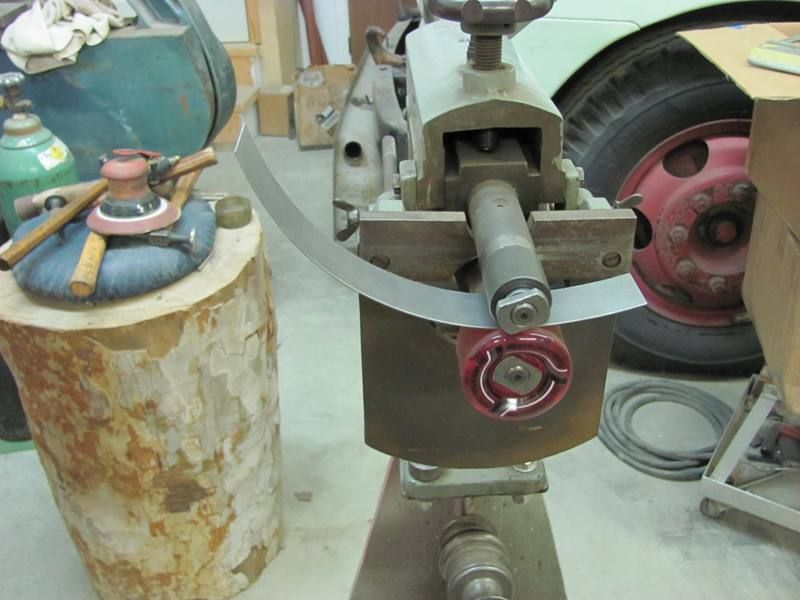
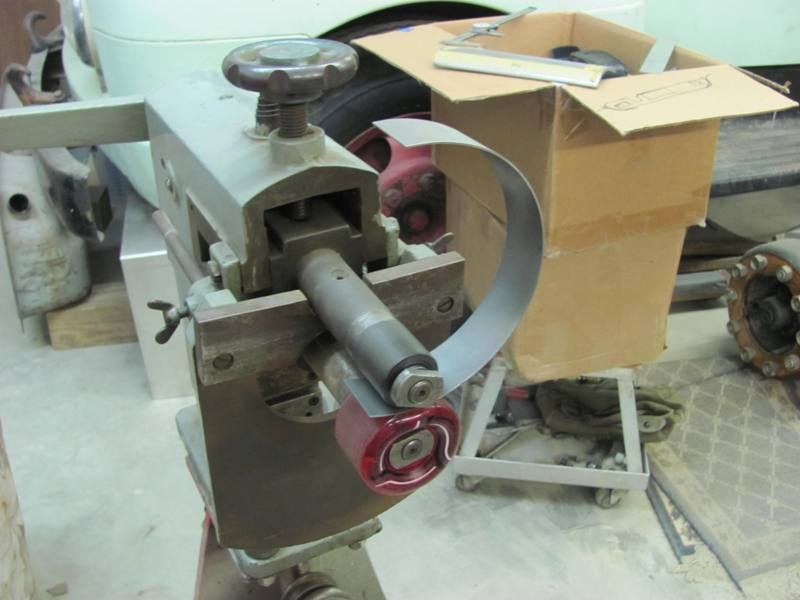
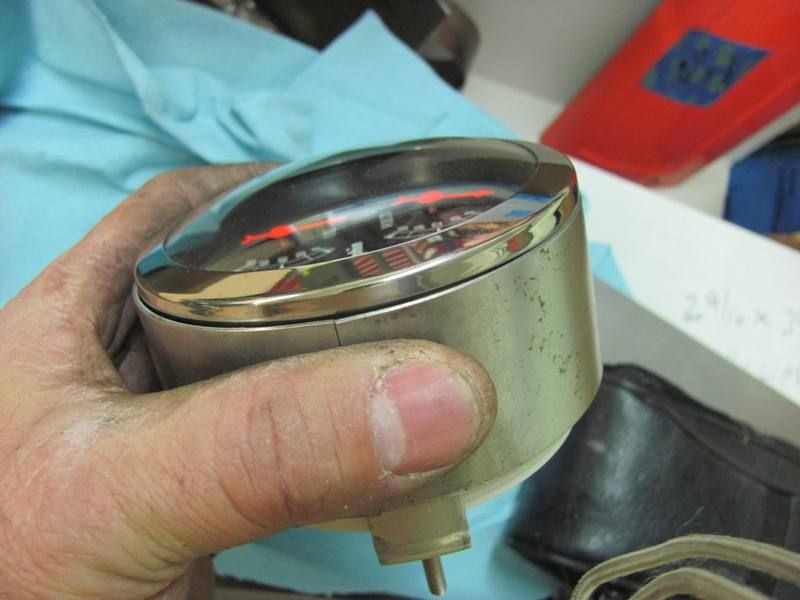
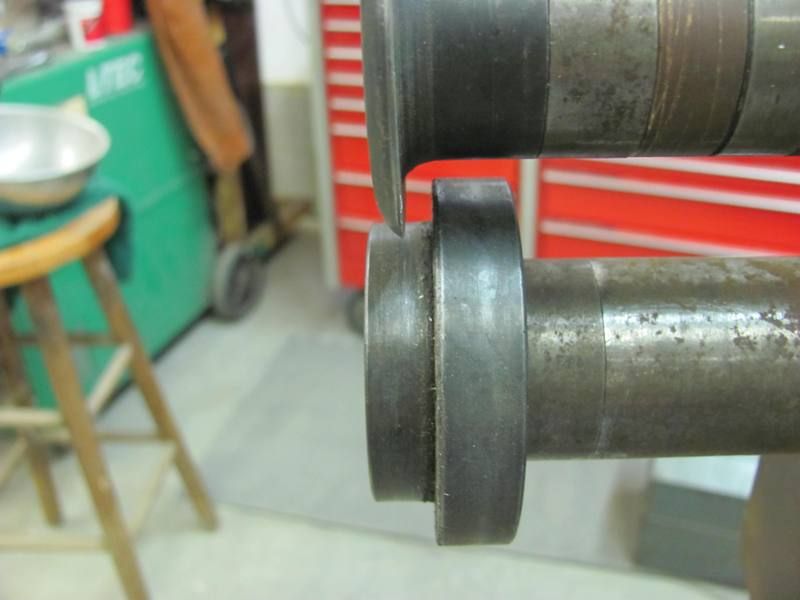
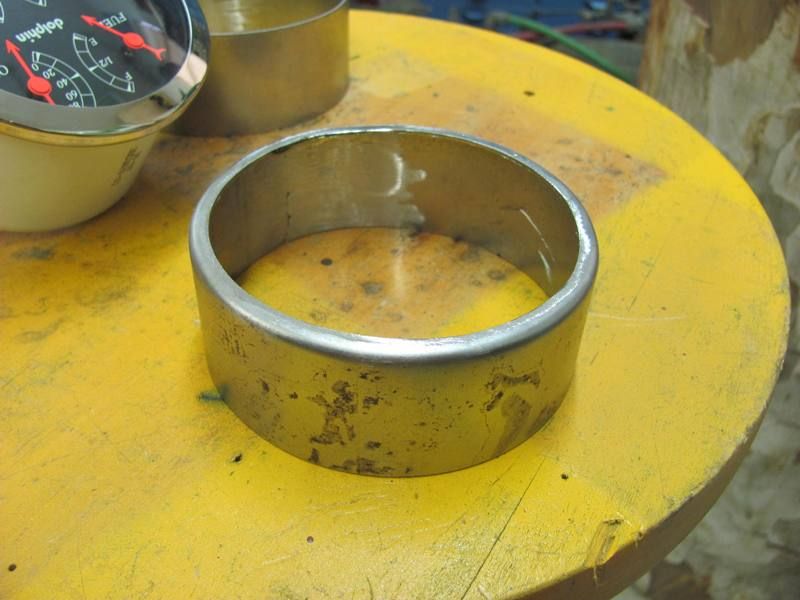
Just to test fit, here's the gauge with bracket, and the ring placed over both....
Both rings formed, tomorrow we'll get them welded up and tip some flanges for the bracket to push against...
Robert
-
05-01-2013 07:45 PM #24
CHR Member
- Join Date
- Jun 2008
- Location
- Leonardtown
- Car Year, Make, Model: Walking
- Posts
- 1,228
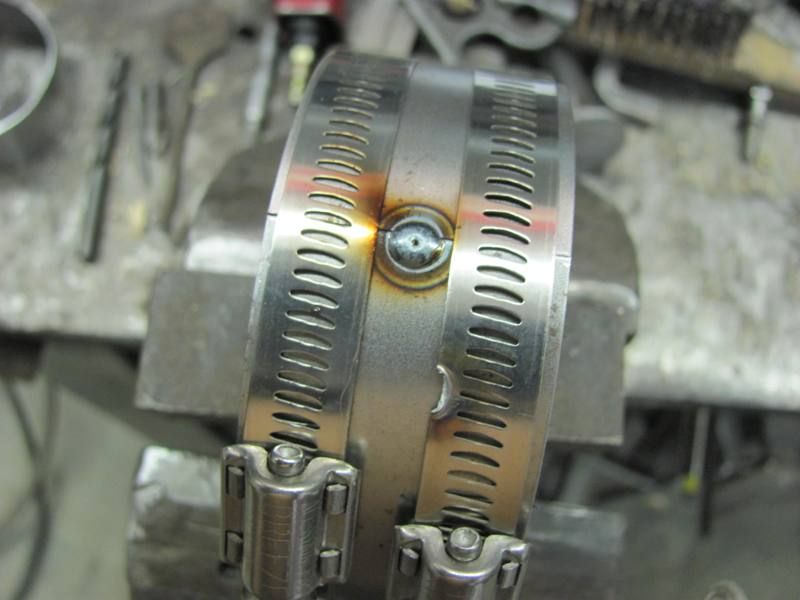
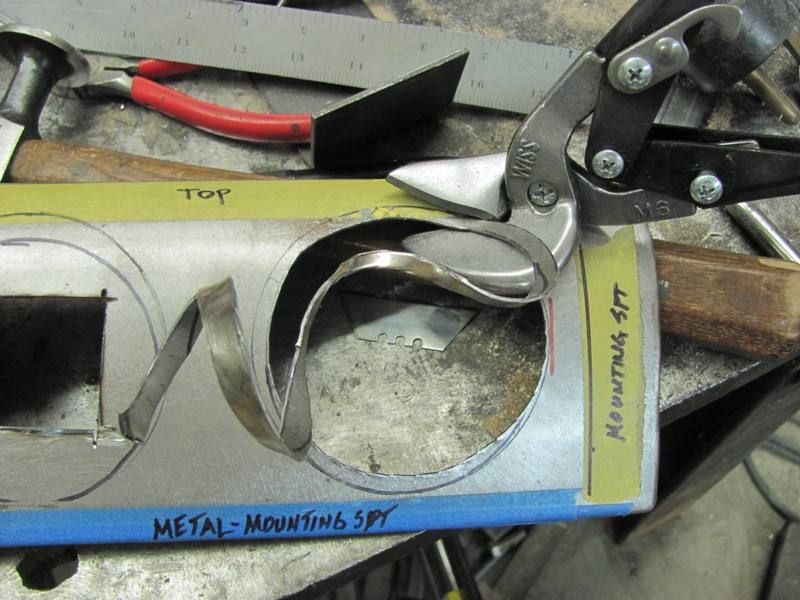
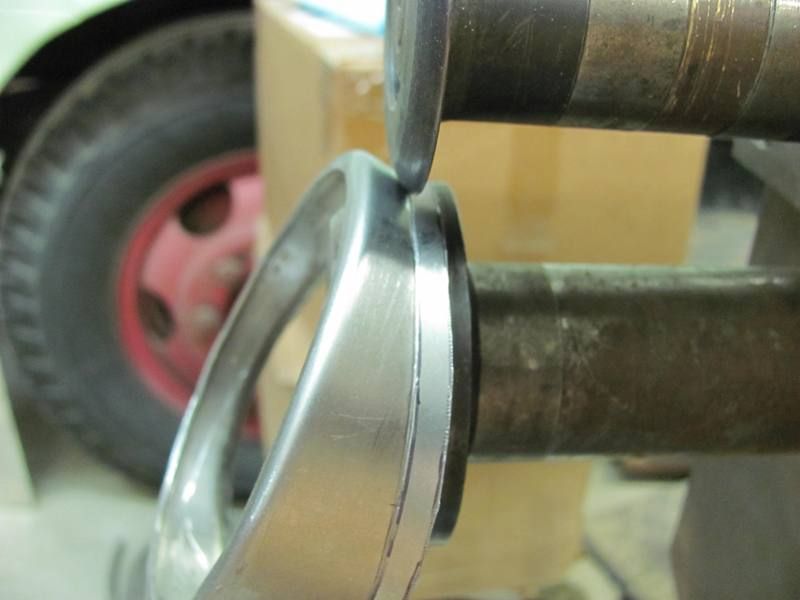
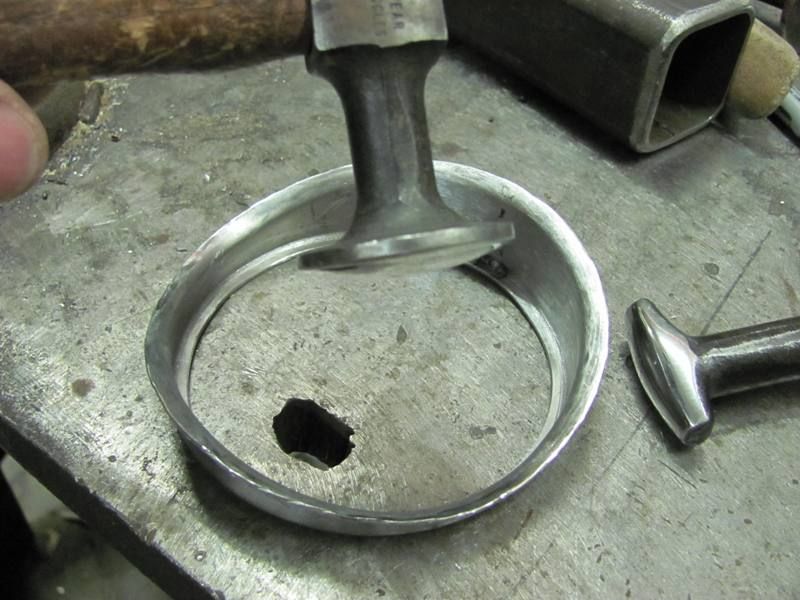
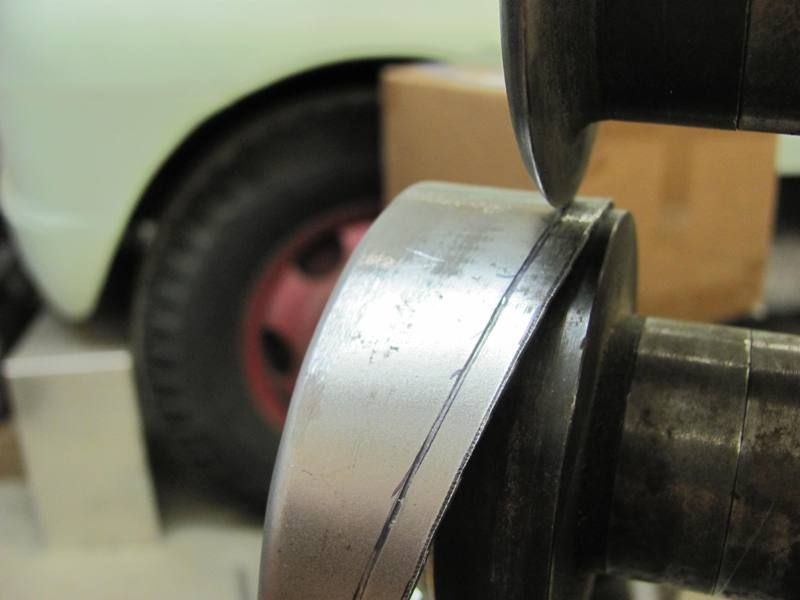
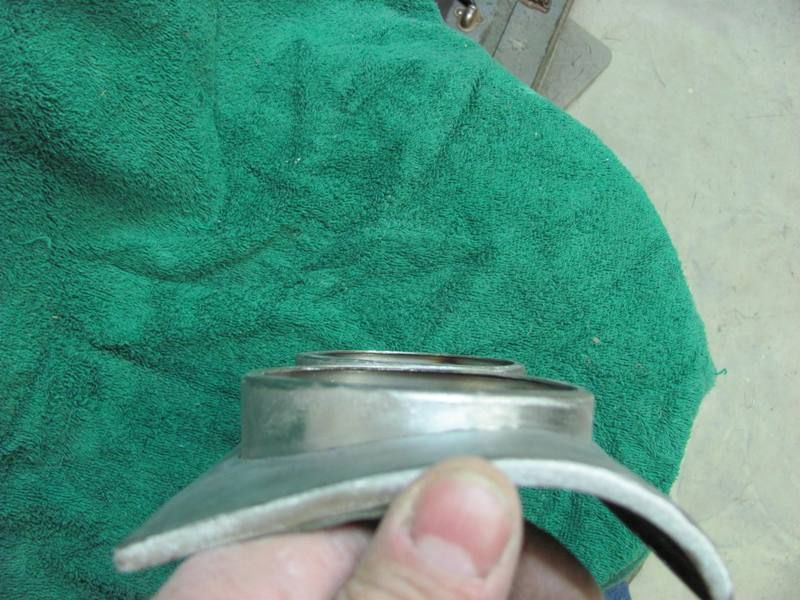
Worked on the gauge panel again today, got the rings welded up...
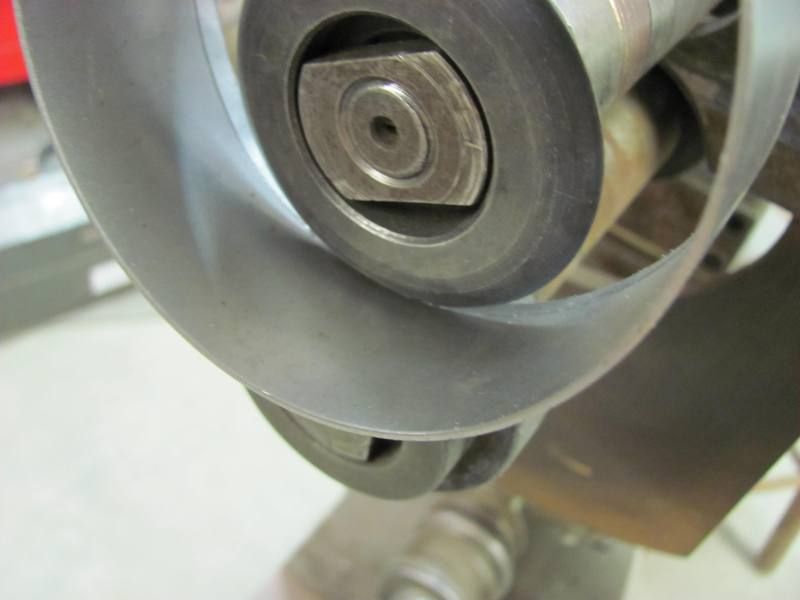
Then to tip a flange to hold the gauge in place, used these in the bead roller....
Applied a bit of pressure and started tipping the ring gradually as we went....
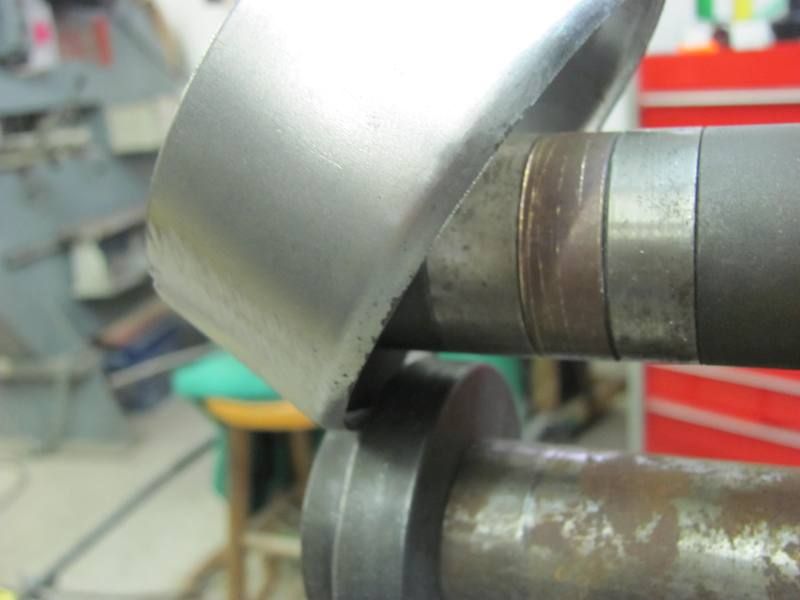
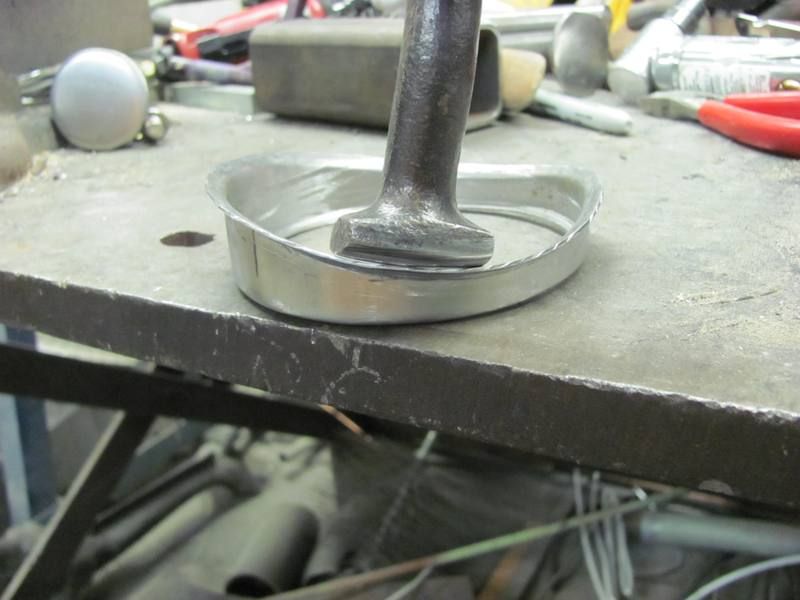
After getting the initial flange tipped to almost 45 degrees, the body hammer was used to get the flange to 90.
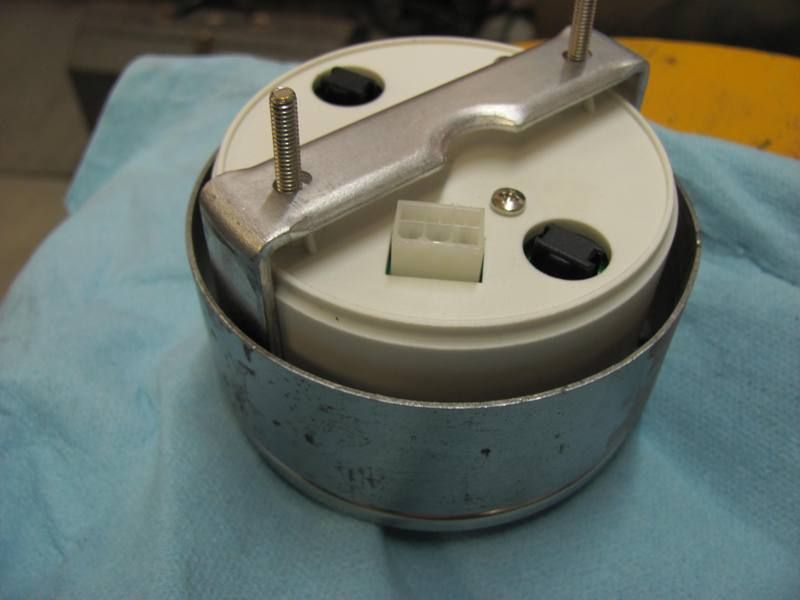
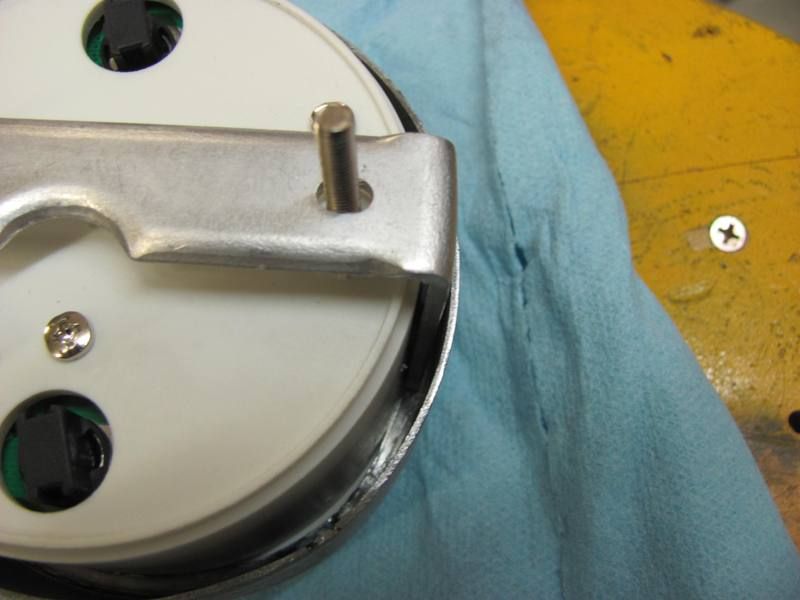
Fitted, and shown with the gauge's mouting bracket in place.....

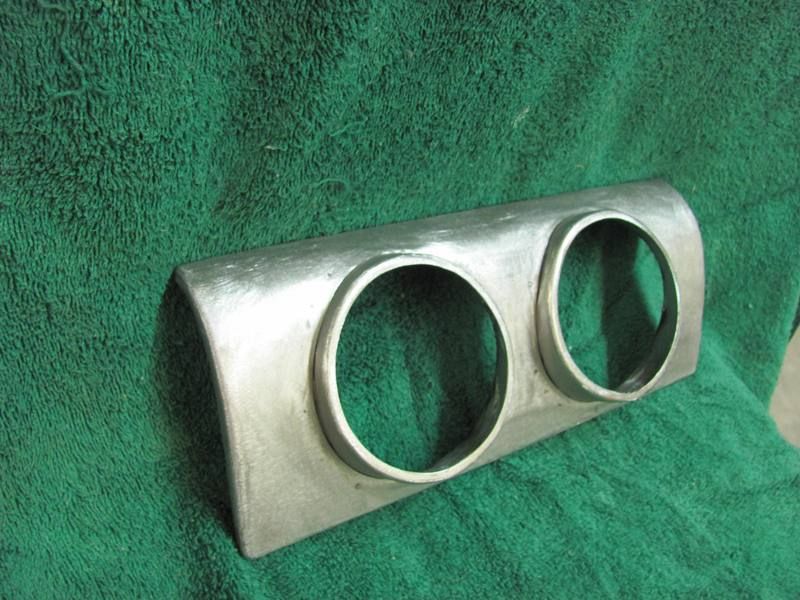
Now to fit the rings to the panel....
....and fine tuned with a drum sander.. A view in the panel....
Rather than weld around the perimeter of the hole, which will surely warp things up nicely, I'll tip a flange on the underside of the rings and spot weld to the panel.
Before marking anything, the panel and both rings were pushed flat to the "table" surface. Then alignment marks added to keep us in the right location....
Marked along the surface of the panel against both rings..
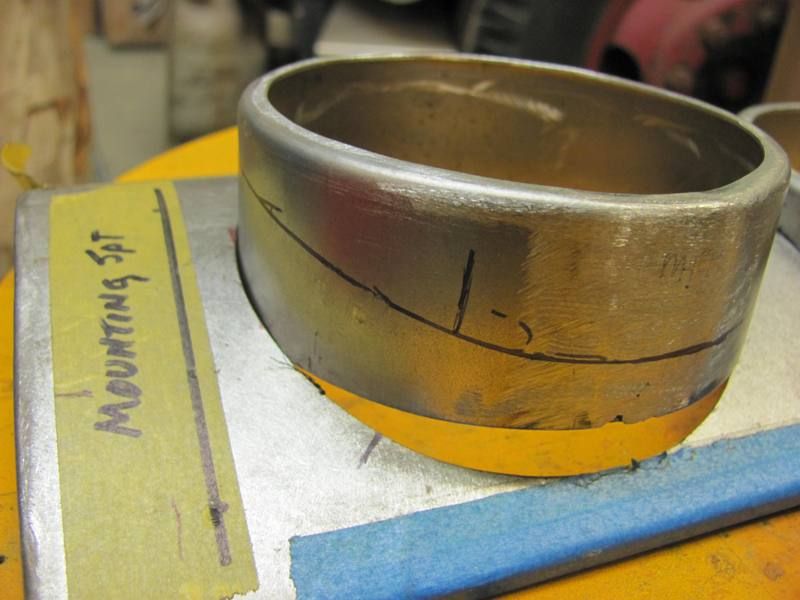
Did an offset line 3/8" away and trimmed. This looked too wide to tip, so I went back and marked again at 3/16".
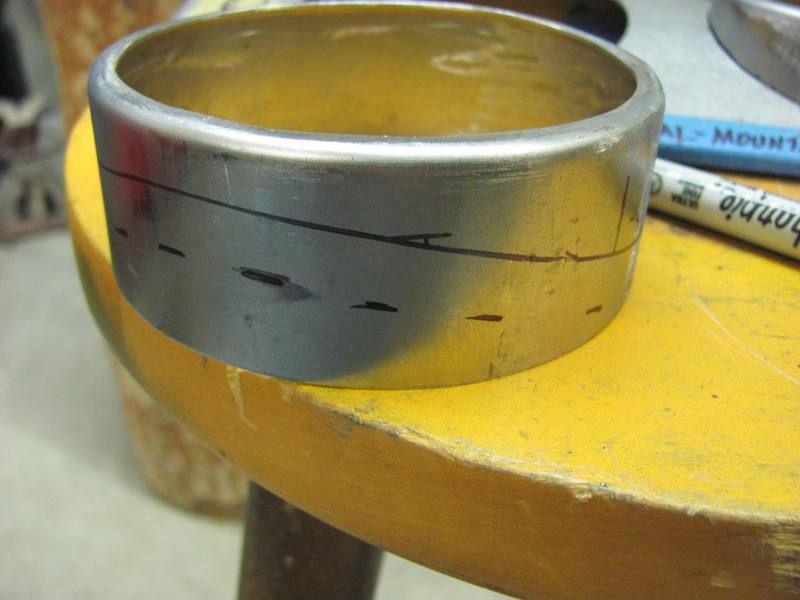
.....and trimmed again to the 3/16 mark. Changed to a different lower die for tipping this time.... made a complete revolution to "mark" the bend line and then started tipping...
Again went to about a 45 degree tip, placed the ring in the panel to see what needed more tipping....
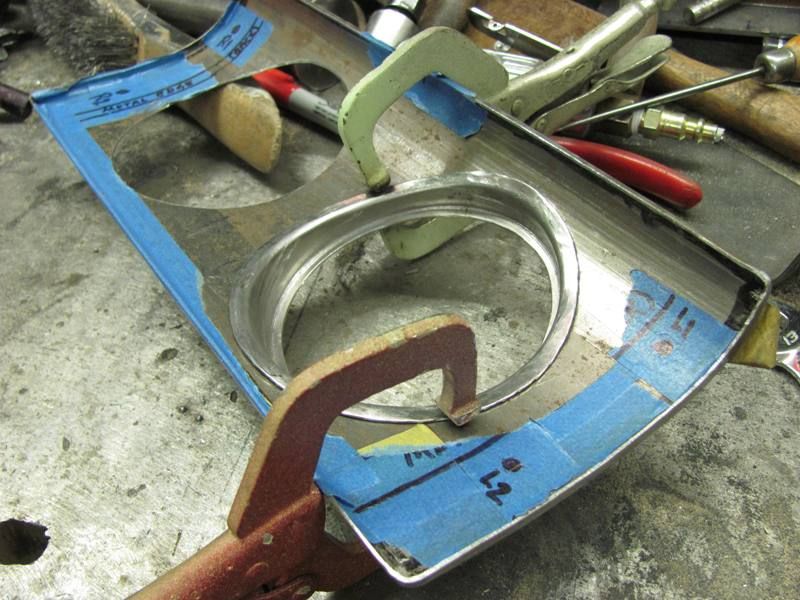
Tipping along a wavy line does pose some "pulling" issues, so I did have some planishing/stretching to do in some areas. It's real close, but I have some tweaking left to do, and then I'll tackle the second one.
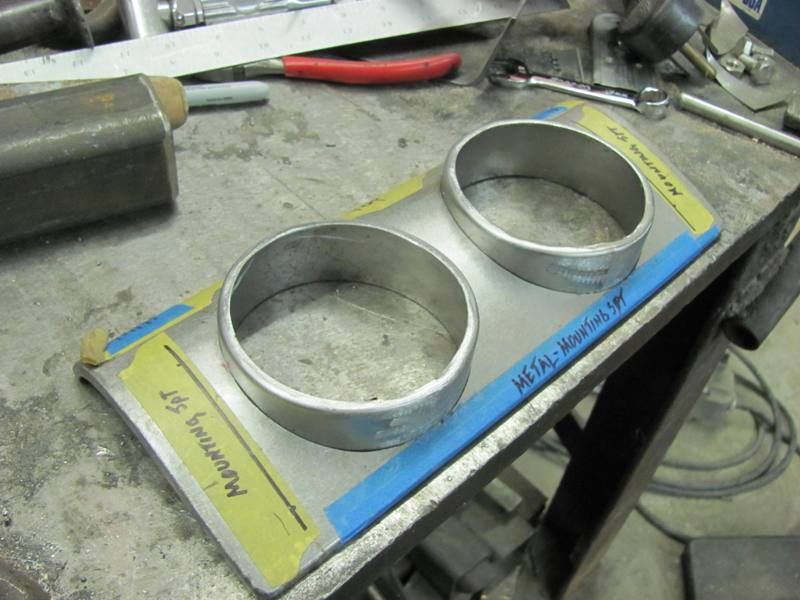
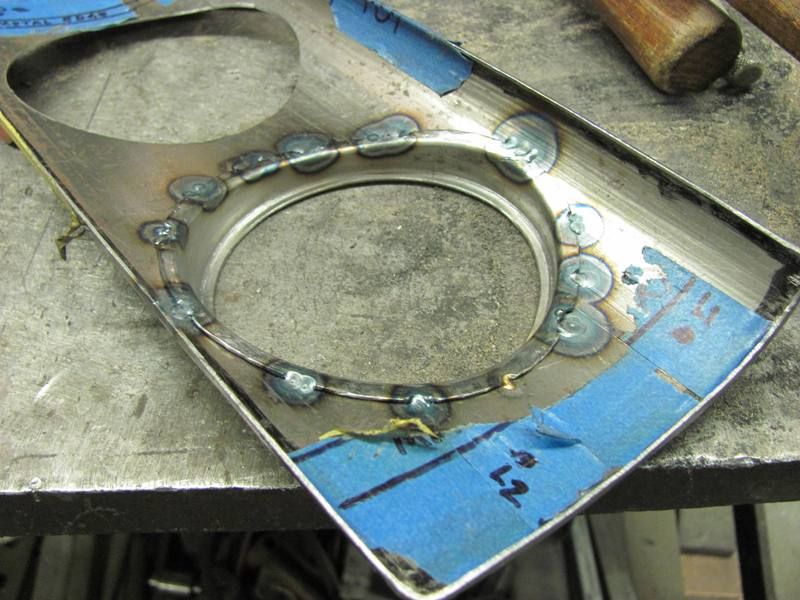
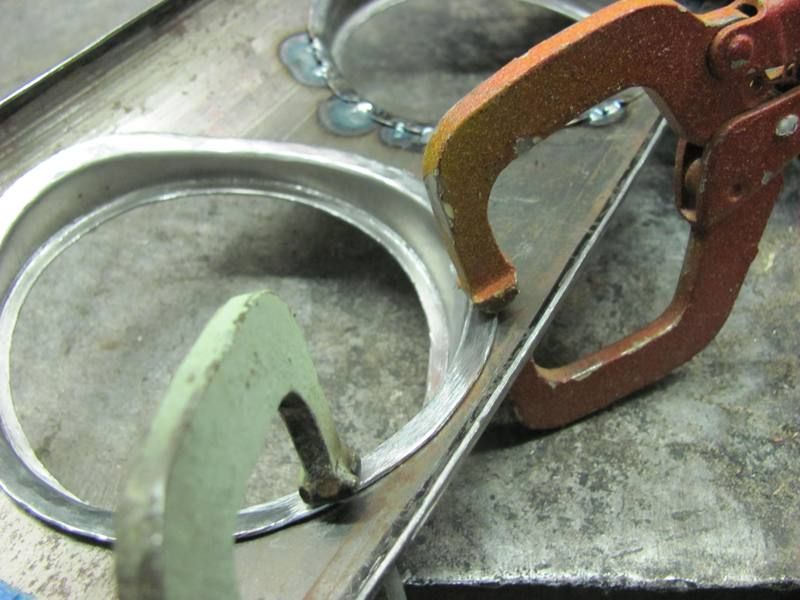
Used the Tig to tack in the first ring...
Then worked on the second, marked the flange at 3/16", trimmed, and made one revolution to mark the bend line, then tipped the inner flange as before...
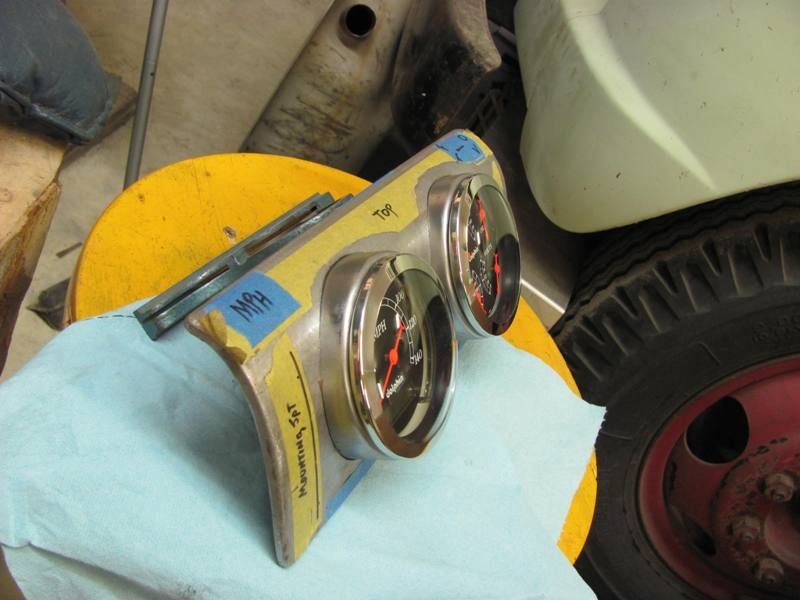
Second ring clamped, tacked in place, panel dressed a bit, and gauges test fit....bolted in this time..


A couple small depressions at some of the weld tacks, some glaze will address any remaining imperfections. All in all, pretty pleased with the results...
Last edited by MP&C; 05-01-2013 at 07:53 PM.
-
05-01-2013 08:40 PM #25
Club Hot Rod Member
- Join Date
- Apr 2013
- Location
- SoCal Diego
- Car Year, Make, Model: Several, in fact too many!
- Posts
- 89
Nothing like quality work. So could you build that in a one hour show like on TV? Love your shop equipment and the great pics on how you shaped your bezels. Of course the paid help always speeds things up and she looks like she has a good feel for the bead roller. LOL Thanks for taking the time to post it! Beautiful work...
Last edited by M.T.1; 05-02-2013 at 08:49 AM.
duplicate account
-
05-01-2013 11:49 PM #26
CHR Member
- Join Date
- Sep 2005
- Location
- Hamilton
- Car Year, Make, Model: 69 nomad, 73 charger, 74 vega
- Posts
- 3,900
Thanks for the pictures, I know that took your time.
I love the step by step.
Good stuff.
Education is expensive. Keep that in mind, and you'll never be terribly upset when a project goes awry.
EG
-
05-02-2013 09:29 AM #27
CHR Member
- Join Date
- Aug 2010
- Location
- Berryville
- Posts
- 486
Robert, that workmanship is outstanding! Just beautiful. Right now on the HAMB they started a new 'tech week', you should post it there too.
-
05-02-2013 07:44 PM #28
CHR Member
- Join Date
- Sep 2011
- Location
- Albany, NY
- Car Year, Make, Model: 33 Pontiac 3 Window Sport Coupe
- Posts
- 37
Nice work guys!!!
33 Pontiac 3 Window Sport Coupe
-
05-03-2013 12:47 PM #29
Club Hot Rod Member
- Join Date
- Apr 2013
- Location
- SoCal Diego
- Car Year, Make, Model: Several, in fact too many!
- Posts
- 89
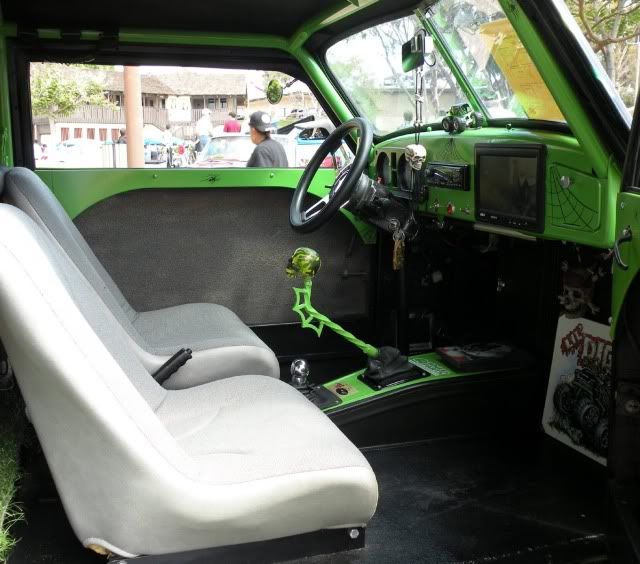
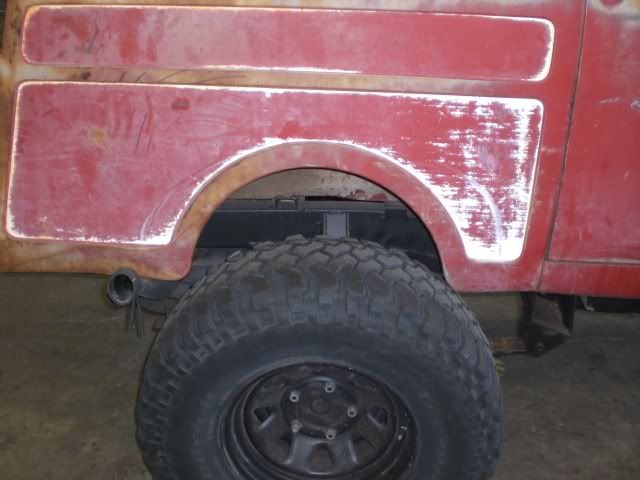
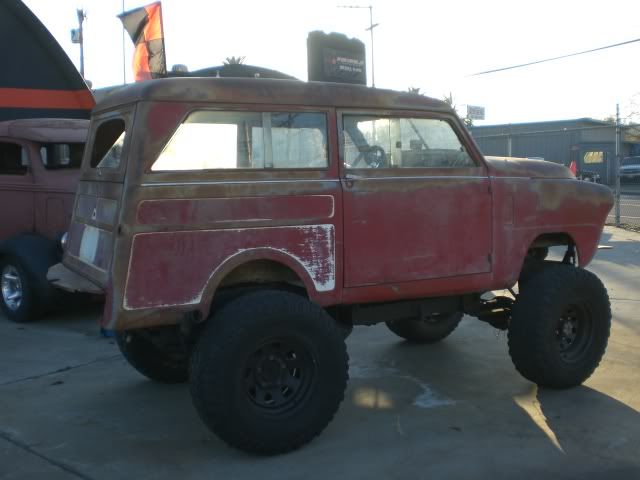
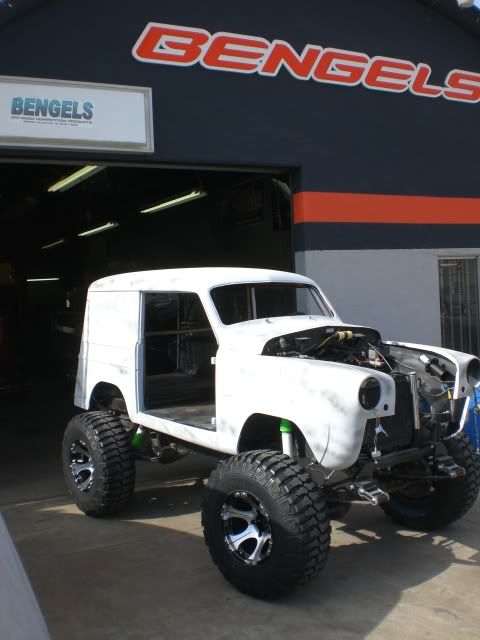
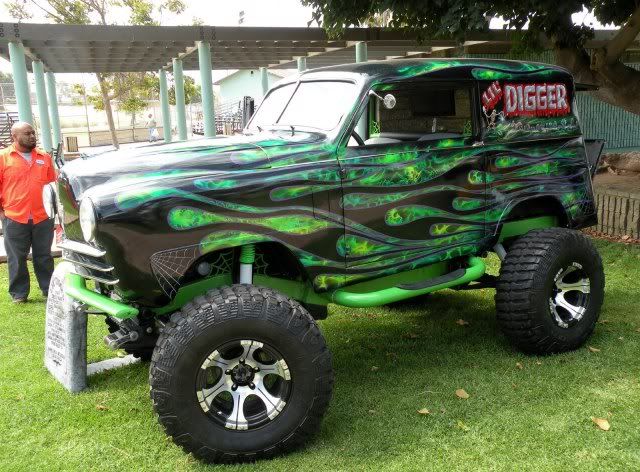
I opened up the wheel wells, and built a cage, bumpers, a little console and a ton of other things... oh yeah a tomb stone as well out of 18 ga. It turned out to be a cute little ride on the Suzuki Sami frame and running gear.. What else can be done with a 47 Crosley station wagon?

Last edited by M.T.1; 05-03-2013 at 02:35 PM.
duplicate account
-
05-03-2013 02:02 PM #30
CHR Member
- Join Date
- Sep 2007
- Location
- New Bedford
- Car Year, Make, Model: 34 Ford 3W Coupe Replica
- Posts
- 14,754
"Lil Digger" is cool! An interesting concept and quite imaginative!
 Reply With Quote


Posting Permissions
- You may not post new threads
- You may not post replies
- You may not post attachments
- You may not edit your posts

Sorry for your loss of friend Mike McGee, Shine. Great trans men are few and far between, it seems. Sadly, Mike Frade was only 66 and had been talking about retirement for ten years that I know...
We Lost a Good One