Thread: 301 gets a new home
-
03-25-2016 09:19 PM #16
No reply, I think the thread is getting bumped off the page.
Anyway, the instructions show to mount the cooler in front of the radiator. I'll have to borrow a tubing flare kit, the one I ordered off feebay got cancelled; out of stock.
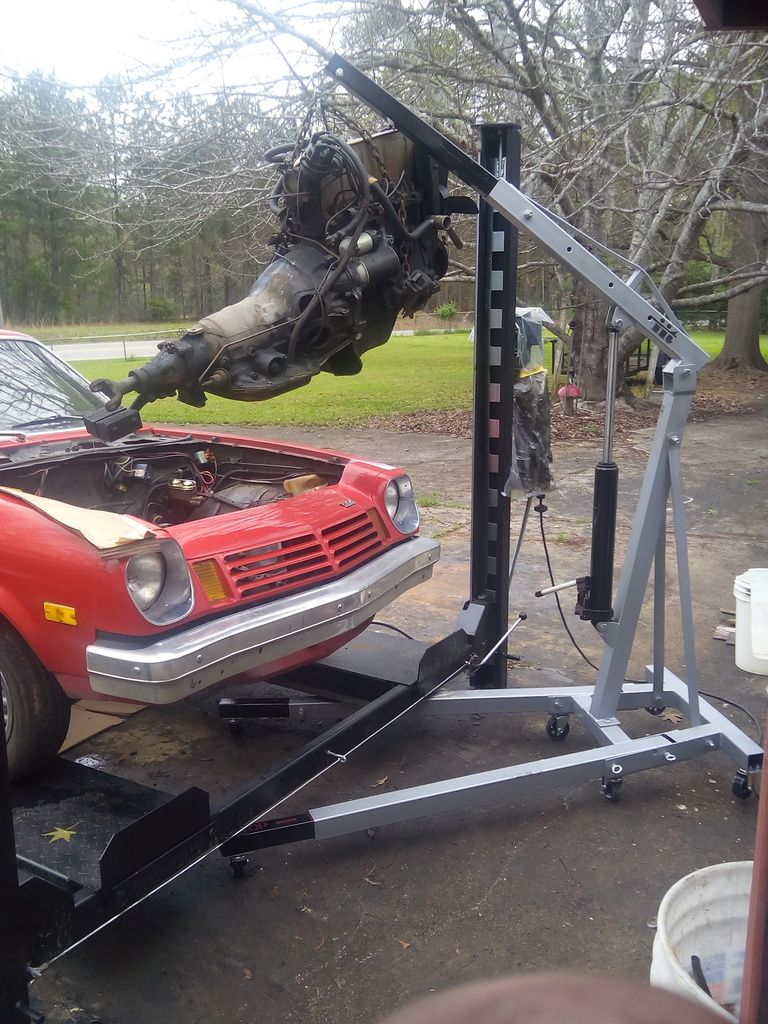
Today I picked up a new engine hoist, it makes my old one look like junk. Same rating but a higher lift.
After I assembled the hoist, I started unhooking stuff. Last serious maintenance on this motor was when I got the car, 50 thousand miles ago. The fan belt I put on is ready for replacement, and the timing belt I put on is a tad loose. Plus the front seal is shot- this engine is definitely showing its 80 thousand miles. Not bad for a Vega engine, really.
Today I got everything on the motor loose except mounts and exhaust. Should be short work tomorrow to get it out..
Education is expensive. Keep that in mind, and you'll never be terribly upset when a project goes awry.
EG
-
Advertising

- Google Adsense
- REGISTERED USERS DO NOT SEE THIS AD
-
03-25-2016 09:30 PM #17
-
03-26-2016 12:19 AM #18
I think I could call this a subtle hint.
front.jpg
Actually, this cooler was a bit too large. The trans didn't get up to temp.
BTW, it's gone now because I needed A/C here in Texas.Jack
Gone to Texas
-
03-26-2016 05:55 AM #19
We put a 327 in a Vega 40 years ago, no tin cutting required with a P-glide. The rear end won't last a week, though! We cut down a '56 Chevy rear for it. Also shortened and narrowed a '64 Ford radiator (cross-flow) HELL OF A JOB! Just a hint...don't use the plastic Vega fan, it turns the wrong way.
-
03-26-2016 11:28 AM #20

Somehow I envisioned doing a better job..
Education is expensive. Keep that in mind, and you'll never be terribly upset when a project goes awry.
EG
-
03-26-2016 11:47 AM #21
Tech you are right of course, and realistically, I'll be lucky to have an inch. Just checking my options..
Education is expensive. Keep that in mind, and you'll never be terribly upset when a project goes awry.
EG
-
03-26-2016 02:20 PM #22

Progress!.
Education is expensive. Keep that in mind, and you'll never be terribly upset when a project goes awry.
EG
-
03-26-2016 03:23 PM #23
Progress is always great.
So, you got a new cherry picker... AND a lift??? Dang!
LOL.. running lines is always a chore to get right straight off. You're doing alright, keep going.
-
03-26-2016 03:35 PM #24
I have a new transmission jack also; waiting for assembly.
Did I mention there is not a budget for this project?.
Education is expensive. Keep that in mind, and you'll never be terribly upset when a project goes awry.
EG
-
03-26-2016 05:08 PM #25
-
03-26-2016 10:41 PM #26
Ya, I'm being a bit of a butt.
The equipment is just to maintain my hobby. The back is pretty destroyed from seven years in the infantry, and I don't like pills.
It's really a matter of prioritization. You can get new wheels, or a new lift. Spring for the polished intake, or an engine hoist. Instead of buying pre formed lines, get the tools to do it yourself. It doesn't save much money at first.
Over time, the stuff adds up. Maybe it doesn't make you better, but you get it done easier.
Personally, I'm loosing my passion for the hobby. If I can't make it easier I'll have to give it up..
Education is expensive. Keep that in mind, and you'll never be terribly upset when a project goes awry.
EG
-
03-27-2016 04:33 AM #27
It's not the tools that make the man.. the passion is there whether you're making models or working on a caddy.
I believe it's all about being creative. Something inside us hot rodders just wants to create / make something that we see as an art.
Hope you can find a way to make the job easier, or at least take smaller steps so you don't overexert.
-
03-27-2016 06:31 AM #28
-
03-27-2016 11:08 AM #29
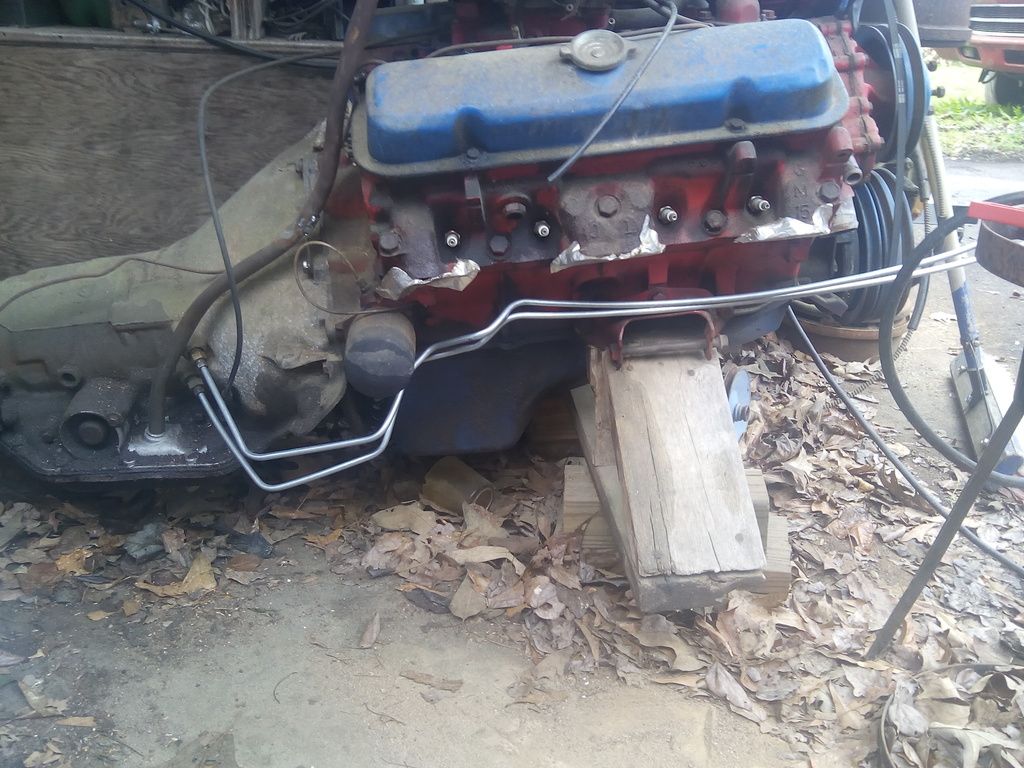
I have decided to bag the manifolds I ordered. I'm making flanges out of 1/4" plate, I'll custom fab something. These heads port straight down, and plugs are all above, a mechanic's dream. But, it's pretty clear why they don't flow well..
Education is expensive. Keep that in mind, and you'll never be terribly upset when a project goes awry.
EG
-
03-27-2016 04:32 PM #30
I cut the flanges as simple rectangles using a cutting wheel in my 4.5" angle grinder.
I used foil tape to template the heads. Then I used the template to locate the first hole, drilled it to 3/8".
I cut the heads off six bolts to use as locator studs. One I ground to a point in the drill, simulating a lathe, to use as a center punch.
I screwed a stud in the head in the first hole, and the center punch stud in the rear hole. Slid the flange over the locator stud, and smacked the flange with a hammer. This effectively marked the rear hole.
Using this method, I located and drilled each hole.
The flange was a tight fit over the studs, so I over drilled all holes by1/32". Now the flanges are a smooth fit over the studs.
I'll take them to school and cut the port holes on an end mill tomorrow..
Education is expensive. Keep that in mind, and you'll never be terribly upset when a project goes awry.
EG


 14Likes

 LinkBack URL
 About LinkBacks
 Reply With Quote


Thanks guys! One more trip around the sun completed. Lots of blessings and things to be thankful for (like still being able to type this message!!) Here's to us "over 70 guys.." Glenn
HBD Glenn!!