Welcome to Club Hot Rod!  The premier site for everything to do with Hot Rod, Customs, Low Riders, Rat Rods, and more. 

  •  » Members from all over the US and the world!
  •  » Help from all over the world for your questions
  •  » Build logs for you and all members
  •  » Blogs
  •  » Image Gallery
  •  » Many thousands of members and hundreds of thousands of posts! 

YES! I want to register an account for free right now!  p.s.: For registered members this ad will NOT show

 
Like Tree4Likes

Thread: Fab of bottom door panels for 1937 Buick


Reply To Thread
Page 2 of 2 FirstFirst 1 2
Results 16 to 19 of 19
  1. #16
    MP&C's Avatar
    MP&C is offline CHR Member Visit my Photo Gallery
    Join Date
    Jun 2008
    Location
    Leonardtown
    Car Year, Make, Model: Walking
    Posts
    1,222

    Quote Originally Posted by Mutt's37Buick View Post
    Attached is a picture of the back of the door.
    The rust goes about 5 inches up the door. I have bee using butt welds for my repairs.
    1) For the door bottom, would I be better off using a flanger and creating an overlapping flange at the top of the 5" panel?

    If you've been using butt welds thus far, don't stop now. That's the correct method to use. Regardless of the dis-information you can find online regarding using flanges, especially manufacturers selling the flanging tools claiming what an advantage they are for installing panels and the fact that replacement panels come with them, flanges are not a good solution for a sheet metal weld repair.

    Sure, flanges can be a crutch for someone who is just learning to weld, but you are adding rust issues/moisture trap, and more importantly the single panel thickness on one side of the weld expands faster in sunlight than two panel thicknesses on the other side. So despite any filler and paint covering the flange seam, the repeated differing expansion and contraction rates will eventually leave a ghost line in your paint finish right at the seam. Just like a wart on the end of a nose, everyone will see it and know exactly where and how the repair was done. Any deformity from the welding process also becomes near impossible to planish out the defects given the multiple layers. IMO is detracts from the value of the car as it is not the correct way to repair. You hear guys saying it's OK to use on floor pans as nobody will see them. I disagree as this is the perfect scenario to practice butt welding to improve your methods, so when you are on a panel that really matters, you feel more comfortable and are more skilled doing it. Keep up with your butt welds...

    Last edited by MP&C; 12-01-2016 at 07:19 PM.
    34_40 and 40FordDeluxe like this.
    Robert

  2. #17
    firebird77clone's Avatar
    firebird77clone is offline CHR Member Visit my Photo Gallery
    Join Date
    Sep 2005
    Location
    Hamilton
    Car Year, Make, Model: 69 nomad, 73 charger, 74 vega
    Posts
    3,900

    Flanged joints can create 'ghost lines' which you won't have using a butt weld.
    .
    Education is expensive. Keep that in mind, and you'll never be terribly upset when a project goes awry.
    EG

  3. #18
    MP&C's Avatar
    MP&C is offline CHR Member Visit my Photo Gallery
    Join Date
    Jun 2008
    Location
    Leonardtown
    Car Year, Make, Model: Walking
    Posts
    1,222

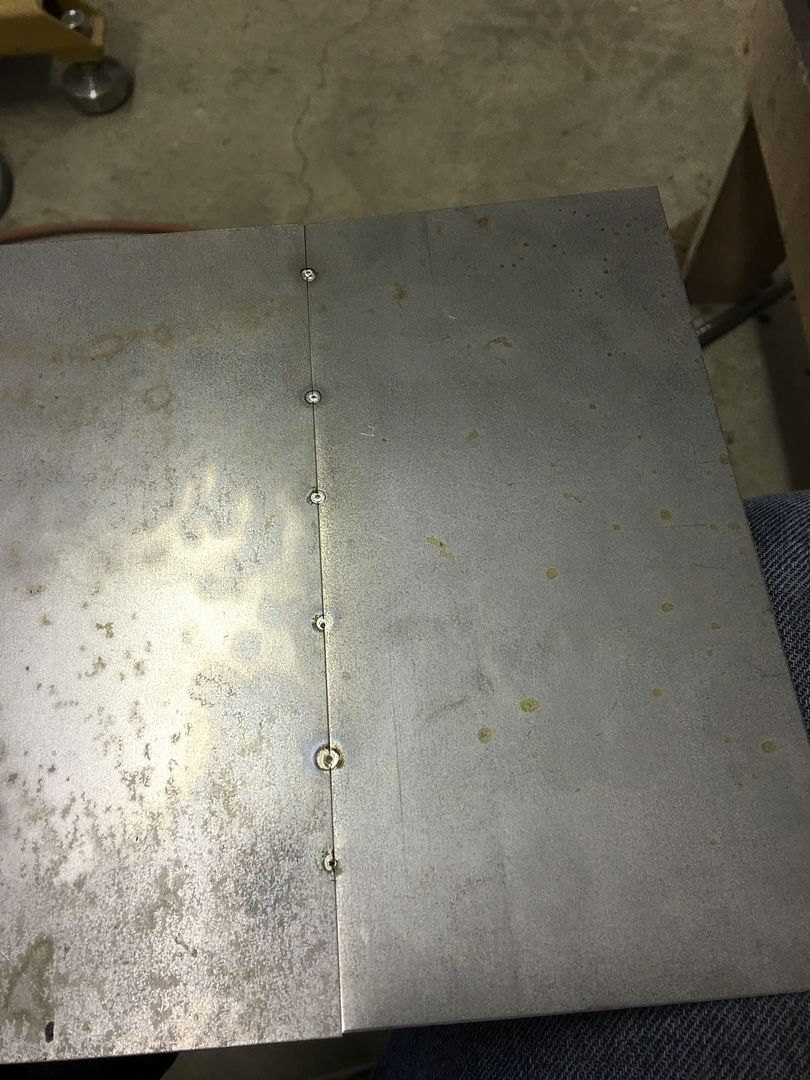
    Welded some more TIG coupons this evening to show results with different weld placement, so I decided to do some samples that mimicked various body shape types.


    First, we have a flat version, this would simulate the flat area at the bottom of a door skin...


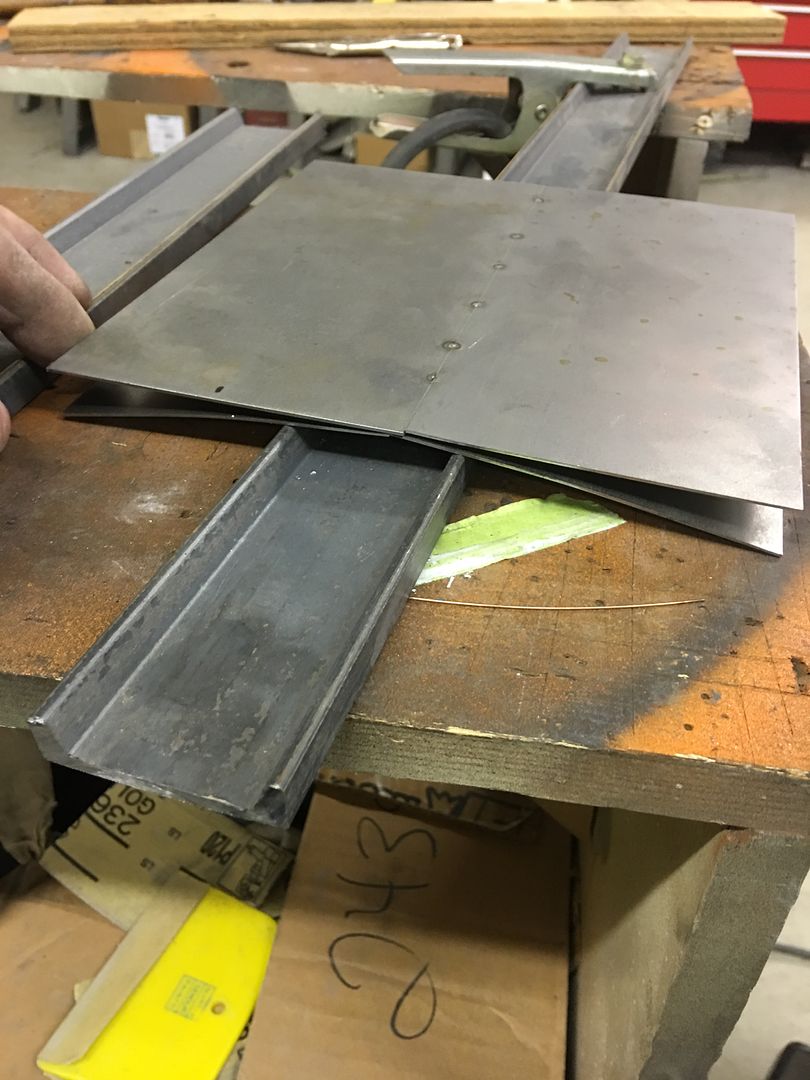
    The second panel has more crown, such as toward the top of a quarter/door skin....


    Comparing the two...


    Next, we have a repair piece that is joined at the beltline bead...


    The flat area distorts quite a bit... Normally we would planish the weld after cooling to remove this distortion, but here it was left to better compare distortion amounts..
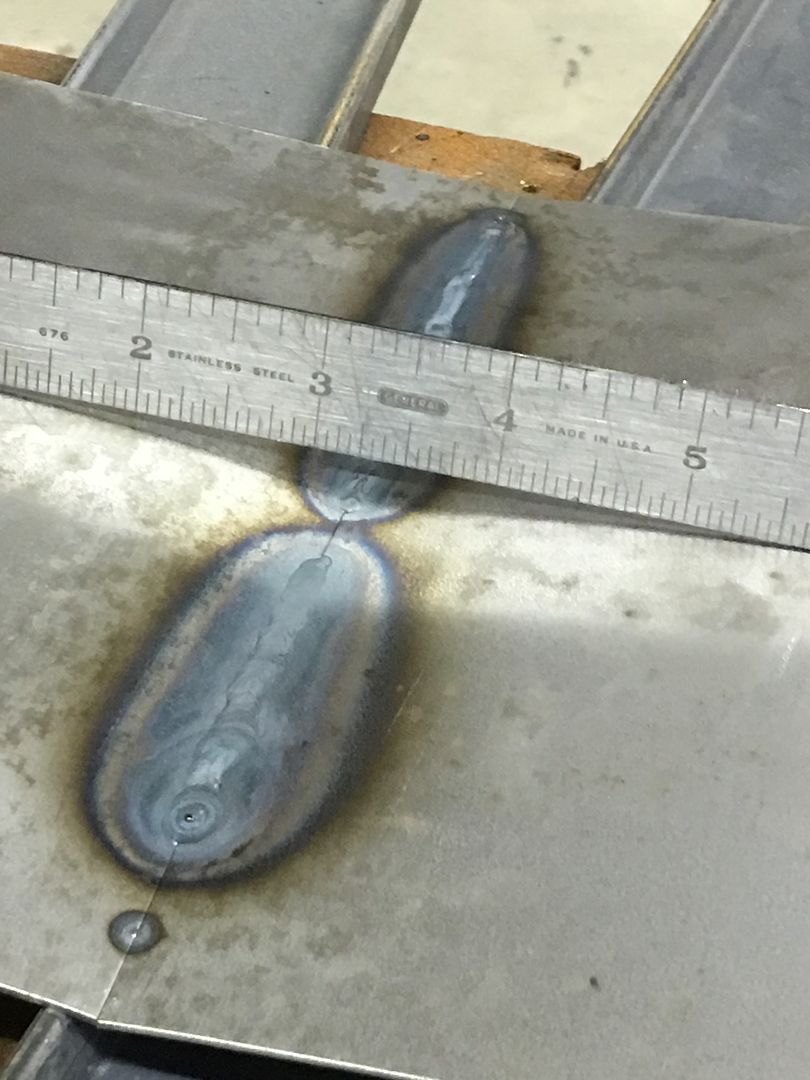


    Looking at the three samples, the flat one moves/distorts the most. The low crown a bit less, the beltline bead even less..


    This helps to show the benefit of weld seam locations, we should select anything but the low crown/flat areas if at all possible..
    Last edited by MP&C; 12-01-2016 at 10:45 PM.
    Robert

  4. #19
    Mutt's37Buick's Avatar
    Mutt's37Buick is offline CHR Member Visit my Photo Gallery
    Join Date
    Jun 2011
    Location
    Westminster, CO
    Car Year, Make, Model: 37 Buick Roadmaster
    Posts
    131

    Thanks for posting these examples. I'm having the most trouble seeing how to form the hem that would hold the 5" panel to the side panels at the end. First picture is the same door on car. Second picture is the end of the door (from back) showing the curve to the bottom. Notice the folded over hem that captures the side piece. The hem is very similar to a folded over hem that holds more modern door skins across bottom of door frames. The difference is the hem goes around that .875 radius curve. This folded hem would be on the end of the 5" tall panel.
    I'm having trouble seeing how to form this hem around the radius.
    Thanks
    Attached Images

Reply To Thread
Page 2 of 2 FirstFirst 1 2

Posting Permissions

  • You may not post new threads
  • You may not post replies
  • You may not post attachments
  • You may not edit your posts
Links monetized by VigLink